Kubicki Factor Bass (9/13)
Jan 3, 2018
So far the wood has sucked in 5 coats of diluted tung oil, but the sixth coat seems to be lingering on the surface. My hope is that the oil will penetrate the top layer of the wood and dry there, making it even harder. Visually, the wood has taken on a translucence, you can see the light reflected out from below the surface. This gives the pine a subtle almost holographic figure.
Jan 5, 2018
Much slower going now. The body is on its seventh coat of Tung oil. The first five coats went on in one day. Four of them sank right into the wood, and the fifth lingered on top. Since then it is one coat per day, building up a sheen. It sure is pretty when it's wet. A sheen is no protection though, I am definitely going to put a clear pickguard over the high-wear area.
I have also sanded down the two oak fretboards. I started with 100 on the radius block, but switched to 80 and ended up going down to bare wood. That's what happens when you use your finish for a grain filler. Not very efficient, but the result will be something like a composite, with the grain filled with polyurethane instead of weak grain filler. I have started re-coating them, probably three coats, tacky.
When sanding, check for shiny spots. Those will be low spots. When the shine is mostly all gone, you are done. I saw no evidence of layering in the poly as I removed it, so my method of re-coating works - the coats merge into a single layer like lacquer.
This is why oak is not used in the industry. If you were building these for sale, this is a lot of extra work and expense. Together with one I did previously, these will be the last oak boards I will do. Maple is better in every way. Unless you pull a fast one - leave the oak unfinished and claim that the pores 'resonate'. Don't laugh, this is the kind of crap marketing guys get paid to think up. If pores can resonate in mahogany and ash ( and they do !!! ) then why not oak?
Jan 9, 2018
The process so far:
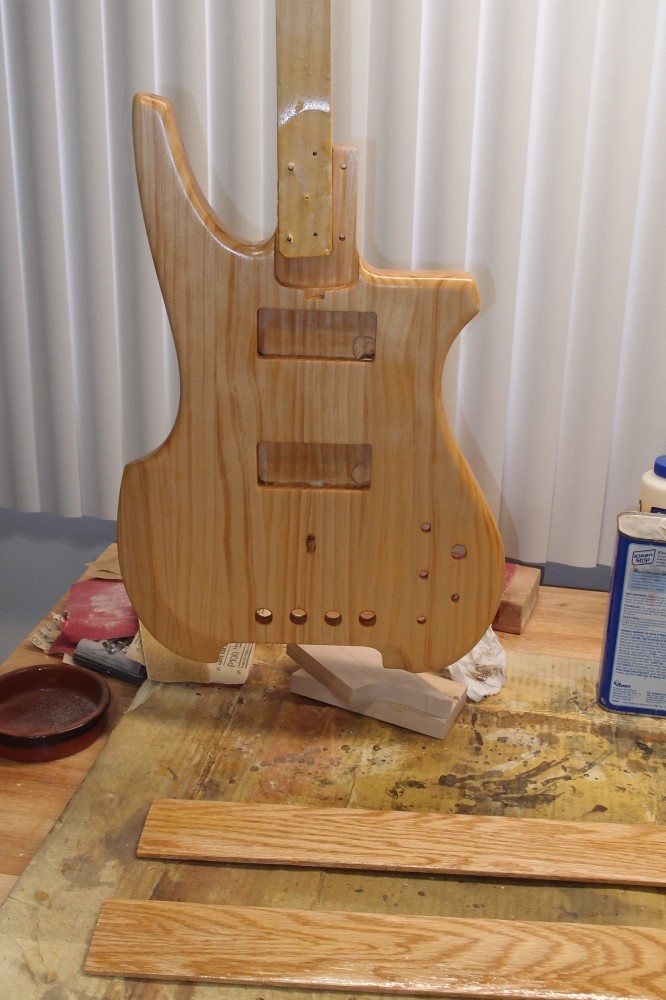
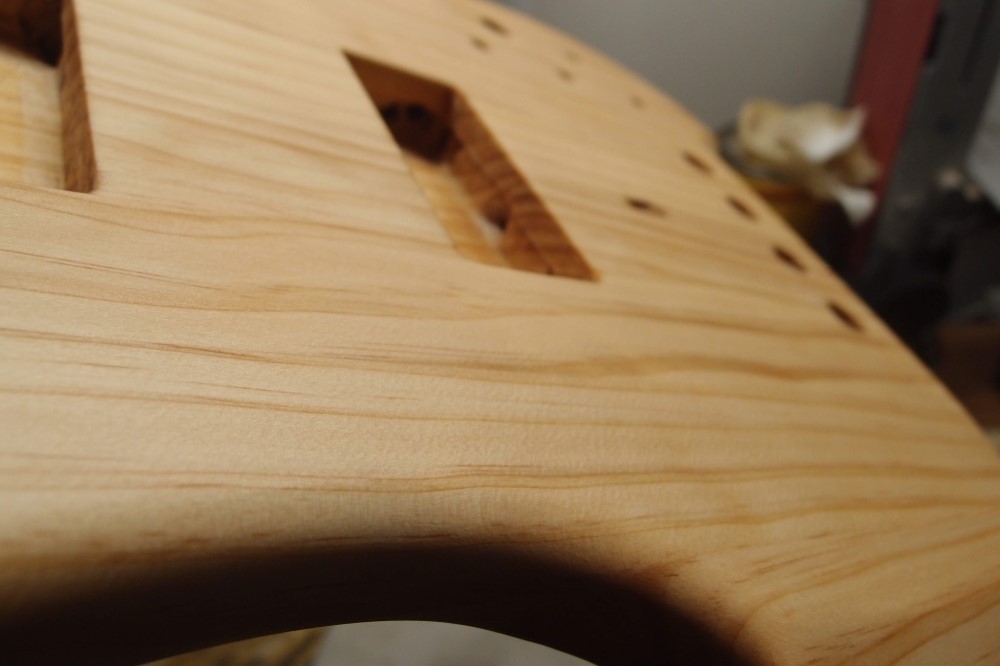
I have applied 10 coats of diluted Tung oil, without wiping them off. I let the last coat set for a day, then wiped it off and let it dry for a day. This is the result. It looks and feels like bare wood - a nice even satin. The surface is very hard. I tried to make fingernail marks in the tuner cavity, and reasonable effort did nothing. However, this finish has no thickness, and I doubt it will be very durable. A pickguard on the front will help, but the back will succumb to the first belt buckle. I still have the neck to work on, so I will continue oiling the body and see if it builds.
Jan 18, 2018
The Kubicki is hung up on finishing. That always happens. I'm trying to build a glossy finish with Tung oil. So far not much to show for it, I rub on another coat every day and let it dry. This is even slower than Danish oil, which is 10% shellac. I'll keep it up for a couple more weeks and see what happens. As I said before, I am really surprised how hard the surface is already, but hardness and durability are not the same things.
I've been using the same rag the whole time, I keep it in a little jar in the fridge. Today I added some more oil to it. You definitely want to thin this stuff with mineral spirits, it goes on much better that way. I assume that since Tung oil polymerizes rather than just dries, I am not wiping off the old as I wipe on new. There is no reason I couldn't just polyurethane over the whole thing if I let it cure for a few months first, but I really want to see what can be done with just the oil, and it only takes a few minutes a day.
Feb 8, 2018
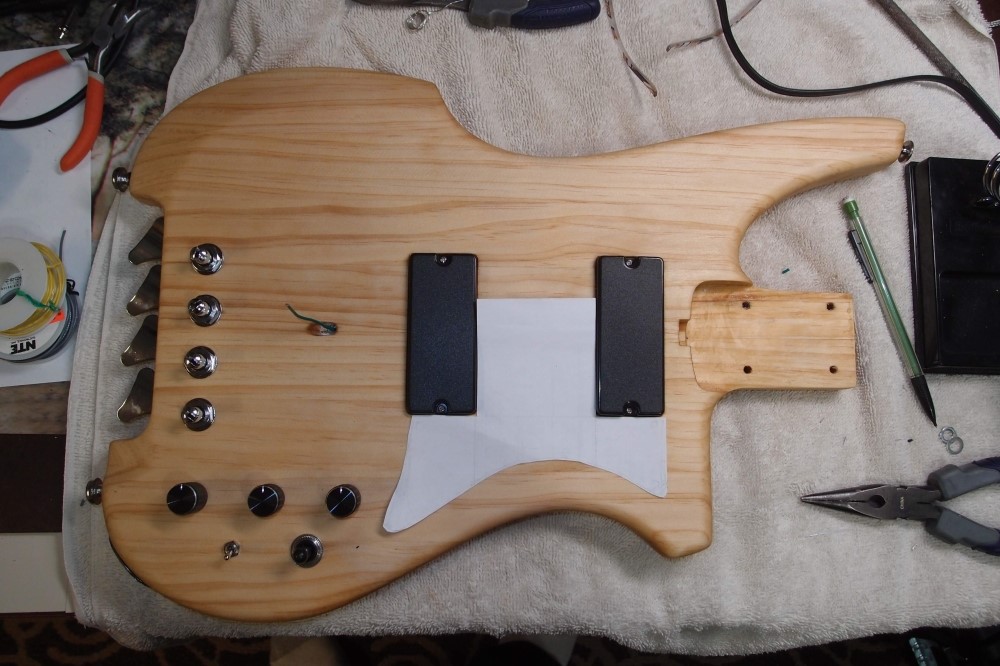
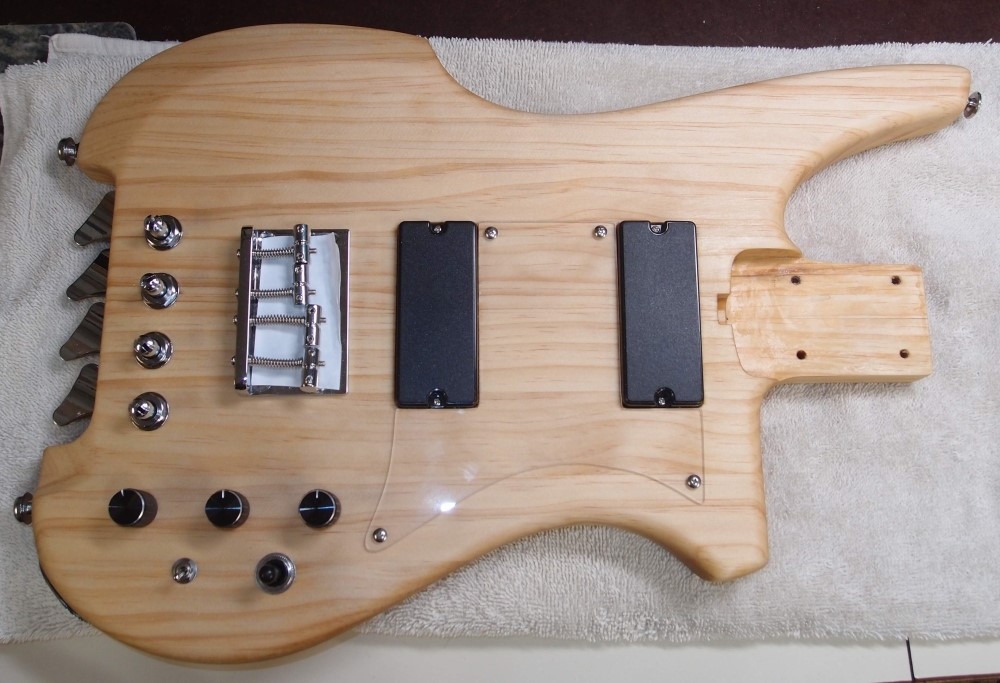
Here is the Kubickish body with all the hardware and electronics installed. The electronics are the same as the Osprey, minus the 'fat' switch. Also a paper mockup of a pickguard.
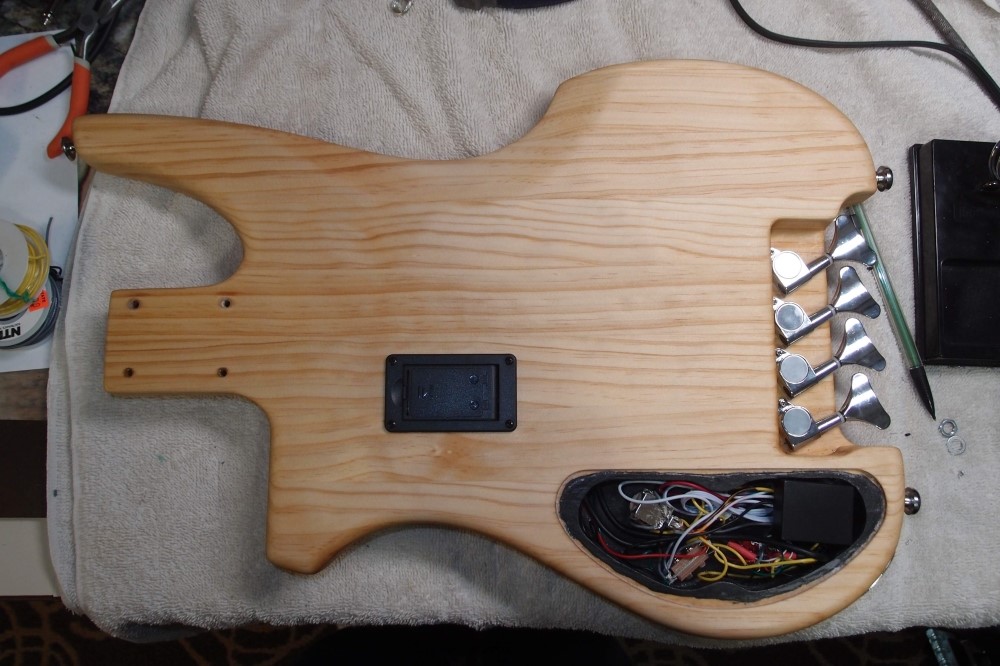
The reverse, showing tuner installation and a very full control cavity. The battery box is positioned to act as a conduit for the neck pickup, then into the bridge pickup cavity and to the control cavity.
Added the pickguard. The material is a spare Lexan windowpane I found while cleaning out the attic. I also made the rear cover plate. With the bridge and neck plate, the whole assembly is 5.3 pounds, pretty light for a bass, but tail-heavy thanks to the tuners, so it should balance. I wonder if this isn't just a better way to build a bass?
Feb 10, 2018
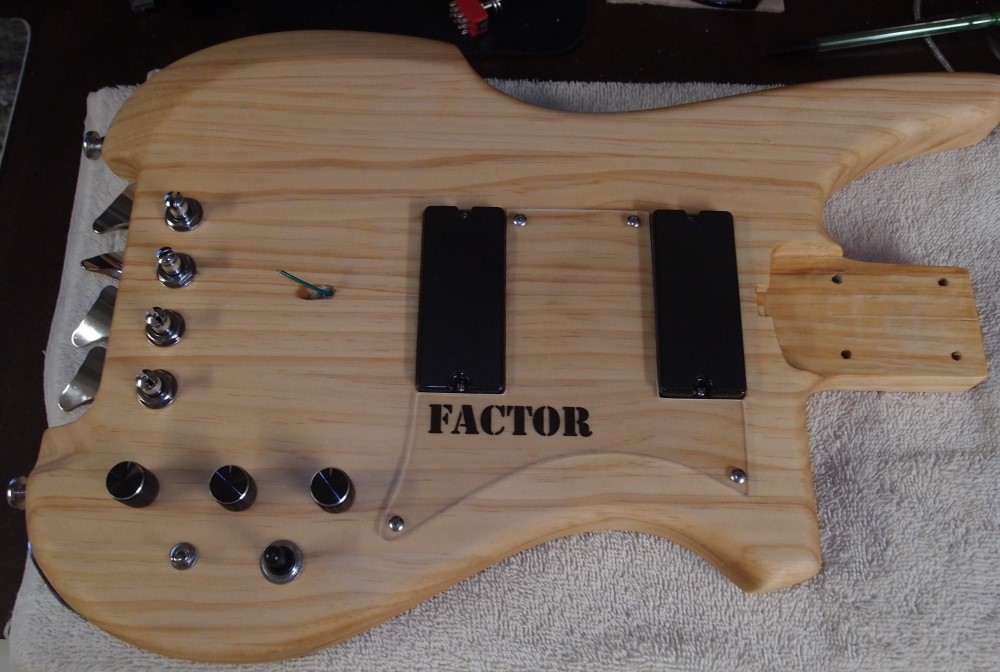
I made some refinements to the pickguard contours, and added a logo, taking another hint from Kubicki.
On a real Kubicki, the logo is silk-screened (?) directly onto the body. Mine is printed on inkjet transparency material ( I had a box leftover from grad-school days. ) I fooled around with fonts and sizing, and finally settled on this stencil font rather than the good old Fender font I had initially considered. ( Fender owns Kubicki. Fender also owns Gretsch, Guild (formerly), Jackson, Charvel, EVH, Ovation, and Ashbory. Hopefully, someday they will buy Epiphone and Steinberger at Gibson's bankruptcy liquidation. )
The logo is underneath the pickguard, where it is protected. ( As is the wood, which I think would suffer badly otherwise. ) The transparency material stretches from edge to edge under the pickguard, so there are no visible seams. The alternative would have been to reverse-print a decal and apply it to the back of the pickguard, but that would have left visible edges. The transparency material also gives a slight shimmer underneath the pickguard, which is neat.
Transparent pickguards are great because you can put anything under there, and change it whenever you want. For example, print anything you want on any color paper you want. Why settle for just tort when you could print tiger stripes on orange paper! The clear material is simply inexpensive window stuff from the hardware store. Another advantage is that it is much harder and more scratch and scuff resistant than typical soft pickguard material.
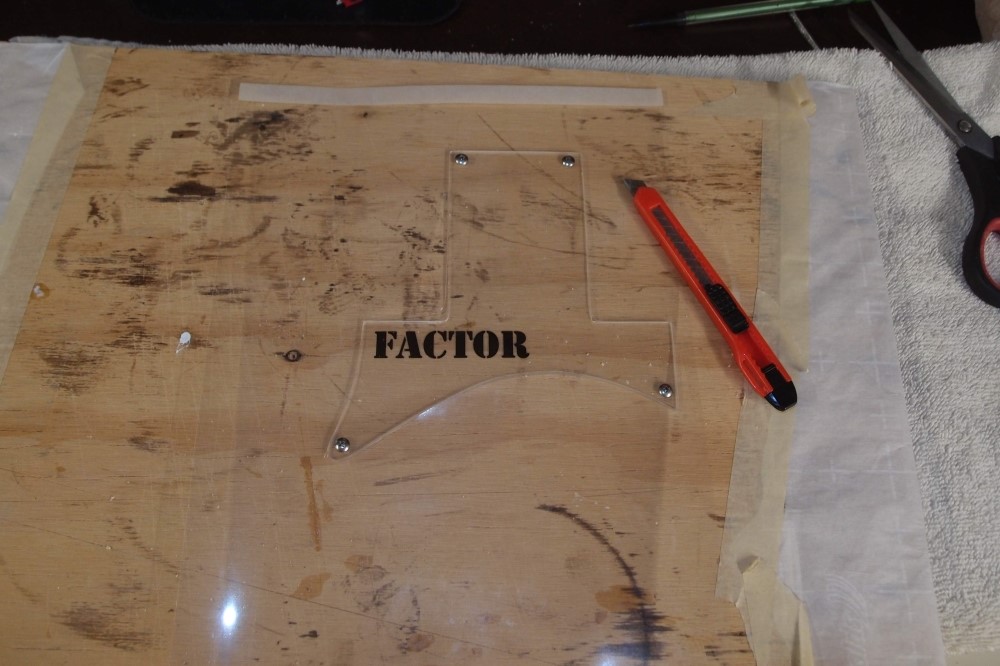
Here is how I cut the transparency to make a perfect fit. The pieces are aligned and the pickguard is screwed down tight over the logo to a piece of scrap plywood. I pre-drilled the holes in the transparency to make sure it doesn't tear from the screws. Then I traced the edges with a fresh razor, pretty easy, really.
I went to Staples yesterday to look for LaserJet transparency, but they no longer have it. Also, nothing was less than $40. You can find it more reasonably on eBay. If I decide to do much more of this, I will get some laser material, because the results from the LaserJet are always better. At any rate, this didn't cost me a cent, which is right in line with me being a real cheap bastard.
You could also use this method to make, for example, a Rickenbacker-style headstock adornment. I made one by printing a logo ( Danelectro ! ) on a white shipping sticker and applying it to a piece of plastic. Looks great, and has held up well. Don't forget to print your own decals on blank material - there are lots of ways you can customize a home build.
I'm on the fence with this one - clear or white? I want to show off the piney grain, but white looks good too. Well, it's an easy change, at any rate.
Feb 12, 2018
Double and triple checking everything before I start cutting. A mistake at this point would be costly, in labor, if not materials. The frets are laid out on the back of the fretboard, and a final check confirms that the bridge will land in the right place. The bridge will go on last, after the neck, in case I make any adjustments to the heel. I switched to a new saw, and the cutting went much faster - about 25 strokes per slot, vs 35 with the old saw.
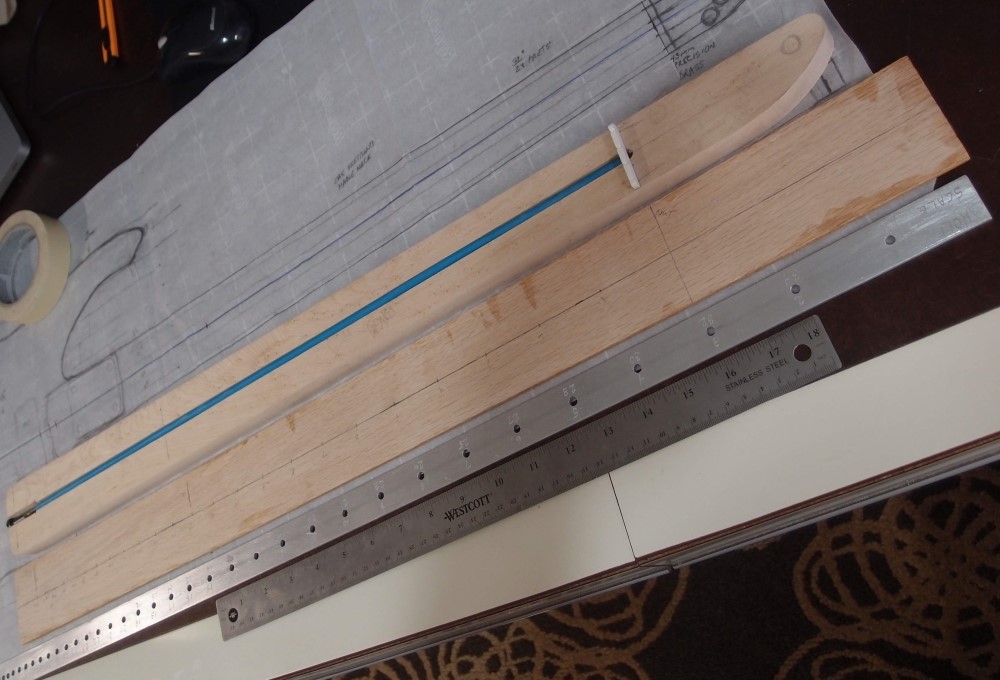
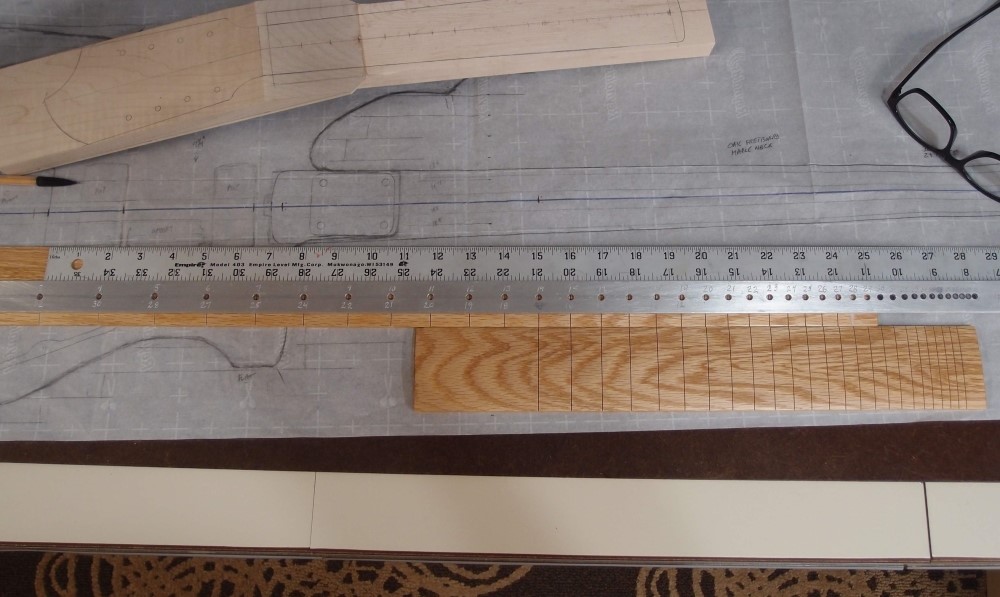
Here is proof that all scales are the same - see how the slots line up between a 32" neck and a 17" neck? StewMac sells a different guide for each scale, for $45 each! Clever guys. This guide uses a base length of 34", and everything else is derived from it. To make non-Fender scales, you'd need a guide with a different base length. This is enough choices for me, if I want a 24-3/4" I can buy a pre-slotted fretboard.
The slots from the new saw are visibly wider than the old one. Normally, thousandths don't matter in woodwork, but in this case, if the slots are too tight, when the frets are pressed in, the resulting compression can induce an excessive back bow. If the truss rod is unable to correct that, you can throw that neck away, which is why I always use a double-acting truss rod on a short-scale bass, where the string tension may not be enough to get the desired shape. The new saw also binds in the old saw's slots, so I dragged it through them all to widen them out. The old saw is now labeled 'tired' on the handle. When you buy these saws, buy several at a time.
The slots on the short board are a tiny bit out of square. I shouldn't have used the old tape, it must have shifted. You can only tell if you hold a square up to them, you can't see it. At any rate, it doesn't matter. The error is consistent, and I can compensate by gluing the board onto the neck that much crooked, or just ignore it. Rickenbacker once offered a 'slant fret' option on their guitars. The slots on the long board are perfectly square.
Likewise, exact fret positioning is less important than you'd think. When I made up my guide, I tried to be as accurate as possible, hundredths. Thousandths would be wishful thinking. But you need to remember that as a 'tempered' instrument, and taking into account the properties of real strings, nothing on a guitar fretboard is really perfectly in tune anyway. So if you cut on a reasonably accurate pencil mark, the results will be good enough. The Gibson Les Paul is known to actually switch scale lengths partway up the neck, a mistake from the 1950s that they never corrected, and no one complains about it. ( A good reason to buy an Epiphone instead, at least they know how to use a ruler! )
So at this point, I have two fretboards radiused, finished, and slotted. Anything you do to the board after slotting is likely to gum up the slots, which will require cleaning them out, which is a pain and risks chipping the finished wood.
As far as how deep to cut fret slots, take a look at your frets. Once a slot is established, it can easily be deepened by hand, but if you over-cut, there's nothing you can do, except maybe cover it up with binding. My jig cuts flat-bottomed fret slots. Since the frets are installed on a curve, that leaves tiny 'tone cavities' under each fret, which resonate and enhance the overall tone of the fretboard. Do you believe that?