Kubicki Factor Bass (8/13)
Jan 1, 2018
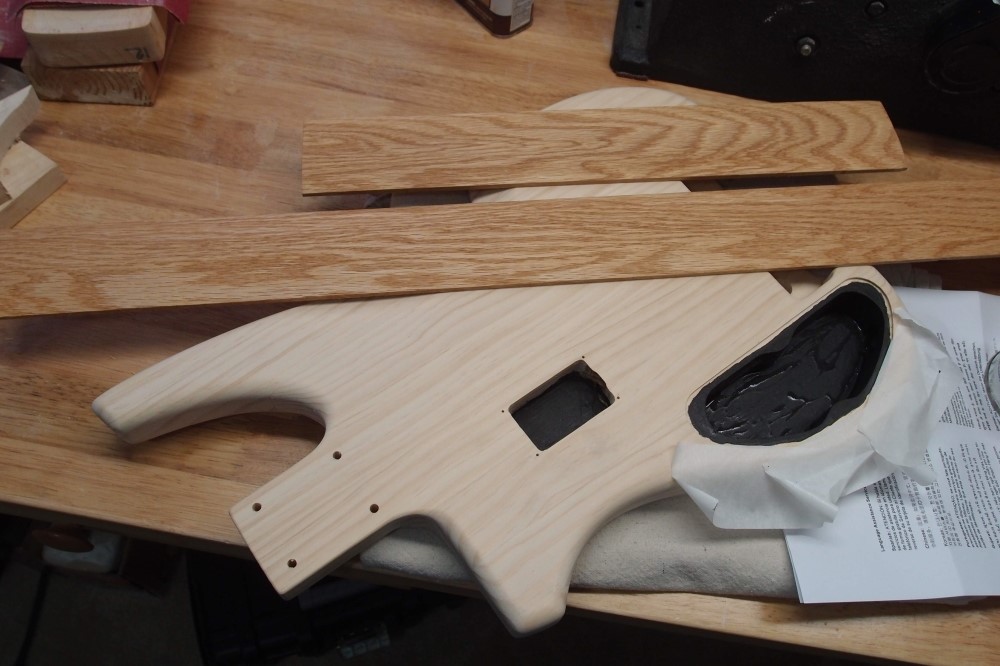
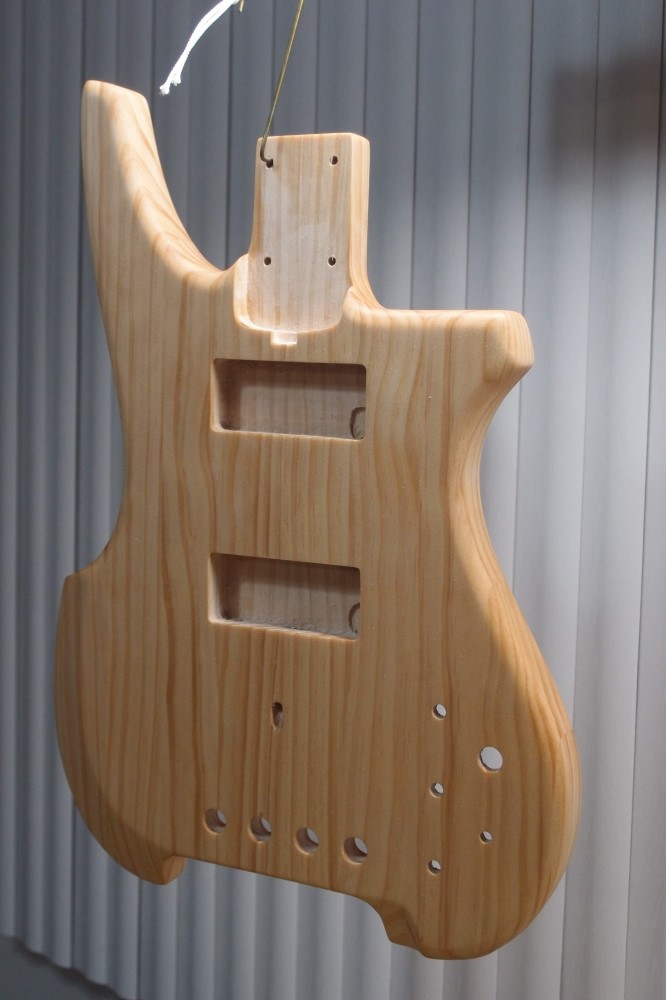
I have not yet drilled the holes for the controls, so now is the time to apply shielding paint. This stuff ( from StewMac ) is very easy but also very messy - any wood you get it on is going to be black forever. So I taped off the body edge and used an acid brush with just a drop at a time. You can't see it, but I also did the inside of the jack cavity. Wrap the jack in insulating tape to avoid and stray groundings. Note how I ran it up onto the edges of the cover shelf, where it will meet the aluminum tape that I will use on the inside of the cover.
To be effective, you need a thick enough coat of paint. The can says three coats. When it is dry, I will put the multimeter on it and take a resistance reading. You want as low a resistance as possible, I try for under 100 ohms ( that's OHMS, not KILO-ohms or MEGA-ohms, but ohms ) between the center of the cavity and the edge. If I don't get a reading I like, I'll just add another coat. Ideally, you'd want your shielding to be 0 ohms above ground, but given that the signal is several hundred thousand ohms above ground, 100 ohms is good enough. I ran the brush out in the battery cavity, but unless it is complete and grounded, shielding is no use.
StewMac's price for this paint is kind of breathtaking, but if you hunt around, you'll find that it is actually pretty hard to beat. The stuff is just expensive.
I had already drilled the control holes on the Osprey, so I dispensed with the shielding, with no ill effects. I did not want to take a chance of any of this black running through and getting on the front. If I ever decide it needs shielding, I will do it with aluminum tape ( from Home Depot, of course ! ) The thing with aluminum tape is that, while it makes great shielding, it is not made for that, and the adhesive is non-conducting. So you have to arrange for every piece to be grounded, it doesn't happen automatically. This is not as hard as it sounds - you can arrange the pieces so each one has a control touching it, and you're done. To join two overlapping pieces, you can cut a small tab, flip it over, and press down - metal-to-metal, or run a small screw through both layers. You can also use the cover as a bridge across multiple pieces in the body. Check continuity with a multimeter, for metal tape, you should get zero resistance.
I also radiused the second piece of oak. Checking with the digital calipers, at the center it is within a few thousandths thickness along the whole length, with a steady trend towards one end. It will get a bit more leveling after it is installed, and any remaining leveling can be done to the frets. In the picture, I have applied a layer of 'natural' stain to both pieces. Oil-based polyurethane will have a further yellowing effect. Oak makes a nice alternative to maple, I don't know why it has not been used more.
Gab gab gab ... the paint looks pretty dry now, I'm going to put the meter on it. And ... still over 100 ohms, so I'll give it a fourth coat. The resistance of this paint drops as it dries, so in a few hours, I should be seeing readings that I like.
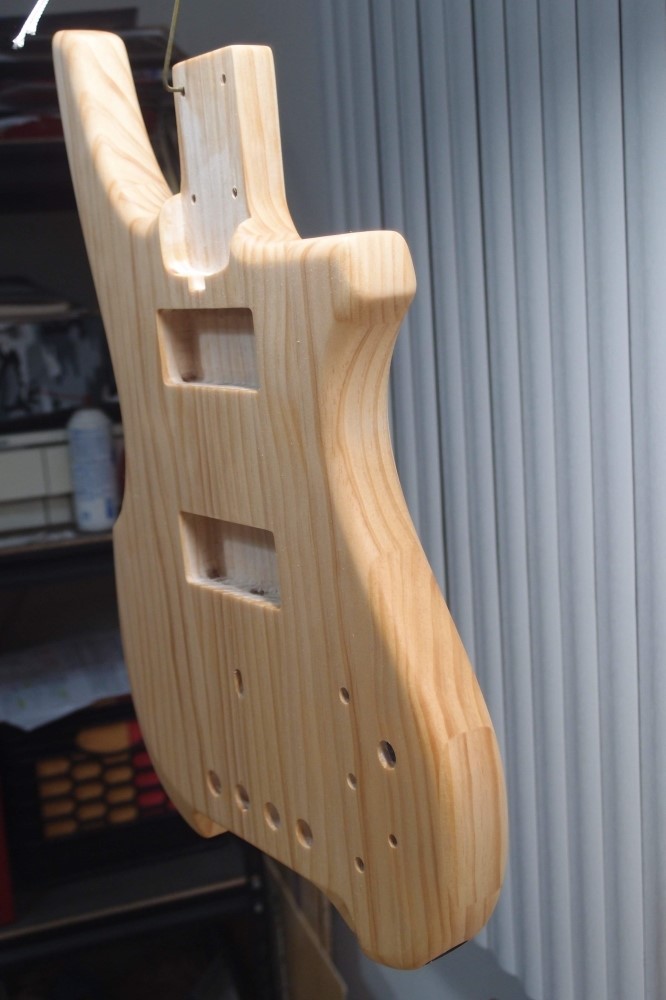
On the plus side, all the routing for this project is complete. The body needs only the control holes drilled, and then it is ready for finishing. The neck will still require a good deal of shaping though.
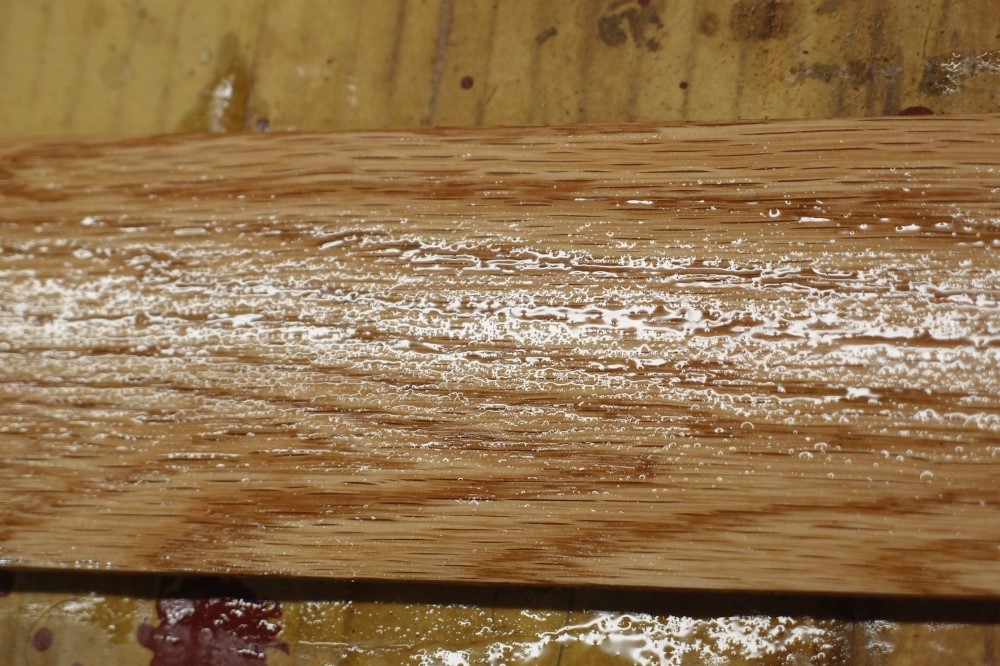
Here's a first wet coat of polyurethane. See how uneven it gets, as the big oak pores suck it in. After several re-coats and some sanding, I will have a smooth plastic surface, and the oak will be fully impregnated with polyurethane. With maple, you get a smooth surface immediately, but you still have to coat it against dirt and oil, or it will turn black. Being naturally dark and oily, 'rosewood' needs none of this. That is the real reason it is popular, the extreme hardness is not necessary.
I would not use a colored stain on a fretboard. If you wear through the thin layer of color, the result will be very unattractive. If you can dye the wood deeper, that would work better. My experiments with an iron solution on oak gave attractive results, but the color did not seem to penetrate any deeper than stain. In general, a stained finish should be well-protected, as any scratch or scuff is likely to show the natural wood color below.
This is an ancient can of polyurethane. When I finally pried it open, I found a dried crust on the surface *, but under that, the poly was fine, at least for brushing. At this point, if you tried to spray the stuff, it would clog up the sprayer almost immediately, you can only spray new. This is an oil-based polyurethane, you can tell by the cleanup instructions: paint thinner or mineral spirits. If it says soap and water, that is a water-based poly, not nearly as good. A water-based poly also will not give that nice yellowing effect, it stays clear. In-between coats, I wrap the brush tightly in a plastic bag and throw it in the freezer. This is a great trick, but for water-based paints, use the fridge instead.
* The poly used up all the oxygen in the can, and then stopped polymerizing.
Instructions be damned, for an application like this, I like to re-coat while the previous coat is still tacky. This way the poly dries into a single layer, much like lacquer. And since the parts are fairly flat, I am using very thick coats and letting them flow out. The second coat already looks much better, the first coat has plugged up the grain, and the second coat is staying on top. When this tacks, I will add a third coat for thickness, and then let that dry hard and sand it down smooth with the radius block and fine sandpaper. After the neck is fully assembled, the board will get a thin coat of spray satin for a final finish.
For a fretless instrument, you need a very hard wood to resist string wear, especially with metal strings. This has been wrongly carried over to fretted instruments. On a fretted instrument, the metal frets are taking all the damage ( unless you have very mighty fingers ! ) and the wood only needs to be hard enough to hold the frets in place. How hard is that? Leo Fender figured that maple ( Janka 1450 ) is hard enough. The truth is though, even that is overkill, and Red Oak ( Janka 1200 ) is more than hard enough. I have had good results even with walnut ( Janka 1000 ) but I wouldn't go any softer than that. Maybe you could, but maple, oak, and walnut are enough choices for me. For comparison, Brazilian Rosewood ( the 'real' stuff ) is about 2800. Hickory is also very hard, but the grain structure is awful. Don't forget that for a good job, you'll be gluing the frets in as well. So don't be afraid to try native woods from the hardware or hobby store for a fretboard.
The shielding paint is now showing about 30 ohms, and I'm sure it will go down from there ... good.
This is what the Radiata looks like, finish-sanded to 220 with three coats of natural stain. You can see the original color in the cavities. This will get a Tung Oil finish, something that I have never done on a guitar, but I don't expect that will alter it significantly; probably just a bit more ambering. Can't complain, this is still just $16 dollars' worth of Home Depot wood and some glue. This blank looks better than most of what you would pay ten times that much for. The pine grain looks like a cross between maple and ash.
I must say that this is my first disappointment with Radiata. Based on previous experience with other woods, I expected the natural stain to have more of an effect. On the teak, it made the grain really really pop, but on the pine, it is much more subdued. Still nice though, a lot more attractive than that most blah of woods, alder. Not as grainy as ash, and very linear; muted zebra stripes. This would probably look great under a sunburst.
I spent a couple of hours finish-sanding this piece and making notes in my head, so this will be another long article. On other threads, I've had people complain that I wrote too much. It never ceases to amaze and amuse me how many people are so eager to declare their own stupidity to the world. If you have an issue with reading, then don't. If you want to complain, start your own thread for it. For a title, I suggest "How Stupid Am I?" or "Help Me With My Brain". It will be very popular and probably end up being featured. Enough of that, if you are reading this, I assume you find this information useful and interesting.
There are two kinds of sanding: contour sanding and finish sanding. Contour sanding is done to create a shape. You use coarse grits like 50 and 80, and often machine sanders - belts or spindles. Contour sanding can also be done by hand, an example would be the radius sanding I did above or block sanding to get a straight edge. The nice thing about contour sanding is that you pretty much know when you're done - you have the shape you want. When appropriate, don't overlook the use of other tools, such as files and scrapers.
Finish sanding is different. The purpose is not to create a shape, but to create a smooth surface. The first thing you want to do is remove all the evidence of the previous contour sanding - deep and unsightly scratches. Start with 150, drop to 100 if that isn't working, then work up through 220 or 320. Use block sanding on flat surfaces to avoid making valleys, finger sanding around curves. There are three natural laws of finish sanding.
- You can never sand enough, along with its corollary: You can always sand some more.
- At some point you have to stop, or go mad.
- You will always stop too soon; corollary: You will always find something later that you should have sanded.
The goal really is to make the imperfections so small that only you can find them. This can be greatly aided by taking your glasses off. Those of you with perfect eyesight, I'm sorry, try setting a timer. If your fingers start to bleed, that is often a good time to stop as well. I think I've gone a little mad now.
Never use a machine for finish sanding, especially one with any sort of rotary or orbital action. Those always leave tiny circles in the wood. Finish sanding is always done straight along the grain, so the resulting scratches are camouflaged.
Sanding the Osprey was easy thanks to the nature of the wood: teak is rather coarse and open-grained, and there is no point trying to put too fine a finish on it. You quickly get to where it is clear it no longer makes a difference.
Radiata is different. This wood has a very fine, hard, even, closed grain. You could polish it almost like glass. This makes it much more difficult to decide when enough is enough. I stopped when all the contour scratches were gone and everything had the same even look. The most difficult parts are the end grain. I deliberately stopped at 220 rather than go higher because the oil finish will work better on a slightly rough surface. Sanding past 320 can actually make applying a finish more difficult.
For a very final sanding, I wiped the piece down with warm water. This causes the grain to spring up so that when it is dry you can smooth it down for good. This is especially effective with pine. Once you put a stain or finish on the wood, you are done sanding. Any further attempt will be a gummy mess unless you let it cure for a very long time. So be sure you have really sanded everything. And rest assured you haven't.
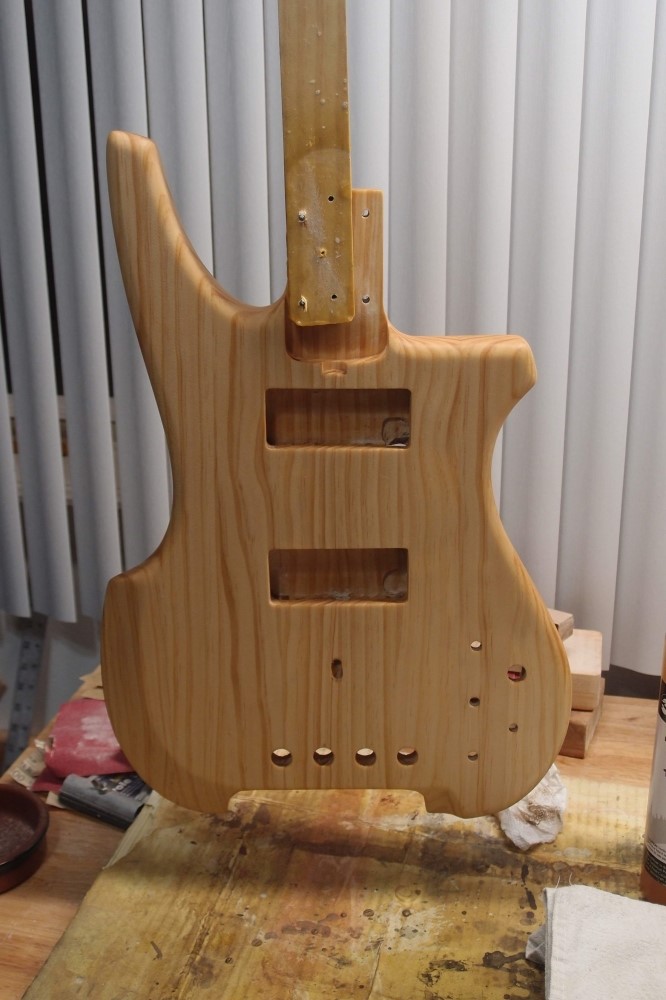
This picture shows a design defect. See the small piece on the end of the bout, and another on the tip of the horn? I call those 'orphans'. It would look better without them. On the Osprey, I actually altered the contours slightly to sand off some small orphans, but these are too big. The solution would have been to put a piece of 1x2 in the center and push all the joints 3/8" outward. I didn't do that because I wanted the nice centerline to work with. The joint lines are actually very nice to work off of. I aligned the control cavity to a joint line on the back, and immediately knew where it was on the other side. All things considered, it is a pretty darn good prototype, and the orphans are only visible from the side. The final weight has not changed - 3.09 pounds.
The shielding paint has bottomed out at about 25 ohms. The fretboards are dry to the touch, and the grain is pulling through, which is expected. There is enough thickness of poly on them that I should be able to sand them smooth in a week or so. I cleaned the brush, the refrigerator trick is good for days with house paint, but only a few hours with oil-based stuff.
Three dried coats of diluted pure Tung Oil looks like this. If I said this was rare Magoomba tonewood from darkest Africa, I could probably charge a thousand bucks for it. Gibson does that all the time.