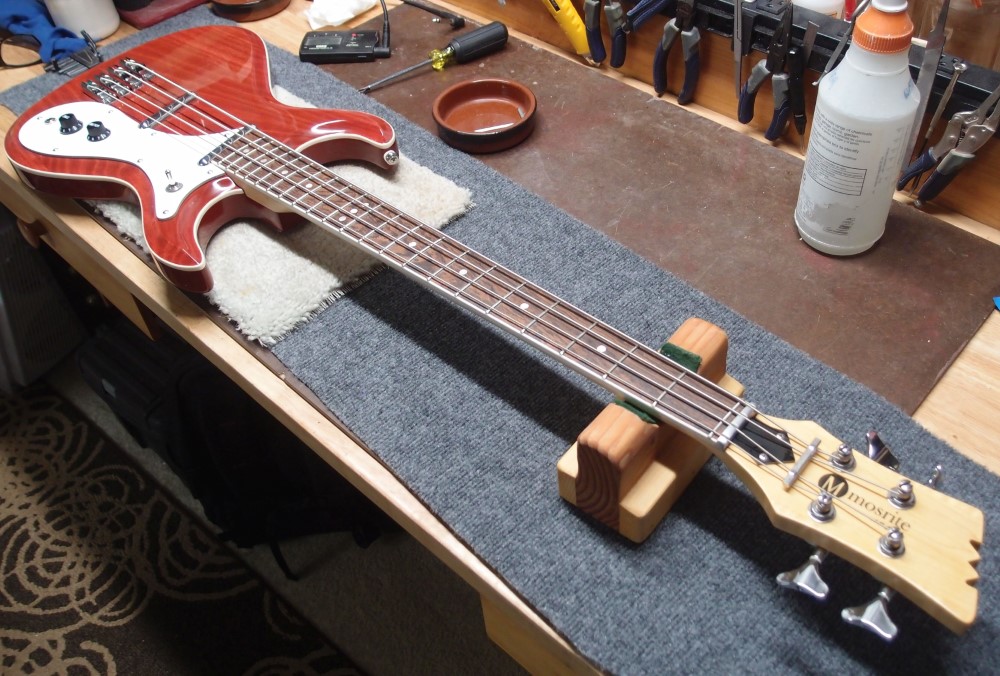
Kubicki Factor Bass (6/13)
Dec 28, 2017
Truss Rod
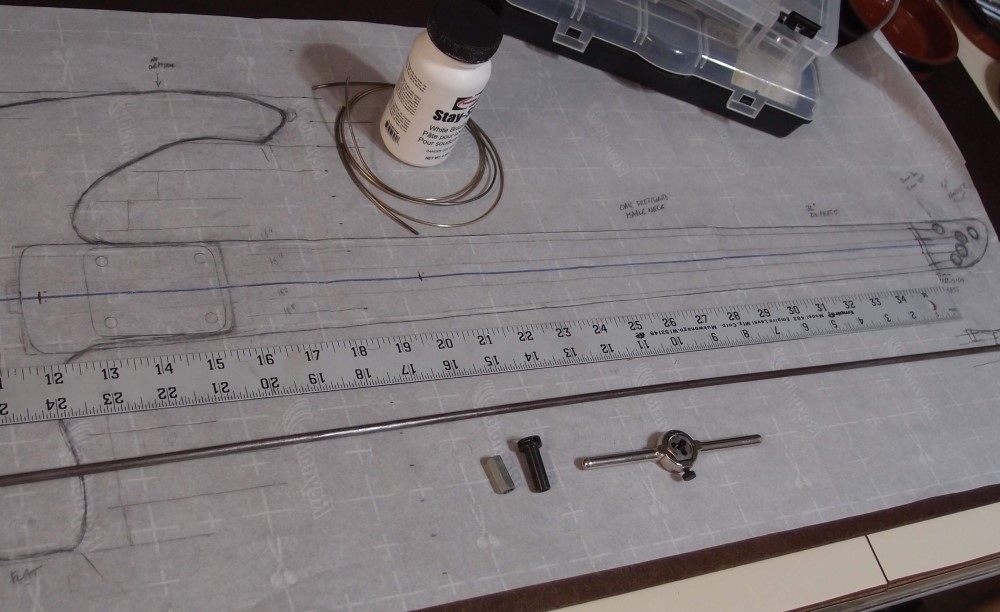
Here is the problem: this neck will be 32" scale and two octaves, so it will be longer than anything I have ever done, longer than a standard 34" neck. You could probably make a regular long truss rod work, but I figured I'd build one a little longer and a little better. Here you can see all the tools and materials:
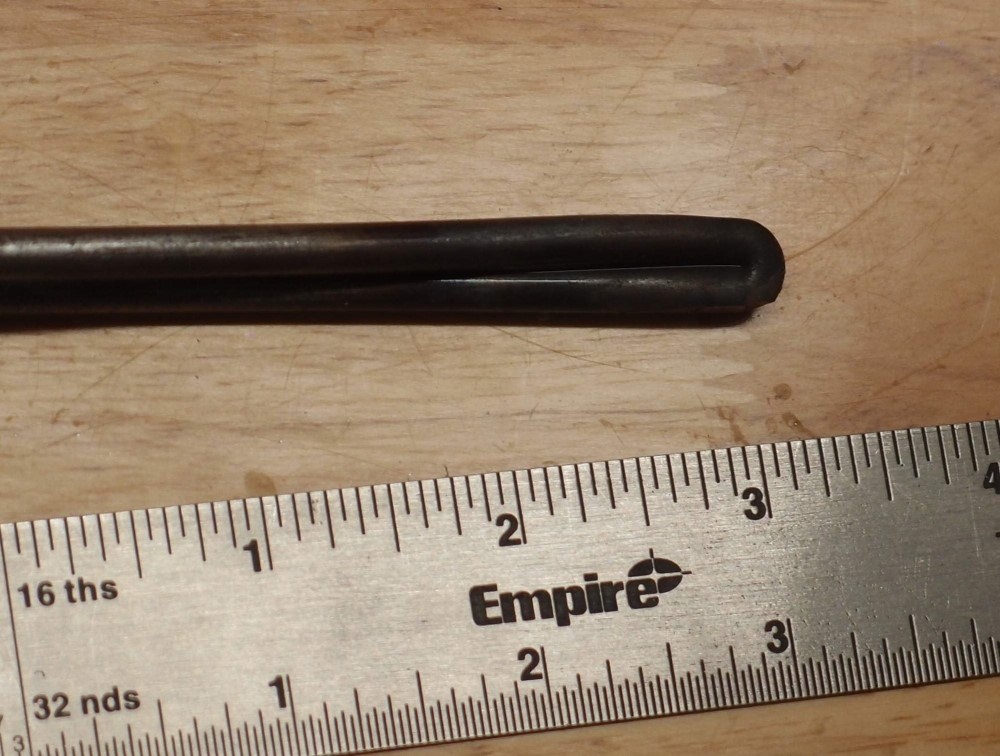
- 48" x 3/16" steel rod from Home Depot
- 3/4" 10-32 coupling nut from Home Depot
- Spoke nut from StewMac
- high-strength silver solder & flux
- 10-32 thread cutter
I happened to have all this stuff lying around already, so might as well use it up. The spoke nut is another motivation in building my own truss rod. I love those things, but they are difficult to incorporate into an existing rod. 10-32 is the standard thread for Fender-style truss rod nuts, and I believe Gibson and Ric use the same. In fact, I think everyone uses it. Cheap imports may be metric.
I have seen short-scale bass necks and guitar necks that needed to be pulled forward, so I always make or use a double-acting rod for those. But for a bass neck this long, I have never ever seen one bow backward on its own, so a single acting rod will do.
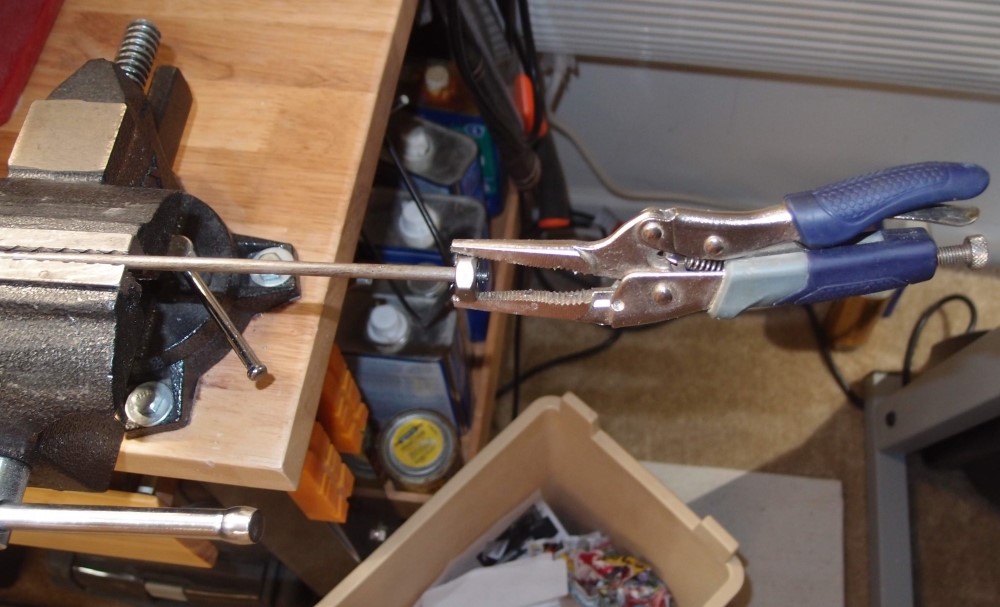
Here I am using the thread cutting die to make about 2 inches of 10-32 threads on one end of the rod. I am using a vise grip for a cutter handle just to see how it works, and it works fine. So instead of a whole tap/die set, you could get just a cutting die from eBay for about $5. However, I would recommend the DeWalt 17-piece tap/die set from Home Depot, which has everything including the oddball drill bits for about $30. You will have everything you'll ever need in one shot. Use a drop of 3-in-1 oil to lubricate the rod.

Once I got it started, I moved the wrench so I could just spin it up. You can't do this job without a bench vise. After cutting the threads, run the die up and down once to clean them up. Why not just use a threaded rod? It would not be strong enough, and you need the rod to be smooth so that it can slide.
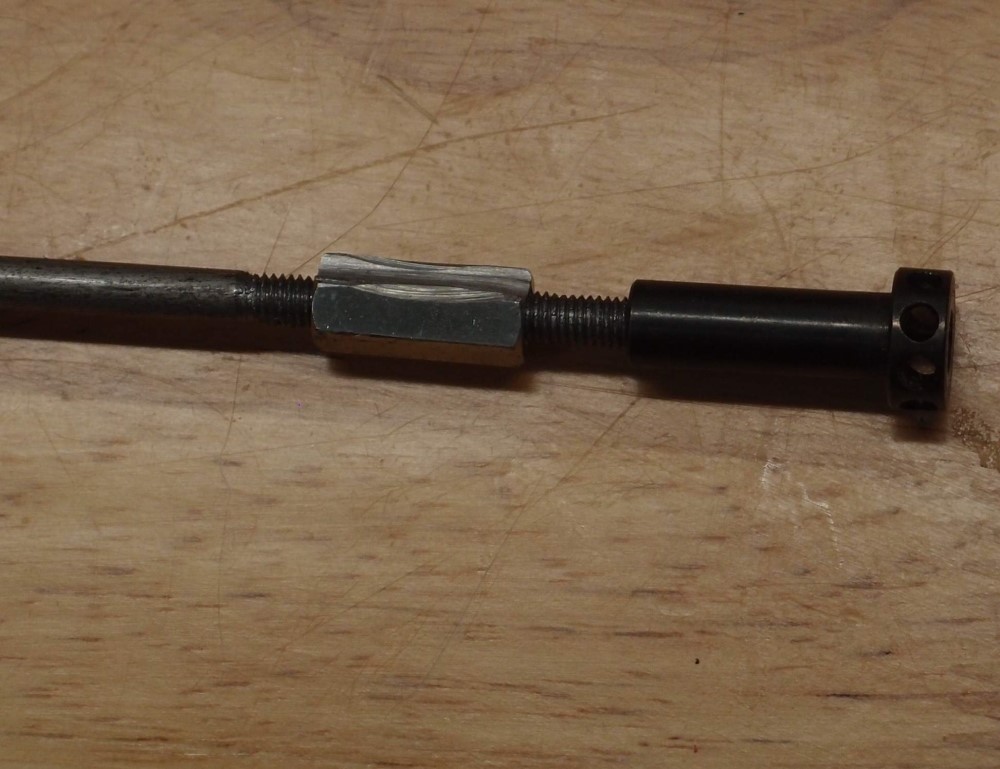
The threads are done and clean. Here I have drilled out the 10-32 coupling nut with a 3/16" bit and reamed it out a bit with the chainsaw file so it slides easily over the threads. Then I filed the zinc galvanize off one side and filed a notch in it with the chainsaw file to mate with the rod. The zinc coating will mess with the soldering process. Also, when it gets hot enough, the zinc will burn off, and the fumes are not good to breathe, so make sure you have ventilation.

Mark the rod in the center, then make another mark 1/4" away from the center on the unthreaded end. That will be the bend point, so the threaded end will project 1/2" beyond the unthreaded end when finished. Here you can see how far I was able to bend the rod cold. Any further, and it would break. Don't worry that the ends get all crooked at this stage. Set up a container of water so you can quench the hot parts once you start with the torch.
The torch is an ordinary plumber's model, and I am using propane. There are lots of good instructional videos on YouTube - watch some. This is not the same as doing plumbing. Pipe sweating uses a very low temperature solder whose only purpose is to make a watertight joint. This is actually 'brazing', using a much higher temperature silver solder for a much stronger mechanical joint. Watch some videos on that too. The torch has a push-button ignitor built-in, so I don't have to mess around with anything else. That is absolutely worth the extra few bucks.
I made my bend mark with a Sharpie, which quickly burned off. Instead, you could make a small nick with a file and do the entire bend process 'hot'.
Here is the final bend. To do this, heat the bend until it glows, then crush it in the vise. It took three passes with the torch to get it as tight as it would get in the vise, and then a couple of smacks with the hammer to get it perfect. ( The vise has a little anvil built-in. ) At this point the ends are all crazy, so gently straighten them out and get them to lie together. Note how there is no bulge or other obstruction at all. It looks a little wet because right after I got it done I quenched it in water.
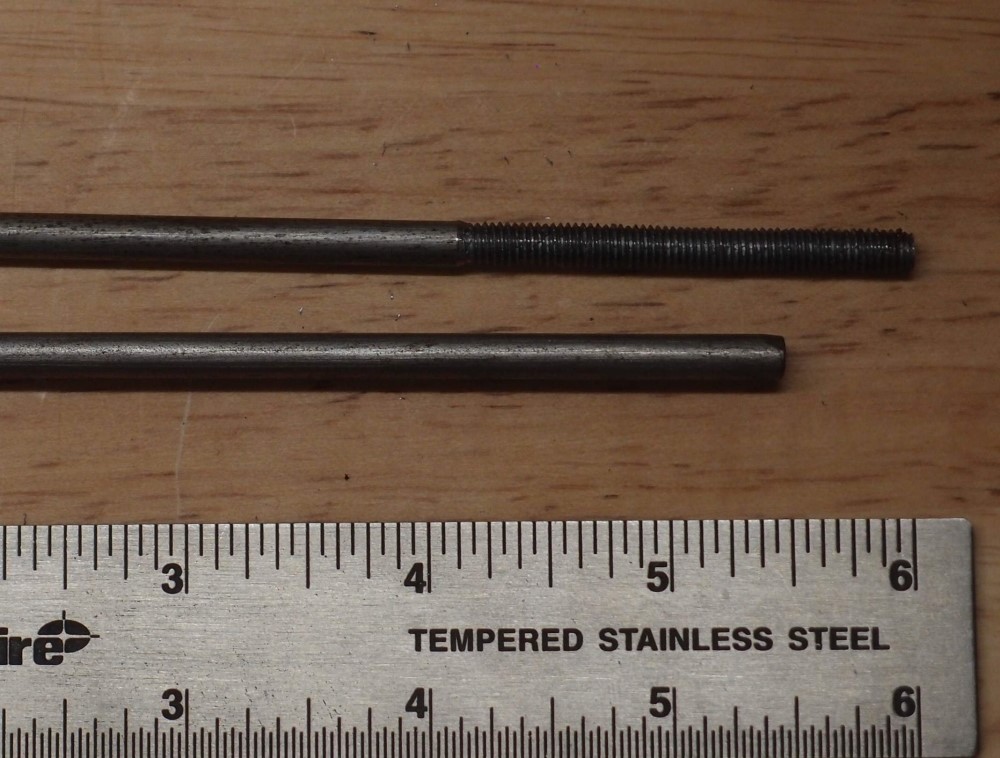
Here are the ends, not fully straightened yet. You can see I got my 1/2" pretty well. You could change the steps around and cut the ends to the finished length, but in this case, I wanted to use the entire rod.
Now the fun part. Put the coupling nut over the threads, coat the joint in flux, and align everything. Don't get flux on the threads. Then put the torch on it until both the nut and the mating rod end glow. Touch the solder to the joint and let it flow in. It should be the metal that melts the solder, not the flame. The melting point of this solder is just below the flame temperature of propane, but the parts are small enough that you can get away with it, just takes a little extra time. MAP gas would work better, but it is much more expensive and requires a special torch. I have done a lot of these with just propane.
I got this solder on eBay. It has a very high silver content and makes a very strong joint. This is how bicycles were made once when they were made well from high-quality steel tubes and braces. Now they are all just machine-welded aluminum boneshakers. Home Depot sells "metalwork" solder. I don't think it is equal to this stuff, but it may be good enough, and easier to use. The only way to know would be to make a truss rod and then try to break it, and I have plenty of this good solder, for now, so someone else can do that experiment.
So here is the joint. I made a reasonable effort to break it, even tried to smack it apart with the hammer, and it stays together. But I don't like the look of it. It has been a long time since I've done one of these, and this is not my best work at all.
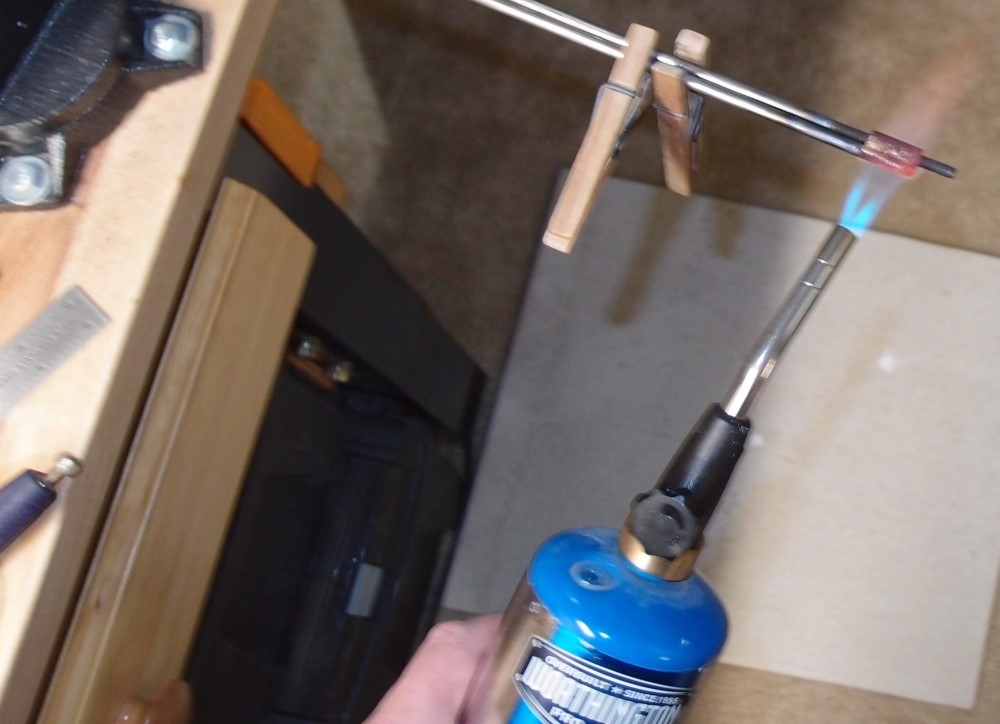
So I put the torch on it again and made it more to my satisfaction. Holding the camera in one hand, the torch in the other, trying to focus. Note the color of the metal. I like to see a nice silver fillet between the parts. When I was happy with the joint, I filed the coupling nut round and made everything smooth and sleek to fit inside the neck.
Here you can see I am using an old piece of cement Hardiboard to catch any drips. Just a couple of white flux spots, no solder. This is the sort of job that is best done out in the garage, but it is colder than hell out there, so I am doing it inside. I'm fairly confident with the torch, and no, I didn't burn the house down.
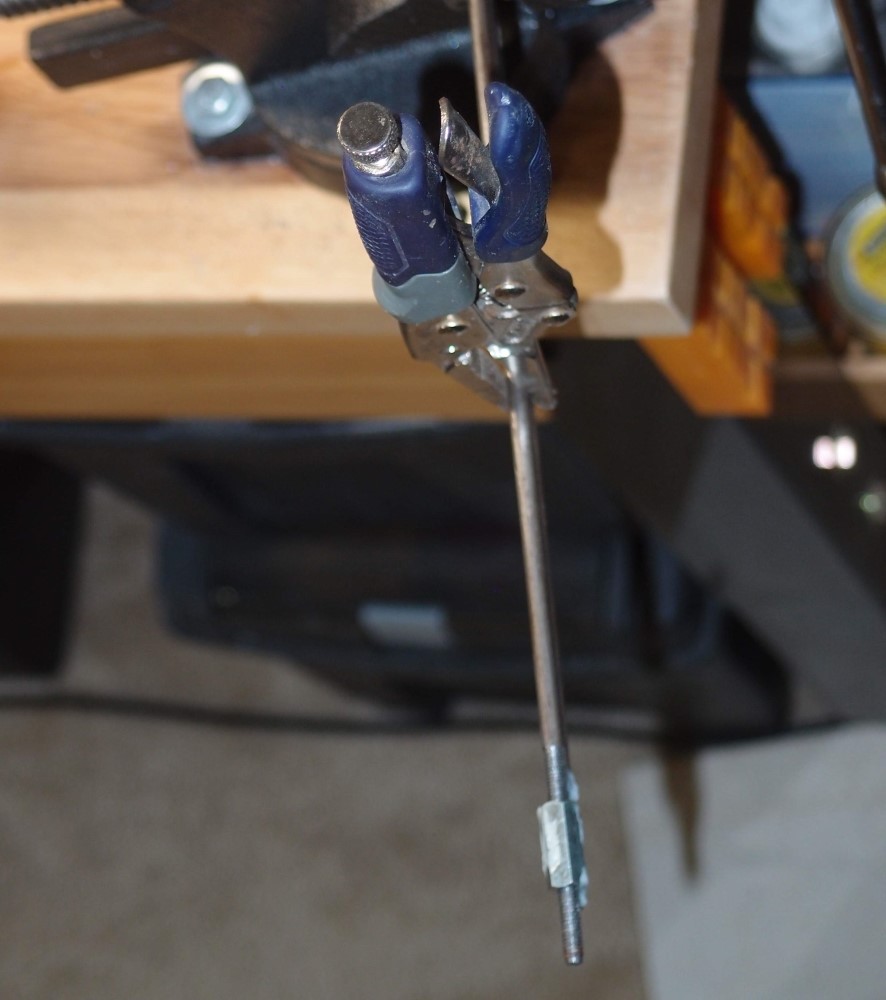
The clothespins are perfect for clamping - they are so lightweight they don't affect the alignment at all. The vise grip was too heavy. From now on, these shall be called "luthiery clips", and sell for $10 a pair.
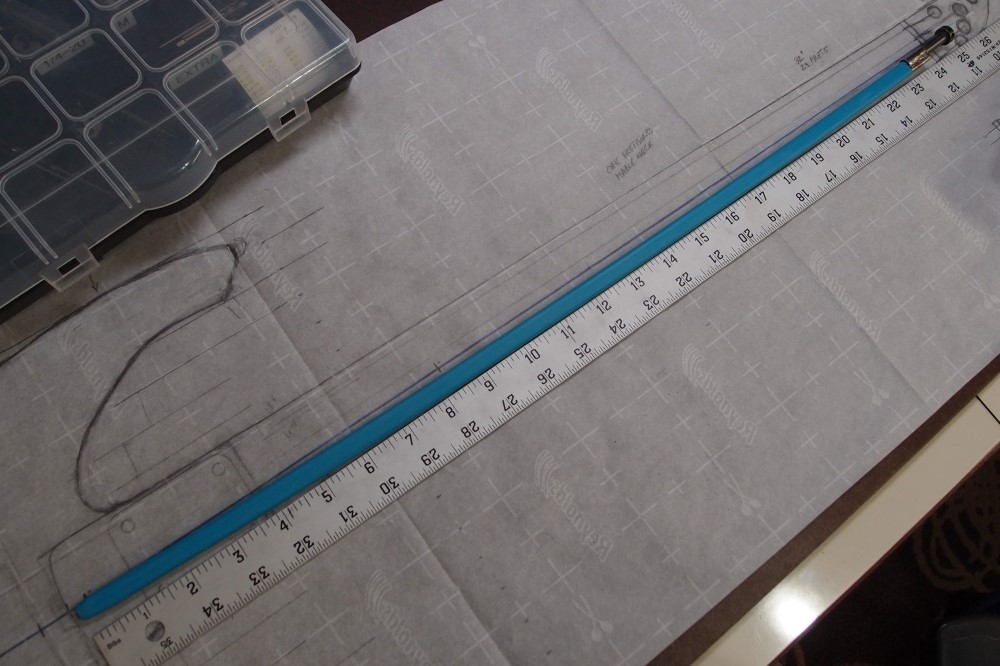
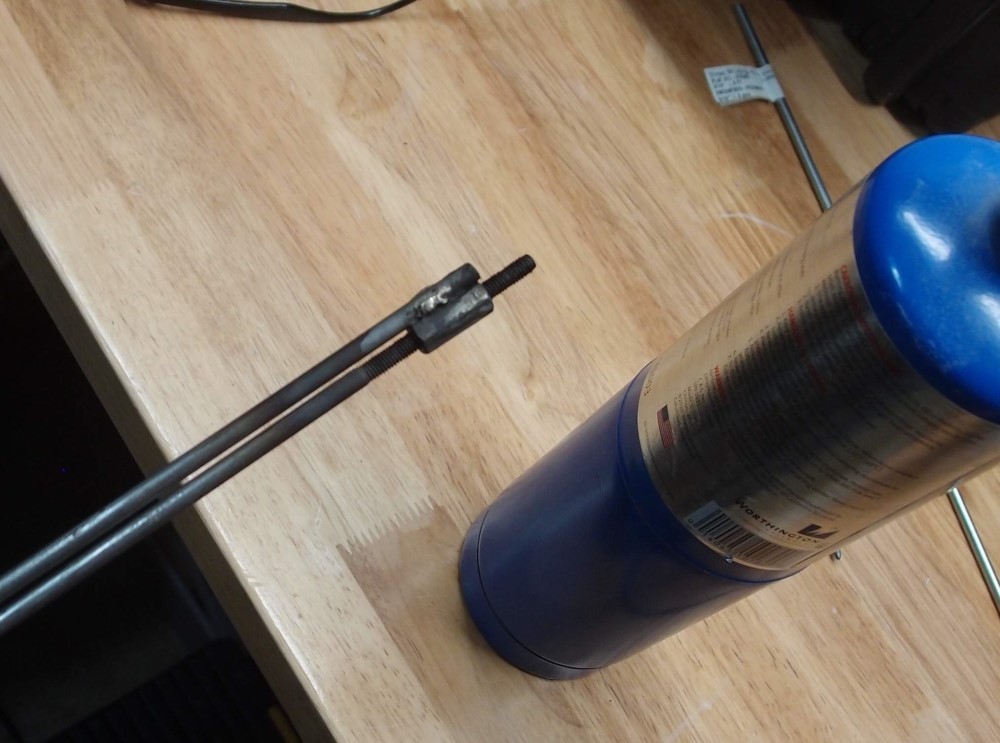
Here is the finished rod, with a covering of heat-shrink tubing. You can see I have put some tension on it, and it curves nicely. The tubing will help with stray rattles, and also keep the glue off it during installation. Pity, it will never be seen, it looks professional.
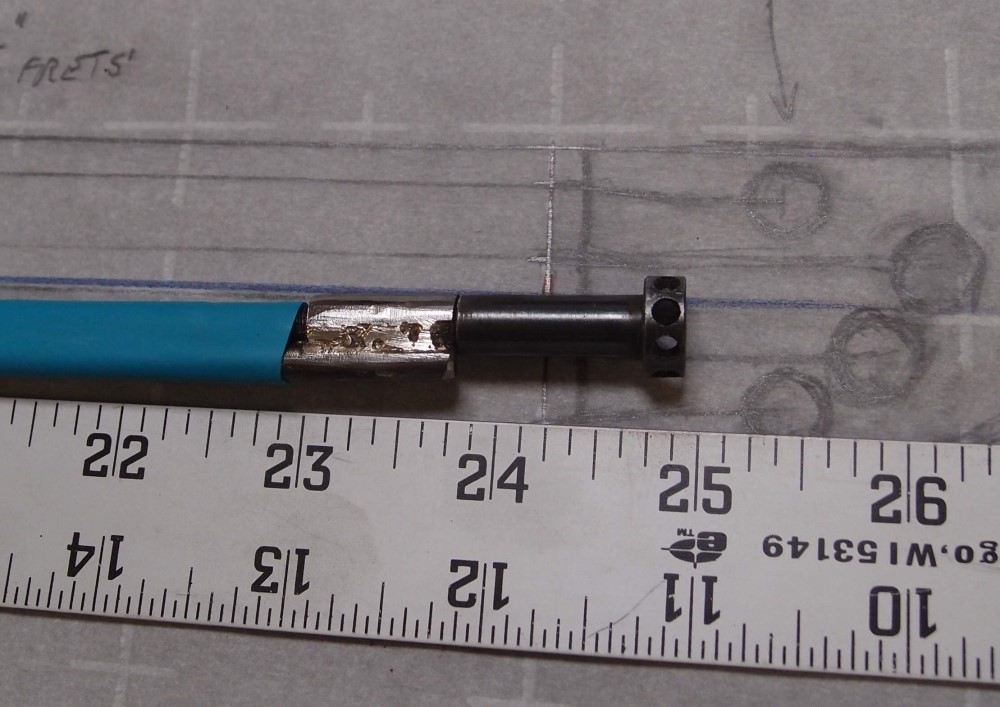
Here is the finished end. Lots of solder holding the two parts together. If you want to avoid soldering, you could use a small brass block with two precise holes, one through, and one blind. I'll leave that to your imagination. It is bulkier than this, but inside the neck heel that doesn't matter at all. Rickenbacker used to use an aluminum shim. The dual truss rod(s) in my 4001 are the cheesiest thing I've ever seen, kind of a miracle that they work. Another design that does not even require a torch at all is the Martin-style or "U-Channel" truss rod; you can look that up yourself. I've built those as well, but I get the feeling they are not as strong as all-steel.
This is actually a better truss rod than you would get in an American Fender or Gibson ( but ironically, not in an import Squier or Epiphone. ) This truss rod acts against itself, the second rod is the compression member, not the neck itself. The only force on the neck is the desired bending moment, not an overall compression. Interactions between the steel rod and the wood of the neck are what make 'skunk stripe' necks so touchy and require constant tweaking for the weather. A neck with a rod like this can be set up once and never need attention again.
The 'skunk stripe' is the worst truss rod design of all time, and not at all easy to install either. At this point, some freak always comes out of the woodwork and starts a windy argument over tonewood and other religions. If that is you, please go start your own website and do it there.
This truss rod has several advantages - for one, it is removable. Simply back off the nut, and slide it out. This rod installs easily in a small straight channel, with a minimum of wood removed from the neck. I will use a 1/4" round-bottom router bit to a depth of somewhat less than 1/2" to install it. Simply route the channel out the end of the heel for the nut - no end-drilling needed. Finally, it is easy to adjust, no need to remove the neck.
So, as promised, that is how to build a truss rod. This is as simple as it gets. I have also built double-acting rods, and even double-acting spoke-nut rods ( the only ones on earth, AFAIK. ) Double-acting rods have a considerably more complex assembly. Eventually, though, I found that the easiest thing for the short-scales that I like to build is to get a decent long double-acting rod from China and shorten it to whatever length I need. That is simple:
Cut the rod at the desired point, but not quite through either part, so a thin bit of metal still holds each in place. This maintains alignment without having the excess end act as a heat sink. Then braze the two rods together, an inch-long joint is more than enough. Finally cut the rest of the way through and file smooth.
This sort of silver brazing is an ancient ( and largely lost ) art that long predates welding. A properly done braze joint can be as strong or stronger than a weld. The reason for this is that the brazing process is at a low enough temperature that the material properties of the parts are not affected. For example, tempered steel remains tempered. This is why high-quality bicycle frames were built this way - the heat-treated steel tubes stayed strong, and the reinforced lugged joints were much stronger than welds. The best example of heat ruining a material is aluminum scuba tanks. People have had their tanks painted and then had the paint baked-on at high temperature. Aluminum derives much of its strength from heat treating, and the baking process ruined the tanks. The next time they were filled to 3000 psi, they ruptured. Of course, welding is much easier and cheaper, if you have a welding setup. I'm not saying this is better than a welded truss-rod, it really makes no difference either way. I just don't have a welder. Someday ...
Note:
I have since come up with a solder-free method of building a functionally identical rod. See Truss Rods.