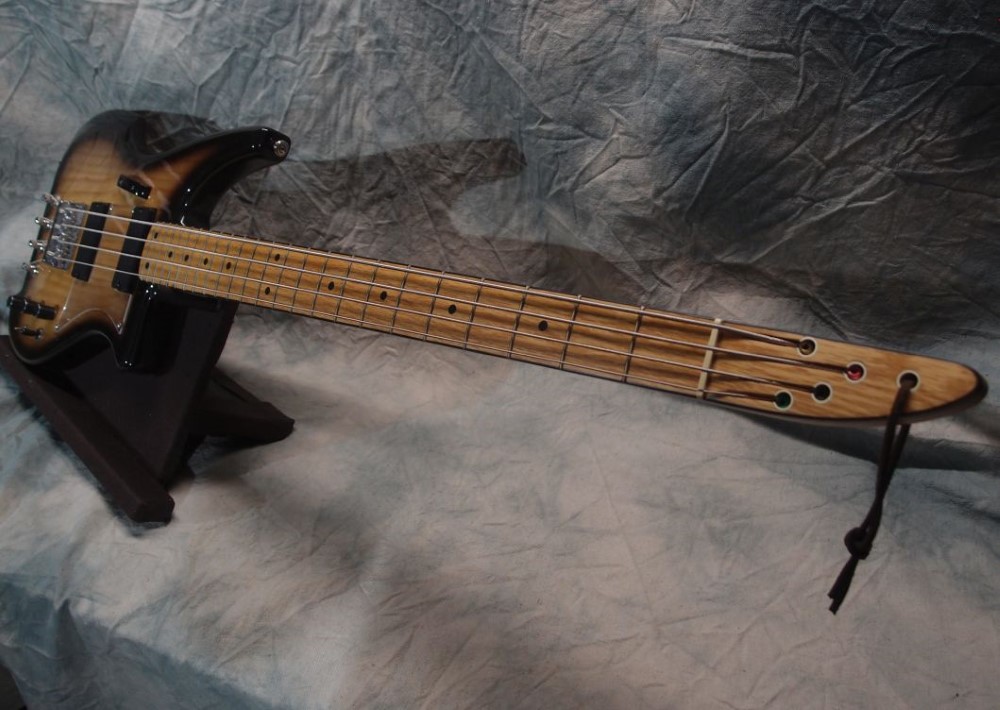
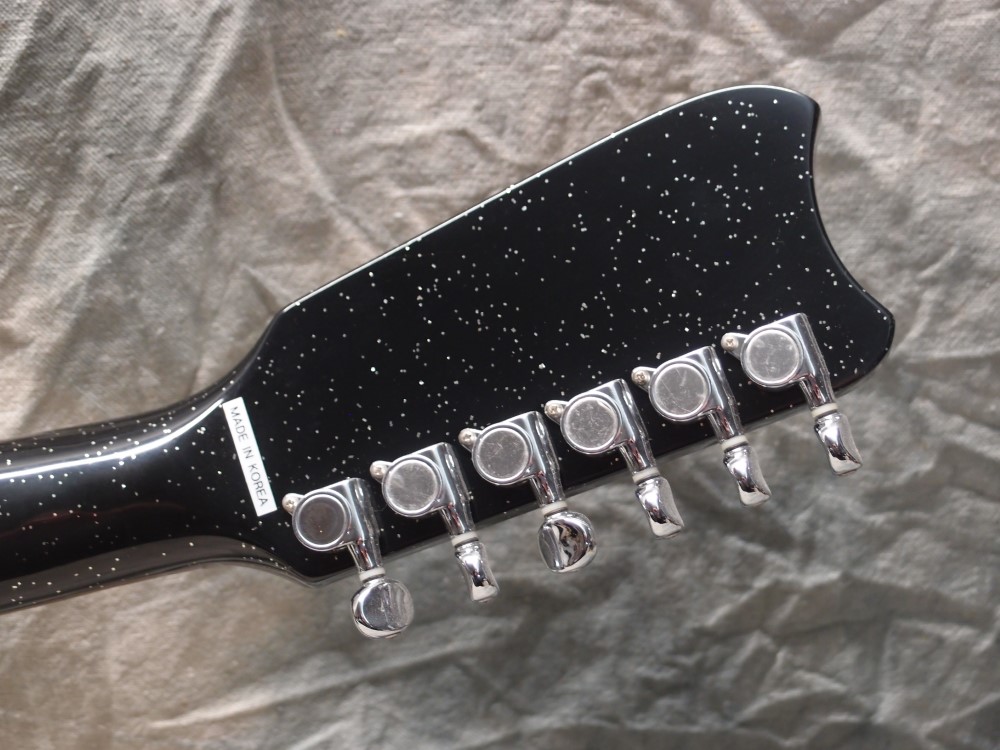
Oak
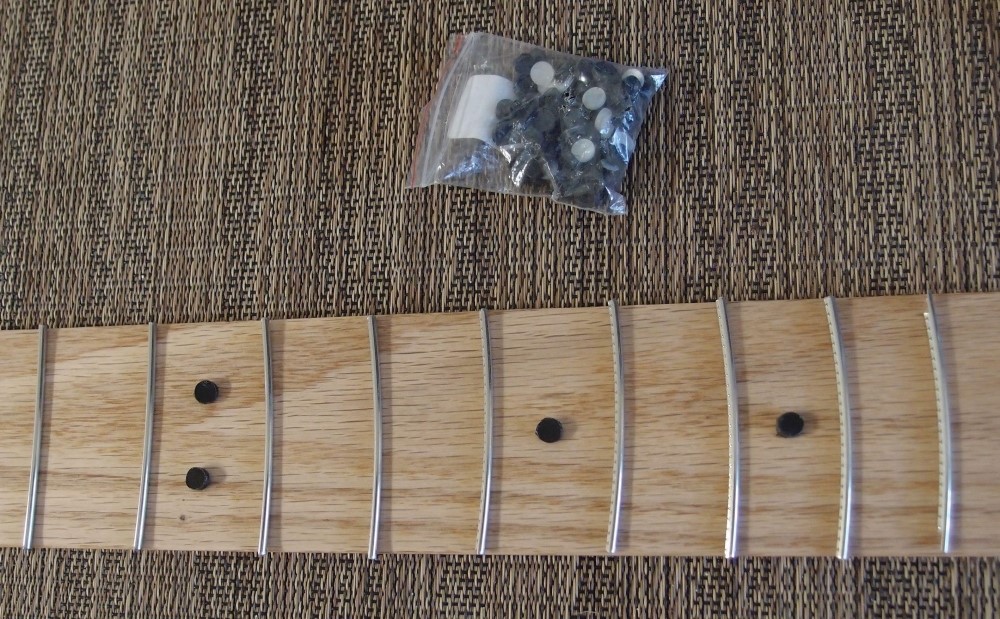
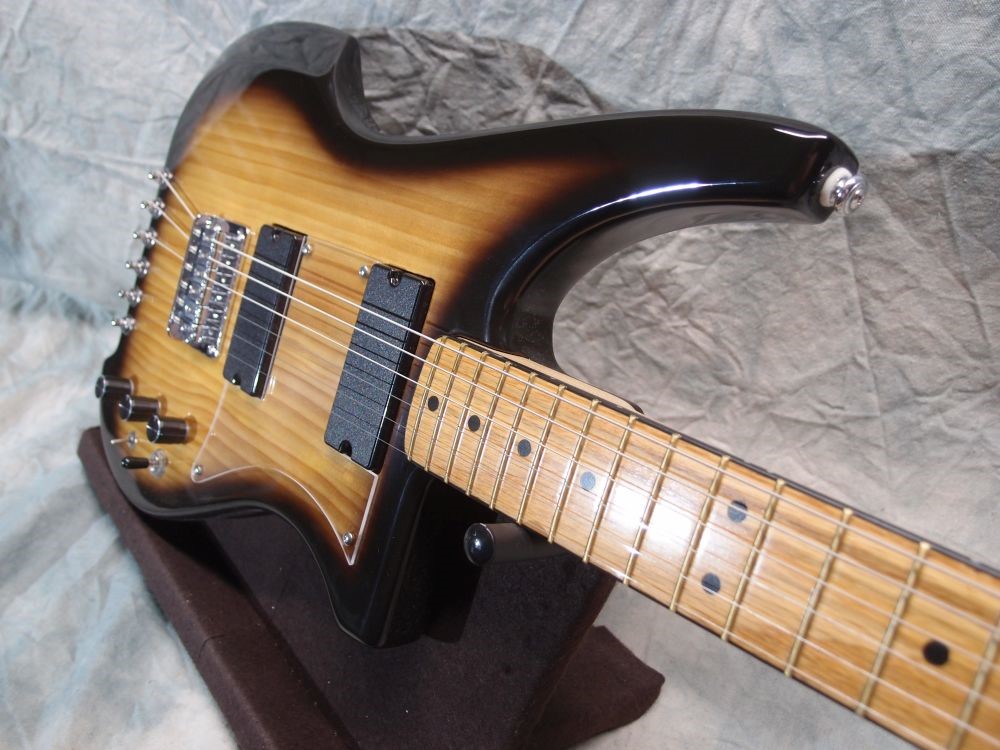
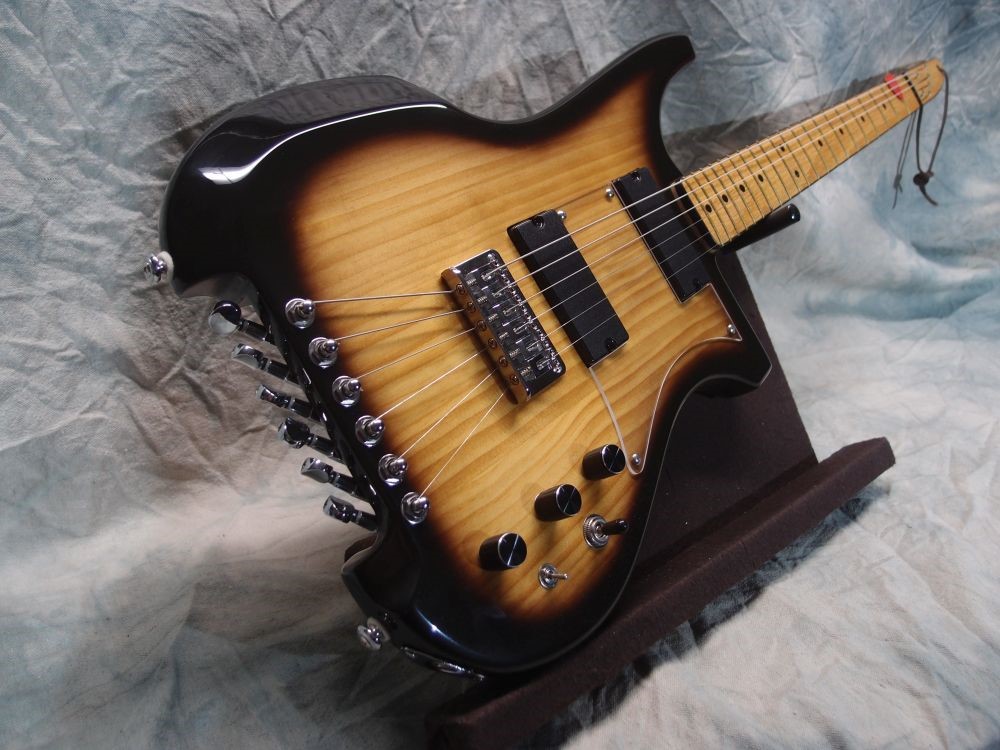
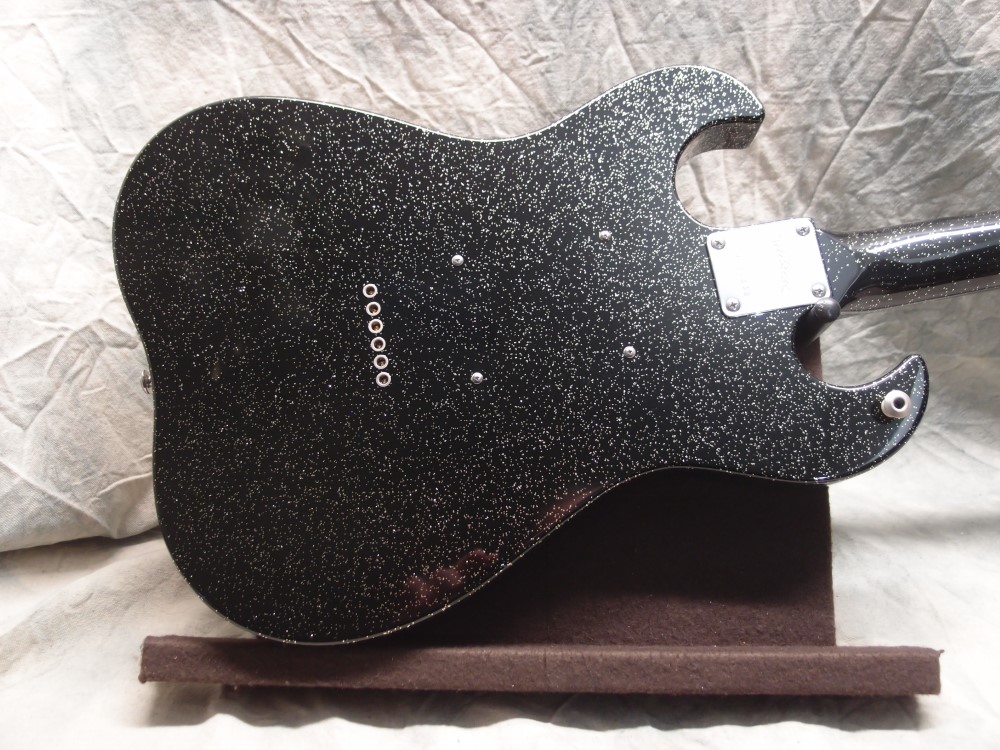
Here is a piece of oak from Home Depot. I grain-filled it with several coats of water-based ( non-yellowing ) poly, sanding in-between until it is as smooth as plastic, which it now is in a way. I used water-based that because that was the first can I laid my hands on. Otherwise, I have a very low opinion of the stuff. I'm really only using it as grain-filler here.
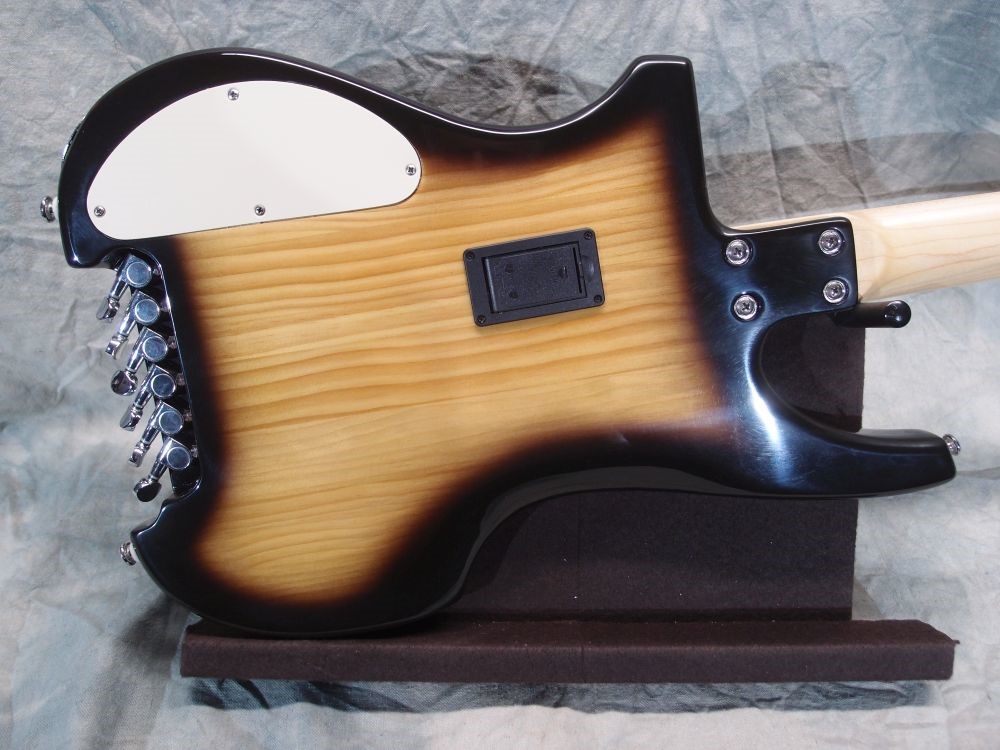
This finish is dull, it could be polished. Before and after fretting, I will probably apply a couple of coats of satin spray poly, which will yellow it a bit. I laid some frets and black dots on it to get an idea how it will look as a neck. I think it looks great, a lot more interesting than maple, with all the little freckles and the much more pronounced grain. And at a fraction of the cost of a piece of tropical wood - you're looking at about two dollars there. Of course, there is a lot of work done to it already, to get it all shaped and finished, and a lot more before it is a guitar, but I count the labor and time as a hobby.
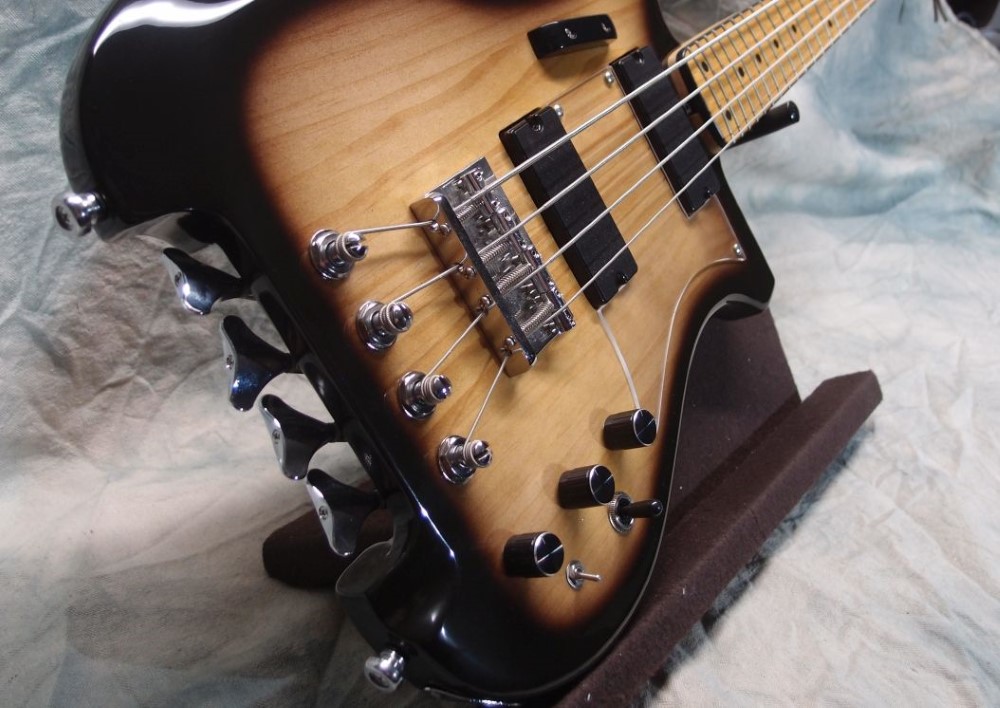
The dots are cut from scraps of solid black pickguard material with an inexpensive 1/4" plug cutter (eBay) on the drill press. You can cut dots from just about any material you have, it is rumored that Fender made them from surplus floor tiles. To cut dots from scrap fretboard material, drill the cutter most of the way through the material, but not all the way. Then put a piece of tape over the top of the material and stick it down good. Sand away the bottom on a belt sander, pressing a fingertip lightly on each dot until you feel it let go, the tape will keep it from being shot across the room. With practice, you can get 90% or better results. I have made black, white, rosewood, maple, Bubinga, and purpleheart dots. You can only use solid materials, so three-ply and other types of pickguard scrap will not work. Solid pearl material is expensive, and the process is wasteful, so I bought a nice bag of 200 pearl dots from a supplier on eBay for a silly price. StewMac sells nice dots as well, but at their price-per-dot, I could make them out of gold. Their side marker material is a good value and very easy to use.
Oak has been called 'furniture-y', and I would agree with that, I would not use it for a body for the following reasons:
- Oak is very hard, it would be hell to work with, and quickly dulls tools and sandpaper.
- Oak has uneven hardness across the different grain areas. This means that the more you sand it to get a flat surface, the more wavy it will become. To get true flat, you need to surface-plane or scrape it. This is true of other woods as well, but oak is especially bad.
- The open grain of common Red Oak will need to be filled. That's a real bother, although no worse than ash. White Oak has a closed grain, if you can find it.
- Oak has a pronounced sensitivity to humidity, more-so than even maple. This causes it to swell and shrink across the grain with the season, which could crack some finishes, and for a large thick piece, could result in warping and cracking of the piece itself. This is much less of a problem for a small piece.
- Oak is heavy - density of 45-50 pounds per cube, vs 30 for alder or poplar, 35-40 for ash. Maple is almost as heavy as oak, which is why Rics are so thin and/or chambered.
- A piece that big will come out looking like furniture. Or like Ash, but even heavier.
There are many other materials that are available are lumber yards and hardware stores that can be used for a guitar body, including poplar, maple, pine, cherry, plywood and masonite. Oak would be my last choice.
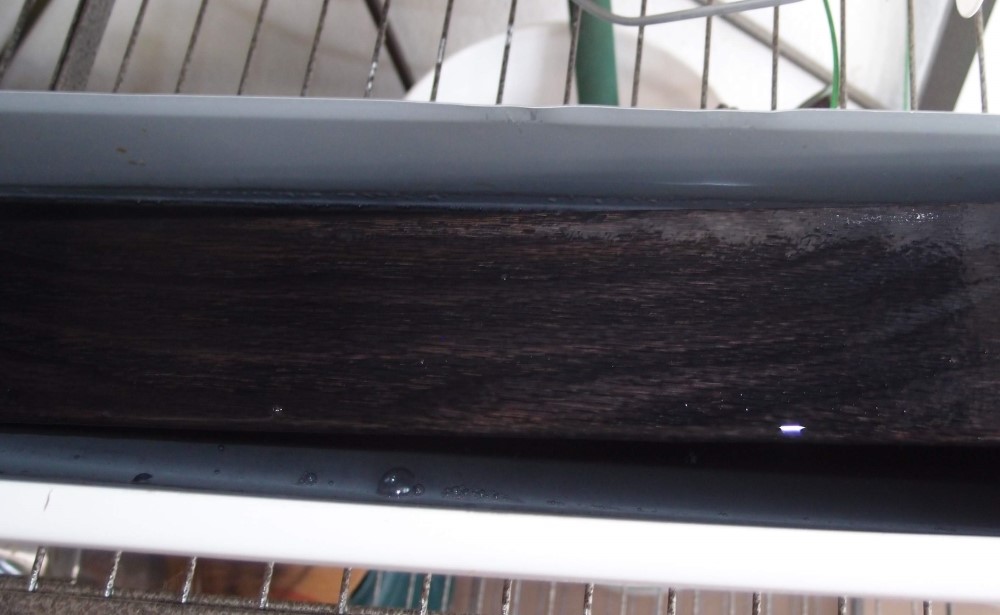
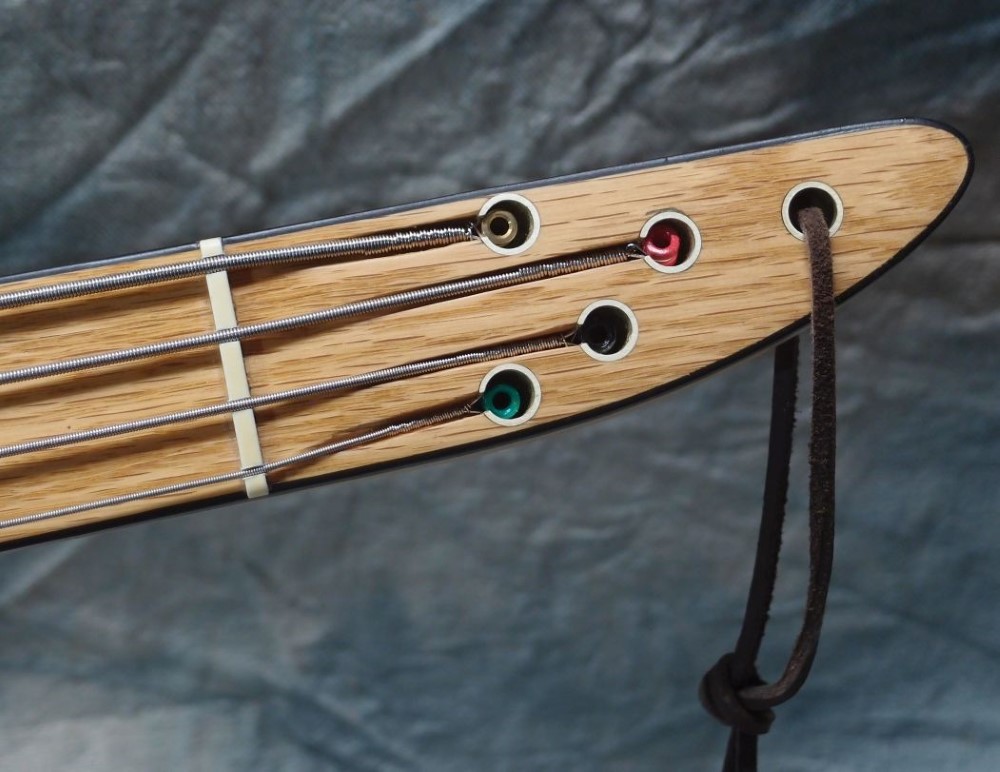
Here is the other half of that same 48" piece of red oak, after soaking in a trough of steel wool / white vinegar solution for a couple of hours. Some earlier test swatches show that the process eventually results in a jet black color, with no brown at all. Normally, the solution is brushed-on like a dye, and forms a surface layer only. That would not be useful for this application, as there is still cutting and sanding to be done before it is a finished product. I am going to let this soak for at least a week, to see how deep the reaction will go. The porous grain of the oak will no doubt help.
Soaking like this might also work with a dye, but a stain would not penetrate past the surface no matter how long you soak it. A stain is a suspension of solid particles of pigment that lodge in the pores of the wood, a dye is liquid chemical pigment. That is why stains tend to be more color-fast than dyes. That is also why stains don't penetrate very deeply and can be sanded off. This solution is neither a stain nor a true dye but causes a chemical reaction with the tannins in the wood, which oak has lots of. This is the same reaction that makes indelible black rings on furniture where you put a cold glass down without a coaster, just taken to the extreme. ( White rings on furniture are different - they result from water penetrating under a lacquer finish. Lacquer just sucks - don't use it for anything. )
With long enough exposure, my hope is that a thin piece like this can be blackened right through. Other things I am investigating are: can the board be dried without warping, and how permanent is the coloring? For the first, I think clamping it between a couple of straight boards in the hot attic for a few weeks should do the trick, and for the second, I have seen every indication ( on the internets ) that the color lasts forever. ( Don't have a hot attic? In the summer, your car is practically an autoclave - put it in the trunk. ) This is going to take a while, but if it works as I hope, I can turn oak boards from Home Depot into ebony at less than 1/10 the price. The trough is made from a scrap of rain gutter and $3 for end caps. The solution costs pennies and is re-useable.
Am I really such a cheapskate? I've built plenty of nice guitars out of the 'right' materials, and I've bought a lot of expensive parts. That's not interesting anymore. I want to see what else I can do, and see just how much can be squeezed out of the cost of a build. So ... wood from the lumberyard ... flooring boards ... dumpster plywood and masonite ... anything that is not 'luthier'. Inexpensive parts from China - you can always upgrade the tuners later, no need to blow $50 on Gotohs when the cheapies work well enough for experimenting. That goes for most of the hardware, and a lot of the cheap stuff is actually good enough that you wouldn't need to replace it ever. I have a box with a huge tangle of strings in it that I have been assembling perfectly good sets out of, they just need a little cleaning. I even learned how to make my own active buffer circuits, for almost nothing. Eventually, I will run out of things to try, and quit.
Come to think of it, the groundwater around here has such a high iron content that I probably could have fetched a gallon from a nearby stream and just used that. The whole stream is rust-colored, and it's not pollution, it has always been that way.
Home-Made Ebony ?
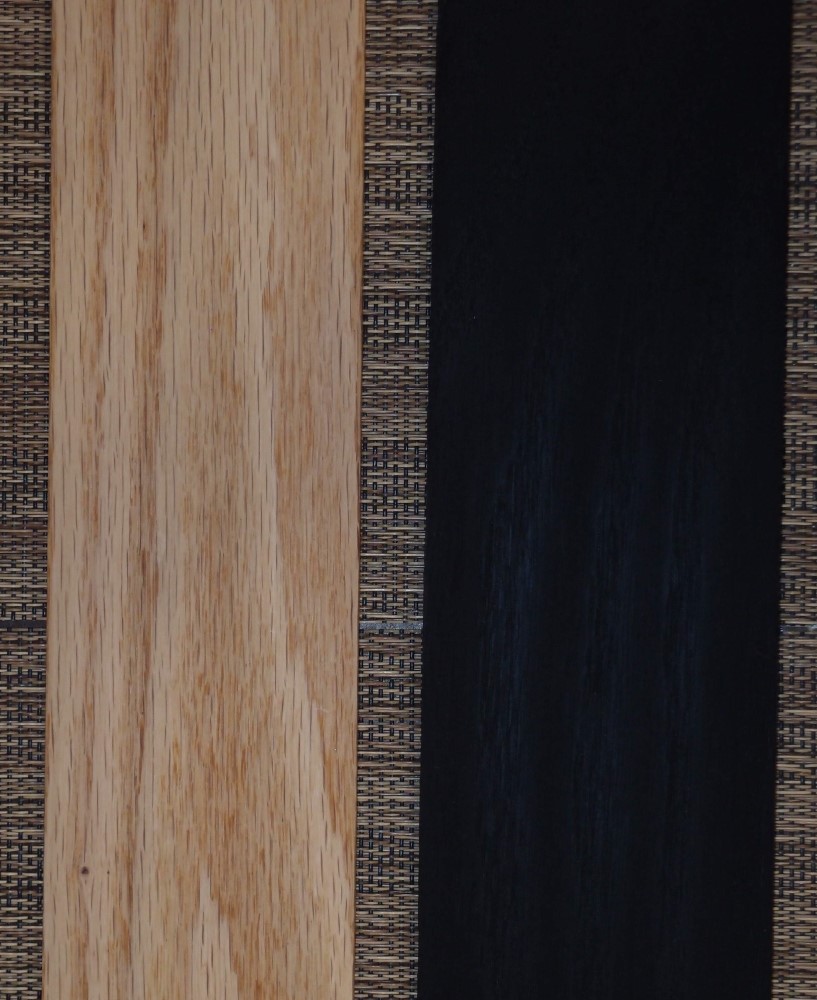
Here is that piece of oak after soaking overnight. On the left is the natural-finish piece, and on the right is the 'ebonized' piece. Both are halves of a 48" six dollar piece that I split. I did a little digging on the back with a razor knife, and it was just as black no matter how deep I cut. It has also swelled considerably across the grain, a good indication that it has waterlogged, meaning the color-changing solution has penetrated the entire piece as I had hoped. That happened a lot faster than I expected, but I will soak it a few more days just to be sure.
Making the solution out of warmed white vinegar and steel wool took about a day. A substantial hank of steel wool was reduced to a small ball. Make sure the container is vented or it will burst from the pressure. I filtered out the iron bits with a folded paper towel inside a funnel before using it. You don't want rust speckles.
Assuming the piece can be dried without warping or splitting, I see no reason why it can't be filled and finished exactly the same way as the natural piece. I will use my radiused clamping cauls to secure it to a piece of 2x4 and put it in the attic. When it shrinks back down to the size of the other piece, I'll know it's done. The non-porous areas will probably make nice black dots.
This same reaction should also work well on walnut, and my walnut test fret shows no sign of loosening. Oak is a lot harder than walnut, only slightly softer than maple, and should make a fine fingerboard, in your choice of color !!! Imagine what that black piece will look like with silvery frets and pearl dots !!!


Questions or Inquiries?
Just want to say Hello? Sign the .