Kubicki Factor Bass (4/13)
Dec 19, 2017
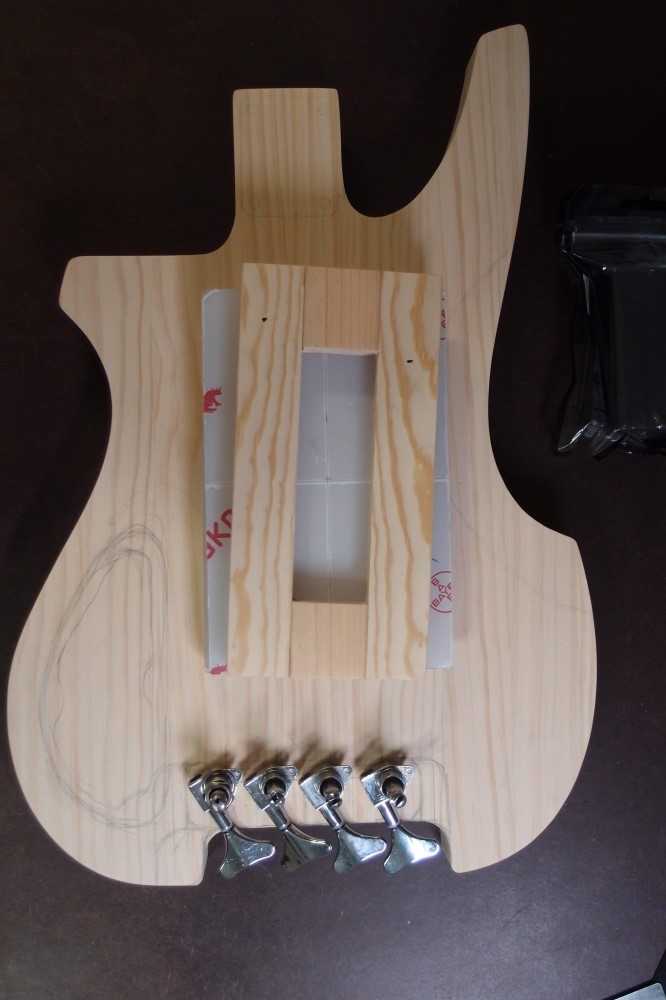
Not much time to work on this today. I bandsawed the tuner cutout and finished it with a sanding drum. A bit of final block sanding will make the straight edges straight. Here, righty tuners are subbing for the lefties the design will use. The edges of the tuner posts are symmetrical around the centerline. The angle gives the tightest possible spacing, with the handles offset to the north. I fooled around with extending the cutout to the south and fitting the jack in there, but it didn't really work.
I have marked out the cavity for the tuners and made a quick and dirty wooden router template for it. This project is going to need several other new templates. My control cavity template is too big, so I cut some pieces of polycarbonate to make a new smaller one. I will also need a template for the soapbar pickups. I have a big slab of 3/8" 1/2" polycarbonate that was the backlight of an old LCD monitor that died. I was taking the monitor apart for fun and immediately realized this piece would be useful. If you have an old monitor that is thick and weighs a ton, take it apart and get $50 worth of template material free.
You can make templates out of pretty much anything. Polycarbonate is good for pickups and things because it is clear, which makes it easier to align. But you could also use MDF, plywood, or just about anything. Router templates are often thicker to allow for bearings on the bit, while tracing templates can be thin. The amount of effort and expense should be proportional to how much you expect to use it. The control cavity template will get used over and over, so I will make it much better than the tuner cavity template, which will probably never be used again.
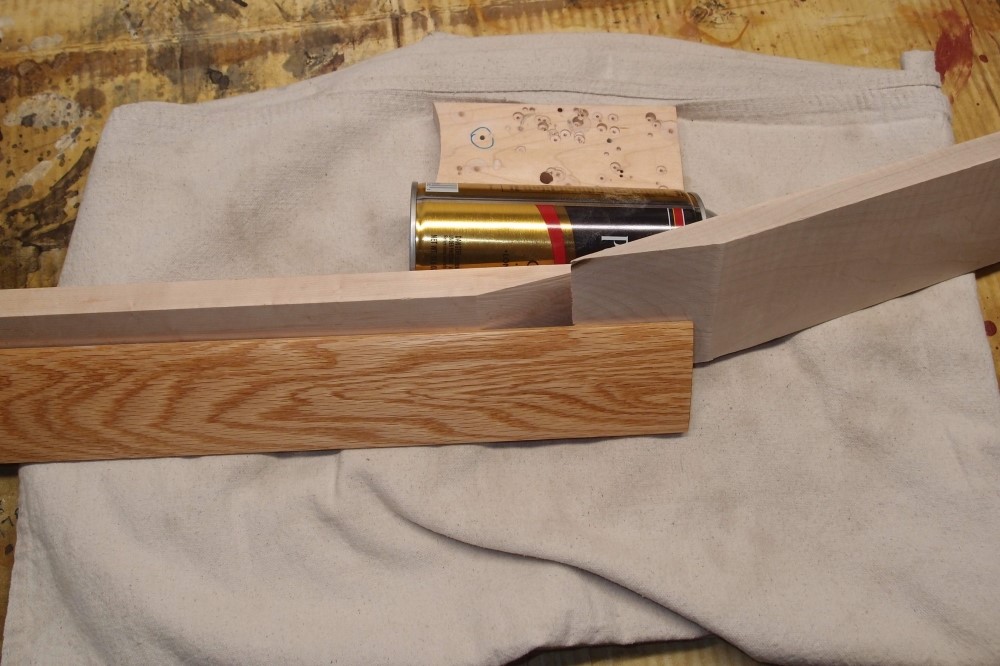
I figured out why this body shape is so cool: symmetry. The lower curve is the same as the upper curve but rotated 180 degrees. I have exaggerated the curves a bit and squared the butt. Considering that the whole thing is an experiment, so far it is coming out pretty good. The horns and all the body outlines are final here. For a visual comparison, I believe the long pieces of the template are Southern Yellow pine, and the short pieces are very old White pine. The "Bayer" thing is my last piece of Stewmac polycarb.
Dec 25, 2017
I've Made An Awful Mess ...
... and I feel like most of it is stuck to me. So it's time to take a break and get cleaned up.
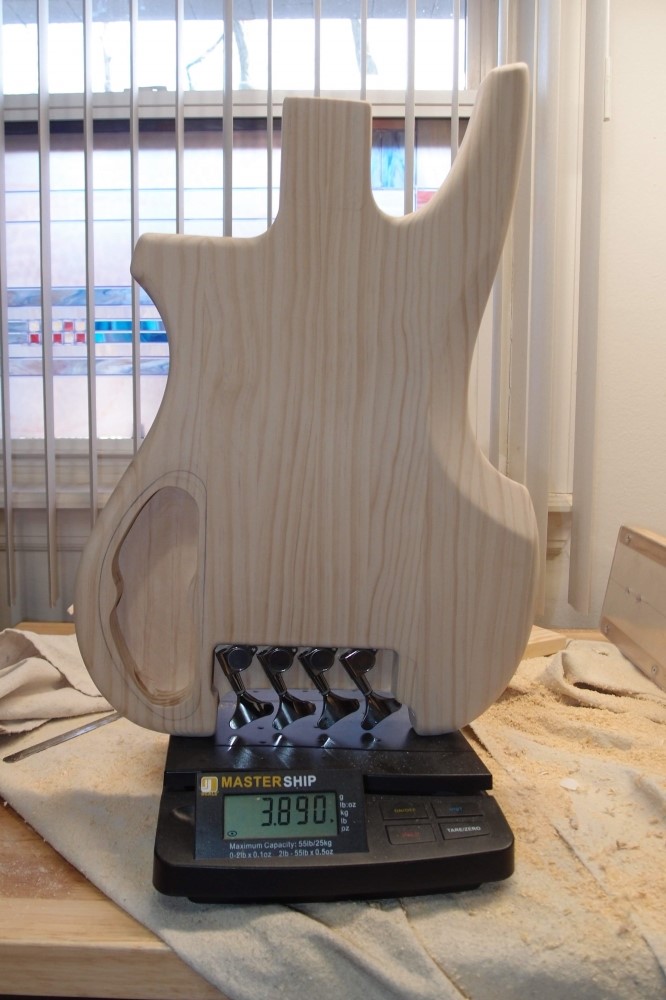
Here is the Kubicki now, after a few hours of work. I have all the body chamfers and roundovers finished, and the tuner cavity and output jack, and the control cavity started. The first test fit of the tuners - no problems. They are pretty well protected all around from accidental bumps. The tuners are about half a pound by themselves. This body is surprisingly light, and I still have the pickup cavities and battery box to do.
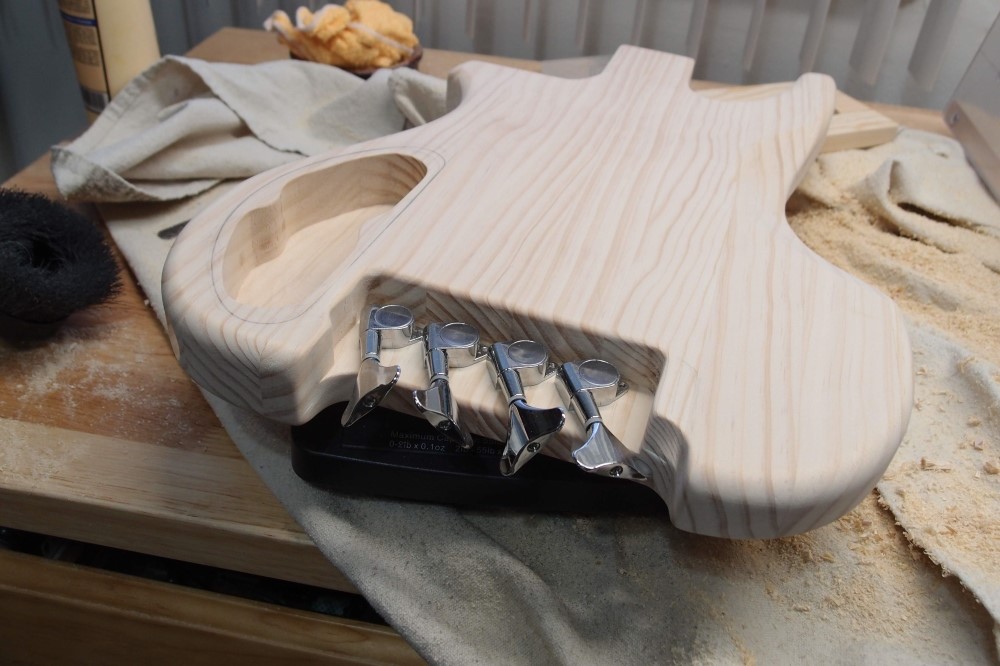
Here is a better view of the tuner installation. They are mounted to a shelf about 5/8" thick, about the same as a headstock. This is as tight as you can make four bass tuners and still have everything clear, they actually overlap. Some preliminary twiddling shows that there are no issues using them. This greatly improves on Kramer's original idea from the 1980s - real bass tuners, and tighter spacing.
Before I routed out the tuner cavity, I drilled small pilot holes through the body from the back to mark the tuner locations on the front. You want a well-aligned drill press for this. Then I drilled the tuner holes from the front with a 9/16" Forstner bit. That's not a size that is in a typical basic Forstner bit set; instead, use a 1/2" bit and widen it out a bit with a round file. All the larger cavities were first hogged-out with a Forstner bit on the drill press, then routed neat.

Here is the front. The tuners are offset from the center so that the edges of the posts are centered, rather than the centers of the posts. I used a 3/8" roundover on the body. 1/2" would probably be more accurate, but with only 1-1/2" of thickness to play with, a 1/2" roundover would make it almost completely round, and that doesn't sit well on your lap. Likewise, the chamfers are less pronounced than the real thing. Around the neck tongue and the tuners, it is about 1/8". A 1/8" roundover bit is a waste of money, you can do this just as well with sandpaper.
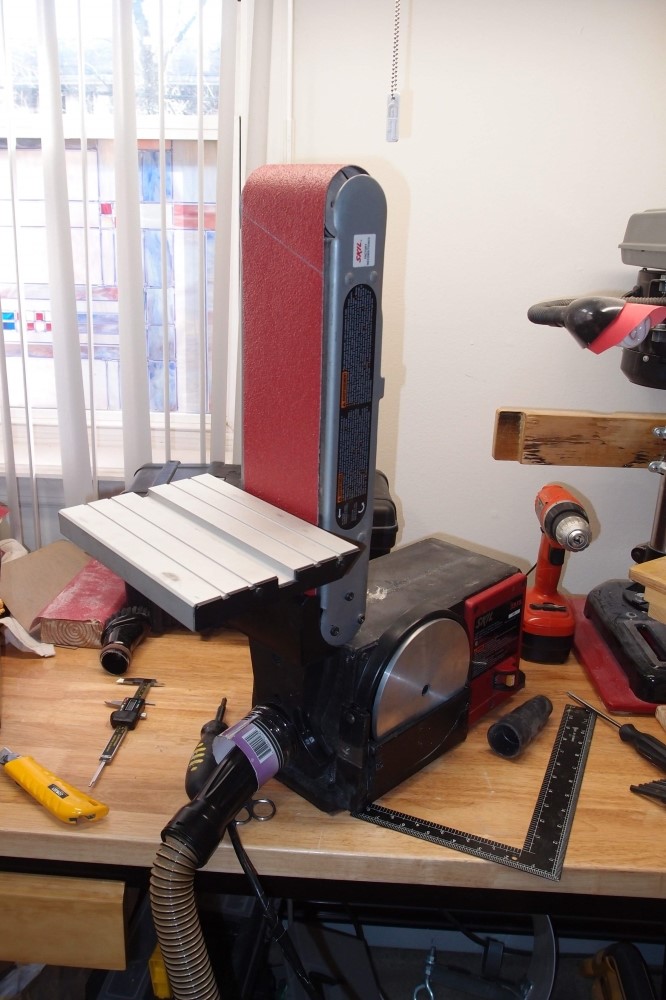
I did the body chamfers and some small outline adjustments on the bench sander.
I finished the control cavity and routed out the battery box cavity, which will also serve as an interconnect for the pickup wiring. The reversible control cavity template worked perfectly. The weight is now down to 3.3 pounds. Have to remember that the hardware that will go into all the holes I am making will be a lot heavier than the wood that was removed.
The only thing left is the pickup routs, but I still have to make that template. A simple thing, just a rectangle. I also wiped the wood down with warm water, and all the little dings and tool marks popped back out. This morning it was a slab. Now it is starting to look like something.
I am still really digging this Radiata pine. I've been reading up on it, and the only real complaint is poor rot resistance - not really an issue for a guitar. Just don't play a lot of outdoor gigs. The White Pine industry claims Radiata lacks character. For white pine, character is knots, cracks, and pitch stains, so a lack of character is not necessarily a bad thing.
Dec 26, 2017
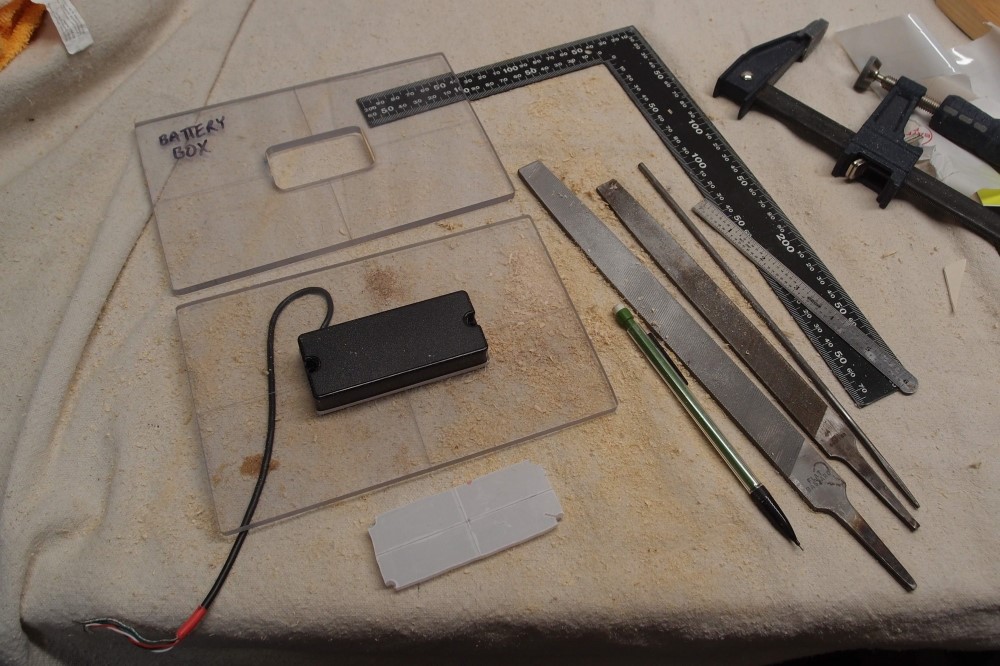
Here is the pickup template and an array of useful tools. To make the template, I traced the pickup onto the material, and drilled out the four corners, inside the outline. Then I set it up on the scroll saw and cut out the waste piece at the bottom of the picture. Up to this point, I have not yet touched any of the lines I drew, I stayed deliberately inside them. I then clamped the template to the edge of the workbench and attacked it with the large rough file. With long oblique strokes, I worked the long edges until the pickup fit that way. Then I rounded-out the corners with the small round file, which is actually a chainsaw sharpening file, and attacked the short edges with the big file. I worked back and forth between the two files until the pickup fit in the hole. At this point, the edges were very straight, but not quite square, and the fit was too tight. I worked at it with all the files until it was square, with a nice even 1/2 mm gap all the way around. That will be nice for mounting the pickup without a pickguard. Finally, I cleaned up all the edges with the smaller fine file.
Note that a router cannot make these tight corners. The smallest template bit is 3/8", and I don't like to use it, that tiny bearing has a limited life. So, in use, attach the template to the workpiece, and drill the four corners with an appropriate sized drill bit, say 1/4". Then route the cavity with a 1/2" bit, and clean up with files, Dremel, sandpaper, whatever. That's how I did the P-pickups in the Osprey, and those were a lot more complicated. Note that if I was using a pickguard, I could make a big loose pickup cavity, and cover it with a tight pickup cutout. Making a pickup cutout in a pickguard is much the same as making a template like this, but easier, as the material is soft and thin.
You want a template like this to be tight. You can always widen the resulting cavity with files, but you can't narrow it. I like to undercut the cavity, so at the surface it is tight, but it widens out inside to avoid binding and make room for wires. You can do this with a Dremel, or by mounting a 1/2" bearing on a 3/4" router bit.
I've seen people free-hand route pickup cavities like this, or razor and chisel them. If you make the initial cut undersized, you can clean it up pretty well with files. But I have to cut two of them just for this project, and the template is one that is likely to be useful in the future, especially if I like these pickups, so it is well worth the effort. I know my new control cavity template set will get used again. A rule of thumb is that the depth of a pickup cavity should be roughly equal to the height of the pickup. That's just a starting point, a lot of other things can enter the equation.
Also in the picture is my battery box template, which I made a long time ago and never actually used. I have now modified it to fit a different box ( actually, it fits two different models now ) and finally used it. A battery box is a fairly precise installation, as the flange is not very big, and the mounting screws are in the corners, so you don't have a lot of wiggle room. Just like a pickup, drill the corners, route the cavity, and clean up with files or Dremel.
These are four-wire pickups, so I can do some more fancy mode switching. I think the controls for this will be basically the same as the Osprey, minus the fat switch. A Real Kubicki uses three sets of stacked knobs and no switches; I make them volume/blend - bass/treble - mid/sweep, or something like that. Mine will be volume - bass - treble, with switches below.