Audiovox Electric Upright Bass (8/9)
Mar 6, 2019

If I've learned anything in my loothery career, it is that piezo response is very much a matter of mounting. A piezo needs to be mounted between two pieces that are relatively free to move against each-other, but with enough pressure that the movement will flex or compress the element. This is especially true for low-frequency response, as is a high-impedance buffer system.
While you can simply stick a piezo on a guitar and get reasonable response from it, the problem is much more difficult for a bass. To get good low-end response, the piezo needs to be strongly coupled with the strings. This means mounting it on the bridge. The typical installation, even for a guitar, is under the saddle, and that is what I did here, having made that work on several previous projects.
The problem, in this case, may be that the pressure on the piezo is excessive. In other words, the saddle, bridge, and piezo are locked together as one piece. So I made a new taller base for the tailpiece, from a piece of 3/4" tonewood from the big box o' tonewood; the old one is 1/2". That will reduce the break-over angle, and the down-force on the bridge. My initial guesses were largely wrong.
Now I have replaced all three bases - the pickup and the tailpiece for height, and the bridge to match the look of the other pieces. That's one reason I like to build these experiments out of junk. This one especially, I have no idea what I'm doing, and I don't want to spend a lot of money on something that may not work in the end.
After the picture, I added a second set of screws to the new base to secure it to the body directly. The upper piece still screws through the lower one, but it is easier to reassemble this way.
The problem with the wiring was ... no problem. I ended up putting everything back together exactly as before. The stacked pot I used is scratchy on the volume end, and useless on the tone end, and I am going to replace it. Other than that, everything works and the magnetic pickup sounds great. The strings really do have an acoustic tone, although the G is defective. I am waiting to hear from Rotosound, otherwise, I have already initiated a return with Amazoon. I'd rather get a single replacement and not have to pull them all off.
Next, while things are apart, I am going to examine the piezos, specifically the wrappings. Piezos are made from industrial piezo wire, which is produced by the mile. Some luthiery supplier simply buys a roll of it, cuts it into little pieces, solders on wires, uses a special color of shrink tubing, and then tries to sell them for $15 each. I doubt there is anything wrong with these piezos, I think the problem is the mounting.
I'm leaving the bridge ground disconnected, because it really doesn't help with tape-wound strings.
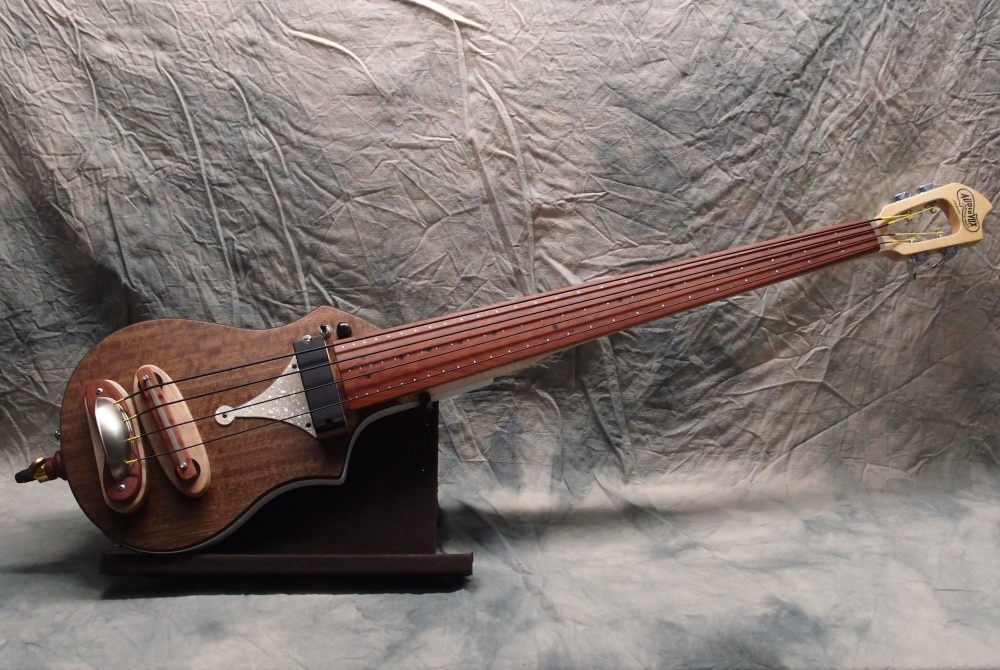
Here's a shot from the side, showing the geometry. I wanted the bridge to adjust for both height and intonation. That means it will be a minimum of about 1-1/2" tall. Instead of using a severe angle on the neck ( it has a slight angle ) I doubled up the heel thickness, giving it a bump on the back at the octave, as it should have.
The size of the body works well. It is wide enough to brace against your leg and keep it from spinning. This way I don't need a Rube-Goldberg bracket like a Steinberger. You can also sit down and pop it in your lap, or put a strap on it, it sits/hangs pretty well, a little tail-heavy if anything. The 36" scale really throws me off. Maybe I'll build a second one with more normal proportions - 32" scale, Fender neck and bridge.
This build is a number of experiments and firsts for me, apart from simply being an upright:
It is my first veneered body - bees-wing eucalyptus (success) finished in UV-cure polyurethane (fail). The UV-poly is much too expensive and behaves very strangely. Often, it seems to be repelled by everything, including itself!
I used a Jatoba floorboard for the fingerboard, and scraps of that for other pieces (success).
The string nut and bridge saddle are 1/4" clear acrylic, scraps of template material (success).
It is the first time I have side-mounted tuners on a bass (success).
I used 1/4-20 photographic thumb-wheels and bolts on the bridge (success). Previously, I used regulation luthiery thumb-wheels on a similar design, but this works much better.
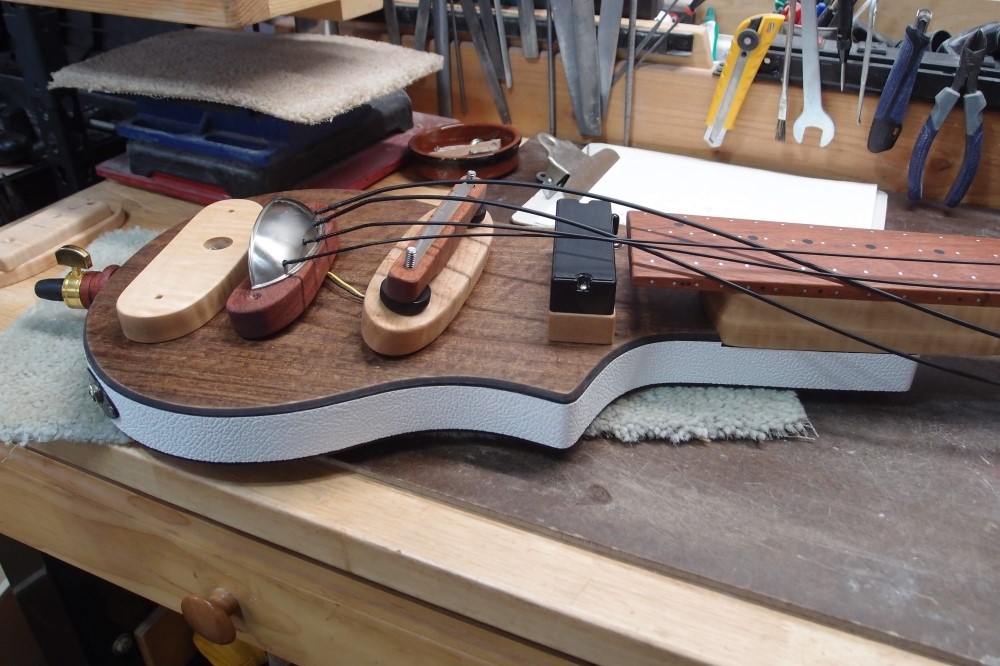
I used a pair of violin piezos in the bridge (fail, so far).
The drawer-pull tailpiece also appears to be a success. However, the part is lacquered, which electrically insulates it, and also makes it prone to attack by just about any chemical, from acetone to water. There are already some small pits in the finish, I have no idea how they got there. If I have to pull all the strings, I will strip this piece and re-finish it in poly.
I'm not sure of the tapewound strings, as one of them is defective.
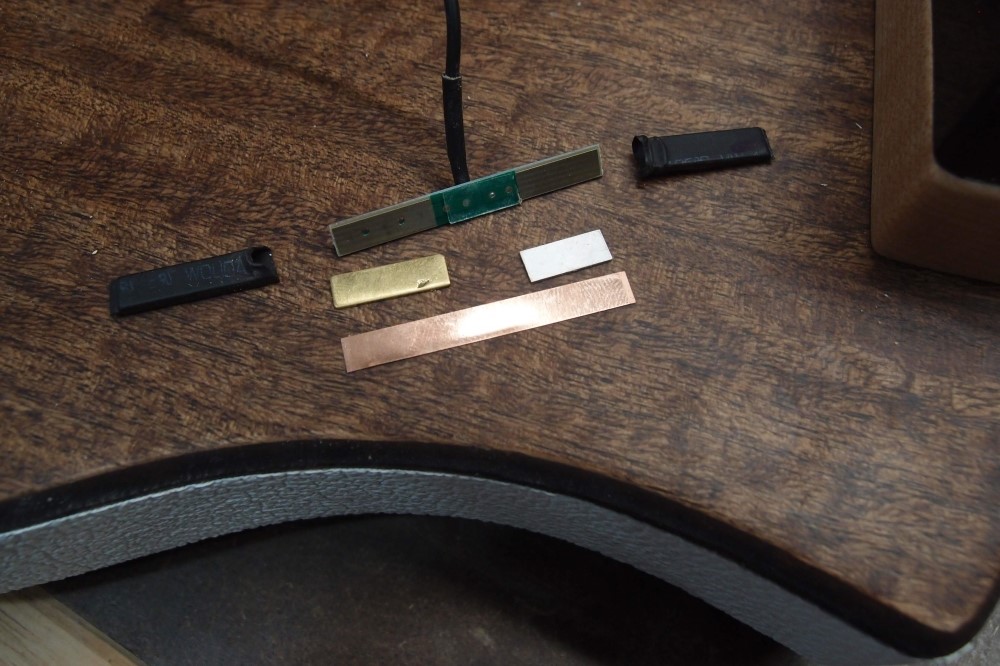
I dissected one of the violin piezos, and now it becomes obvious why one end was marked. In the photo above, the parts are arranged in the way they were stacked, with the coverings on either side. From top to bottom:
- circuit board with leads and two big conducting pads
- left: brass shim / conductor
- right: the piezo element
- copper conductor to complete the circuit
You can see the actual piezo element is very small, just 1/2" long, and only on one side. It's like a small piece of a button piezo. This explains the low unbalanced response I was getting. Even if I cannibalized two of these to replace the brass shim with a second piezo, they would be in series -- not good.
I'm not going any further with these, they are going in the trash.

Here I have my last two guitar piezos. They are crossed to cover the string spread, using the existing wiring holes, then connected in parallel ( piezos are capacitive, they sum in parallel, subtract in series. )
The result is astounding. Where the humbucker used to drown out the piezos, now the piezos drown out the humbucker. I had to use the low-gain setting on the buffer, and then drop the on-board volume to get a good balance with the humbucker. Good thing I included those extra bits in the buffer circuit.
Chances are, a single one of these in the center would do, and a longer one would be better. But my quick and dirty test has nice even response across all the strings and finally sounds the way it should, so I am going to leave it.
A six-string bass piezo would fully cover the string spread with one piece, probably at a reduced volume, and set me back about $15, on a build that was largely free, so ... naw. These guitar piezos are about a buck each, and they sound great.
I think reducing the break-over angle also had a positive effect, but I never tested that properly with the original piezos, so I'll never know for sure. Mechanically, I think it works better, the cross-bar is less likely to collapse over time, and it is easier to adjust. Also, the bend in the strings is less.
Now I just need to get that bad string sorted out, and order some more of these piezos for the parts box.
Doing the same thing over and over and expecting a different outcome ...

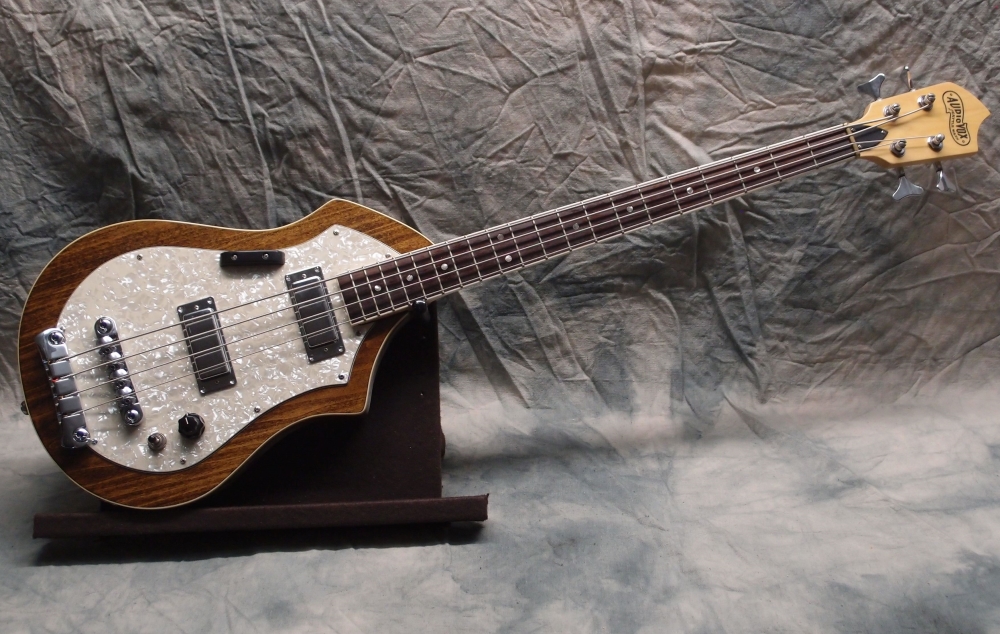
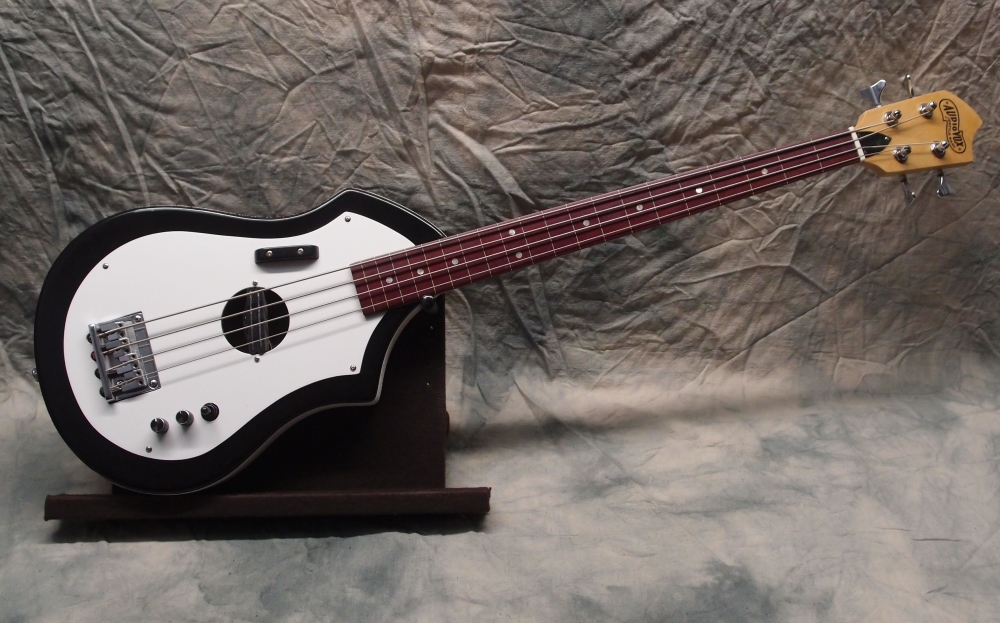
Here is the upright next to a bunch of other basses. On its left is a tiny piezo Uke-bass, which shows just how versatile this "Audiovox" body design is. The uke has a miniature version of the same bridge design as the upright.
The rest are, left to right:
The closest thing to the original Audiovox, solid-body, 32" scale. This one originally had a more authentic narrow walnut body that handled very poorly, so I replaced it with this 'standard' poplar body and authentic 'brass' pickguard. This also has a more-authentic headstock design, that works rather poorly compared to the improved one on all the rest.
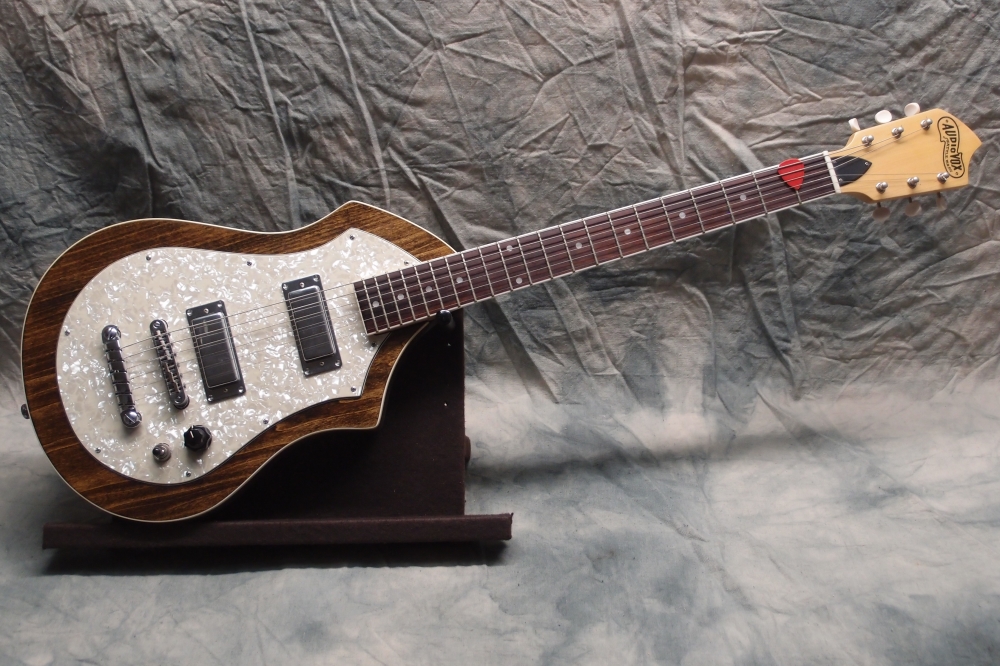
Fretless hollow-body, with piezo-converted bridge, 30" scale The closest thing to the upright in many ways.
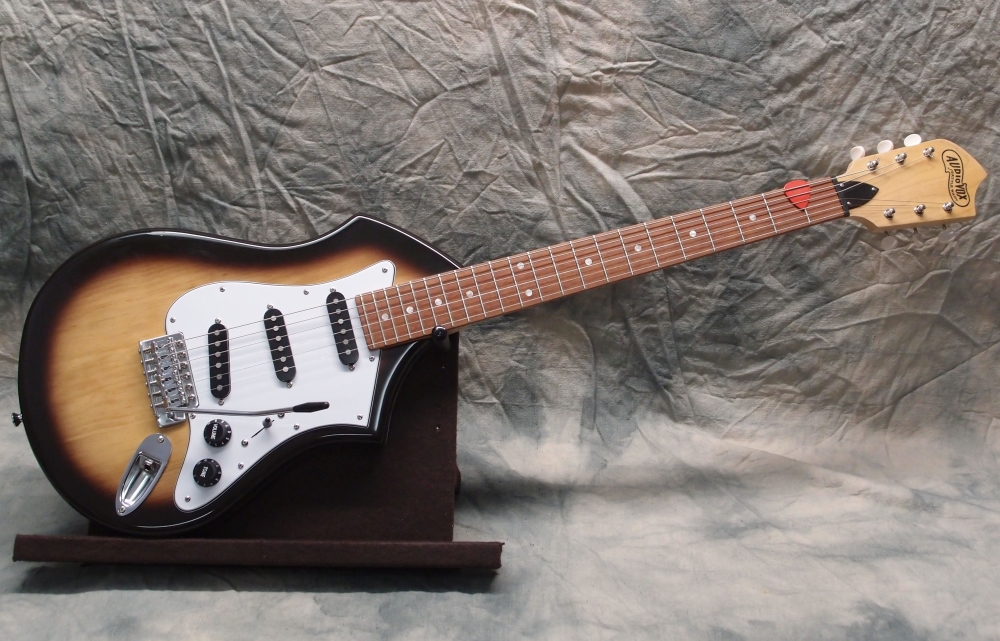
Danelectro-style, 30" scale. Has a 12-string twin.
Gibson-style, solid poplar body, 30" scale. Has a guitar twin.
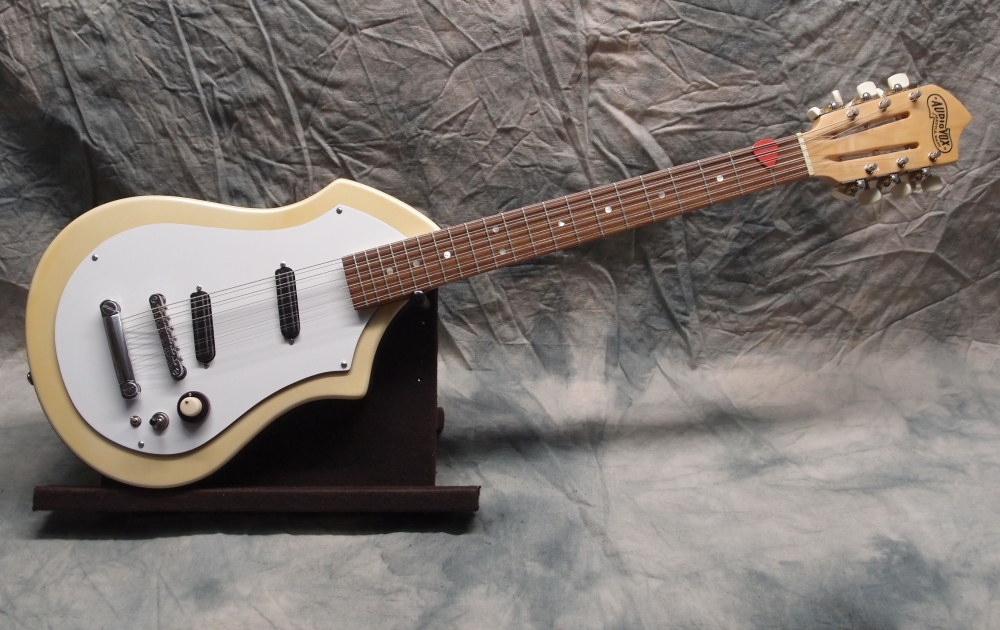
On the floor are (left) 8-string uke/mandolin and (right) Fender-style Radiata-body guitar.
Two steps forward, one step back
I was playing around with my new EUB/UEB*, and realized that one of the tuners was really bad. Too cheap and sloppy even for me. So I took it off and broke it, but I may have learned something. I think the only tension on the post is the round cover that is press-fitted on the back. If that cover is not on quite tight, the post can be loose. A few smacks on that cover with something like a fretting hammer can tighten it up. A few smacks on the post can push the cover off so you can tighten-up the retaining screw, but that may also wreck the tuner. Loctite is apparently not a thing in China.
Anyway, I pulled all the tuners and replaced them with better ones, since this build is actually working out. That took a while carefully filing out the holes on a finished neck, because the new ( but still cheap Chinese ) tuners are beefier than the old ones. The three remaining old tuners will go in the parts box for spares. If I had made the headstock longer and staggered the tuners, I could have used a 15mm socket on the bushings instead of a risky pliers. I got one side with the socket. Little details to remember for later. In a factory setting, that would be a big detail.
I don't mind using cheapo tuners. They get the job done. If I ever want to, I can always replace them with fifty-dollar Gotohs, but at that rate, I would be building a lot fewer experiments. This entire build came in well under $100, with all the free stuff I scrounged.
Since Rotosound has not acknowledged either of my inquiries, one to the US and one to the UK, instead of replacing one defective string, they can eat the whole set. My return window with Amazon closed today, but last night I arranged the return just in case. Rotosound might answer in a few days, Europeans work on a different schedule than us Yanks, always in a hurry. In that case, I will get a spare G string and put it in the string box for insurance. I think these strings are made no different than the regular scale, but are under greater tension and therefore more likely to fail.
Since this bass is going to be apart for a while now, I took off the drawer pull and tossed it in a jar of acetone to get the icky lacquer off it. I sanded the inside, so now I get a good electrical contact for all the strings, and can put the ground wire back on. With tape-wound strings, it is kind of pointless, but it may not always have these strings on it. I will coat the exterior of the part with good polyurethane, which should age it a bit yellow. I find myself using the drawer pull for a handle quite a bit. It's a good trick to remember.
I found that the tone control does work - it wipes away finger squeaks and line noise, but these strings have so little high end that it doesn't make much difference otherwise.
Finally, I re-oiled the floorboard, and set it aside where I can admire it until my new strings arrive. When I get it back together, I can go back to re-learning I-IV-V patterns and stuff. One thing with a 36" scale - you quickly learn to appreciate open notes. I have a pretty long reach with my pinky, but not that long. If I do another of these, I will give it a regular bass neck.
* I like UBE -- Yoob.