Spray Booth
This is a spray booth I just made. This should work much better than the ad-hoc spraying setups I've used until now. I came up with the following criteria for the design:
- cheap
- easy to build
- as big as practical
- break down for storage
If you've been following this thread, the first one should come as no surprise.
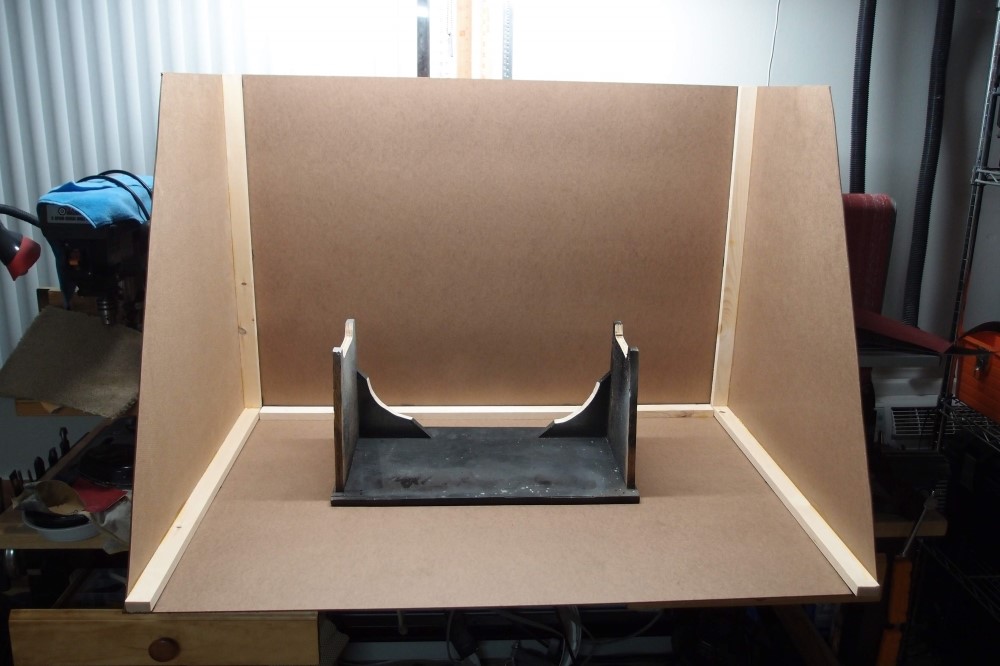
The main part is a 4x8 foot sheet of 1/8" Masonite, that I had cut into thirds of 32"x48" at the store. One piece became the bottom, one piece became the back, and the last piece I cut on an angle to make the sides. The framing is 1x2 pine. The side frames are glued to the sides, the back frame is glued to the bottom. The pieces are assembled with self-adhesive velcro. The total cost is about $20, fairly lightweight, and breaks down to almost flat. A drop cloth in front on the floor should complete the setup.
The sides could just as well be cardboard, but the bottom should be sterner stuff. Having the store do most of the cutting satisfied the second criteria, for just $20, any extra work is not worth it.
You can see it holds my paint stand with plenty of room to spare, and the stand slides easily on the smooth masonite. This should work well for small jobs with rattle cans, but I wouldn't try anything big that way. Rattle cans put out clouds of noxious propellants and solvents in addition to the paint, and this has no exhaust fan. By small jobs, I mean necks, pickguards, etc. I consider a body to be a big job.
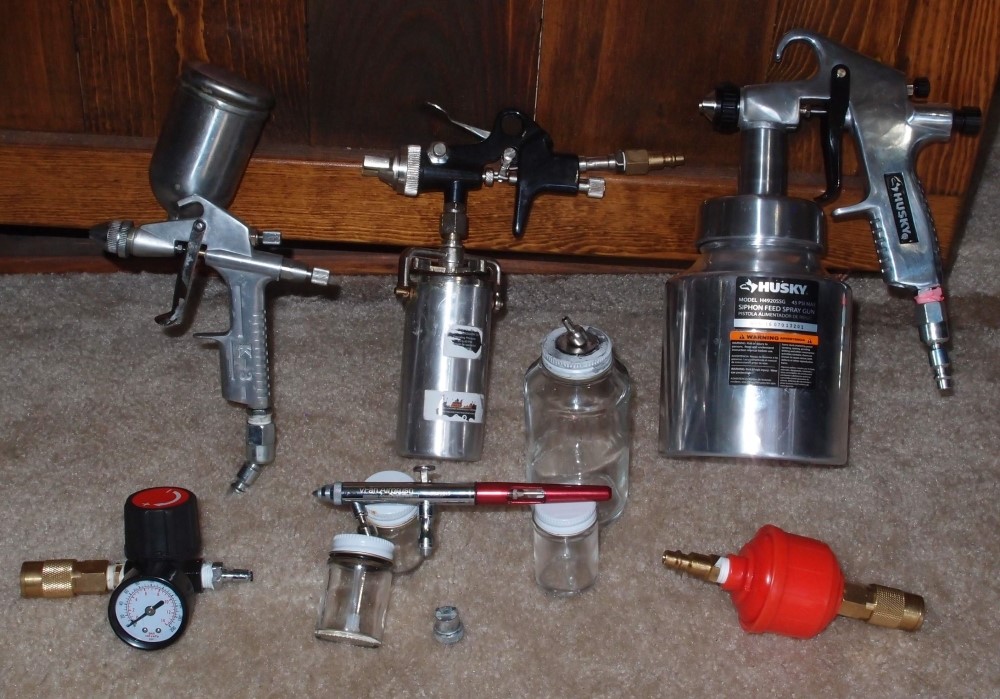
For big jobs, I fire up the compressor. Oil-based poly sprays very nicely, instructions notwithstanding. You just need to thin it a bit with innocuous mineral spirits. With compressed air for propellant, spraying is surprisingly clean. You still need a mask and good ventilation, but there is surprisingly little fog if you spray quick thin coats. Spraying lacquer with a compressor is also cleaner than a rattle can, but lacquer is nasty stuff regardless of how you apply it.
You can find a limited range of colored polys sold as "stain with finish in one". Several coats of this becomes opaque. This is my standard black. For other colors, you can tint small quantities of clear poly. You can do a three-tone sunburst or anything you want.
I also got a brand new can of oil-based clear gloss poly. After you open a can, it starts to age and form microscopic clumps. These will jam a sprayer, and especially an airbrush, so once you've gotten a couple of jobs out of a can, throw the tail end away. I've tried filtering it but never had any success. Also, avoid anything that says "cleans up with water" - water-based junk. Water-based poly also doesn't give that nice yellowing effect, it dries completely clear.

The spraying setup works pretty well. Out of the picture are a small and very quiet compressor and a strong work light above. This piece just got two thin base coats of clear for the burst I am going to do. I'll do the burst with a real airbrush, it comes out much finer than with the sprayer in the picture. I have added washers to stand off the handle from the body, otherwise, they might get painted together.
The spray booth works better than I ever hoped, and sets up and breaks down in minutes. When spraying with a compressor, using the lowest pressure that will work, and there is remarkably little 'fog'. You still need to wear a mask. I got some speckles on my left hand from working the handle, that's the only mess.
The booth contains any over-spray almost completely. Any tiny particles that drift away seem to harden in the air before landing, and simply become dust by the time they settle; they don't adhere to anything. I haven't tested this in any scientific way, I can just say that even spraying color, there is just no mess. I don't even bother putting a drop cloth down in front of the booth anymore, although I really should.
I dilute the oil-based poly with mineral spirits, about 1:4. That lets me drop the air pressure down to 30-35 psi, which greatly reduces the 'fog'. The nice thing about spraying poly like this is that there are no rules about when you can re-coat, unlike rattle cans, which are full of nasty solvents and propellants that can mess up under-coats. I have also used acetone for a thinner, it flashes off faster than mineral spirits.
On another body, I wanted to build up a substantial layer of poly over soft poplar, so I sprayed multiple coats, waiting 10-20 minutes between for each one to tack, then applying another. That way they all bond together into one layer, like lacquer.
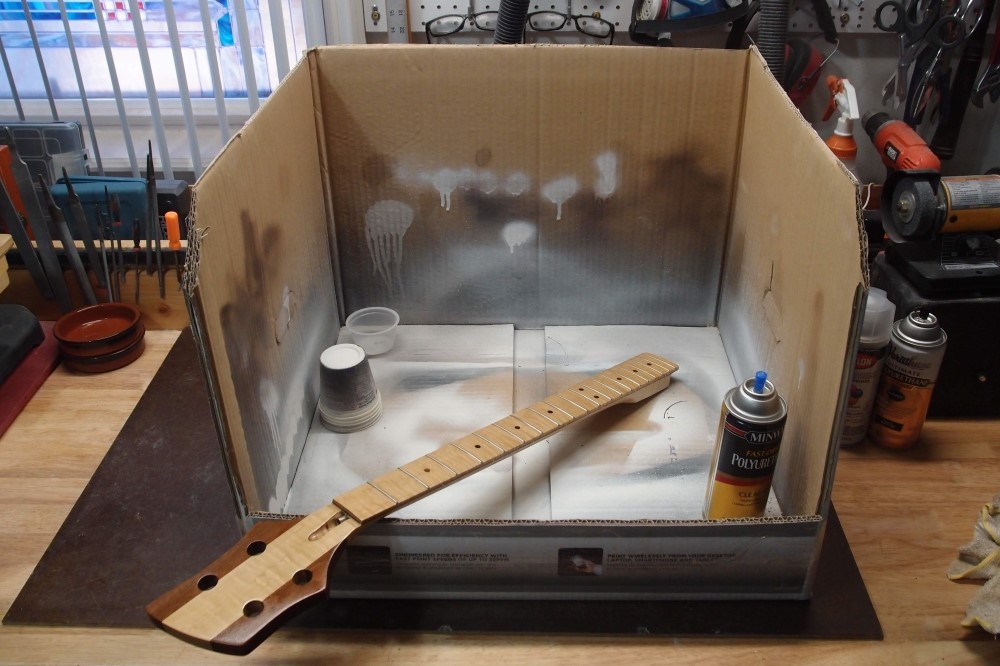
This is my small spray booth, otherwise known as the box my new laser printer came in. I had to do some gluing and taping to make it hold together and seal up the corners. It's perfect for small jobs where I don't want to assemble the big booth.
Getting off-topic: there was nothing wrong with my old printer, except that HP refused to release Windows drivers for it anymore. This is not the first time they have pulled this stunt, far from it, and I will never buy another HP product, ever. In fact, I came to this conclusion a long time ago. Apart from printers and scanners, their laptops have a rather high failure rate, and their inkjets are a total scam. I'm writing this on a Dell, the new printer is a Brother, and I make my decals with an Epson scanner and a Canon photo printer.
Questions or Inquiries?
Just want to say Hello? Sign the .