Audiovox Electric Upright Bass (2/9)
Dec 1, 2018
I've been toying with the idea of building an EUB for some time. Searching for information for a while, but mostly finding videos of people stringing-up 2x4s, fence posts, drain pipes, old skis ... I want to do a little better than that.
What I've been thinking is something along the lines of an NxT, but with a less minimal body. 34 or 36" scale, so I can use regular bass strings, not $100+ double bass strings. I'd firstly like it to have a similar playing feel to a double bass, which I think means matching the fingerboard radius. I have no intention of ever bowing it. I'd like to have a similar tone as well, but that is secondary.
So some questions:
Strings:
Flatwound steels would be my first guess. Or roundwounds? Bronze acoustic strings would be extra-bright, the opposite of what you want, and also present problems with magnetic pickups?
Geometry:
As a said, I would use a 34" or 36" scale, not the full 41". I found the following specs for an NxT:
- radius at nut: 3.1"
- radius at bridge: 3.1"
- width at nut: 1.7"
- width at bridge: 3.5"
spacing at nut: 10mm = 30mm = 1.18" (approx)
spacing at bridge: 27mm = 81mm = 3.19" (approx)
Does this seem like a reasonable approximation of a double? The NxT is intended to be either plucked or bowed. Elsewhere, I have seen a radius more like 6", which would certainly be easier to manufacture, but would probably feel more like a regular bass than an upright.
As for pickups, a 5-string soapbar would cover this spread. I would also like to mount a piezo, but getting good bass response from anything but a saddle-mounted pickup has proven difficult.
Here is the opposite of this project:
I think this body style would make a neat upright. The bridge saddle is a piezo, but it is much too flat for this project. I could come up with something similar using an acoustic guitar saddle.
I also plan to commit the crime of making it a lined fretless. I know you're supposed to just pretend you're playing in tune on an upright, and some people actually can, but I'm lazy.
Jan 4, 2019
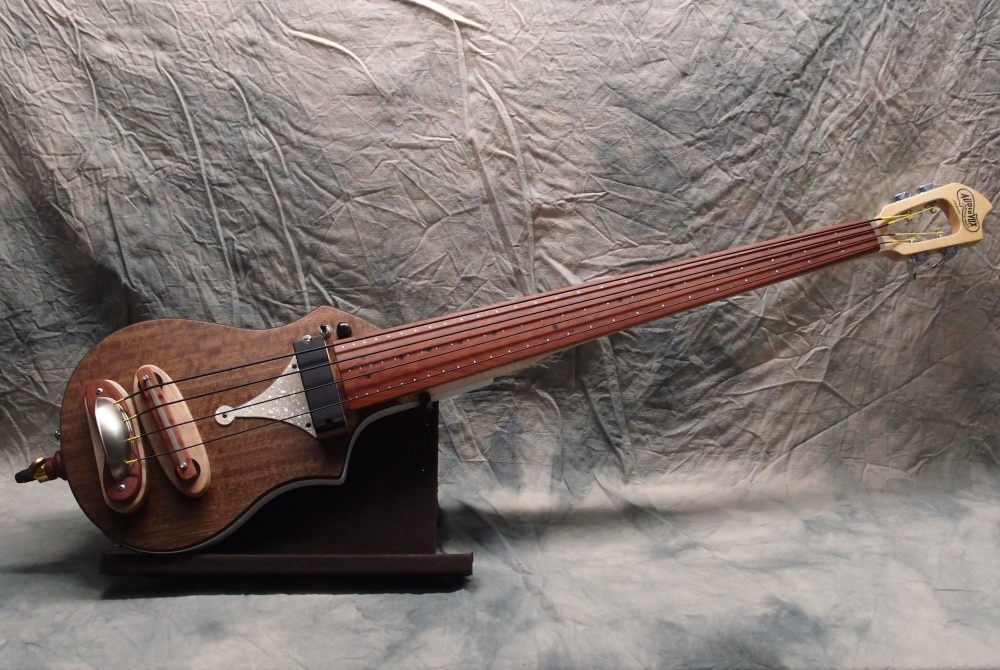
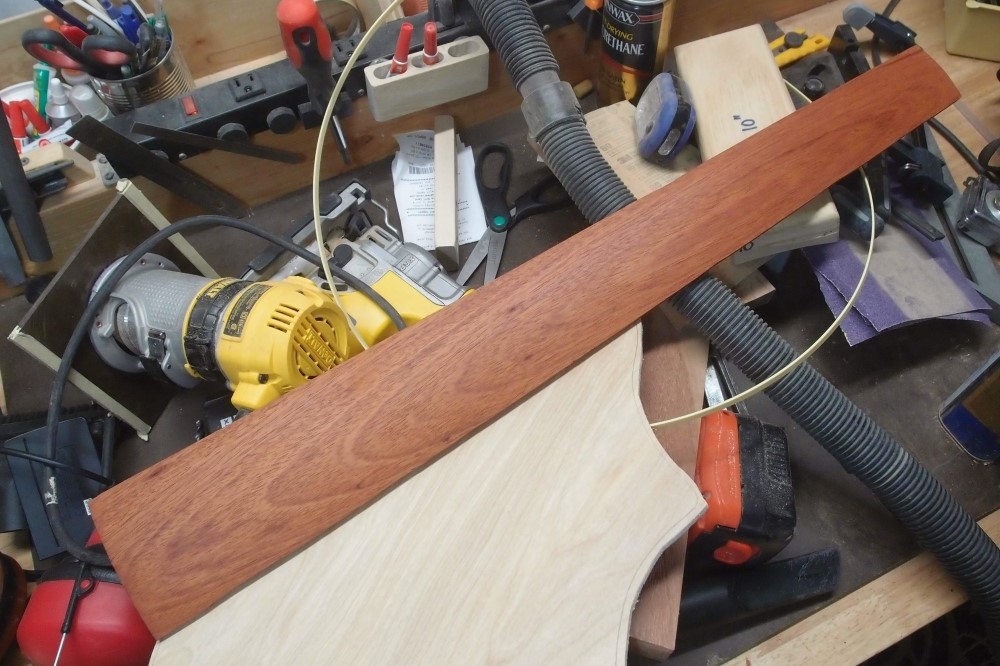
The other day I cut this fingerboard from a piece of Brazilian Cherry floorboard that I begged from a home supplies place. 6" radius, 36" scale, double-octave. This stuff is super hard, this is not a job I ever want to do again. Fortunately, it came out good, I still need to add the regulation dip in the middle and trim the sides to about 2" at the nut and 3-1/2" at the other end.
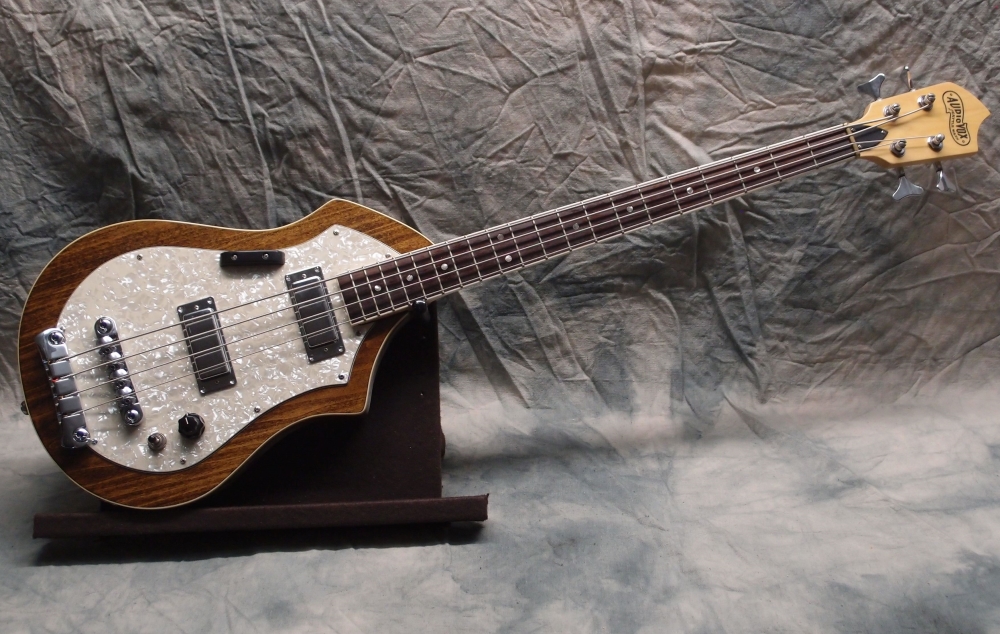
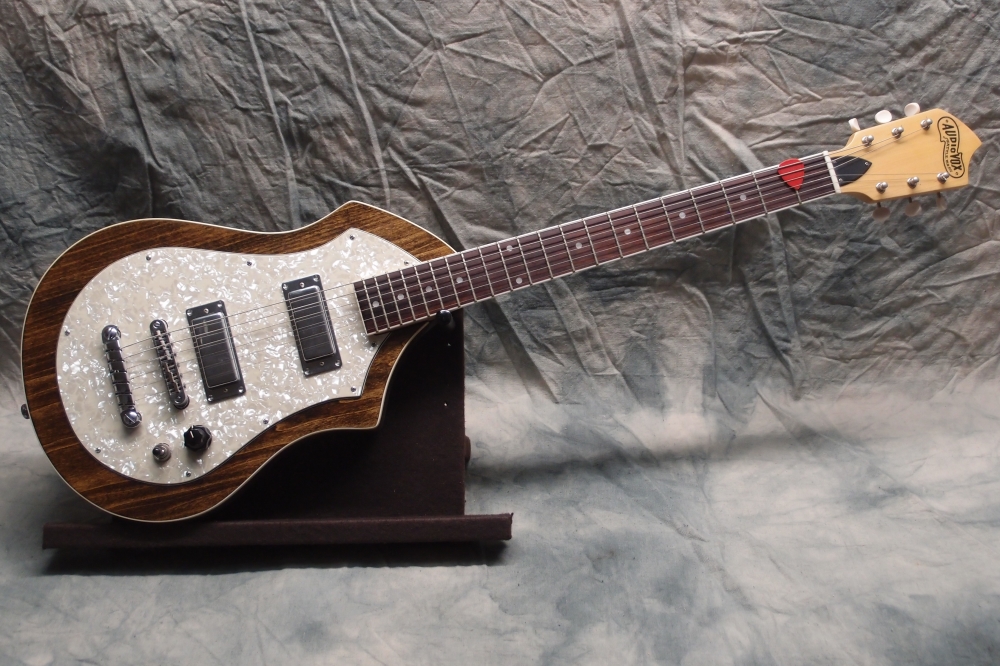
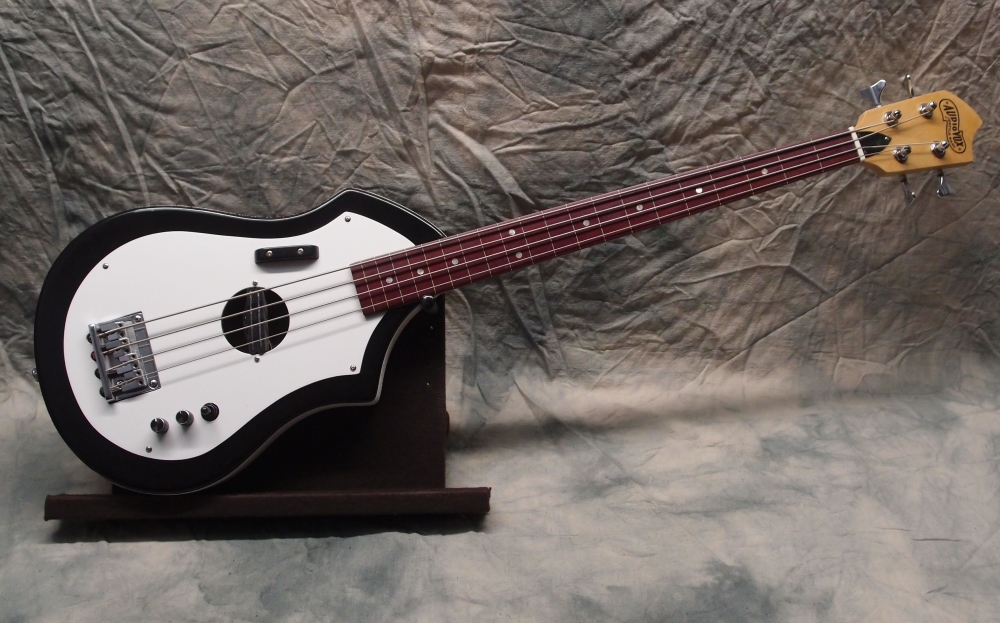
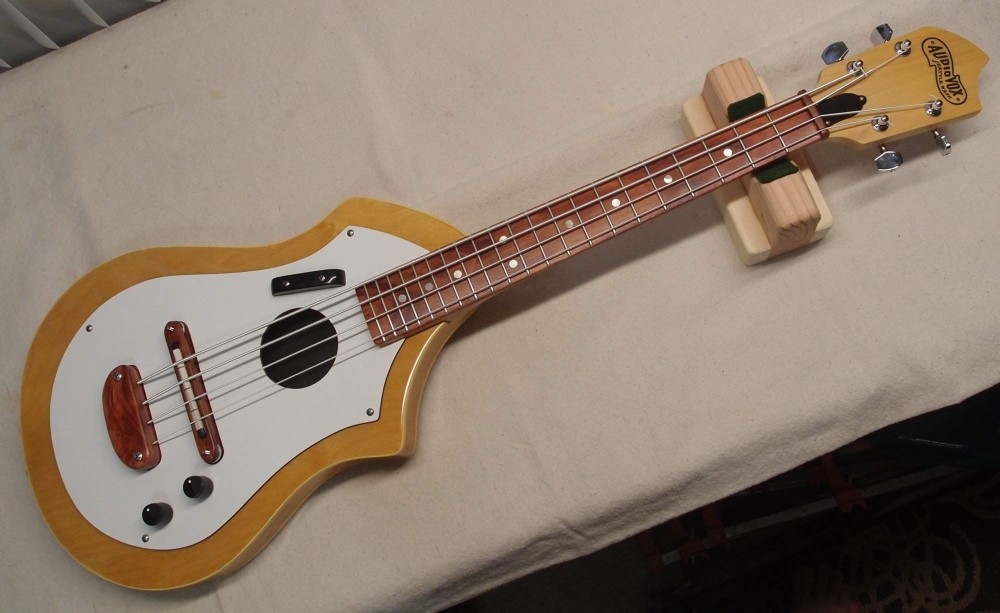
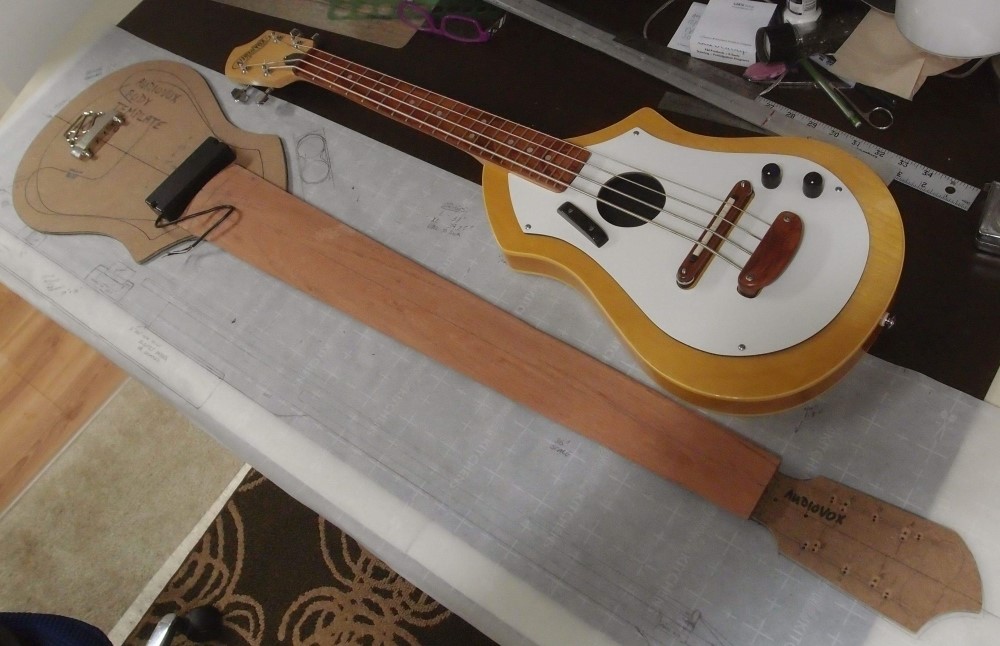
Laid out here with my Audiovox templates, and uke bass. I think it will be neat to make a tiny uke and a giant upright from the same body. I will use the 5-string magnetic pickup in the picture, and a pair of piezos in the bridge. I also ordered a cello end-peg. I'll make the bridge from the remainder of the flooring.
The body is going to be as solid and heavy as I can make it. I don't expect this long neck to balance very well, but it would be neat if you could pop it in your lap or even put a strap on it, as well as play it upright. I've never built anything like this before. I chose the specs from looking at commercially available models. The scale should be suitably uncomfortable, but still be able to use normal bass strings. The radius should be good for fingering, I don't care about bowing, and it should work well enough with the pickup.
I've changed my mind about making it lined. I think installing lines on this radius would be very difficult. Instead, I will install dots on the fretboard where the lines would be. I thought that was pretty clever, then I saw that Steinberger already does it. It's still pretty clever, just not as original as I thought. I have a roll of aluminum wire that I use for side markers that will work perfectly. I will also put regular dot markers on it, I'm not going to pretend I can find my way around on one of these things unaided.
Jan 5, 2019
Brazilian Cherry is a great wood. It looks good, it works well, it's harder than heck, and it's inexpensive. This 3/4" flooring material wouldn't be too useful for anything but this, but in 1/4"x3" it is perfect for a fretboard.
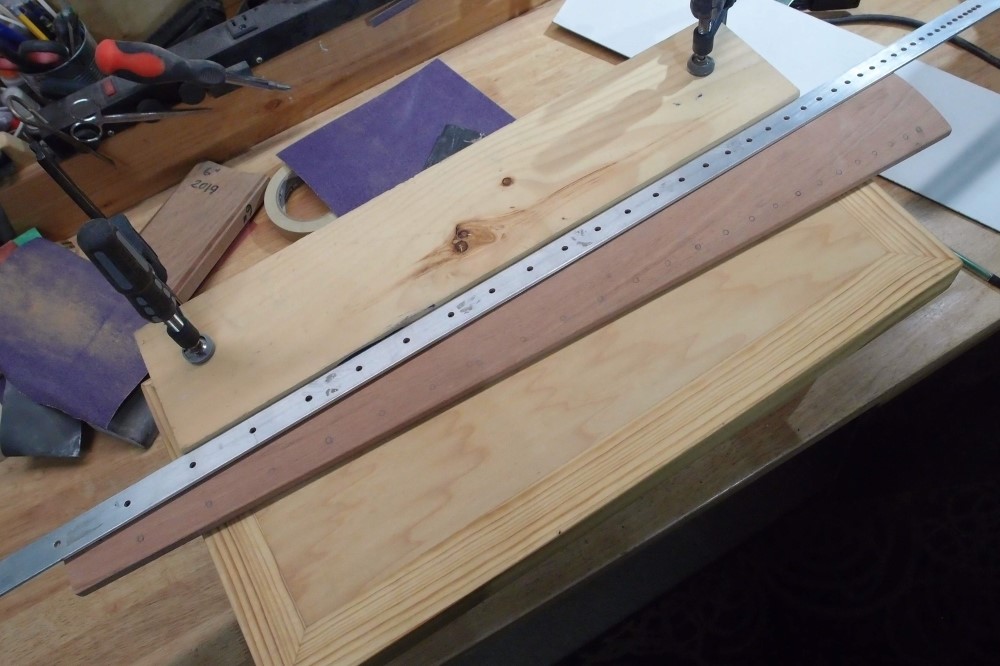
I'm laying out the fret lines - dots actually. There will be three sets on the front, and along both sides, along with 1/4" position markers. The frets will be small aluminum dots, the position markers will be black. Note how I am automatically inheriting the precision of the fret guide.
I'm following the edge of the board. By rights, I should go down the center, the angle-off introduces an error. But it is so small ( I haven't bothered to calculate it, I can barely measure it ) that it won't matter. Everything is slightly off on a guitar anyway, and that goes double for a fretless.
With the right size shims underneath, I am laying out the side fret markers. Note my super-useful bench-top mini-workbench. The fret guide will do Fender scales from 36" down to about 12". It ends where the holes would touch each other.
That's 161 holes. 161 holes to be punched, drilled, filled, and leveled. Somebody stop me, I must be out of my mind.
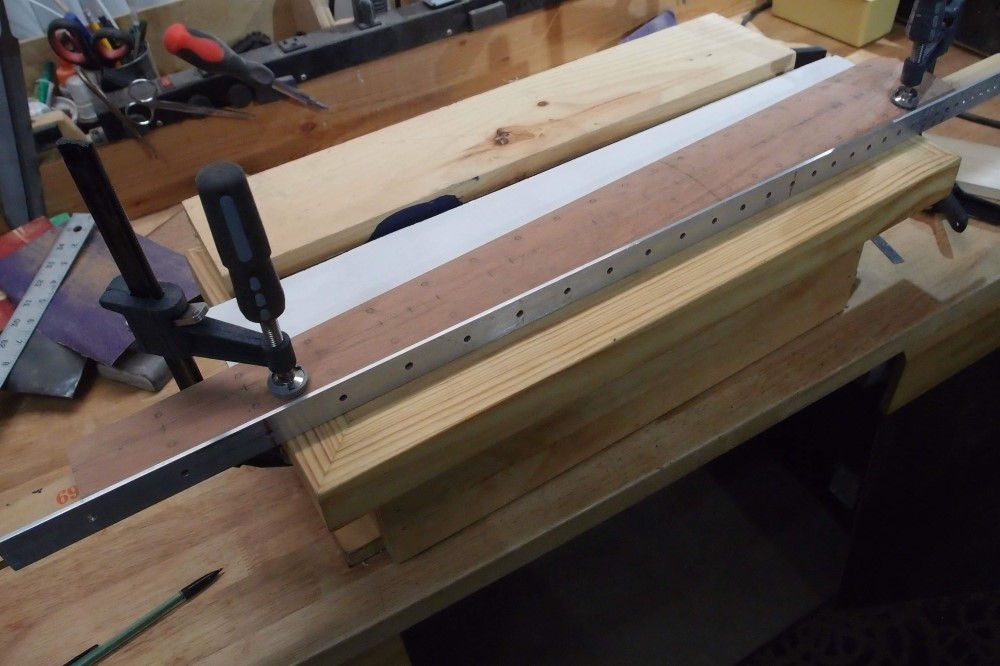
I connected the outer markers to draw the inner ones, rather than use the guide. This way they will form a straight line, otherwise, the inner line would be a little off.
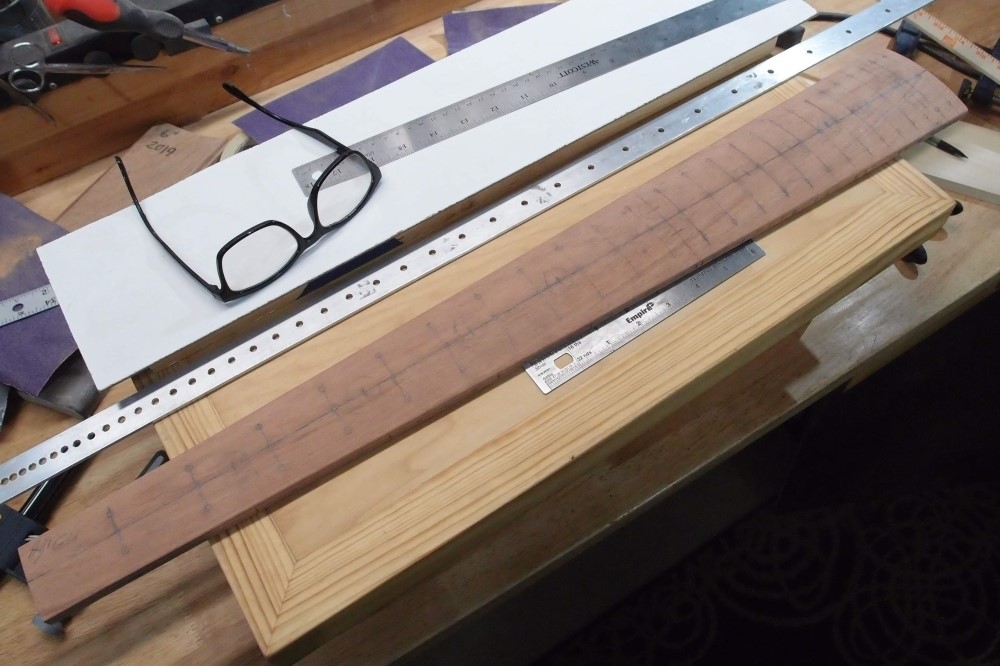
Now is a good time for a trick I do with writing: Step away from your project long enough to clear it out of your head. When you go back to it, you'll see all your mistakes.
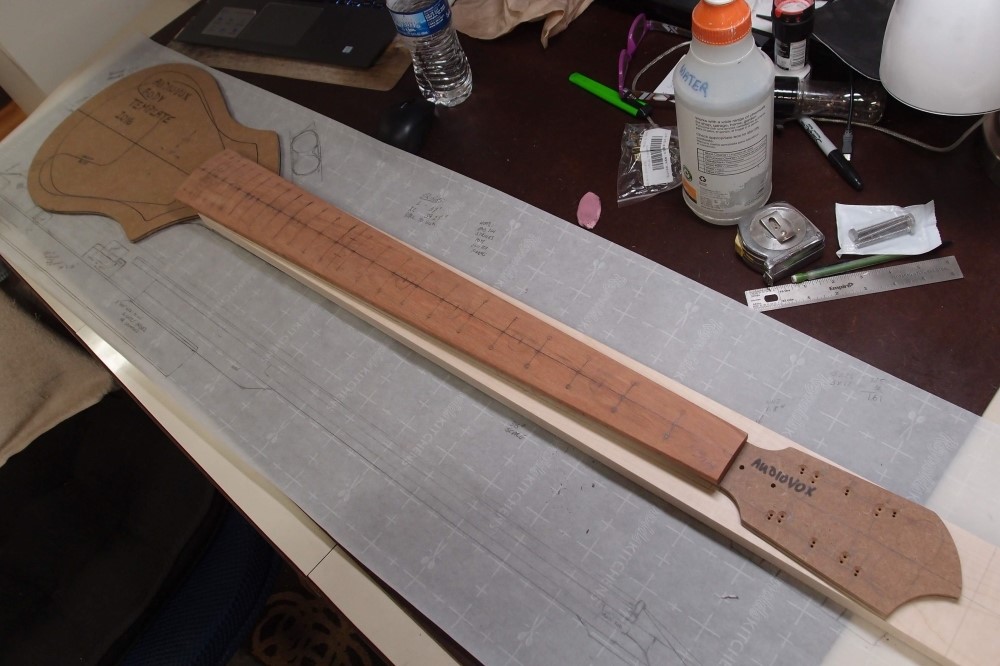
Laying out the neck. I tried all four positions to see which one fit the best, since no piece of wood is perfectly straight and flat. Of course, best fit today may not be best fit six months from now, wood is not steel. First I sanded the bottom of the fingerboard flatter, I hope, and also sanded it a bit concave, so when I glue it up the middle won't be fighting the sides. I also noticed one side is a bit high at the nut, I'll fix that when I'm sanding down the markers. I did get the regulation dip in the middle of the fretboard, about 1mm. That was lots of elbow grease and 80 grit with the 6" radius sanding block I made at the same time as the fingerboard.
My radius jig was really pushing it to make the 6" sanding block as well. It came out a little rough, to smooth it I put a whole sheet of 80 around a bucket that had about the right radius, switching the block end-for-end often to allow for the slight taper of the bucket. The end result is good enough. Fingerboard radii do not need to be all that exact.
I'll install a guitar-length truss rod in the lower part, for whatever good that might do. This neck is going to be much bigger than a guitar, and I don't know if a rod will ever be needed, or that it will do any good if it is. The rod doesn't need to be full-length, as the high end of the neck will be so massive that the rod couldn't possibly have any effect. I prefer to build guitars with non-adjustable truss rods, and this rod has been in the parts box for years.
The headstock will be flat, hollowed-out with the tuners sideways, as for an upright. But I will use mini tuners to keep the weight and size down, in hopes that it might balance horizontally as well. As with the body, the headstock will come directly off my Audiovox template, so this one will fit right into the family.
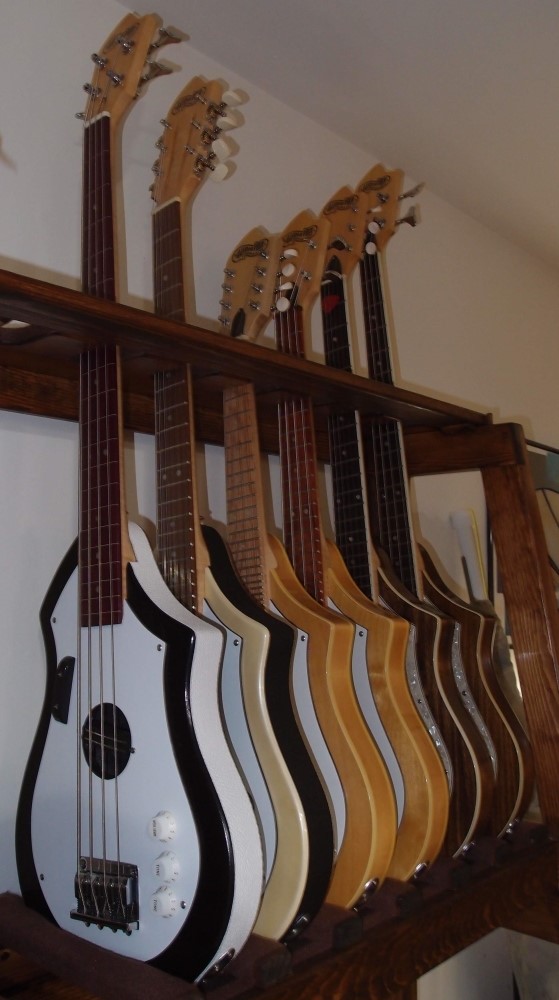
Although it might not fit into the rack !!!
I got the nice piece of maple from Home Depot, or rather Loothier Depot. It has a bit of flame to it that might come out with finishing. The cashier got frustrated trying to ring it up and gave it to me for two dollars. There were people in line behind me, I wasn't going to complain. This is going to be a very economical build.