Osprey Bass (BC Rich Eagle) (3/10)
Oct 6, 2017
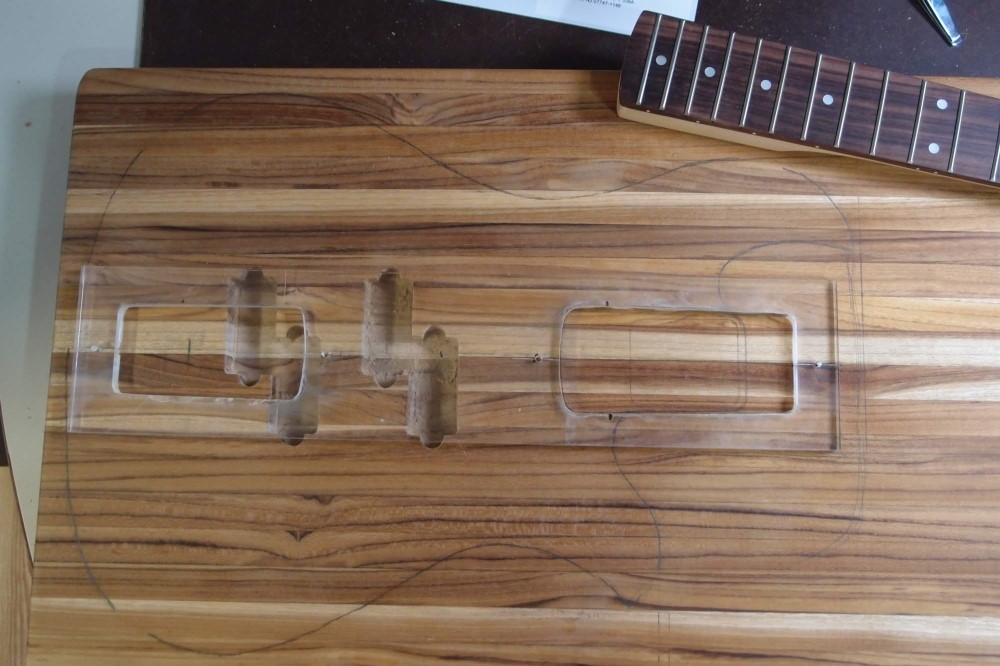
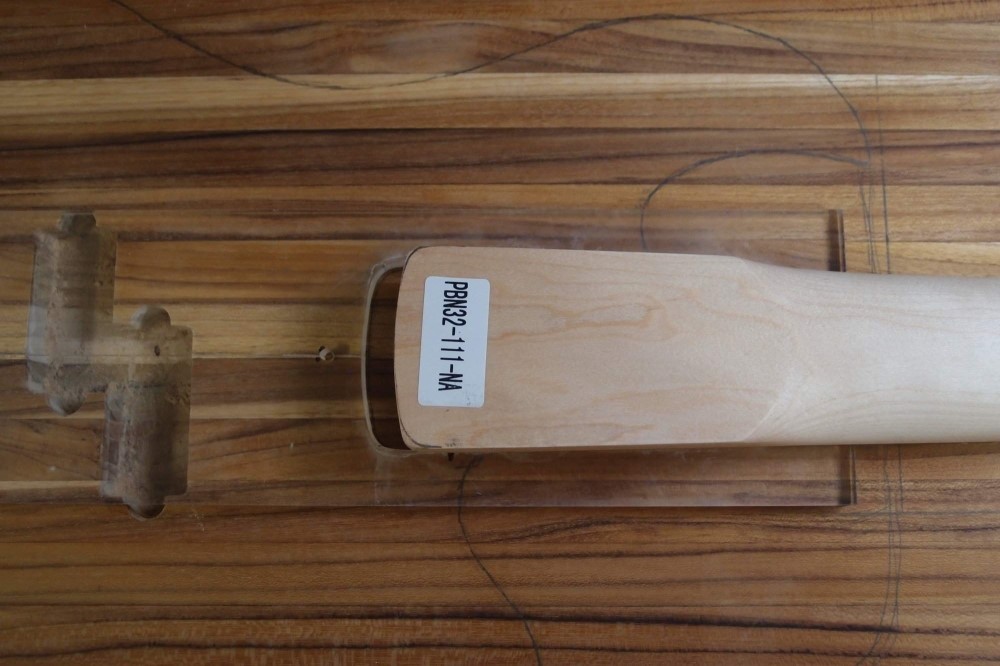
Here are the finished pickup routs:
You would think the second one would be quicker and easier than the first, but it wasn't. I think the router bit, which has already seen a lot of action, was dulled up by the teak, as promised. It grabbed a chunk of wood and broke it off. Luckily, the break was along the grain, and the piece was big enough to easily and invisibly glue back in. The bit also grabbed out a smaller piece. I fixed that with Crazy Glue and sawdust, and if I didn't tell you about it, you'd never notice. But all that got me spooked, and with the job about 90% done, I set aside the router and finished with files and a razor knife. I also used the Dremel to undercut the sides of the pocket, but never at the top edge. That way I only had to file the top edge, not the whole depth. Needless to say, it took a while, but in the end, I got the result I wanted.
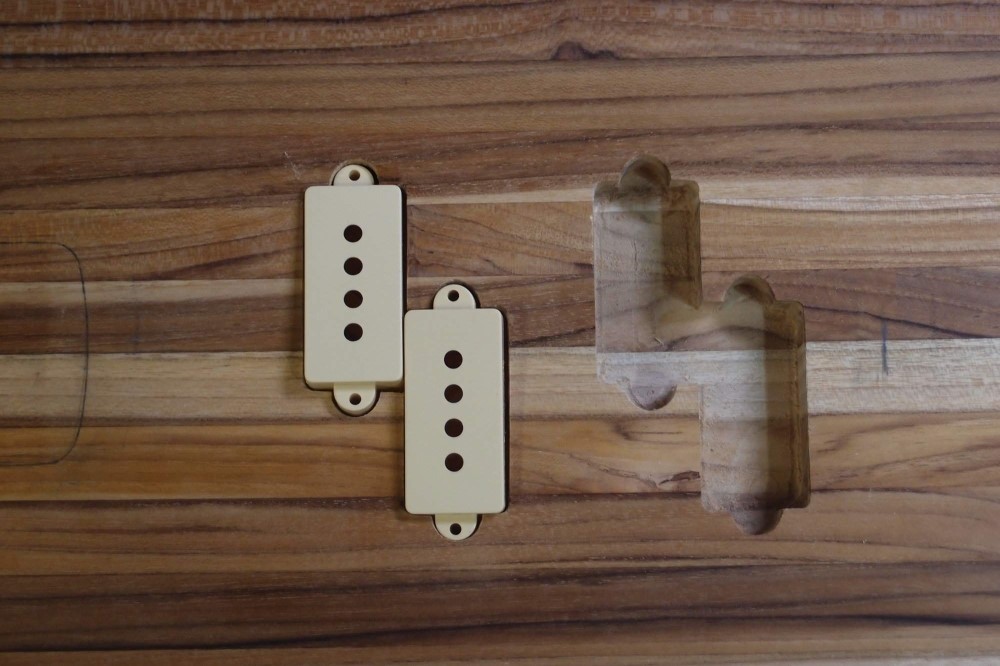
I will resharpen the router bit and test it on a scrap area before I attempt the neck pocket. For insurance, I ordered a new bit from eBay's. These P-cutouts are about the most complicated thing you can do, and are difficult to do well in plastic pickguard material, let alone wood. Previously, I'd done Musicman and Jazz pickups like this, without much trouble.
I can say a word about the teak cutting block now. While the wood does indeed work pretty well ( compared to say hard maple or oak, which is like routing glass ) the different strips are different hardnesses. Most of them are not a problem, but that dark one just above the centerline is rock hard and fought back. That's the main reason I abandoned the router - it was too risky. Teak has a sweet oaky smell as you work it, and I have not had a reaction to the dust, although I don't react to most things anyway.
So unless you get one of these for free or cheap, I cannot recommend it for a guitar body - get a nice alder blank online, it will be much easier to work. Poplar is another easy wood that can come out beautiful, painted or stained. Neither of those is good for an oiled finish though - too soft. All that said, if I ever get another one of these, I'll be building that Mockingbird ( Mockerybird? )
This is the first time I've ever done the cavity routing before sawing out the outline. Normally, I use a drill press with the Forstner bit to remove the bulk of the material, and you need to cut the outline to reach into the center. But with a hand drill, there is no such problem. This is not even my good drill. If you have access to a drill press, then use it for whatever you can.
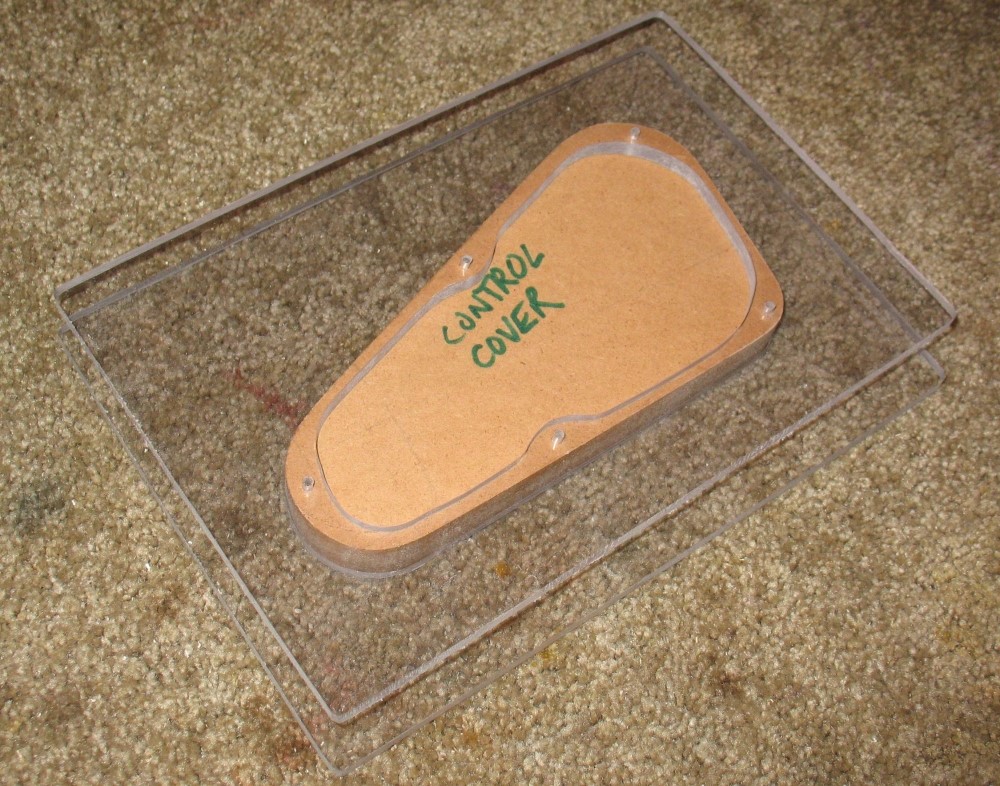
Part of my motivation in starting with the pickup cavities is that I knew they would be the hardest part. If I pulled them off, I would be unlikely to screw up down the road and ruin the piece, whereas if I ruined the part now, I wouldn't be wasting a lot of other work when I throw it in the fireplace. The remaining routs are the neck pocket, which is pretty simple, and the control cavity on the back, and maybe a battery box.
The controls will be rear-mounted, with no pickguard to cover up mistakes. If you've never made a guitar before, pick a design with a great big pickguard. Not only does the pickguard cover a multitude of sins, but if you mess it up, just throw it away and start over. On a Strat, the pickguard covers everything from the neck to the bridge. I have used that to do all sorts of creative things with stock Strat bodies. This one is not going to have any pickguard - don't want to cover up that beautiful wood. But that leaves no room for error.
I had an awshit moment when I realized there is a finger groove in the end of the board that I had forgotten about, that would intrude into the body edge. So I erased my outline, and traced a new one about 3/16" over. The net effect is to sink the neck 3/16" further into the body. So what? It will probably balance better.
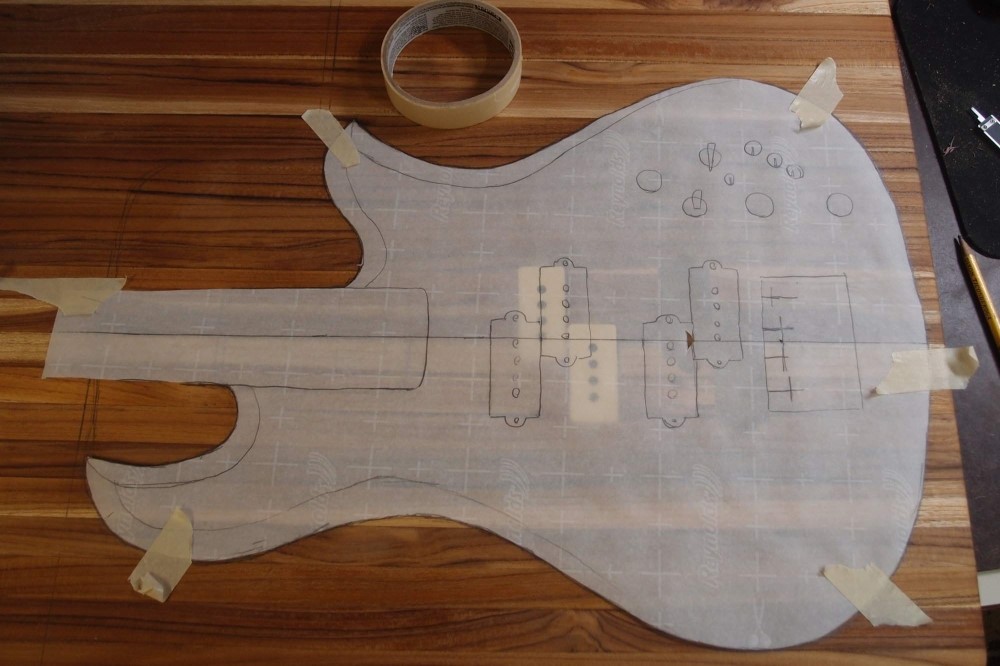
Above is the outline taped to the blank. The pickups on the drawing obviously don't match the pickups on the blank. The drawing is a reproduction of a real Eagle, which has a 34" 24-fret neck, while I am using a 32" 21-fret neck, so everything is going to move. I'm not going to duplicate the control layout either, whatever it is, and I don't like Badass bridges. It is really only the outline that matters.
Since this is not going to be a full-sized Eagle, I'm thinking of calling it an Osprey.
Laying out the Neck Pocket
First of all, it really helps to have the neck you are going to use, or one like it. There are two datums on a guitar neck - the nut, and the 12th fret. You can measure off either of these, a good metal yardstick is most helpful.
First, draw your centerline on the body. Then line the neck up on it. You can tape a piece of thread or string to the center of the nut and run it down the neck over the centerline to align it. Lay the yardstick on to figure out roughly where the bridge will land - 34" from the nut, or whatever. Move things around until you are happy with the geometry, then mark the neck heel on the body. There is no set measurement for neck heels, it depends on the number of frets and whoever made the neck, which is why you really can't use it for a datum, at least not on a prototype.

You could trace out the neck onto the body and free-hand the pocket with a router and files. I've done that, it takes a long time and a lot of nerve. Much better to get one of these:
This is a StewMac Fender neck template. Notice how it has a Strat at one end and a bass at the other. Harder to see is a laser-etched centerline that you can use to line it up. The Strat pocket is spot-on, but the bass pocket is woefully oversized; they tell you to put tape in it to fit it to your neck, which is bullsh!t, they should just make the damn thing right. But it is still the best thing on the market. I've also made my own templates from MDF, but honestly, just spring for one of these.
Here is the heel of the neck I'm going to use. It is an Eden 32" paddle-head bass neck. The heel width is pretty good, but you can see that the corners are too square. I have traced the correct contours onto it from the template. This is an easy fix on the belt sander. For this build, I am going to use a hand-held belt sander for everything, just to prove I can ( unless I chicken out. ) However, for guitar building, I strongly recommend the Ridgid benchtop oscillating spindle/belt sander from Home Depot. A hefty investment, but well worth it.
The corners are the only flaw I can find on this neck. It is a gorgeous piece of work, for only $50. Previously, if I wanted a non-long-scale neck, I built it, but that takes a lot of time and actually costs more than this. For Fender-style necks, I also highly recommend Mighty Mite - more expensive, but as good as anything I have seen. MMs conform exactly to Fender specs, unlike these Chinese-made necks, which can be a little off sometimes. Allparts paddle necks are also good, but a major jump up in price.
I should mention at some point that a BC Rich is neck-through, not bolt-on. I think bolt-on is actually a superior way to build a guitar, as it allows both the neck depth and angle to be adjusted, allowing the truss rod to be used solely for relief. On a neck-through or set neck, you have to misuse the truss rod to accomplish all three adjustments. That works ok if everything is perfect, but if not, you've got a dog that will never play well. Speaking as an engineer, a properly made bolt-on joint is going to be just as good as a glued joint or through-neck, with no measurable difference in 'tone' or sustain, but let's not get into that here.
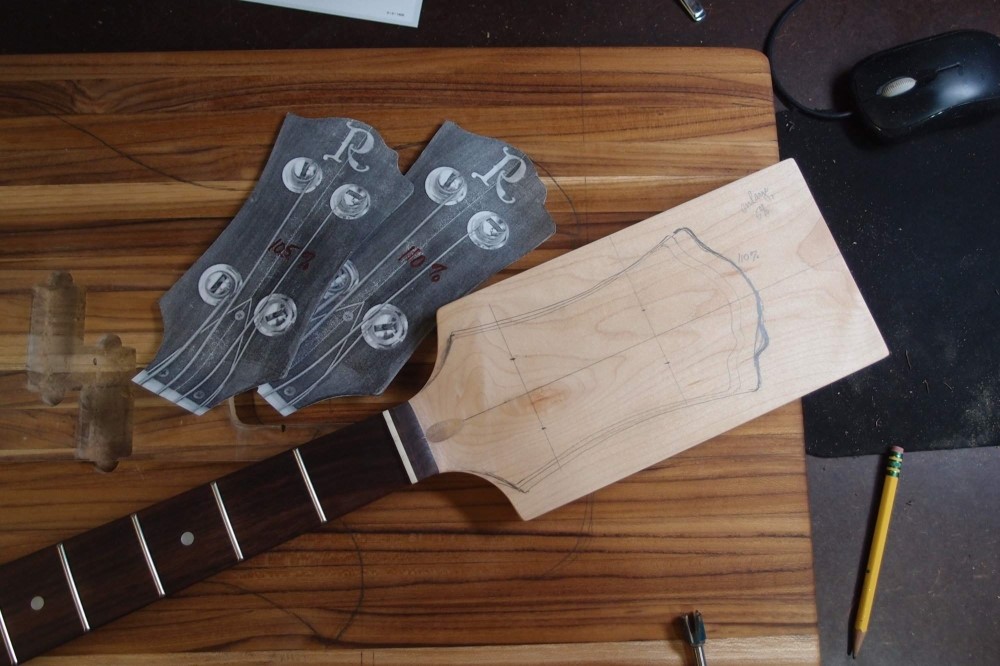
Here is the other end. It is a Fender-style flat headstock, not an angled one like a real BC Rich. I don't care. I'm not building a fake, I wouldn't WANT anyone to think this is a real Eagle - that would be dirty pool. You can see two headstock plans that I made from a photo, the same way as I did the body. I printed this out at several scales: 100%, 105%, and 110%, as the BC Rich headstock is pretty small, and I want some extra space to make sure the tuners will fit. To figure out the 100% scale, I used the nut width, assuming the original has a P-bass width, as a Jazz made no sense. I need to find a piece of black thermoplastic that I can make a curved truss rod cover out of. I will laser print a nice "R" on waterslide decal stock, which in this case is also my initial, so all's fair.
That's all for today. It is important not to rush - that is how you make mistakes. Another thing: lighting. Make sure you have even bright lighting from several directions, with no hard shadows to throw you off. My eyes aren't what they used to be, and I use a range of Dollar Store reading glasses for all kinds of tasks, from woodwork to soldering. You should always have something over your eyes for safety, and it is handy to have some magnification too, even if your eyes are good. Ok, now really, that's all.