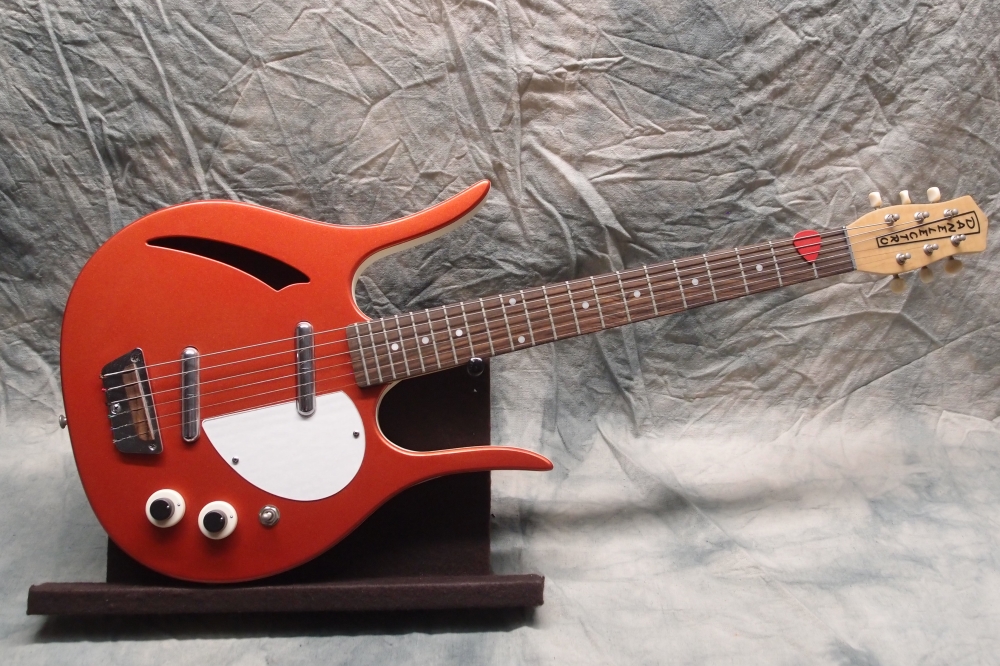
Osprey Bass (BC Rich Eagle) (4/10)
Oct 7, 2017
Saturday Morning Easy

That's a much better fit. I used the belt sander to rough it out, and then finished with a file. The belt sander is a Skil-branded Bosch. I've had this tool for many years, and put it through hell, and it just keeps going. This sander has a number of advantages over most, the obvious one here being you can flip it on its back and use it like a bench sander. You can also remove the front handle to get into tight places. About half of the front roller is exposed, so it even has a limited ability to do curves. I would not get any other sander. Unfortunately, this model seems to be discontinued, so for guitar building, I would recommend an inexpensive bench-top sander instead, or the Ridgid I mentioned earlier. You can also get sanding drums for use with a drill press. I will probably resort to those at some point on this build. They are not nearly as effective as a proper sander, but I am trying to avoid using the big guns.
BTW, I always intended for this carpet to be sacrificial. I try to keep it nice, but it is really just a giant work surface.
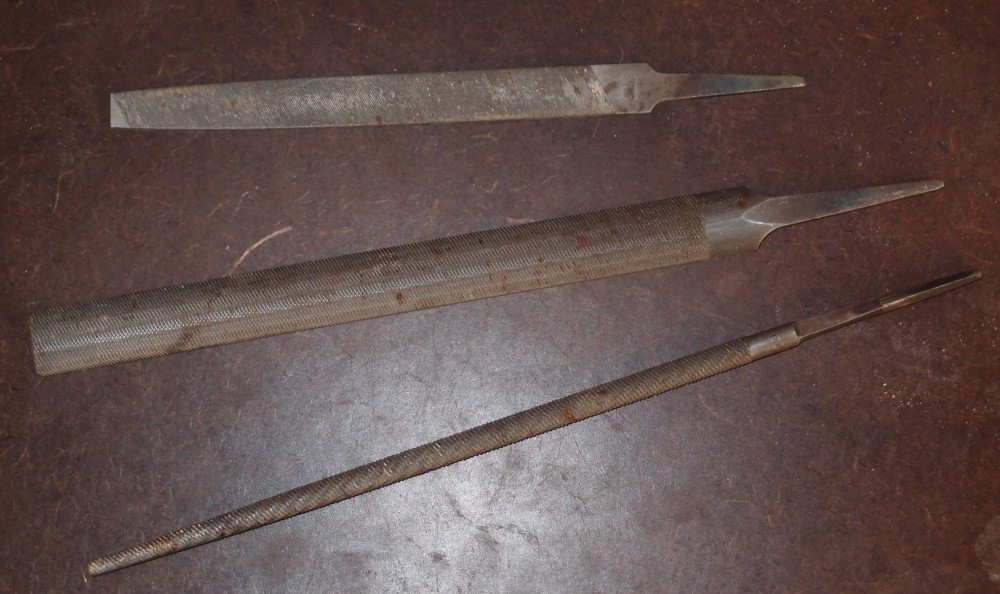
Here are the files I've been using. At the bottom is a coarse round file that is perfect for woodworking. The tip was just the right radius to do the corners of the pickup routs. Move up the shaft, and it can be used to ream out tuner holes. In the middle is a half-round file. This one is also pretty coarse and good for woodworking. It has a radius on one side, and a flat on the other; both sides are very useful. Finally, an ordinary fine file, better for metalwork, but sometimes useful for fine cleanups in wood. Files like these are often much better than sandpaper. Search "file cleaner brush" and get one online, the rest of these are at Home Depot.
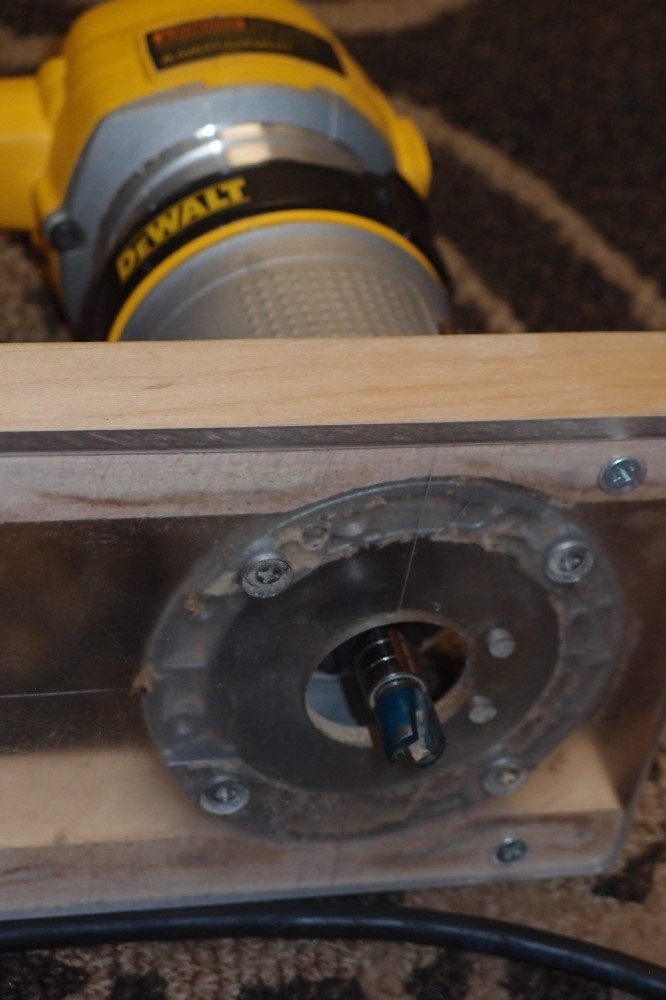
Here is the business end of the router. The bit is a 'hinge mortising template' bit, 1/2" x 1/2". I just resharpened the carbide edges with a diamond hone, I hope. You can see three 1/2" bearings stacked above the bit, held in place by the collet of the router. You need a short bit for this kind of work. A neck pocket is only 5/8" deep, and my template is only 1/4" thick, so any taller a router bit with a bearing stacked on top would present serious difficulties. Even with this, your first cut is going to be deeper than you really should do. That is why you want to remove as much wood as possible with the Forstner bits before you start routing.
The base is a custom creation of mine, the router comes with something similar but much shorter. After I thought about it, you really only need two bearings for this job, so I took one off to give the collet a better grip on the bit. One more thing: a lot of high-speed power tools are very loud, and you're going to be using them in close proximity, so always use some kind of hearing protection.
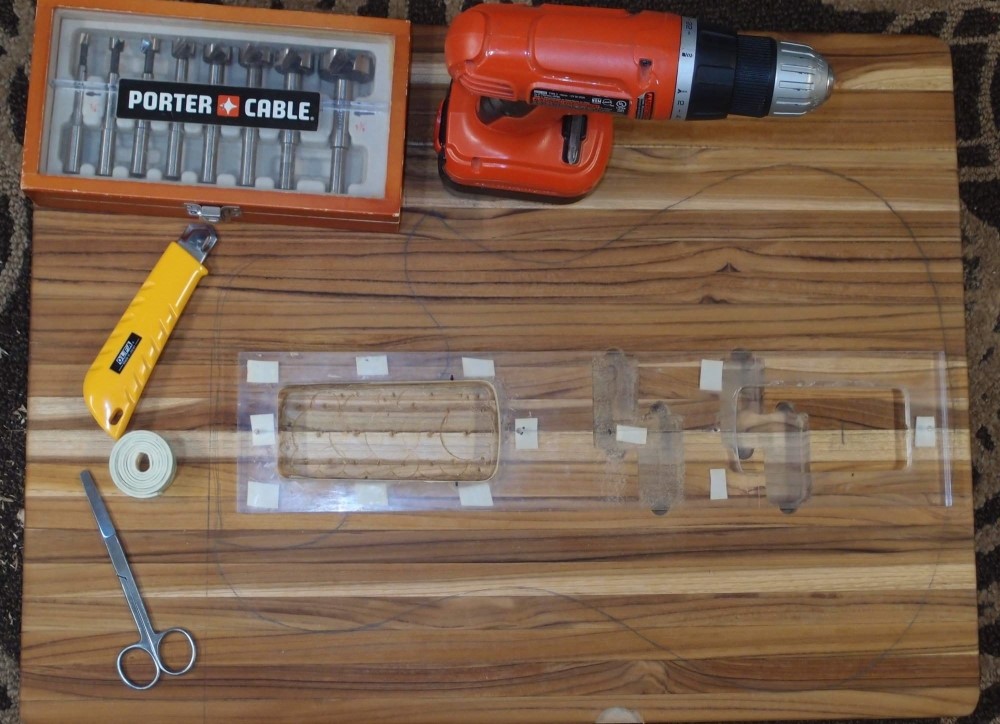
So here I've stuck on the template. I have permanently tightened up my template with layers of Crazy Glue, rather than layers of tape, which does not work nearly as well as StewMac claims. I also put on two layers of tape anyway. I have hogged out the pocket with Forstner bits to a depth of about 1/4". That gives a good start for the router and also ensures that it will clean up all the dimples from the Forstner bits, although that really doesn't matter. I also cleaned up all the edges with a razor knife, as I am a little nervous working with this wood after yesterday's problems. Note how the length and transparency of the template makes it easy to align to the body centerline.
You can see my set of Forstner bits - a good Porter Cable one. I recently tried a cheap set from Harbor Freight, and they were utterly worthless, I returned them. They were obviously just mild steel, and wouldn't hold an edge at all. Get a good set like mine - Bosch, or something equivalent.
Standard Fender neck pocket depth is 5/8", flat and level. Fender designs are made for mass production, if you use a standard neck and bridge, that depth will make everything fall into place. A guitar like a Gibson, on the other hand, has a tricky angled neck, and on top of that, it is glued in, so you only have one chance to get it right. That's not so hard in the factory, but if you are building a one-off on your dining room floor, it is something you probably want to avoid. There is no reason why you can't make an angled bolt-on neck too, and I have done that, both by angling the neck pocket and by angling the neck heel. Very small adjustments can be made with shims.
To do a Strat or bass neck pocket, you just need a commonly available 1/2" router bit and bearings. To do a Telecaster pocket, you need a specialized 3/8" bit and bearings to nip out the tight corners ( do most of the job with the 1/2" bit, then switch, otherwise you will wear out the tiny 3/8" bearings pretty fast. ) Danelectro neck pockets are similar to Telecasters. You can avoid the extra tooling by simply rounding-over the corners of the neck the way I did above, and convert it to a Strat. Leo Fender was always one for correcting his mistakes, and although he left the Tele design alone, he never repeated it, as the Strat is much simpler and cheaper to produce. ( Actually, the Precision was the next model after the Telecaster, so the Stratocaster is more properly considered a shrunken Precision than vice versa! )
I just did a test cut in the edge of the board, and no problems, so neck pocket coming up!
Oct 7, 2017
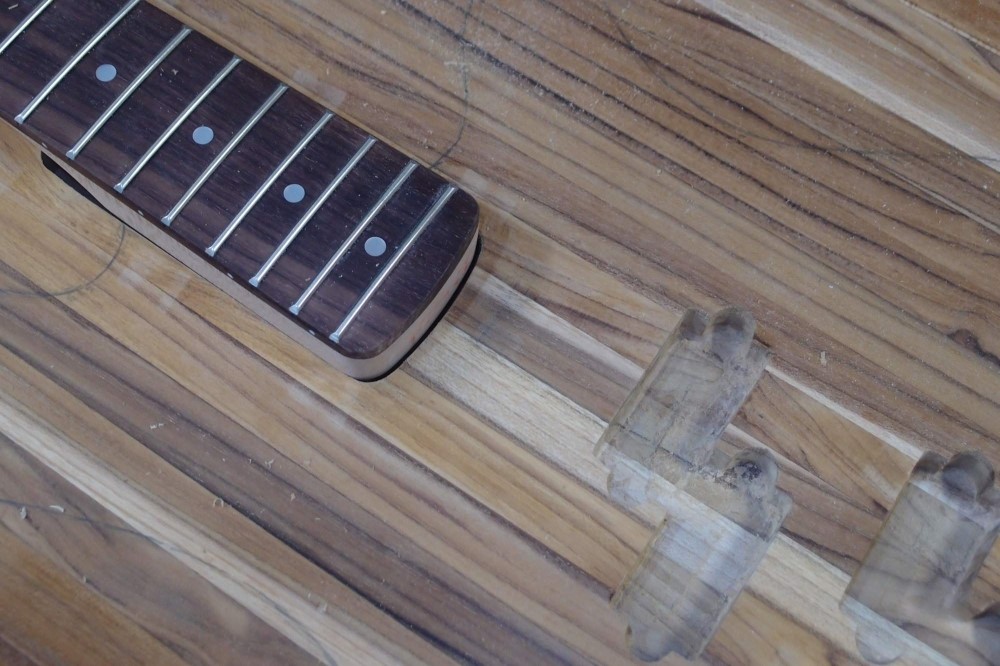
The neck pocket came out perfect. Here, the neck is pulled out just a bit to show off the nice even gap. The re-sharpened router bit performed flawlessly. The only hitch was that the router collet kissed the top of the template, in a place that doesn't matter much. So I added the third bearing back into the stack. I could also have switched to a taller router bit like 3/4". I've already filled the damage in the template with Crazy Glue Gel, and when that is hard I will file it all smooth.
Resharpening the router bit was pretty simple - you can find videos on the YouTubes. I'm not sorry I ordered a spare - 1/2 x 1/2 is not a size you will find at Home Depot.
It is best to do the neck pocket before cutting out the horns. That leaves plenty of material to support the template all over (all-under?) This is the first time I've ever done this much routing before cutting out the body. I actually think this way works better. So far, all the forstnering with the hand drill has worked out just fine, I haven't missed the drill press at all, which was always the main reason I cut out the body first.
Just one route left - the control cavity on the back. For that, I have a homemade three-piece template set that does the cavity, the shelf for the cover, and the cover itself. I copied it from one of my factory guitars, d@mned if I remember which. I think I will cut the rough body outline first. That will transfer the outline tracing from the front to the back, and make it easier to align everything. Then as always, a lot of hogging-out with the Forstner bits, then clean up with the router. This will definitely require a longer bit, but otherwise the same setup with 3 stacked bearings.
I am thinking I will route the control cavity to a depth of 1". That leaves a strong 1/2" of wood. Wherever I ultimately decide to install the controls, I will thin those spots to 1/4" with a Forstner bit. Where the wood is thin, I will dribble a little Crazy Glue on the back side to reinforce it. I can do a battery box entirely with the drill and files, no routing. Finally, I need to fetch my extra-long 1/4" drill bit to do all the inter-connects.
Can't Leave it Alone
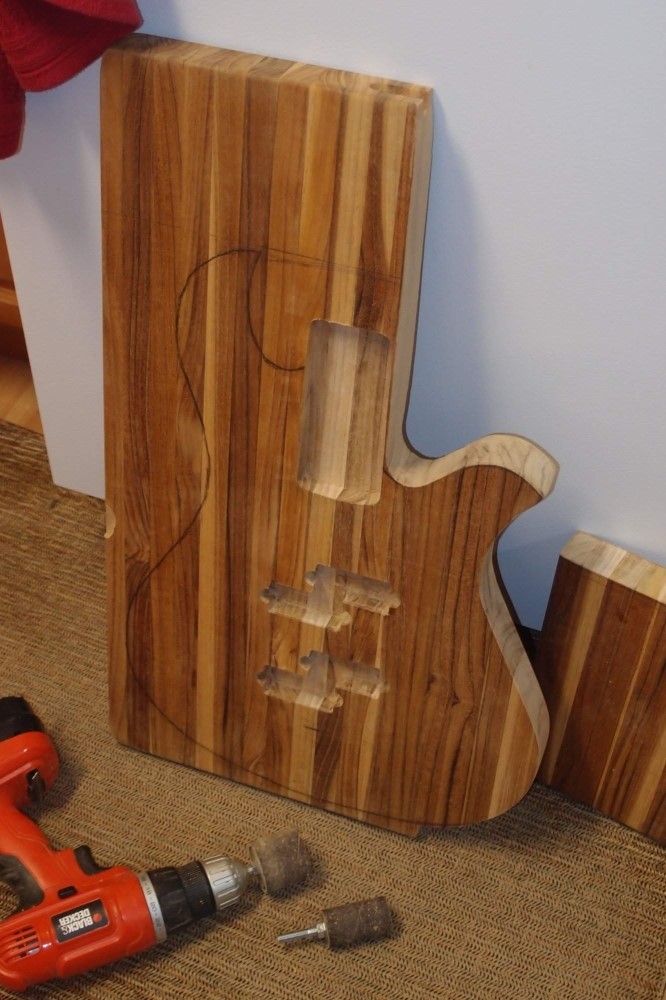
Here is the lower body contour, cut out. I am actually pretty satisfied with the result, but I cannot recommend the method:
I did the outline cutting with a scroll saw. While scroll saws are capable of cutting thick materials, they are really not good for it. The problem is that the blade is so thin and flexible that it draws into a bow when cutting curves. The result is that you don't get a straight cut through the material, at least not always. Of course, you always want to cut outside of your line, but even so, things can go pretty wrong. The tight curve inside the horn went completely awry on the other side. I managed to sand it out, but now the cutout is a little deeper than spec. Actually, that compensates for my previous goof - I will have the same access to the high frets. And you know how important that is in free-form exploratory Jazz compositions.
You could also use a jigsaw to cut out the outline, but in that case, you'll want to cut even further outside the line, as jigsaw blades tend to lean around curves. That means even more sanding. If you really want exercise, you could even use a coping saw. The scroll saw was ok on the cross cuts, but it really hated ripping ( along the grain ) and I actually did that long straight cut with a hand saw. My strong advice is, for this kind of cutting, buy, beg, borrow, or steal a band saw. I have a cheap little Skil from Lowes that gets the job done just fine. I think the Skil is better than the Ryobi from Home Depot.
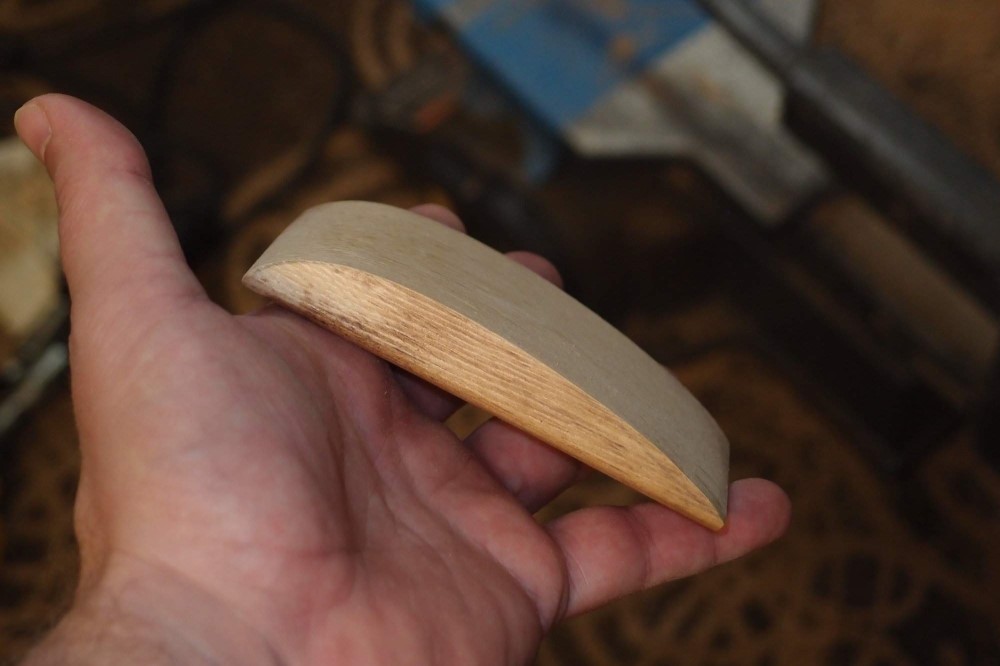
One pleasant surprise was how effective and controllable the sanding drums were, even on the hand drill. All of the contour sanding was done with the drums pictured, and my homemade airfoil-shaped sanding block with 80-grit. I mainly used the drums on the tight curve inside the cutaway. The block is made from a scrap of maple, with a constantly changing radius that just naturally sands smooth inside curves, while the flat side makes smooth outside curves. I have another block somewhere that is symmetrical and matches the lap curve on a Fender body, and another with super-tight radiuses on each end.
I didn't want to make a lot of noise at night, so I didn't use the belt sander this time. That's good for another reason - power tools can get away from you. Working by hand may be slow, but you can really see what you are doing, and not go too far. If you are going to do any major amount of sanding, especially power sanding, wear a mask - you don't want to be breathing that stuff.
Some more notes on teak: it cuts and sands pretty nicely. Janka hardness of 1070, vs 590 for alder. Teak is strong enough to make a neck out of, and almost hard enough to make a fretboard. You could probably make every single part of a guitar out of this stuff. Nearly as hard as maple, this wood should wear an oil finish very well. Apart from dulling-up a router bit (maybe), I have not had any great problems working with it, and the problems I have had, I attribute to the laminated nature of this board, not the wood itself. I don't understand why this wood is not used more in 'luthiery'. It must have really failed its tap test.
I put a small ding in the surface by accident. ( Like anyone does that on purpose. Oh wait, Fender Custom Shop ... ) Rather than sand that out, here is a trick that often works: put a drop of boiling water on the ding. The grain will swell right back out. Repeat if necessary. You can also try heated acetone if the water fails, but first go online and learn how to heat flammables without burning your house down! I learned about acetone's effect while stripping the lacquer off an old poplar Danelectro neck. When I was done, all the dings had disappeared, it was like new! Even for really bad dings and scratches, do this first, then sand.
I am really surprised how smooth and perpendicular that edge came out with just these simple tools, especially after the scroll saw made a mess of things. If you run your hand around it, there are no bumps or ripples. If I worked at it some more, I could get it perfect. This proves that you can do it. But now I've done my part for science, and I am going to do the other side and touch up the bottom with the band saw and spindle sander. This body is coming out pretty nice, and I'm not going to screw it up over a principle. I'll still be using the hand-held belt sander for the body chamfers later. Now I can lay out the control cavity. Stay tuned ...