Osprey Bass (BC Rich Eagle) (2/10)
Oct 5, 2017
You Can Build It
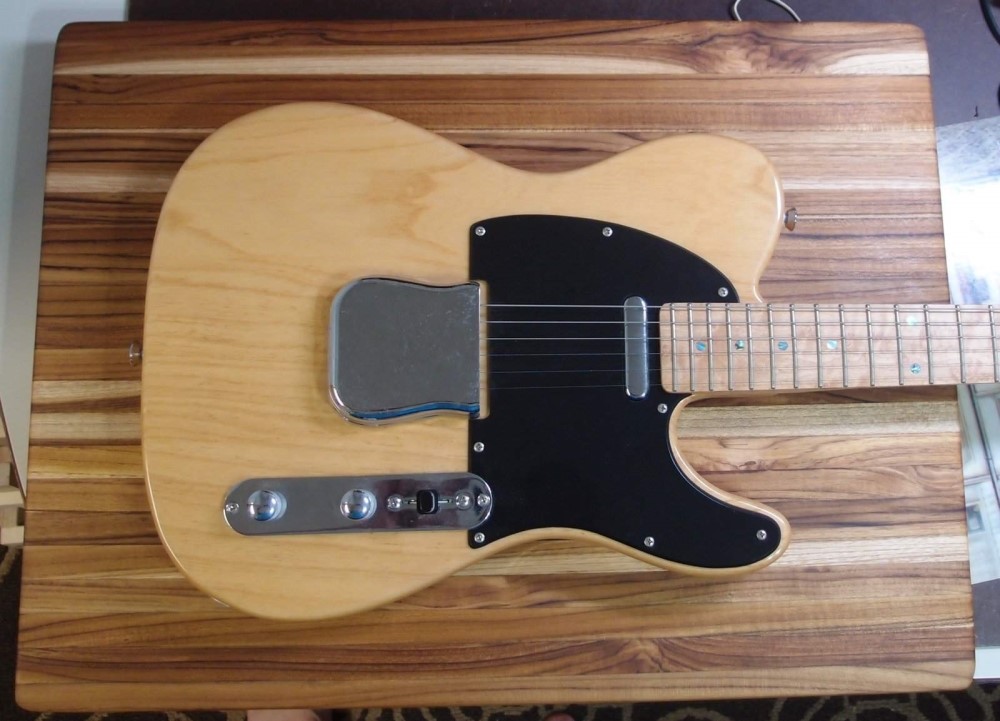
I'm starting out with this piece of wood ( underneath the Telecaster. ) It is actually a teak cutting board that Home Depot gave me for review, but it normally goes for around $87. This board is precisely 1-1/2" thick and nicely finished on both sides. It is laminated from 1/2" strips with TiteBond glue. The only flaw is a tightly filled knot hole on the other side, that I can cut around.
I really like the look of the laminated teak. Teak is a rather hard wood of medium weight, with fairly closed grain. It is an oily wood that is difficult to glue, but the gluing is already all done and I don't plan to be doing any more. I plan to use an easy oiled-wood finish, so no spraying or polishing. Teak is ideal for this, as it is already naturally oily, and also hard, so it will wear well even with a finish that really does nothing to protect the wood.
At this price, you could easily get a real guitar body blank, my main attraction to this piece was the price (free) and my desire to experiment with a new wood. Teak is reviled in luthiery circles. Maybe it failed its tap test, I don't know; luthiery is full of hogwash. Another drawback of teak is that it is abrasive and tough on tools. Otherwise, it is an easy wood to work. That's what I've read, anyway. Let's build a guitar out of it and see.
So, what kind of guitar or bass do I want to build? Not another Fender clone, done too many of those. What would be different? A Mockingbird !!! But that's too different, there is another BC Rich I've always liked better - the Eagle. Good enough for Derek Smalls, good enough for me. Free-form Jazz exploration, here I come.

It's always easiest to copy something if you already have one. I don't have an Eagle, in fact, I don't think I've ever even seen one in person. I found some nice plans for a Mockingbird online, but no Eagle. So ... online image search, and I found this:
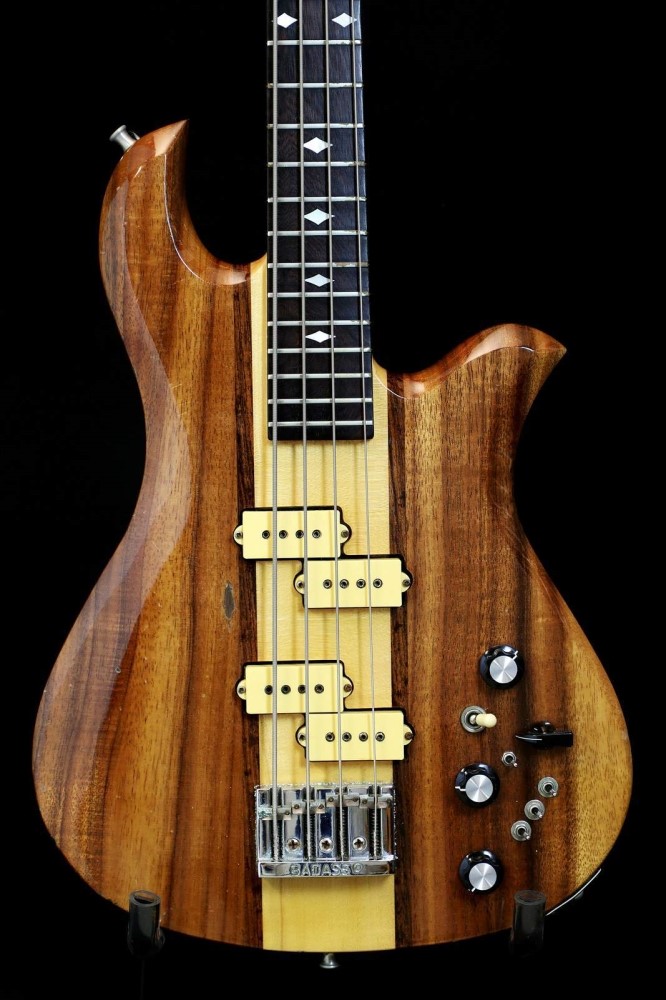
If you're going to work off an image, it needs to be flat, or head-on, or however you want to put it. And big - as big as you can find. You also need some point of reference for the dimensions. Here, you can see the 12th fret. The distance from the 12th fret to the saddle along the G string should be about 17 inches. ( I actually used millimeters for this. ) There you go - from that you can work out all the other dimensions, and figure out how to scale the image so you can print it out as a full-sized plan. But my printer only does letter-size. So I cut the image into quarters in Photoshop, and printed those at the proper scale. A few pieces of Scotch tape later, I have this:
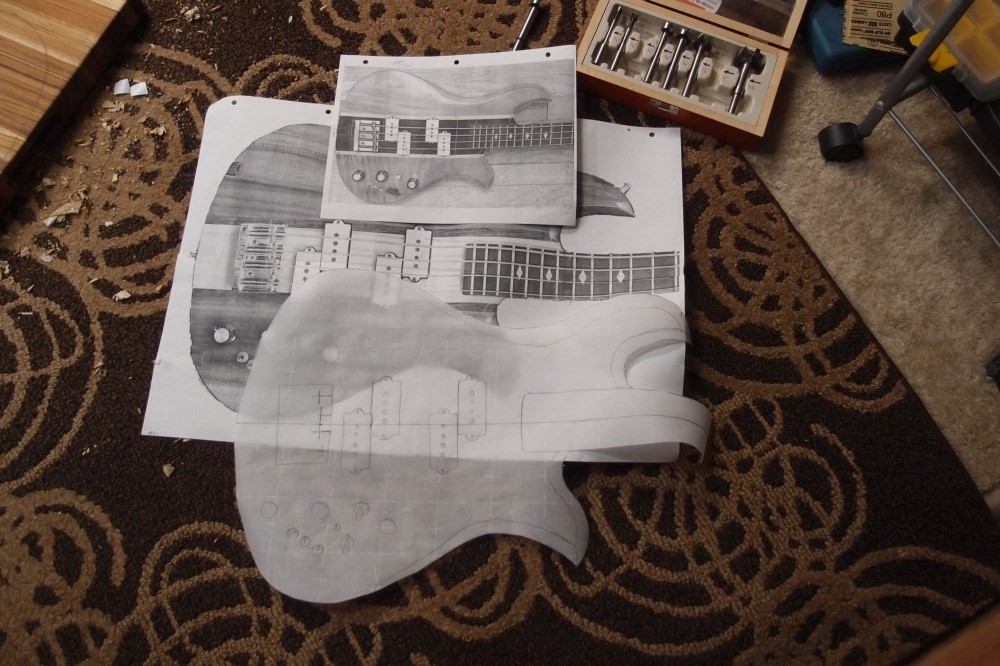
Since I don't want to mess up my 'blueprint', I overlaid some parchment baking paper from the supermarket and traced it out. I cut out the tracing and used that to transfer the outline to the wood. I used one of the lamination seams as a centerline. I also laid out the neck pocket, bridge, and pickups. I used good old math to scale the pickup locations so that they will be in the equivalent places for the 32" scale I plan to use. I also just plain jiggered everything a bit, to make it all fit nicely.
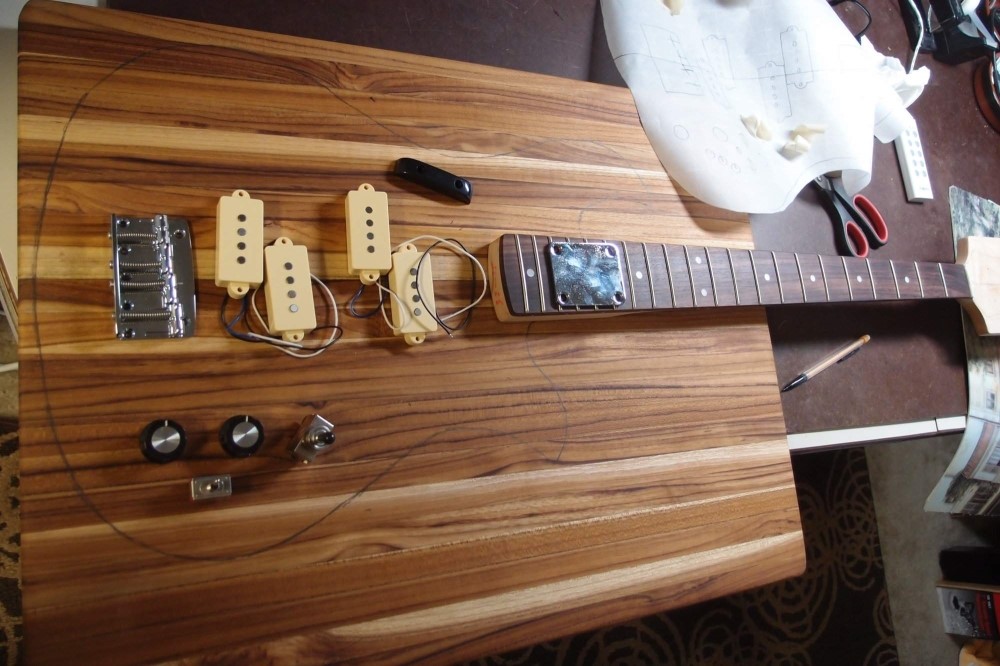
I decided to use the classic BC Rich double reverse P configuration and found a reasonably-priced pair of cream-colored pickups on eBay. I took StewMac's pretty poor P-bass pickup template and modified it to fit these pickups exactly. I also scribed guidelines on the back side, as I will be using it upside-down. Then came the moment of truth. I stuck the template down with double-sided tape and started cutting wood.
The Precision pickup route is fairly tricky - it is a very odd shape, with some pretty sharp corners. If you are going to do it under a pickguard, you can be pretty sloppy about it, but if you are not using a pickguard ... you've got your work cut out for you. First, I drilled the 6 outside corners with a 3/16" drill bit, to get a nice radius. Then I drilled out the ears with a 1/2" Forstner bit and extended the corners with the same bit. Finally, hogged out as much more as I could with a 1" bit. All of this was done to a depth of about 1/2", and without actually touching the template. As promised, the teak dulled up the drill bits, but I can re-sharpen them, and removing as much wood as possible this way saves wear and tear on the router bit.
The routing was done with my trusty little DeWalt DWP611 router. This little guy is probably all the router you will ever need, I hardly ever use my 'big' router anymore. I stacked three bearings over a short 3/8" carbide bit; the cutting edge of the bit is only 1/2" long. You need a short bit like this to follow a template. In several passes, I deepened the pocket to about 5/8", which should be enough. I cleaned up and straightened the top edges with files - one round, and one half-round. You'll be amazed what a clean sharp straight line you can make with a file. Always file sideways and downwards, into the piece. Filing upwards can grab the grain and pull out chips. Finally, I cleaned out the bottom corners where the router didn't reach with a Dremel. You don't need to be neat down there - it will never show.
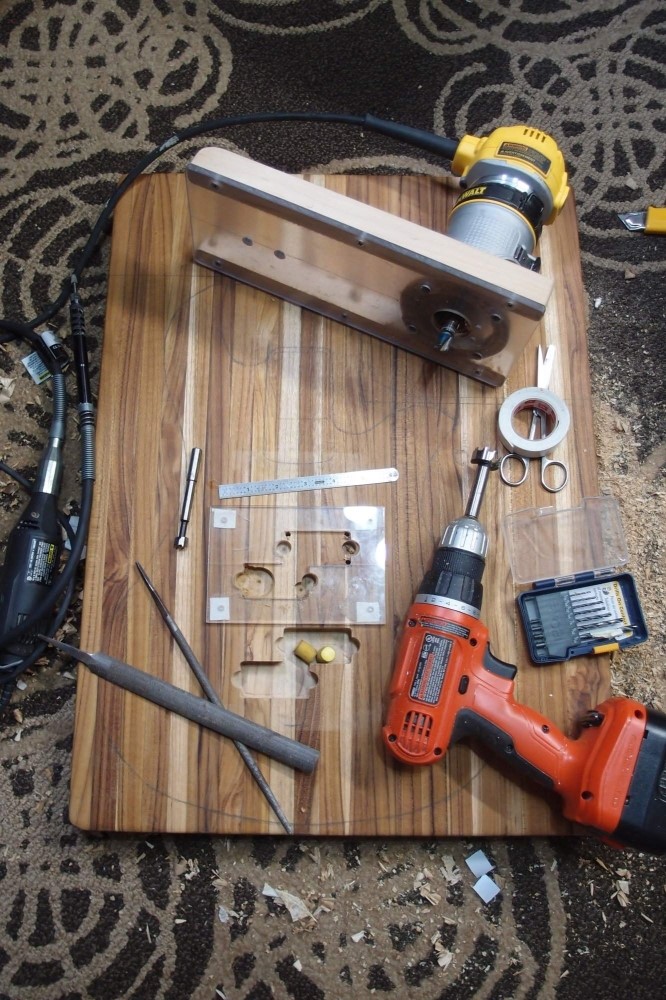
So here is one pickup route all done, and the other started. All the tools so far are in this picture, I think, and you can see that I am doing this on the ugly carpet of the dining room floor. It's a mess, but that is what vacuum cleaners are for. Working on the floor helps keep the sawdust from flying all over. My toy drill pooped out at this point, so it was a good time to take some pictures, do some writing, and go to bed. Good night all.


