Osprey Bass (BC Rich Eagle) (6/10)
Oct 9, 2017
Progress Report
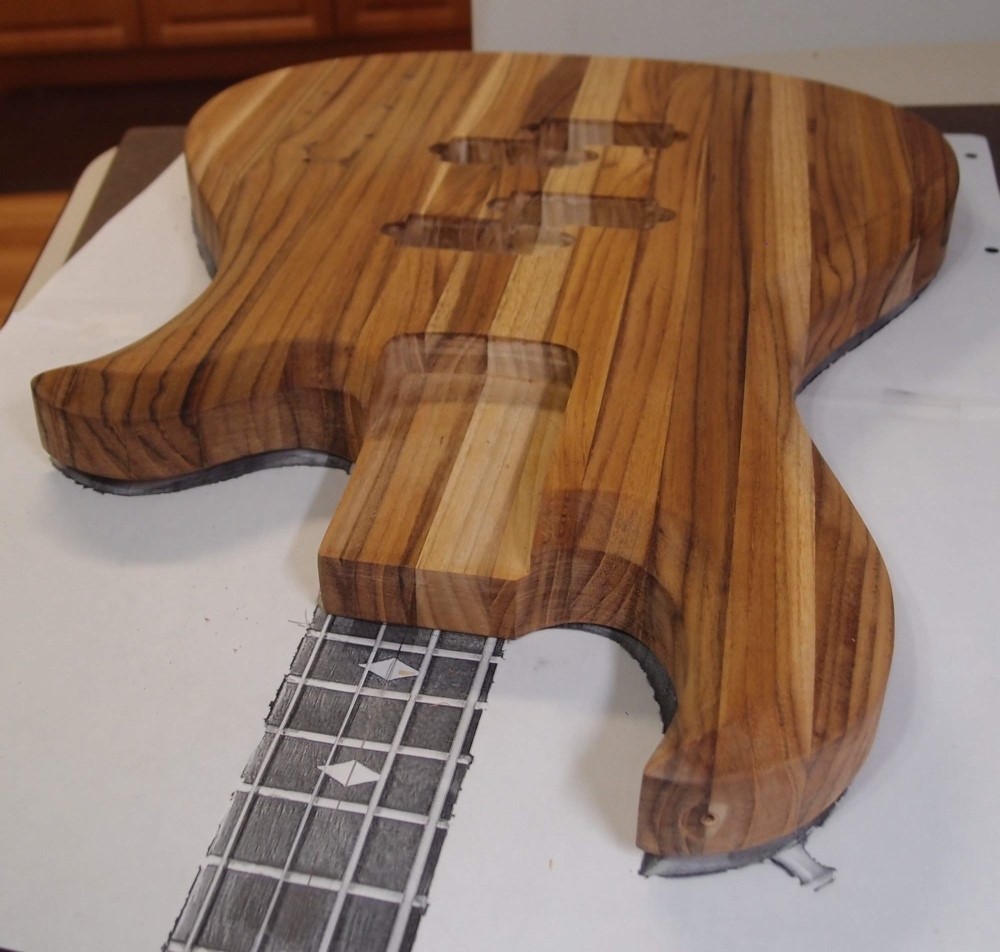
If you look closely, you can see that I drilled a small flat in the upper horn for the strap button. You can see how badly placed the button is in the drawing; I'll bet a lot of Eagles have met the floor because of that. Looking at photographs, the chamfers on the real thing look steeper and more pronounced than mine. I don't want to make the body edge too thin, and I only have 1-1/2 inches to work with. Also, the butt-end of a real Eagle has very sharp edges; I gave mine comfortable roundovers. I was tempted to give it a Strat-style cutout on the back, but a body this thin would not really benefit from that, and I want to stay true to the original, more or less.
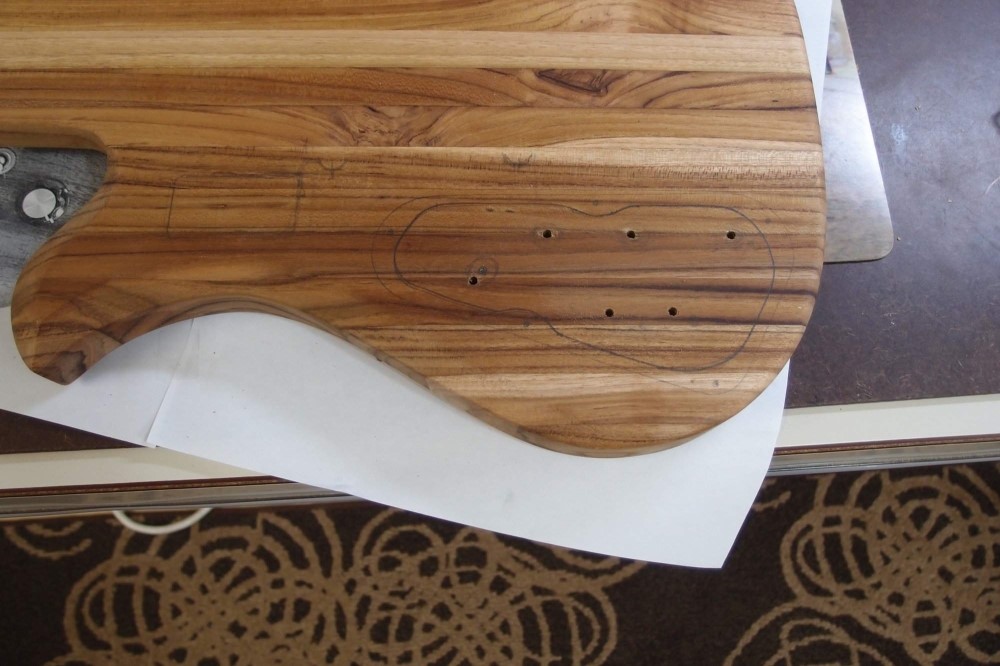
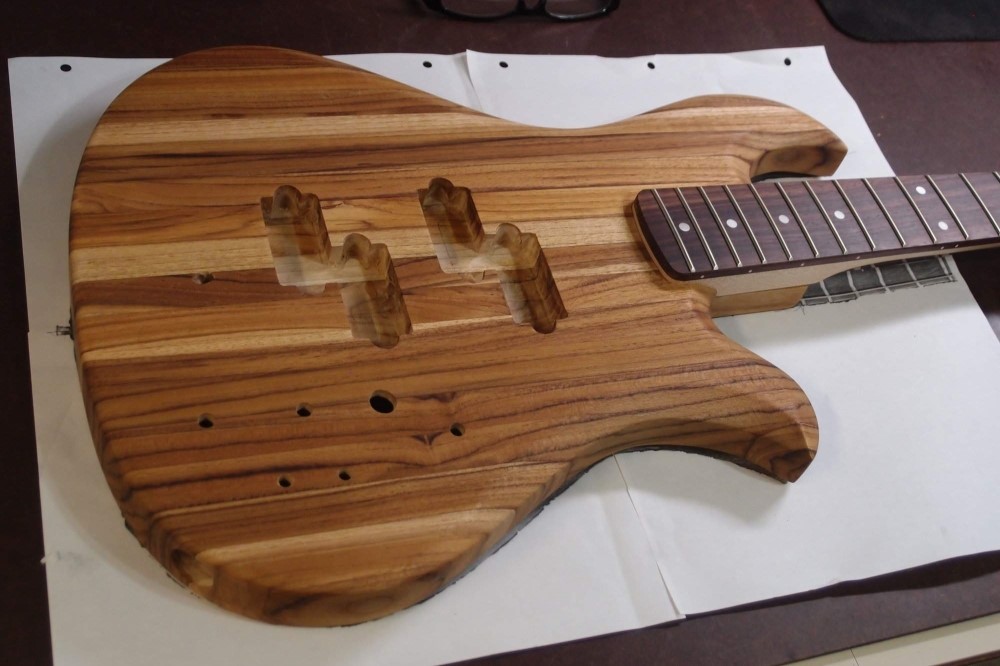
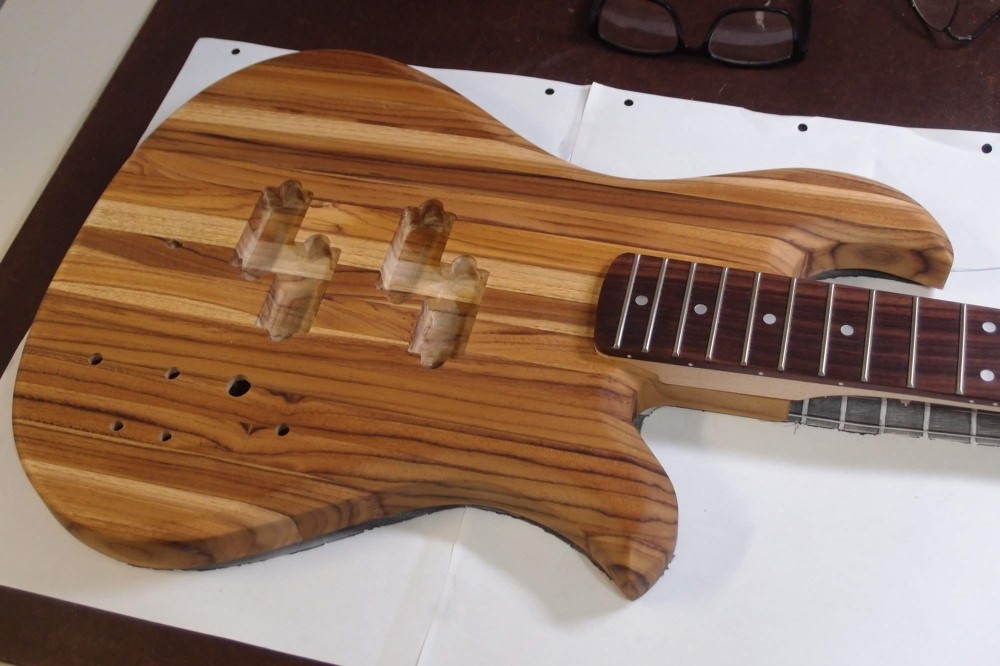
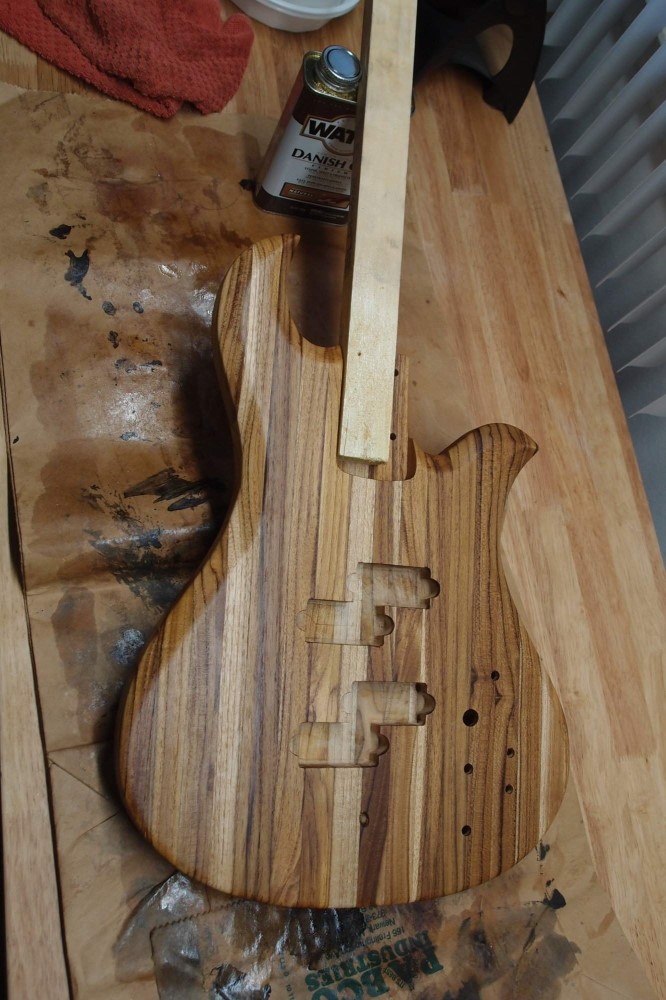
I marked the spots for the controls on the front and then drilled marker holes through to the back on the drill press. They came out pretty much where I expected. That was my last check for the control cavity location. You can see I have drawn in the lower ears of the pickups. I need to find a spot for the battery box that won't intrude on those or the body chamfers, but still be close enough to drill the connecting hole for the wires.
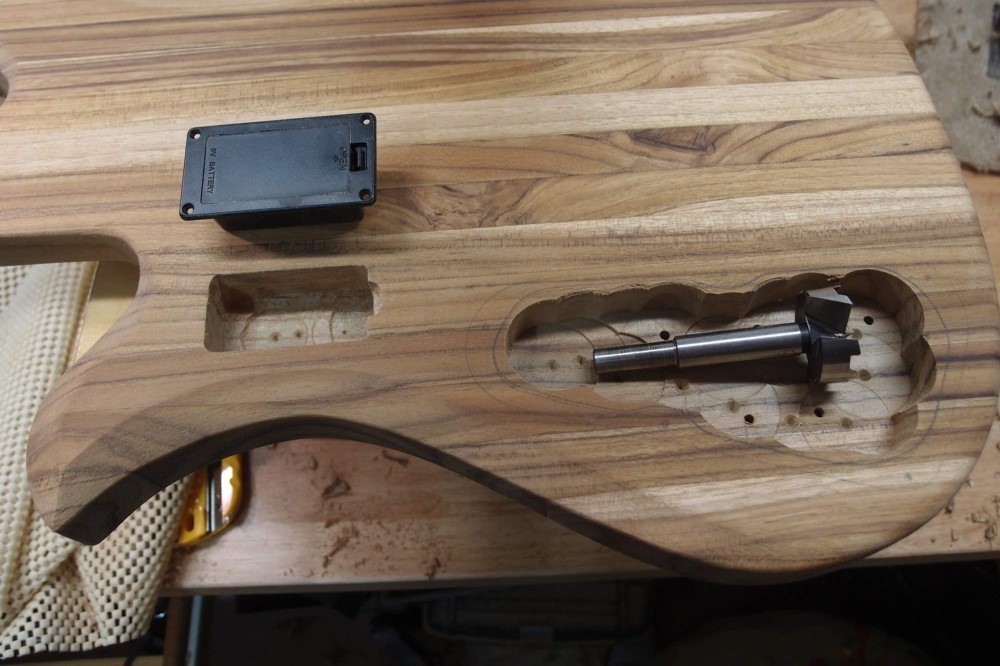
I've dug out a lot of wood with Forstner bits on the drill press. This is more than I care to do with the hand drill. The battery box is finished. In the spirit of low-tech, I carved the sides out with a razor knife, then finished it with a Dremel - no router. You can't be very sloppy with this cavity, as the flange on the box is pretty small, and you need to leave wood at the corners for the screws.
This battery box has spring contacts rather than a wired clip. That is much better, for two reasons: First, you can pop the battery in and out very easily, and second, those 9-volt battery clips always break. Also, these boxes hold the battery flat, which is better for a thin body like this. You can find these boxes on eBay, they are not expensive. The best battery boxes are the Gotohs, but they are pricy.
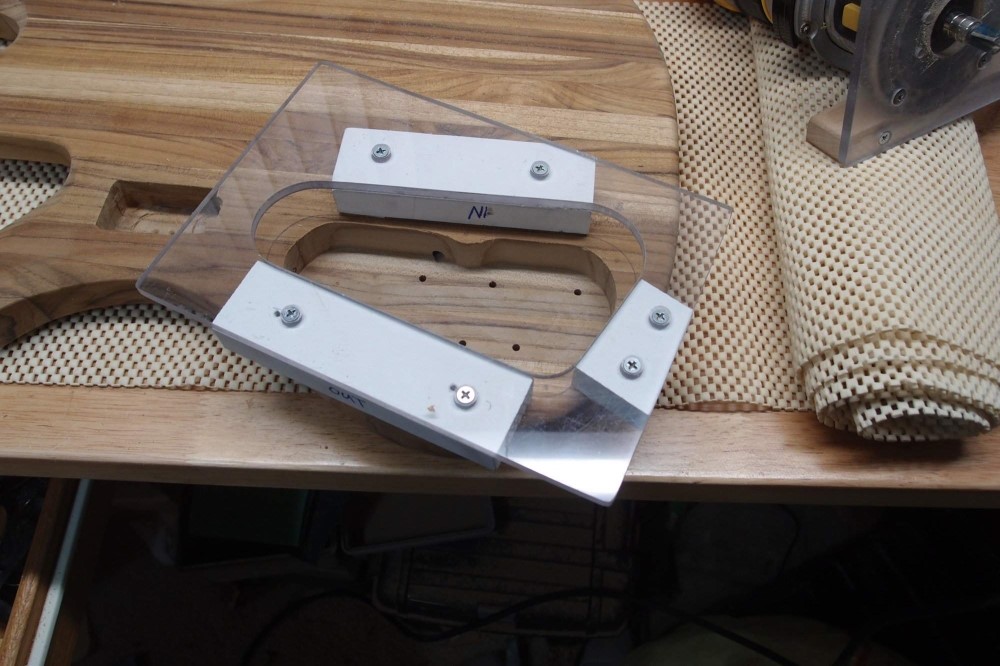
I've done the initial route for the control cavity, not to full depth yet, and now setting up to do the cover shelf. This is a very shallow route, about 1/10", so this template needs spacers for extra height. I just modified it so I can install the spacers on either side now. The spacers match the edges of the template, to make it easy to align. This job almost went very wrong - the double-sided tape wasn't sticking to the oily teak very well, and the template slipped. Luckily, I wasn't cutting at the time, and I was 99% done, so I removed the template and finished the job by hand with a file. If the shelf outline had come out a little wonky, that wouldn't really be a problem, I'd just fix it and make the cover to match.
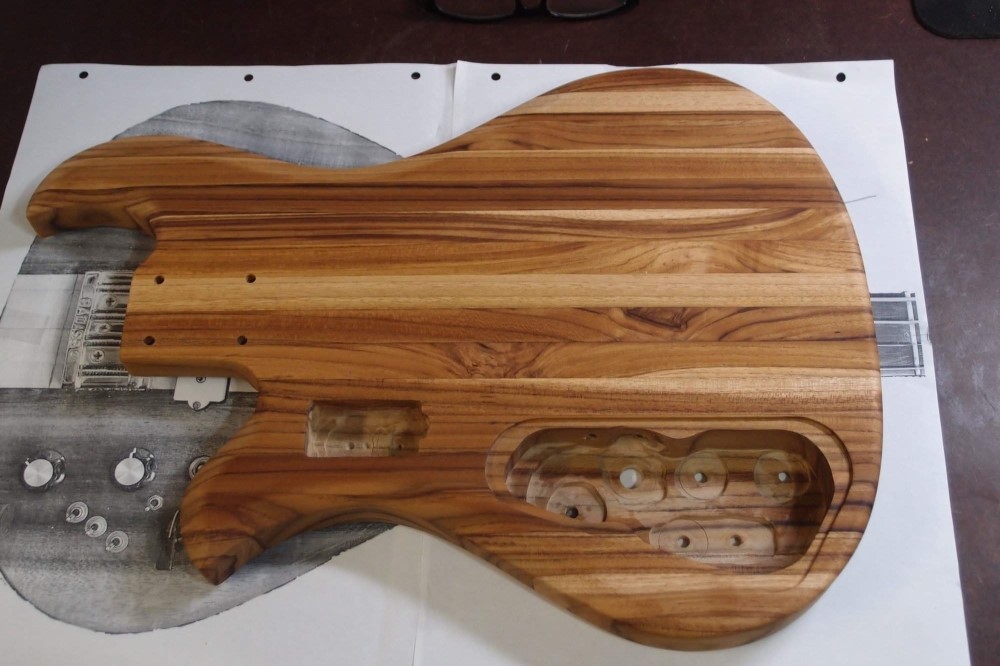
You can see that the control cover is pretty tight to the body edge. You might think the back of a guitar doesn't matter much, but it actually takes careful planning to make everything fit. You don't want to run into the stuff on the front, but you don't want to be too far from it either. That is why I recommend for a first project you do something with a pickguard, and mount everything from the front. With a thin solid body, no pickguard, front-mounted pickups, and rear-mounted controls, this hardware install is about as tricky as an electric guitar gets.
I ended up deepening the control cavity to about 1-1/8", then dug out an extra 1/8" around the control holes. That makes the necessary 1/4" thickness, but with some 3/8" webs. I like to leave a little extra wood in there for strength, 1/4" is pretty thin, especially for glued-up strips. Don't need the template anymore for this, just use the walls of the cavity as a guide.
And it's done. A good deal of finish sanding, using 100-150-220, got all the scratches and machining marks out. It takes extra sanding on the end grain to get it nice. I've also enlarged all the control holes to their final size with the round file. The control shafts are probably metric, and while I have a set of metric drill bits, I don't have them handy, so the file did the job. Lastly, I drilled a 7/8" hole in the side for the jack with - surprise - a Forstner bit in the hand drill. Two coats of 'natural' stain and the grain is really poppin'. After that dries for a day, I will put on a few coats of Danish oil, but not too much. How much do you think this much zebrawood would cost?
If you have a really sharp eye, you can see that I have also drilled all the cross-connects for the wiring. For this, I used a foot-long 1/4" drill bit in the hand drill. You want to drill as flat as you can, especially with a thin body like this. I connected the two pickup cavities by drilling from both sides and meeting in the middle. The bridge ground also goes into the neck pickup cavity, and I drilled it from both ends. From there, everything goes through two holes into the control cavity, so I can keep the two pickups' wiring separate. That will make things easier down the road.
The goal is to drill the shortest holes possible. The last inter-connect is to the battery box, which was easy because I had the full length of the control cavity to lean into. In the past, I've used the battery box as a midway point rather than drill a long shot from the pickup all the way to the controls. I considered drilling a long flat hole from the neck pocket all the way to under the bridge, but I was able to run everything into the neck pickup without resorting to that.
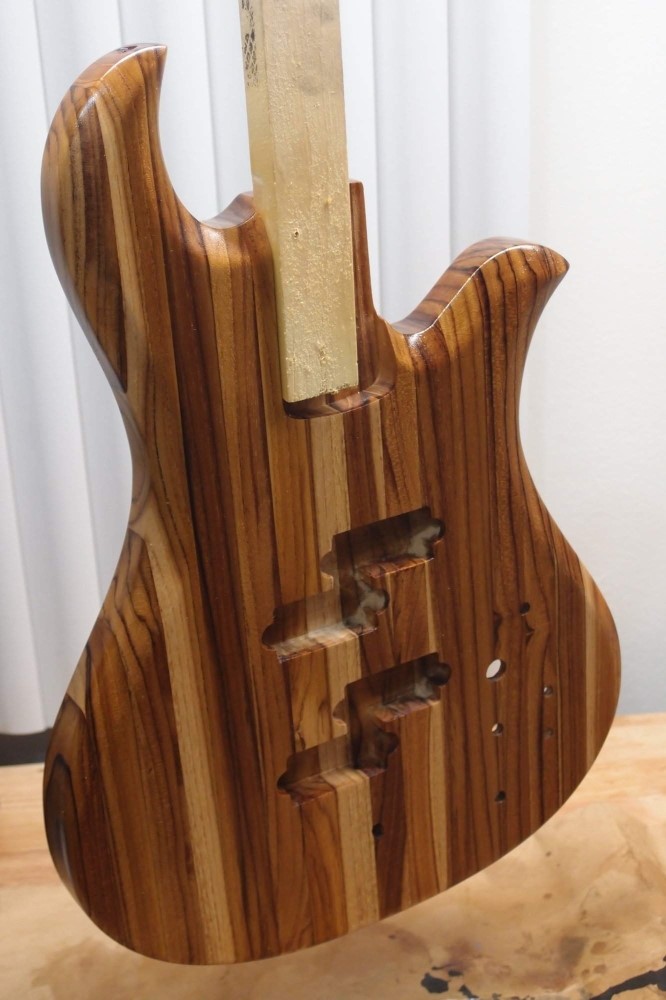
A shot of the back, showing the finished control cavity. You can see I undercut the side near the switch so I can mount it at any angle I like later. All through this, I have been using the glue lines in the blank for reference, starting with choosing one of them for a centerline. Also, the 1/4" neck mounting holes are drilled for a standard Fender neck plate. I simply laid the plate down and aligned it to the centerline, and traced the holes onto the wood.
I used the drill press, as these need to be straight, but these holes are short enough that you could do it carefully with a hand drill. For accuracy, drill small pilot holes first, and enlarge them in steps, rather than just going for the final size. This is especially important when working in metal.
I am not going to use shielding paint in this cavity, because the humbucking pickups and active electronics really don't need it, and if any of that nasty black stuff leaks through the holes, it will make an unfixable mess of the front.
And that's it - except for some oiling, this body is finished. When I first liberated it from the big slab, it weighed 5.36 pounds, with the pickups and neck pocket already routed. The final weight is 4.54 pounds - pretty light for a bass body. The thinness of the blank and the density of the teak canceled each other out, as I expected. I made over a pound of sawdust, and I have a huge cleanup to do.
While I used the bandsaw and drill press to speed things up, I think it is clear this build could have been done without them, it just would have taken longer. Conversely, it would have been a lot faster if I has allowed myself use of the spindle sander and other tools. Next up is the headstock on the neck, which will be trivial compared to this.
Oct 10, 2017
Two thin coats of Danish oil, and this. Danish oil is a mixture of about 90% boiled linseed oil and 10% varnish. You just wipe it on. As long as you keep applying wet-over-wet, it will soak in. If you put a good coat on and let it dry, that will seal the wood, and subsequent coats will build on top. You can actually build up a nice coat of varnish this way, but it takes a lot of time and patience. By wet-sanding in the oil, you can also get a grain-filling effect. Not enough for ash, but it would work very well with this teak. But I'm not going to do that here, I want the grain to show. I use a paper towel to apply the oil, and then flush it down the toilet. That avoids any fire hazard from drying rags.
Many woods drink in oils like this, with the result that the finish goes deep into the wood. It is not a highly protective finish like polyurethane, but it is easy to repair. Simply sand out blemishes, and re-oil until everything blends again. I've done a lot of furniture like this, mostly hard pine, and it wears very well. Teak being naturally oily, it is not taking a great deal more. I just want to give it a luster, the wood itself is hard enough that it doesn't need much protecting. I would never apply a finish like this to alder or any of the other soft 'tone woods' - they would scratch and ding-up into a terrible mess in short order. I've used it on walnut and cherry bodies with very nice results. While Danish oil is a very cheap and easy finish, the downside is that it can take a long time for a piece to fully cure - a heavy coat may stay sticky for months. After a few more thin coats, I will hang this body up for a week and see how it goes.
Note the temporary 'neck'. Two screws through the existing neck mountings into a piece of scrap, with a bent coat hanger hook. And, miracle of miracles, I got my workbench cleared off. There are lots of good instructional videos on wood finishing on the YouTubes.
In the sixties, Fender built a couple of solid rosewood Telecasters; they gave one to George Harrison. With a Janka hardness over 3000, three times what this is, I can hardly imagine how difficult and expensive it must have been to make those - they must have had a pile of ruined saw blades, used sandpaper, and dull router bits when they were done. A solid rosewood guitar would weigh a ton - really not very practical, and I don't think they actually got used for anything. The truth about guitars is that they are made from soft, light, cheap, readily available woods that are easy to work with. Everything else is just mythology.
The Other End
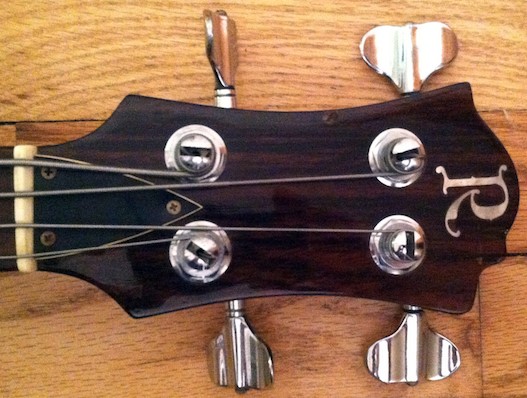
This is the image I decided to use for the headstock. I assume the nut is a standard Precision, and measured mine. That gives me the scale. The tuner shaft diameters fall into place, so that is probably right, if that is a Jazz nut, then everything is impossibly small. Need to remember that this is an angled headstock, and account for perspective.
I don't like the angles of the string pulls on the E and G. They're ok for an angled headstock, but I'm using a Fender-style flat one, and that is a little extreme. So I widened-out the design and moved the E and G tuners out and down a little. That gives a better angle. Then moved the A and D tuners out to match, and up a little for better clearance of the E and G posts, and to leave a bit more room for the logo. Like this:

That all works pretty well, I use the little ruler to check the clearances. I don't know if I will need a hold-down for the A and D, but I already have one made if I do. The tuners are cheap Chinese knockoffs of Schallers. They are good enough, it is a simple matter to upgrade the tuners later if I ever want to.
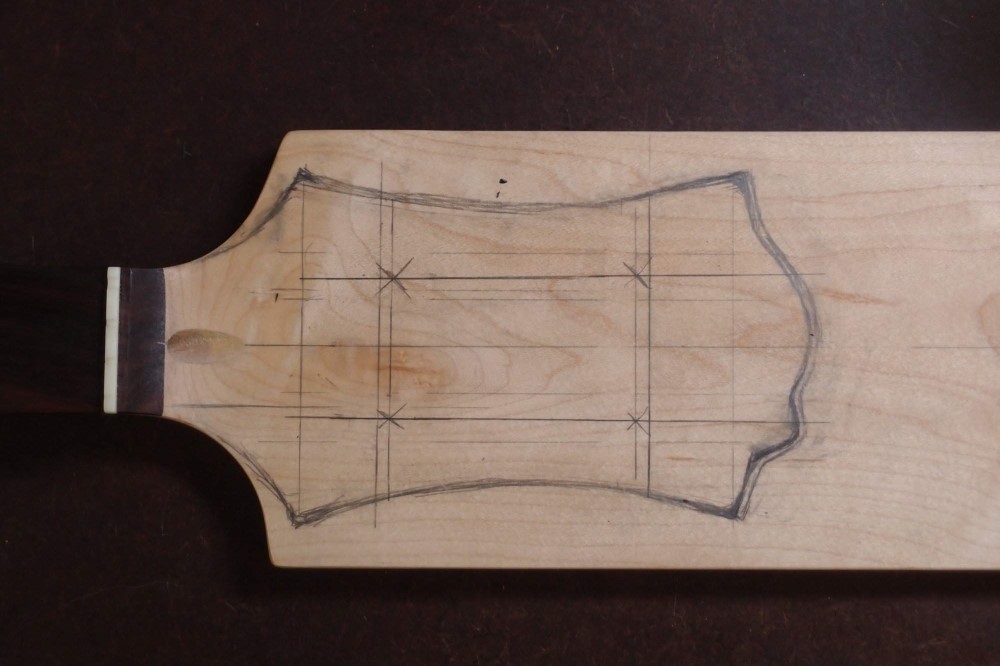
X marks the spot. You can scribble and erase on sealed maple all you want. ( It was a bit messy on the oily teak. ) If I remember correctly, these tuners require an 11/16" hole. I have a set of 'sixteenths' Forstner bits for just such things, but if you don't, you can just drill a 10/16" ( that's 5/8" for the math-impaired ) and widen it out with a big round file. The specialty bits are from Rockler. I'll drill the holes first, and then lay the tuners in them flipped to make sure my outline covers everything. The scroll saw and sanding drums should make short work of the rest. I'm going to use the drill press from here on out, but all of this could easily be accomplished with a hand drill, as none of the holes or edges are very deep. It's going to take a very small sanding drum to keep the corners on that little bump crisp, or maybe even the file.

This is the sixth coat of oil, still wet. I'll let this dry for however long it takes, and then rub it out with a rag and see what I get. I've got the neck to work on in the meantime. I noticed something: on mine, I had to taper the chamfers on the back to meet up with the neck tongue. On the real model, that's what they had to do on the front, because of the through-neck. I carried my chamfers right up to the neck pocket, a mistake, but I like it better. All the curves and angles make some interesting grain patterns in the edges. I think this glued-up teak board is really beautiful. I hope I can score another someday.
The oil and varnish are starting to build a nice sheen on the surface. I'm going to put maybe a dozen coats on, then let it dry hard and buff it out. Once the oil starts staying on top, you have to let each coat dry pretty well before applying the next, otherwise, you'll just wipe off the previous coat. That means one coat per day. It just takes a few minutes to wipe on the oil, then hang it up. But you need a lot of patience to wait. Twelve coats will mean five more days, and then a good week to let it harden off. Still faster than any spray finish, I give that a month before touching it. And much easier.