Osprey Bass (BC Rich Eagle) (5/10)
Oct 8, 2017
Sunday Morning
... rain is falling ... really. Look who's trying to get in the picture! My little buddy. RIP, friend. He sang backup, and cowbell. Gotta have cowbell. More cowbell.
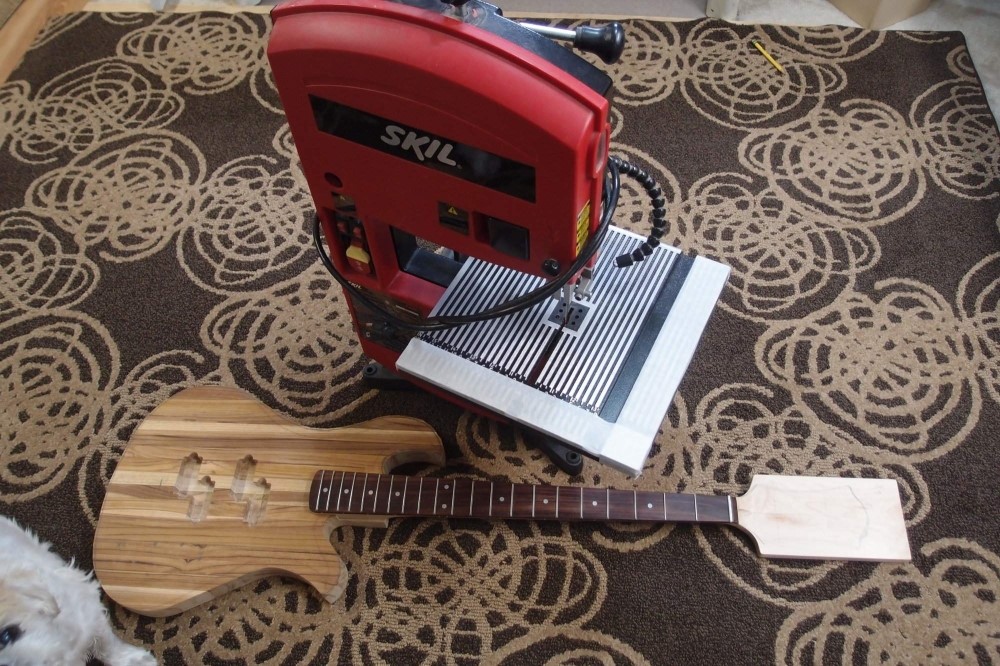
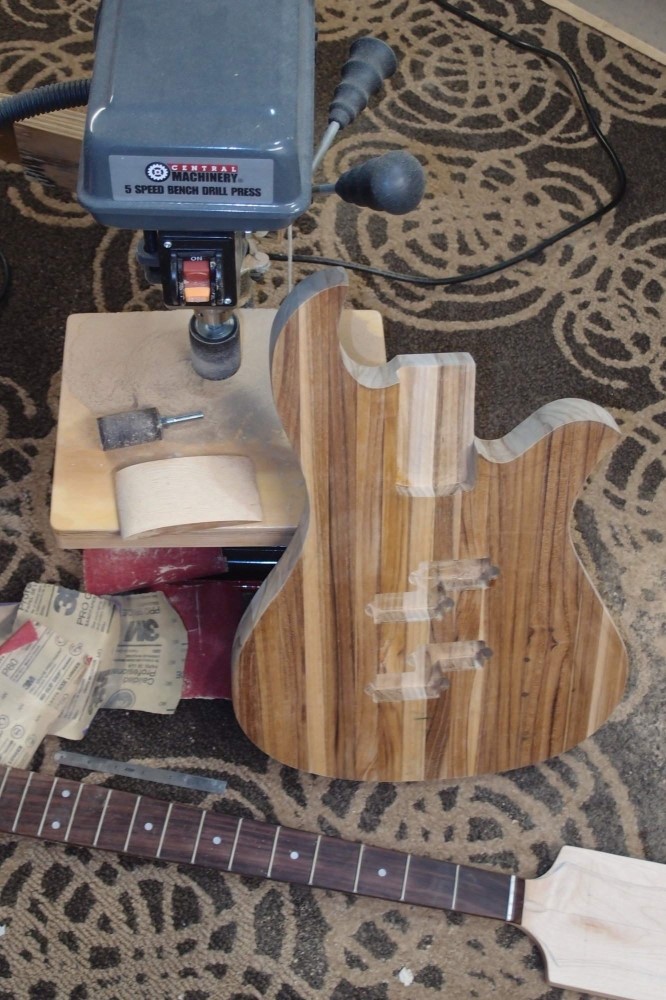
A few minutes with the bandsaw, and now this is really starting to look like something. This is the little Skil bandsaw I mentioned, cleaner than it has been in years. You can get one of these for well under $100. Get some spare blades too - these things can be a pain in the @ss sometimes. However, compared to the scroll saw, the bandsaw made a nice straight perpendicular cut, and it did it about 10 times as fast. That is because the bandsaw blade is constantly cutting, while the reciprocating scrollsaw blade makes a stroke, then has to reload, like a jigsaw. The bandsaw blade is also much bigger and more aggressive. You can get very thin bandsaw blades for tight curves, but they break too easily for me, so I stick to a 1/4". Next up, I'm going to continue cheating with the spindle sander. Like I said, I did my part for science - I did the whole lower edge with little more than hand tools, but I want things to move along now.
Note how I have taped off two edges of the saw's table to avoid marring the workpiece. All four edges were taped off when I was cutting. Don't leave the tape on though - it makes a mess. I like Skil tools when I am buying cheap ( can't have DeWalt everything! ) Skil is owned by Bosch, and the quality trickles down. Ryobi tools are good for light use too. Harbor Freight's power tools have a bad way of self-destructing in my experience. My scroll saw is a tired old Craftsman that I paid $20 for many years ago. It is from an era when Craftsman tools were top-notch; now they are just re-branded Ryobi ( which isn't necessarily bad. )
The scroll saw has one big advantage over the bandsaw: you can drill a hole in a piece, thread the blade through and hook it up, and make completely enclosed cuts. That's obviously impossible with a bandsaw. The templates below were roughed-out on the scroll saw this way. I will usually resort to a hand-held jigsaw rather than the scroll saw for anything thick. The best use for a scroll saw is pickguards and other thin materials, where you want really fine control. A bandsaw will rip through pickguard plastic like it's not there, and that kind of speed can lead to mistakes. Likewise, using a jigsaw on floppy plastic can be difficult.
Since I've been inserting safety tips in this thread, here's another one: it is pretty hard to hurt yourself very badly with a scroll saw, it just doesn't cut that hard. But you can easily saw halfway through a finger with the bandsaw before you even realize it. So be careful, kids !!!
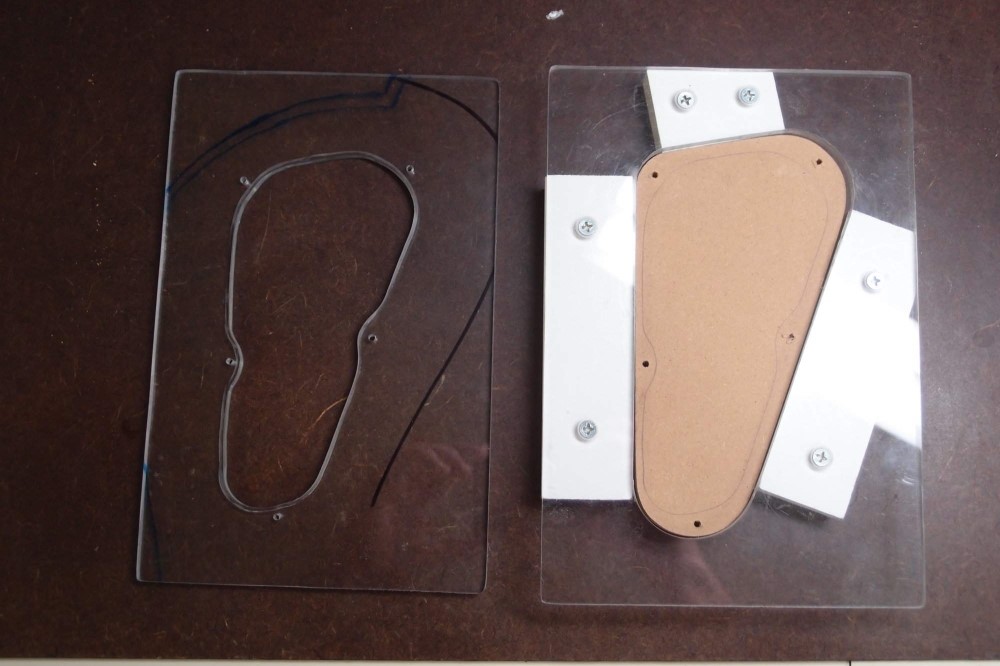
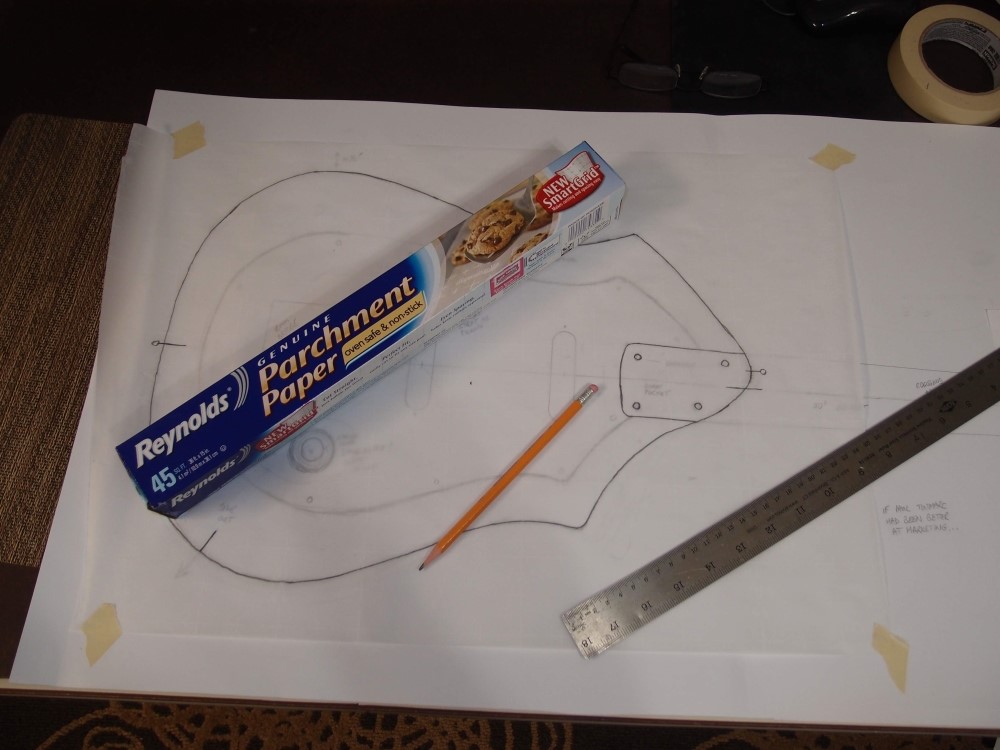
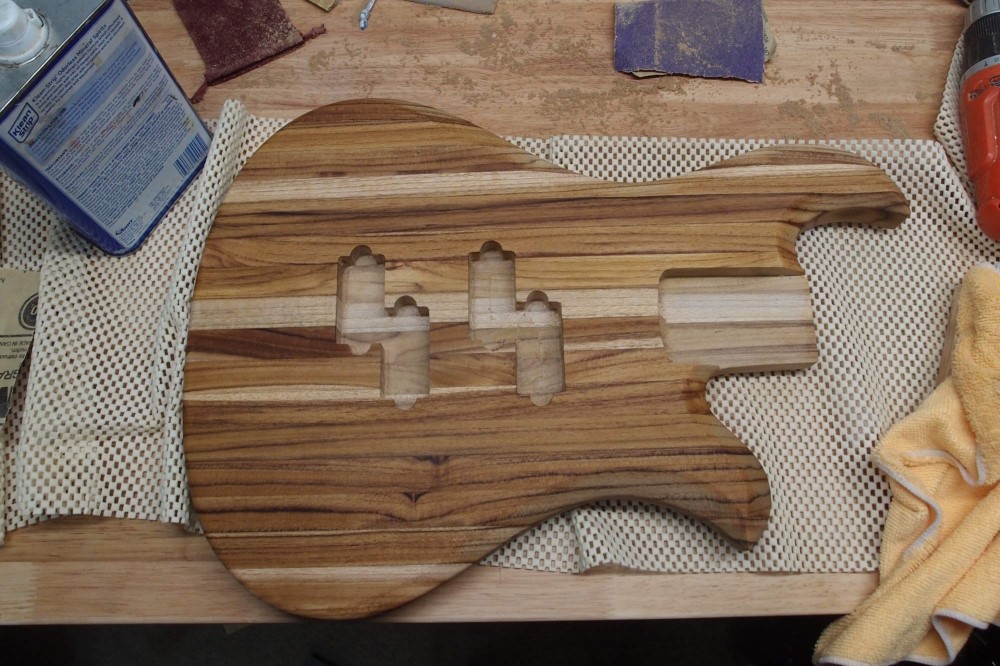
Here is my control cavity template set. On the left is the cavity itself. On the right is the outline for the cover shelf, with stand-off blocks. Without those, it would be impossible to get a bearing on the template for that very shallow route. Inside the outline template is the template for the cover itself, made of MDF. I made these all myself, but honestly, just buy them from StewMac. They don't sell the cover template because they want to sell you pre-made covers, but you can buy one of those and use it as a tracing template. Then cut out the cover with just about anything, and finish it with a file - pickguard material is very easy to work with, you don't need a router, although sometimes that can save time. I've made entire pickguards with just hand tools. StewMac also sells this nice clear template material if you want to make your own.
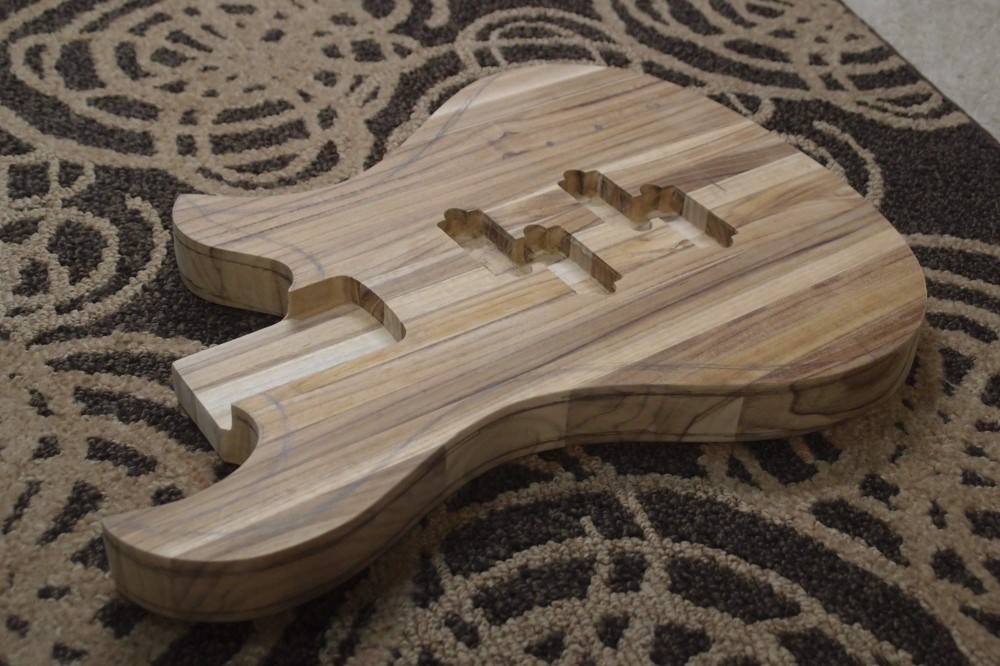
For this project, I poked through my parchment tracing and marked the control locations on the wood. I've decided to duplicate all the major controls on my original photo except the chickenhead "VariTone". What is the point of that, with active bass and treble? And it's ugly, I never liked chickenhead knobs. I'll have two small silver switches as well, and as always, a pull on the volume knob that disables/bypasses the active electronics.
With all the control locations marked on the front, I took the cavity template and started jockeying it around to make them all fit. There are other considerations as well, like staying away from the body edge. Finally, I flipped it over, and that was the best fit. So I drew the body outlines on the template with a Sharpie, flipped the body over, aligned the template to the back, and traced it out. Those are the blue lines in the picture. This means I will have to pull the standoffs from my cover outline template and re-install them on the other side. No big deal, and makes it that much more versatile.
Sharpie erases from plastic with rubbing alcohol. Or drinking alcohol. I guess what you have depends on whether you are a luthier or a musician.
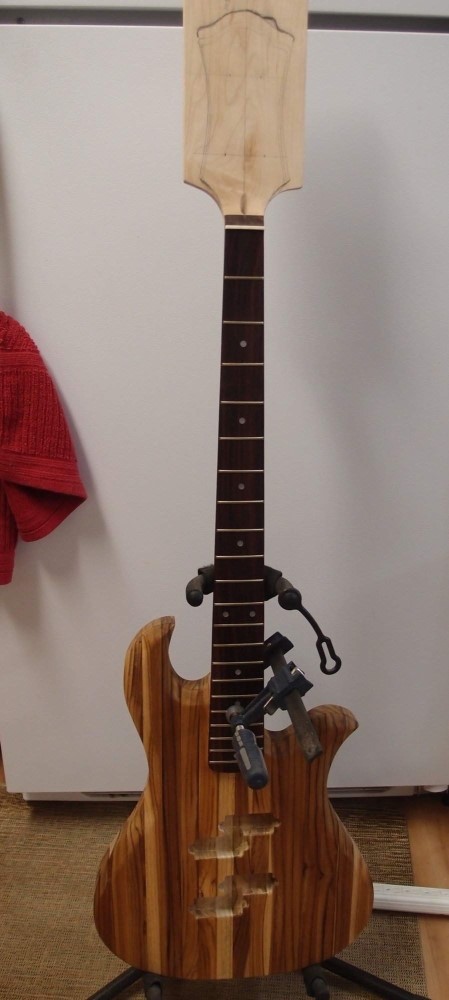
When I am all done making sawdust, this body should weigh about 5 pounds - light for a bass, but should balance out nicely with the 32" neck. Not enough pictures in this post. Here's one more:
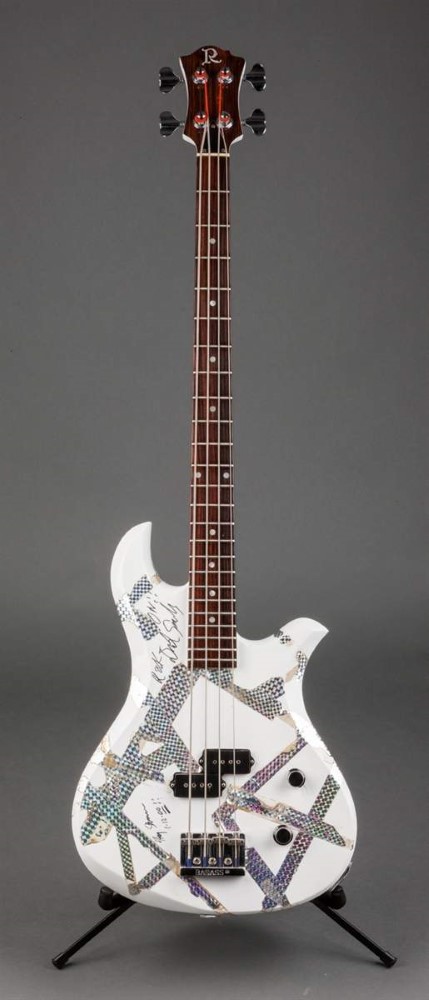
This is Derek Small's actual bass, on which he composed his legendary "Jazz Odyssey". It is stuck on a wall at a Hard Rock somewhere. Now I want to eat.
For Science!
I've done all the outer body contours, without the spindle sander. I did the outside curves on the belt sander as before, and the inside curves with sanding drums, on the drill press this time. Doing the inside curves on the belt sander was not as practical as I had hoped. Instead of my belt sander, you could do all this on an inexpensive bench-top belt sander. At any rate, while the spindle sander is the best tool for the job, you certainly do without it.
I am shocked how well these little sanding drums work, even on tough hard wood like teak. I'm sure they'd work even better on mush like alder or basswood. You want to use the largest drum you can at any point, that will minimize the bobbles. The key to any power sanding is to have a light touch and always keep moving. Any time you stop, you are going to grind in a problem. You can find these drum sanding kits on eBay's, or StewMac's.
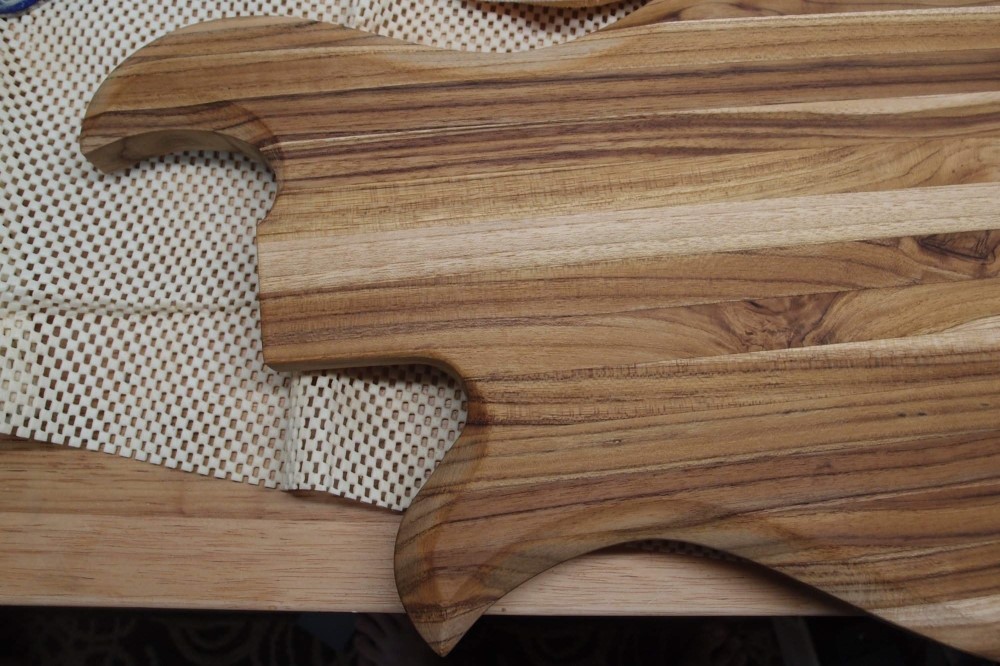
Everything has been sanded in to the line, which is actually outside the tracing, so I have a little extra if I need it. I used that on the tops of the upper bout and horn, where there were small islands of the next strip of wood that were unattractive. I sanded them off, then re-contoured around the flat spots. The inside of the horns appears to be a 1-1/2" circle - gee, exactly like my biggest drum! Do you think that is an accident? As you build different designs, you'll find that many of the curves on them are exactly the same as common tooling, both necks and bodies. This is especially true of Fender designs - ol' Leo was a very practical guy.
For final contouring, I went back to my sanding block and 80-grit. You want to feel around the edge of the body with your hands, and anywhere you feel a flat or a bump, you need to sand. Sand next to flats, and right on bumps, using either a flat or curved block as necessary. The straight edges of the neck pocket were roughed-in with the biggest drum, then finished with the sanding block. I went through a lot of sandpaper on this tough wood, but I am completely satisfied with the results, and I am my own worst critic. I am also surprised how well I kept the sides perpendicular, working by hand. I thought, in the end, I would kiss them straight with the spindle, but there really is no need. I just touched the inner sides of the neck pocket with a file, and they are perfect. One corner of the neck heel needed a little more work, again with the file. I took almost 2 tenths of a pound off the body, just sanding. See that big pile of dust on the table?
The drill press is the littlest one from Harbor Freight. ( Yes, I know I said bad things about them, but, knock wood, this piece has been pretty good. ) I have a better one back at the workshop, surprise, a Skil, cheap, but good enough. This junior-sized drill press has been quite a pleasant surprise, it can do 90% of what the bigger one does, and is compact and easy to move around. I also use it as a fret press, with StewMac's fret arbors and a soup can under the table for support. I added the wooden table-top, and made a non-marring base for it so it doesn't mess up my nice workbench. I also made up a little fence that clamps to the shaft, you can't see it in the picture. Finally, that d@mn chuck key is never where you can find it, so put a leash on it !!! You can see the string hanging down from the handle. I got this press for under $50, and it has been a great investment.
I still need to do the final cavity routs, and the body chamfers and roundovers. I'm running out of things I can screw up. Working in teak is 'fun'. The only suitable wood that would be harder is maple; oak being a non-starter. Rickenbackers are made of maple, but I'm sure it is the soft western stuff, not the hard eastern species. This room is going to need a serious dusting when all this is done, and the vacuum cleaner is going to need some extra cleaning as well. But all for science !!!

Body Work
Here I've marked out for the chamfers. Nothing precise, just eyeballed some pencil lines on the wood to make the size and angle that it looks like in pictures.
First, cut with the belt sander. Almost exclusively using the front roller, there are few places to use the flat. As I said, the key is a light touch and constant motion. So far so good.
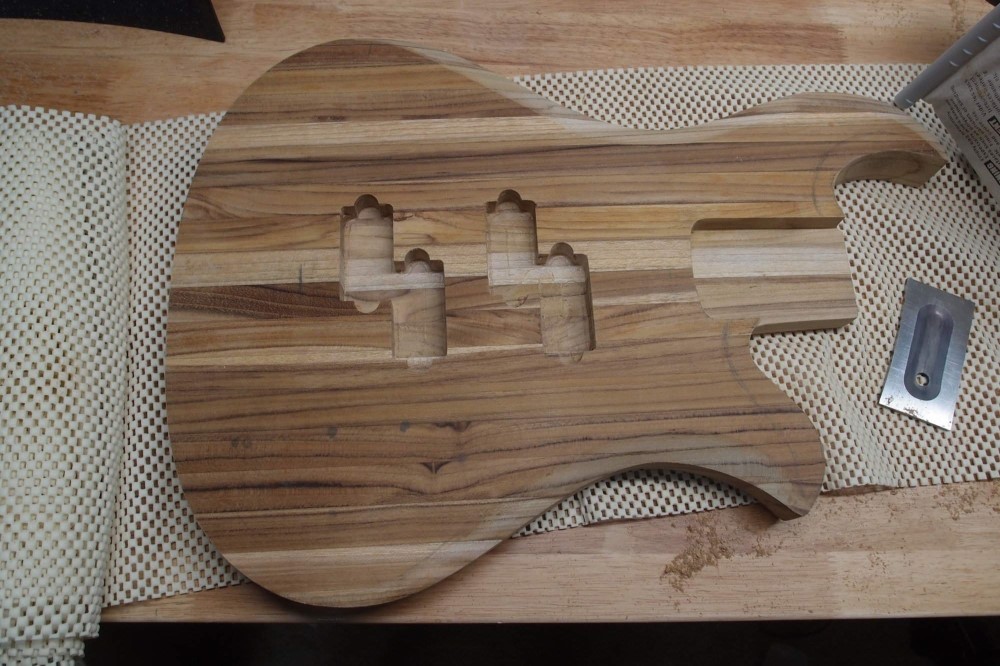
Here is the finished job. I gave it a quick sanding and wipe down with mineral spirits to see the color. I was able to use the belt sander to cut the corners on the horns, but no more. I used a 1-1/2" sanding drum on the drill to do the insides, and also to dress up any spots that needed it. I also hand-sanded some spots, and tried scrapers, but the teak took the edge right off them, now I have to sharpen the lot. The sanding belt and drums were new when I started, and now feel distinctly tired, and I'm filling a trash can with 80-grit sandpaper. No wonder the big three don't use teak ! On the plus side, it does not pick up dents and dings and tool marks like softer woods.
The belt sander blocks your view of what you are doing, so you want to check often. The drill/drum was much more pleasant to use, but a lot slower. With both, you need to hold the right angle. When I was done, I had hit my marks pretty much everywhere. I'm sure this is exactly how they did it all those years ago in Bernie Rico's garage. Cutting these chamfers is a lot more work than simply running a roundover bit around the edges and calling it a day like Fender. Speaking of which, I didn't have a roundover bit handy to do the non-chamfered body edges, so I just faked a 1/4" roundover by sanding a consistent 45-degree bevel around the edge and then taking the corners off it.
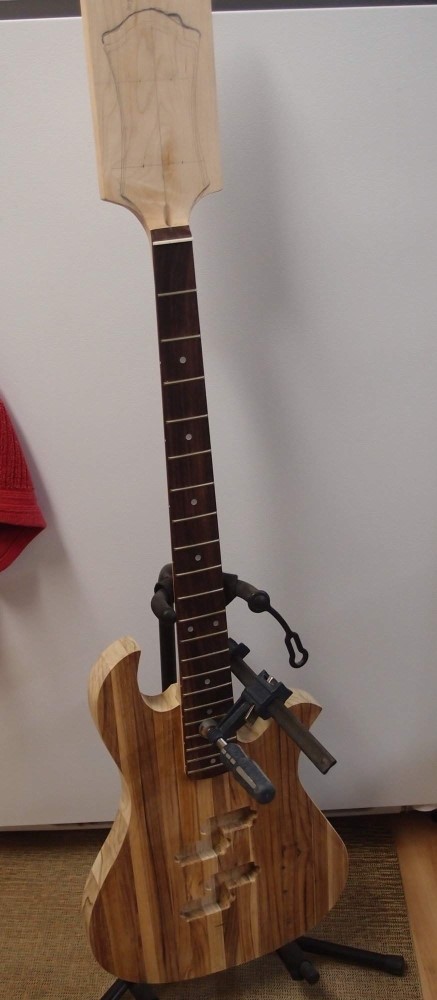
Here is a detail of the back. A real BC Rich is of course completely different, neck-through. I had to bring the chamfers into the tight radius of the neck tongue, so I just let them peter out. The radius on the back edges of the neck mounting is about 1/8", standard Fender. Look at the corners on the horns. Dog will hunt !!! **
Today I made about half a pound of sawdust.
** I've moonlighted as a carpenter, and that is what one of my clients exclaimed when he saw my work.
Can't Leave it Alone: Part II
I jumped the gun and put a coat of "natural" stain on it, and this is the result. A trick I've found is to put this same stain on a rosewood fretboard, and it will have that freshly-oiled look forever. Or use linseed oil instead of lemon oil, it will last much longer.
I've also cleaned up the horns a bit with a file. I can see from this that for this finish I don't need to sand it much, I'll probably go up to 120 and quit. I've done a lot of oiled-wood furniture, where the entire finish is 80-grit belt sander scratches. Do it right, it comes out very nice, and is very easy to maintain and repair.
Up to this point, I could have done all this with:
- coping saw ( or jigsaw )
- router, template bit & templates
- drill, forstner bits & sanding drums
- dremel
- belt sander
- files, sandpaper, etc
- vacuum cleaner !!!
I actually cheated and used a band saw for part of it. It would have taken forever to cut out the outline by hand. Where I also used a drill press so far, the drill would have sufficed. There is no getting around needing a router and belt sander, you simply couldn't do all this sanding by hand. The neck will not require any tool that I haven't already used. I will have some soldering to do as well. So this makes up a working minimum set of tools and skills to build a solid-body guitar using a bought neck. An investment in better tools, ie. spindle sander, band saw, drill press, will certainly speed up the job, but with care and patience, it is possible to do without.
Here's a tool you don't want to use: any kind of sander that has a rotary or 'orbital' action. You can use them for roughing-out, but they leave behind unsightly little circular scratches that you will have to remove by hand. That can be a lot of extra work. Sanding should always be done along the grain whenever possible, including belt sanding, especially belt sanding.
The body is just over 5 pounds right now. It will go under when I get the remaining cavities done. And when I tap this body, it really rings. A surprising tone, quite unlike softer 'tonewoods'. This thing is going to be really spanky, unplugged. Of course, once you hook up an amp, that doesn't matter. I've made bodies out of alder, ash, poplar, pine, walnut, and plywood, and I have to say, despite the difficulties, I really like this wood. If I ever get another piece, I will do it again. This will also be the most rot-resistant guitar I've ever made.