Osprey Bass (BC Rich Eagle) (7/10)
Oct 14, 2017
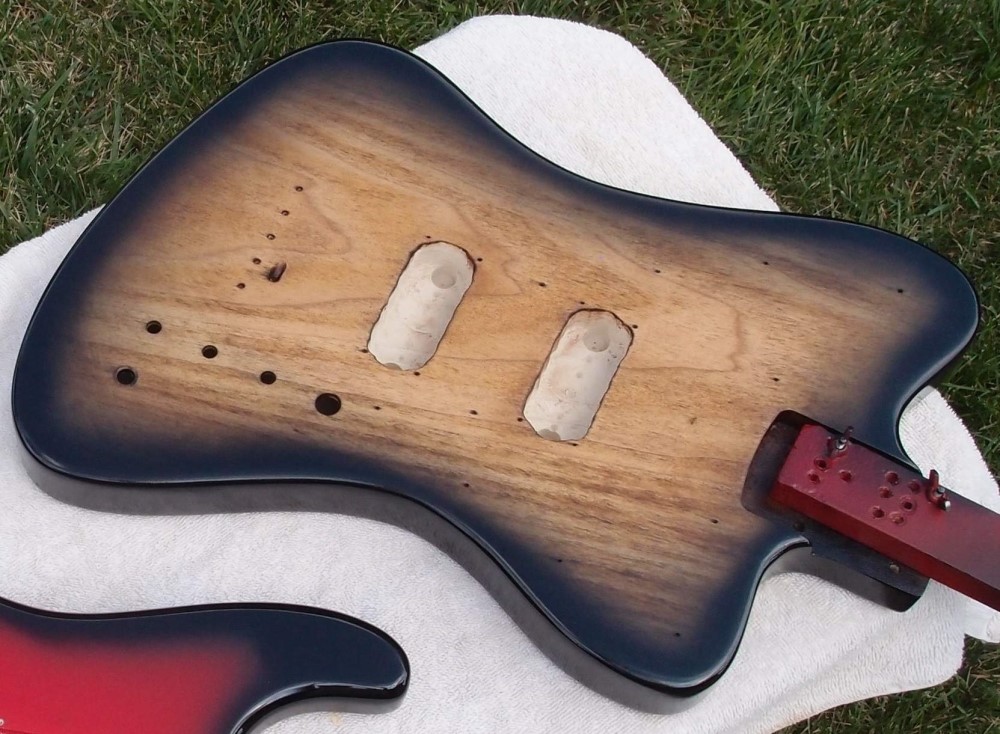
It's been long enough since the 11th coat, it is just a tiny bit tacky. All those thick coats of oil had collected a lot of dust and nits, and were pretty rough for a guitar ( although I don't mind that finish on dog-tough furniture. ) So I sanded it down with 320 and a green ScotchBright pad to a nice overall dull and smooth. You can see in the picture, the area between the pickups is not yet sanded.
A happy discovery is that the oil has largely filled the open grain, without any special effort on my part, but I expect as it dries and shrinks, the grain will become more pronounced. I don't really care how that turns out, this is supposed to be a bare-wood finish, not a mirror polish. I wouldn't care to try a poly finish over teak, in the long run, it might not adhere. That seems to be the consensus online too.
So far I like it. I brushed it as clean as I could and wiped it down with a cloth dampened with alcohol. Then I applied several 12th coats, very thin with a lot of rubbing. Looks great, but the wet oil always does. I think maybe a few more coats like that, and I'll call it quits. If you're getting the impression that I am making this up as I go along, you'd be right.
The one thing I'm not doing is rub-on rub-off like it says on the can. Here's to the marketing guy who thought of that - way to sell oil !!!
Oct 17, 2017

I decided I still didn't like the finish I had, so I tried something else. With a piece of 100 sandpaper, I gently scratched over the whole body, always along the grain. The object is not to remove the finish, just to lightly scratch it up. Then I softened the scratches with a ScotchBright pad, and rubbed on two coats of linseed oil. After drying overnight, I buffed off any remaining oil with a clean cloth and ended up with a finish that is all but invisible. It looks like bare wood, with just a slight sheen, but is actually completely waterproof. Right now it is still pretty soft, but the varnish will harden over the next few weeks. So finally that is done.

I've installed the neck pickup, with the wires passed through into the bridge pickup cavity, and from there to the control cavity. On both pickups, I cut the wire between the coils and spliced on color-coded extensions. I pre-drilled the mounting holes with 1/16", and shortened the mounting screws a bit; the screws are 1-1/2" and so is the body, don't want them poking through!
These long thin screws are a bit delicate, so I drove them in and backed them out to pre-cut the threads before installing the pickups. To find an existing thread when starting a screw, gently turn it backwards until it hops. That is the thread, now start driving.
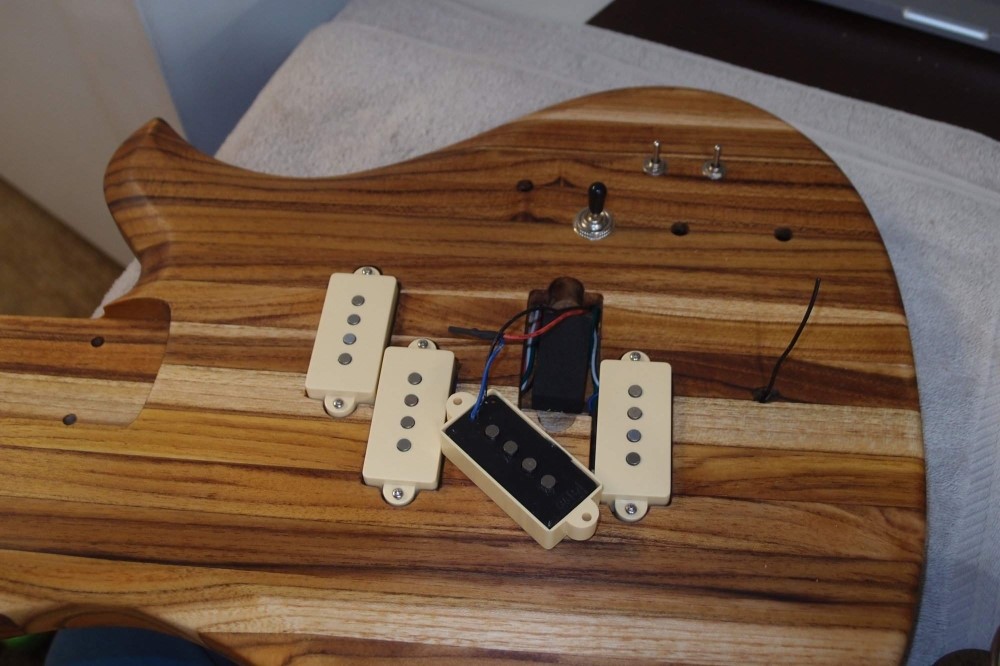
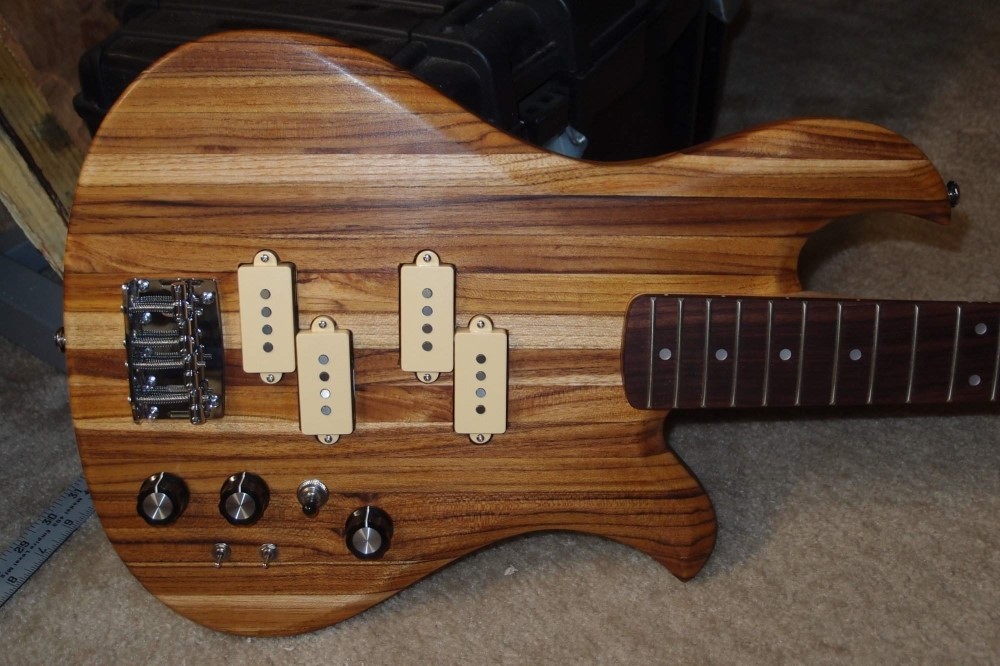
The last pickup coil is going in. You can see each pickup's wiring goes through a separate hole. This will make things easier on the other side. You can also see the bridge ground, which goes through the same hole.
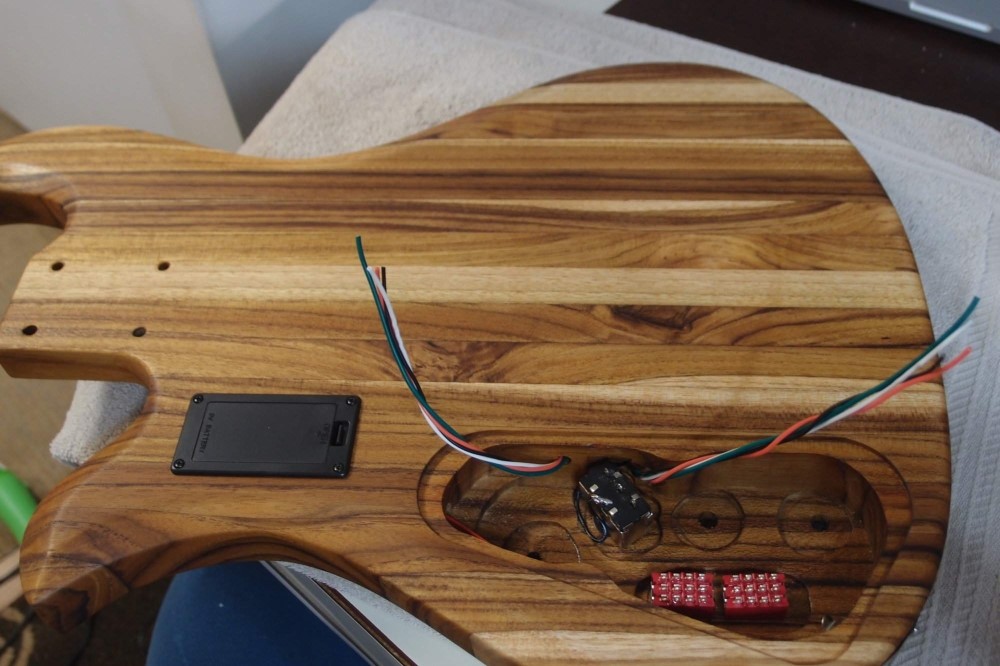
The other side, with the wire bundles separated. Black and white are the stock wires, red is the new hot for one coil and green is the new ground for the other. You can see the pickup selector switch, and the two mode switches that are the reason for the pickup mods. Each of the red switches is actually 4 switches on one handle, or '4pdt'. The battery box is also in.
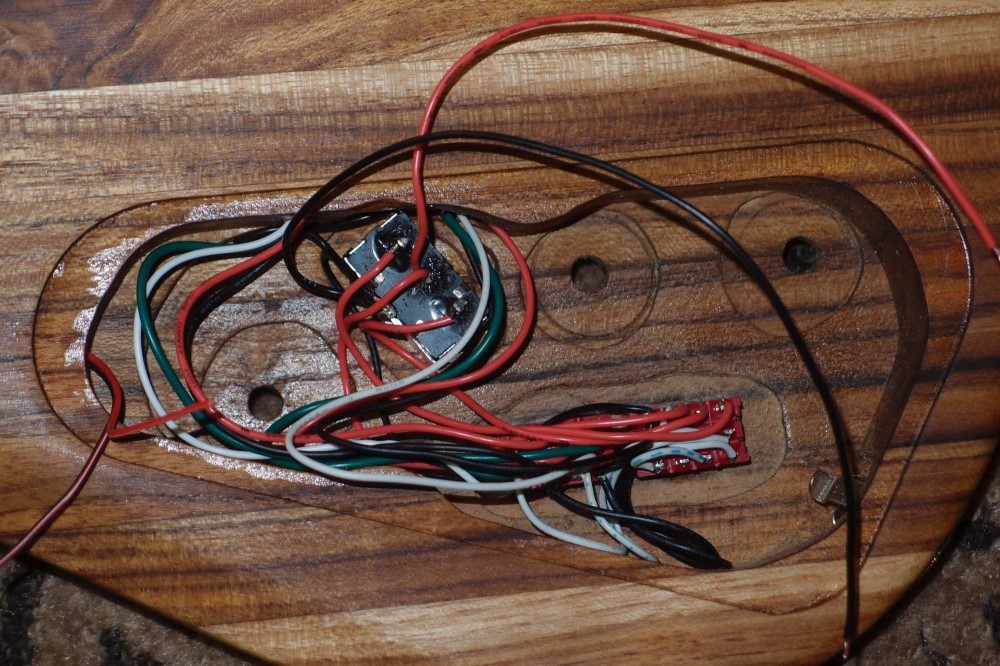
Now it's becoming a real rat's nest. One of the mode switches is 'skinny' - it selects the pickups' internal mode, series (default) or parallel. On a real Eagle, this is handled by two switches, one for each pickup, but I had these switches so I used them. Also, switching just one pickup into parallel will cause it to be swamped by the other one, there's not much point in having them separate, and this gives a neater control setup.
The other mode switch is 'fat'. The fat switch selects the pickups' external wiring - parallel (default) or series. A real Eagle has a phase switch instead, which is silly on a bass. Half of the fat switch is used as a selector: In parallel mode, the pickups' outputs go directly to the selector switch ends. In series mode, the outputs go to the other half of the switch, which is again wired as a series/parallel switch. The single output of this goes to the center of the selector switch. Thus when series mode is selected, the selector switch is bypassed. Otherwise, you'd have to center the selector before switching to series.
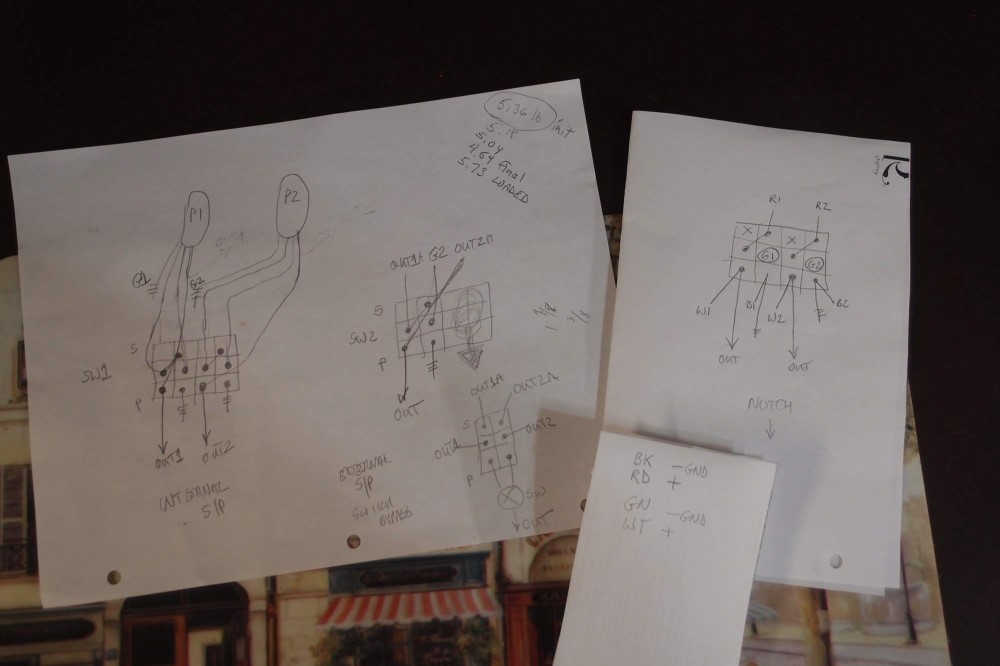
Here are some notes and diagrams I drew up. I later reversed the positions of the fat and skinny switches, so don't bother trying to trace the wiring. One reason it is such a mess is that I have not shortened any of the wires. That's a good thing to do in a factory setting, but it can make it difficult to make changes and repairs down the road.
I have largely duplicated the control layout of the original while improving on the functionality. I can do that because, unlike the big manufacturers, I am not stuck in a time warp where nothing ever changes.
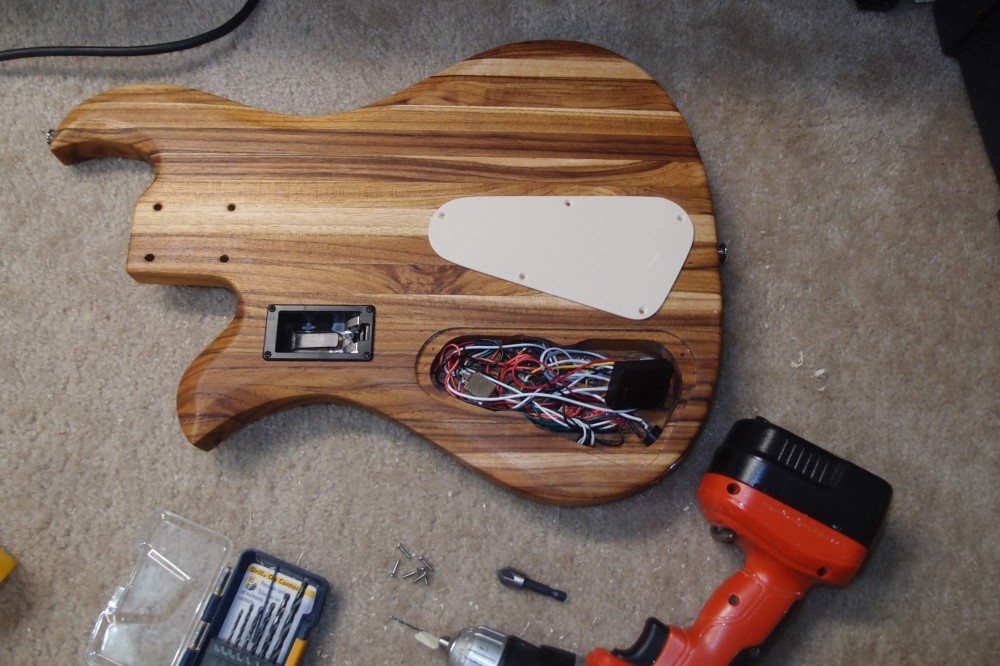
I've finished the whole mess with a two-band active tone control. A push/pull switch on the volume knob selects between the output of the active electronics (down) and straight out from the volume control (up). The up position also powers down the electronics. This way, I can pull the volume knob and play without a battery. I can also shut off the electronics without disconnecting the cord. Note the interior of the battery box.
I've made a control cover from a piece of scrap plastic. I have a lot of this material from a bathroom remodel, and I want to see how suitable it might be for pickguards and such. I traced the template onto the material and actually cut out a rough outline with a pair of scissors. I whittled a bit more with the scissors and then switched to the belt sander, which was used very judiciously. When I was close, I started using the sander as a stationary sanding block. Finally, I cleaned up the edges with a file, marked the spots for the screws, and drilled them.
The screws are #4 1/2" oval-head stainless steel. I get these by the box from the marine supplies store. They are the same size as Fenders, and the stainless looks a lot like nickel, but will never tarnish. You can see the countersink for the screws on the carpet. I started the countersinks with the drill and finished them in the soft plastic by turning the countersink between thumb and fingers until the screw head fits flush.
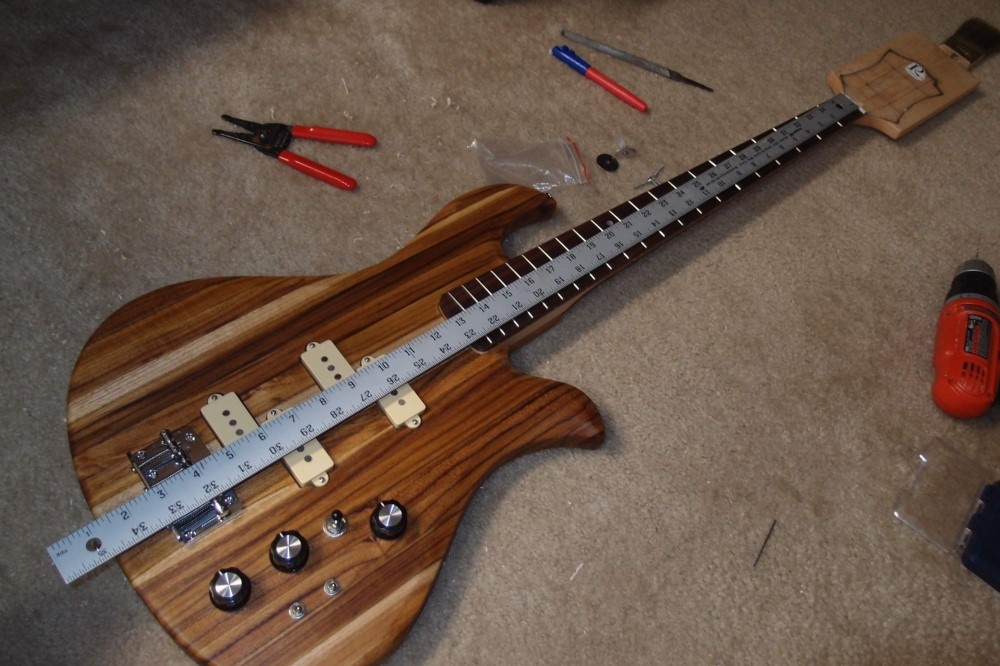
Now it's time to lay out the bridge. I set the neck in the pocket, adjusted the G-saddle to where it should be, and laid it down just a smidgen over 32" from the nut. The G string requires practically no compensation, so it is the best one to measure. I marked the screw hole on the centerline and pre-drilled it. The bridge ground wire was stripped and fanned out across the wood, and then I set the bridge down snug with the one screw. When I was happy with the alignment, I tightened it down good, and drilled and installed the two front corner screws, and then the rest. Teak is naturally lubricated and screws go right in. On most hardwoods, it is a good idea to 'soap' screws before installing them for the first time.
The bridge is my last good Gotoh. This is a nice heavy piece of steel, hopefully, it will counterweight the neck. In any case, my 21-fret 32" neck is going to balance better than the 24-fret 34" neck on the real thing. I like these Gotoh bridges the best of any Fender-style bridge, including the Badass. They are top-loading, with two extra screws at the front corners, grooves to keep the saddles in place, and super-heavy chrome plating. And they are not terribly expensive. I always liked these big shiny radio knobs, so it is nice to get to use three of them on a project. I've made such a mess of my usual workstation that I have had to move to another part of the floor.
The all-up weight is going to be about 9 pounds. Not light, but not too bad. The 'skinny' switch is toward the bridge. When you flip it up, the pickups switch internally to parallel mode - a much thinner, Jazz-like sound. The 'fat' switch is toward the neck. When you flip it up, it puts the pickups in series rather than the standard parallel. This makes a Jazz bass sound like a Precision. I'm almost afraid to find out what it will do with two Precision pickups. If you use both switches together, they defeat each other, at least that's what the multimeter says. Each pickup is roughly 10k, and with all the switching options, I can get anything from 1.2k to over 20k. Plugging this thing in for the first time is going to be interesting.
Note to first-time builders: don't try this wiring at home !!! My original plan was a simple passive volume-tone setup, but as usual, I had to make things hard for myself and complicated it beyond all reason.
If you count them individually, there are 12 switches including the jack, which is used as a power switch. ( The original wiring used 9 switches. ) I have substituted active bass and treble controls for the archaic Varitone control ( the chickenhead knob. ) I recreated the coil switching options of the original and replaced the useless phase switch with a series/parallel switch. Although my design shows 2 fewer controls, it actually has far greater functionality. The original was actually semi-active, you could play it just fine it without the active electronics, and I have retained that as well.
The only thing left now is the neck.