Danelectro Pro-1 Bass (4/7)
Sep 15, 2019
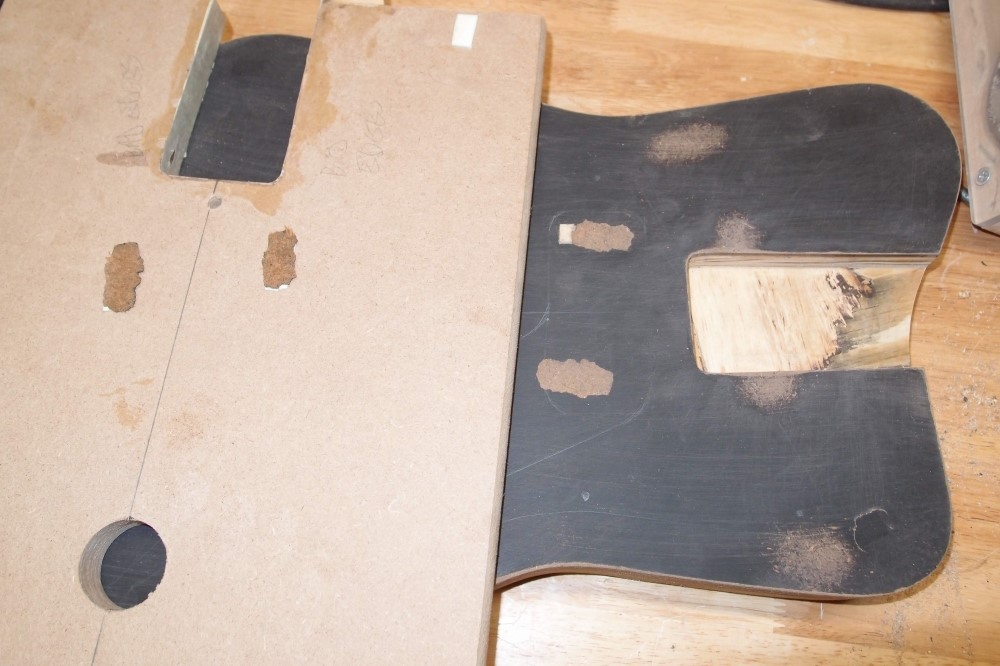
My worry about the tape pulling up the material is confirmed. The worst damage is where the control opening will be cut away, but there is also a damaged spot on the lower 'horn', despite my precaution of using masking tape there. This is not the norm for building with masonite. New masonite is as hard as metal and as smooth as plastic, incredibly flat, with very little porosity. It is very easy to work with. If you don't mar it up, it is very easy to finish as well.
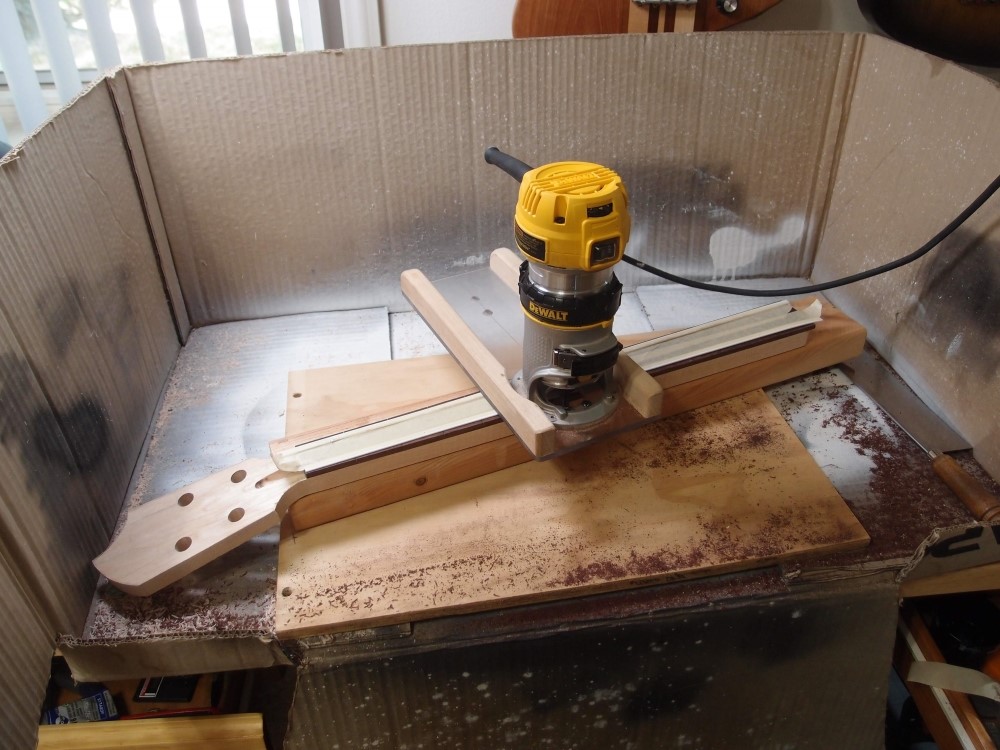
This old piece of masonite has really bit me in the @$$. You can see I sanded all the crinkle off the faces to get them hard and smooth. That was a lot of extra work. I'm also sealing all the cut edges with Crazy Glue, to harden them. Harbor Freight sells Crazy Glue crazy cheap, most other places want an obscene amount of money for a tiny tube with about 2 cents worth of chemicals inside. I wish I hadn't been so determined to build this project from all-junk.
Oh, I finished the corners of the neck pocket and spent some time filing out the sides. The neck now drops in, nice and snug.

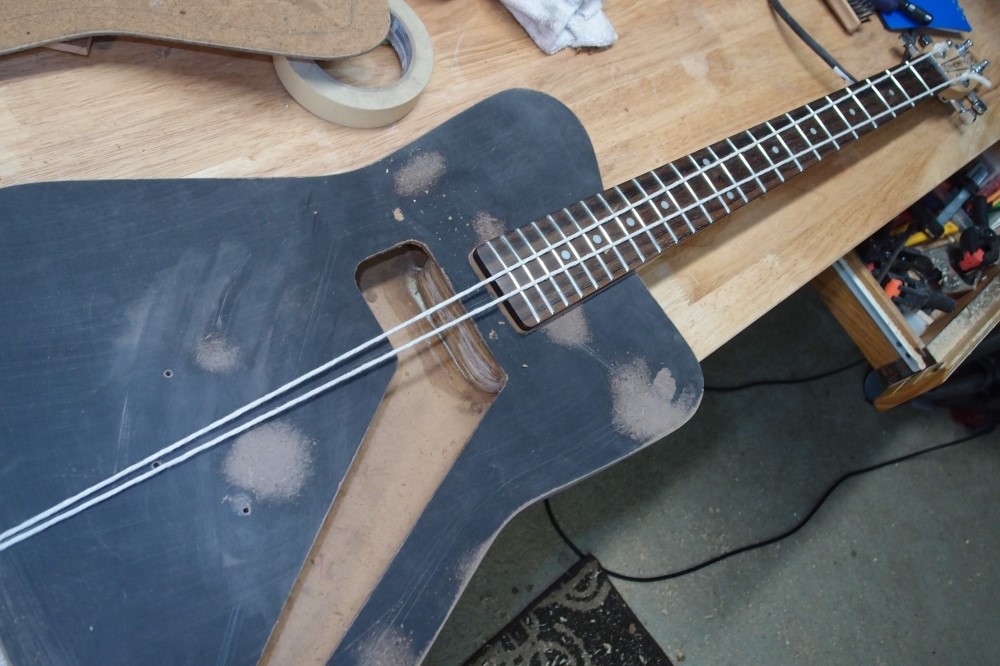
Here I'm doing the control opening. I drilled the corners with a 3/4" Forstner bit, then connected the holes with the hand saws. Finally, I smoothed everything with files, even though it will all be hidden, and sealed up the edges with wood glue. I also started to fix the pull-up on the horn, with, what else? Crazy Glue.
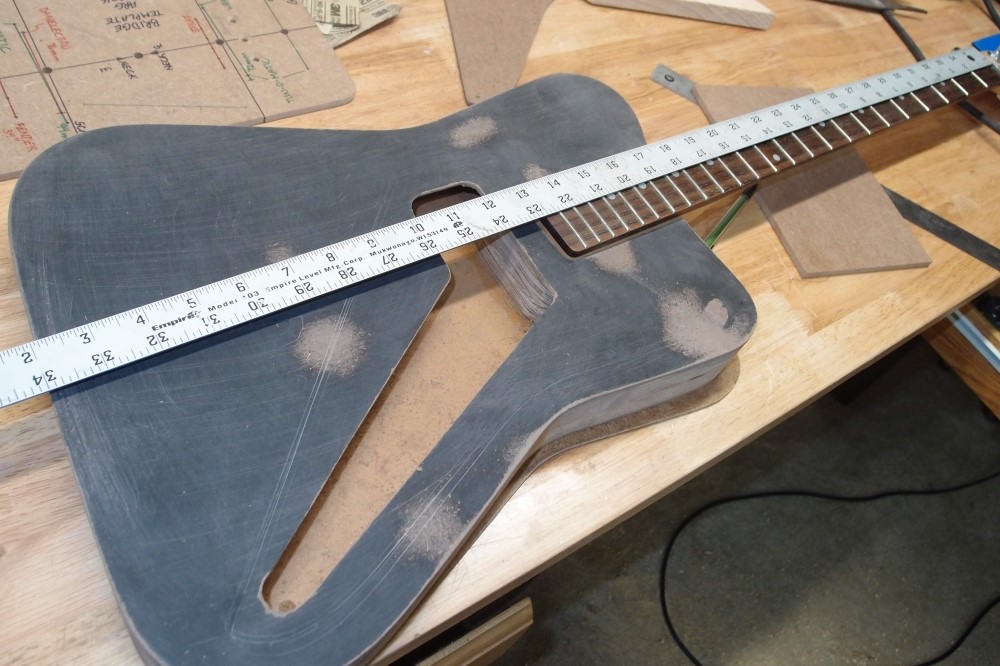
Establishing a new centerline off the neck. The centerline on the template no longer matters, the real centerline is this. The two agree within less than 1/16" at the end of the body. Pretty good precision on my part. There is no wiggle at all to this neck pocket, so I need to get the bridge set down very exactly.
You can see the pull-up spot on the horn is all done. From now on I will always only use new store-bought tone-masonite. It was my hope that the premature coat of polyurethane would soak into the material and harden it, and I think that worked, judging from the results I'm seeing from sanding. Take a look at that neck pocket - it is tight.
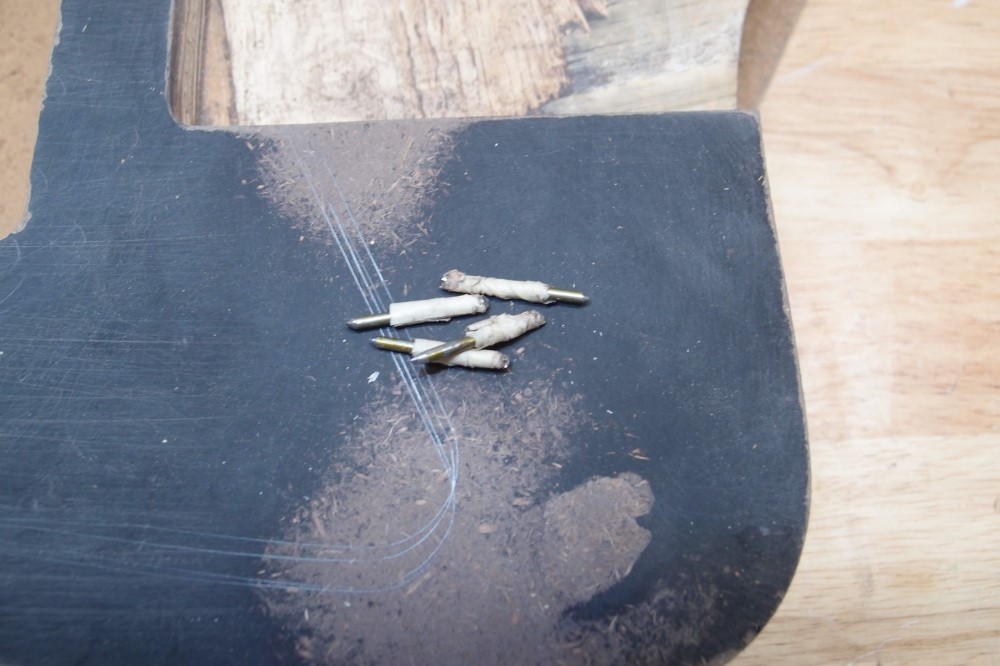
I don't want to drill new holes in the neck, so to transfer the locations to the body, I use these little pins. They are just sharpened bits of coat hanger wrapped in tape. Hey StewMac - copy these !!! Just think of the profit margin !!!
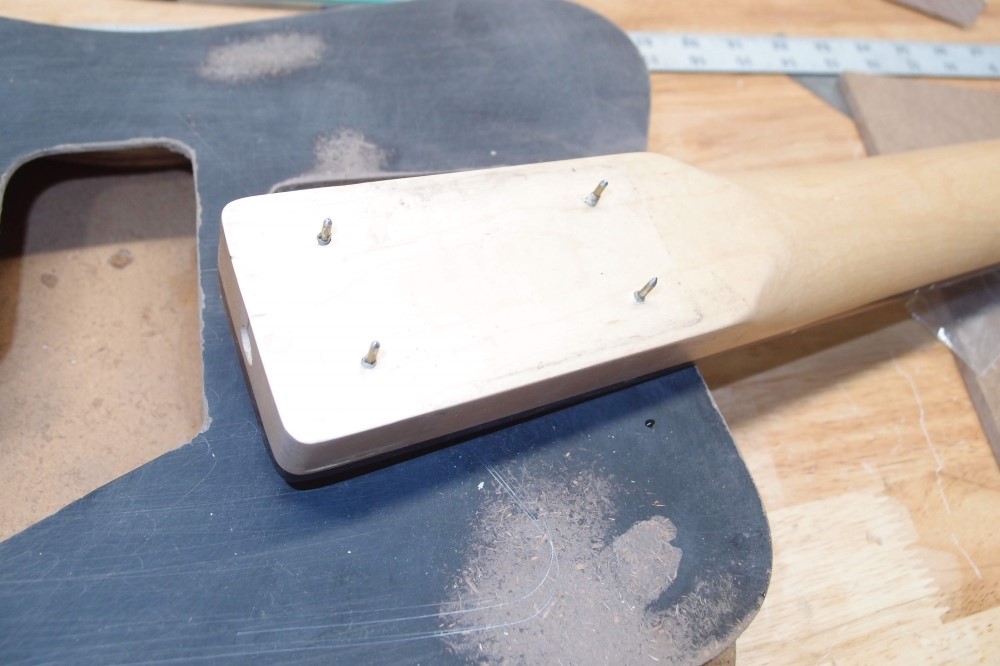
Put the pins in the holes, put the neck in the pocket, and press hard. Surprisingly accurate. I punched the marks deeper, and then drilled the holes through with a 1/8" bit on the drill press, to get them nice and straight.
With nice small 1/8" marker holes on the back, I drilled some recesses for the mounting screws with a 7/16" Forstner bit. I spun the bit by hand first to mark circles around the holes, then switched to the drill press. Finally, I drilled out the holes until the screws drop in. You don't want the neck screws binding in the body. The last step, again, was to harden off the cut surfaces with Crazy Glue.
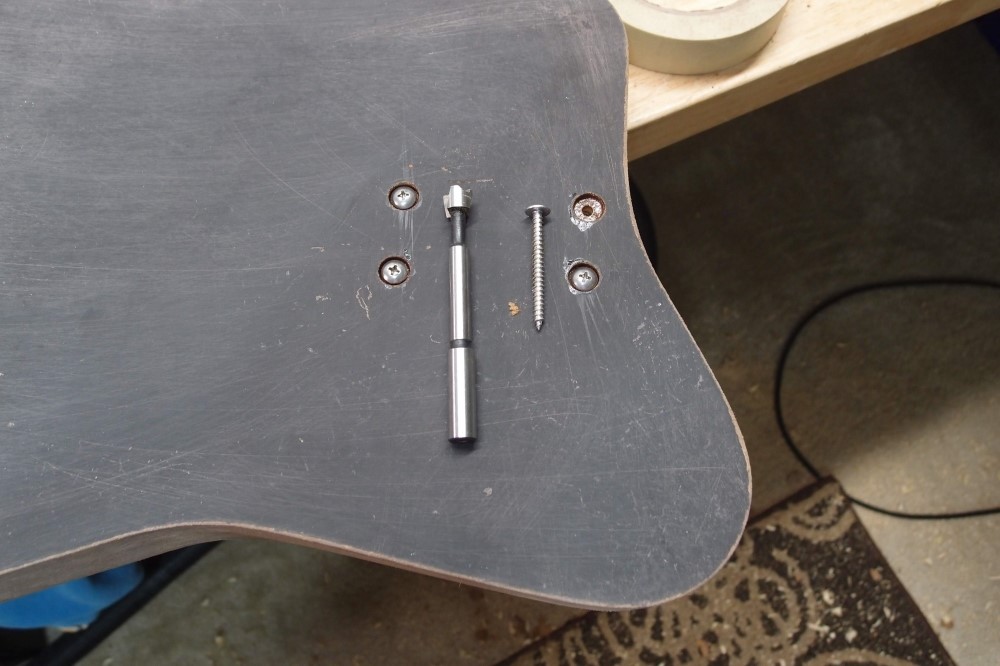
These screws are called 'truss head'. They are accurate to Danelectros, but a bit hard to get. These stainless ones are from BoltDepot.com - a great resource for all kinds of fasteners. Marine Supplies stores are also very useful. The last thing I will ever do is pay a dollar each for 'guitar' screws. Stainless steel looks remarkably like nickel, and will not turn black after a few years, or ever. The nice thing about truss head screws is that there is no need for washers or bushings or anything.
The reason for the recesses is that if the screws were flush with the body, they would probably crack the finish when you tighten them down. Also, it gives a nice smooth back that won't tear your delicate hands when you are soloing way up the neck ( which you can't do on this bass anyway. )
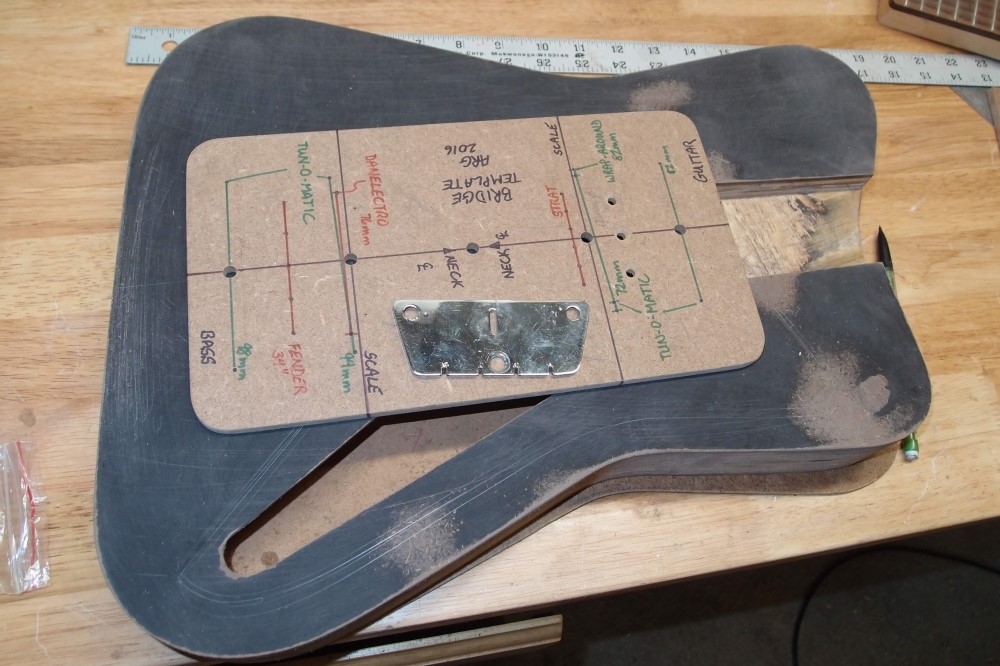
Installed the neck with two screws, and laying out the bridge holes with my bridge template. It has marks for every kind of bridge. You mark the scale along the centerline, line up the template with the sight holes, and pencil through. Perfect every time. Hey StewMac, really copy this !!! Do it in nice clear acrylic, laser-etched and all. You'll sell a pile of them.
There are only two holes marked for the Danelectro bridge, as the third one depends on the specific model of bridge. I lined it up on the two marked I had and spotted the third one from the actual hardware. This bridge is over 50 years old, you can tell by the notches.
These old bridges are much better material than the reissues, which have a bad tendency to collapse in the center after a short time. There is an easy fix for that though: take the wood saddle off and put a tiny shim under it in the center, so it sits straight again. I use masking tape on the back of the saddle. The bridge plates only collapse so far and then stop, so you fix it once and it's good forever. Of course, this opens a vigorous discussion of the tonal aspects of masking tape bridge shims, not to mention the impact on sustain. But please, do that somewhere else.
I drilled the bridge holes to 1/8", two on the drill press and the third by hand because the little drill press wouldn't reach it. I also drilled the angled hole for the ground wire and patched up the divot with sawdust and Crazy Glue, even though it will be under the bridge and never show. Here I am doing a final check with string, and it all looks good. It would not be too late now to catch a problem and fix it.

I have notched out the pickguard where the neck intrudes and then transferred the new centerline to it. I sketched in the cutout for the double-lipstick pickup. I think I will build that first before cutting the pickguard. I have a piece of aluminum that will make a nice double mounting plate. Actually, the 17th fret is clear, and the 18th is an easy reach - it's not as bad as I thought it would be; better than the guitar. In fact, I can reach up to the 21st fret on the G-string - not bad at all.
I put it on a scale, and it comes to about 7-1/4 pounds, so with hardware, it should be around 8, and pretty neck-divy, thanks to the lap curve being so far back, and the upper horn almost non-existent. This body was never meant to be a bass. I may glue half a pound of lead weights in the back corner. Leaving more wood back there doesn't help nearly as much as lead.
The only woodwork left on the body is to cut a nice 45-degree bevel around the edges. The bevel is truer to the old Danelectros than a round-over, and also works better with the binding. But I don't have the bevel bit handy, so that's all for now.