Danelectro Pro-1 Bass (5/7)
Sep 15, 2019
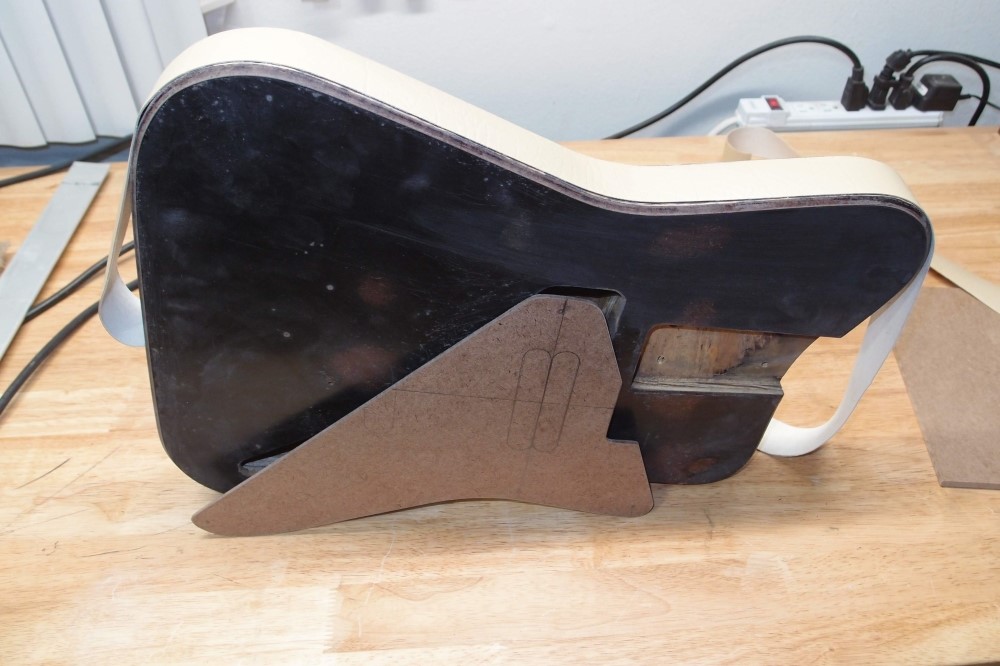
I cut the body bevels and treated the edge with Crazy Glue and sanded it smooth. A strip of Tolex laid on to see how it looks. Earlier I described where to get suitable material and how to cut it into strips. The only way to attach it that actually works is wood glue. Go figure - the cheapest and easiest thing you could use. You need to strip the finish from the sides, or not finish them in the first place.
I just used a tube of Crazy Glue like a magic marker, and let it soak in. Didn't even take a whole tube. The result is like hard plastic. So that's all the woodwork, and I've cleaned up an enormous mess. Time to put the blue one back together, and then I'm quitting.
9/16/2019
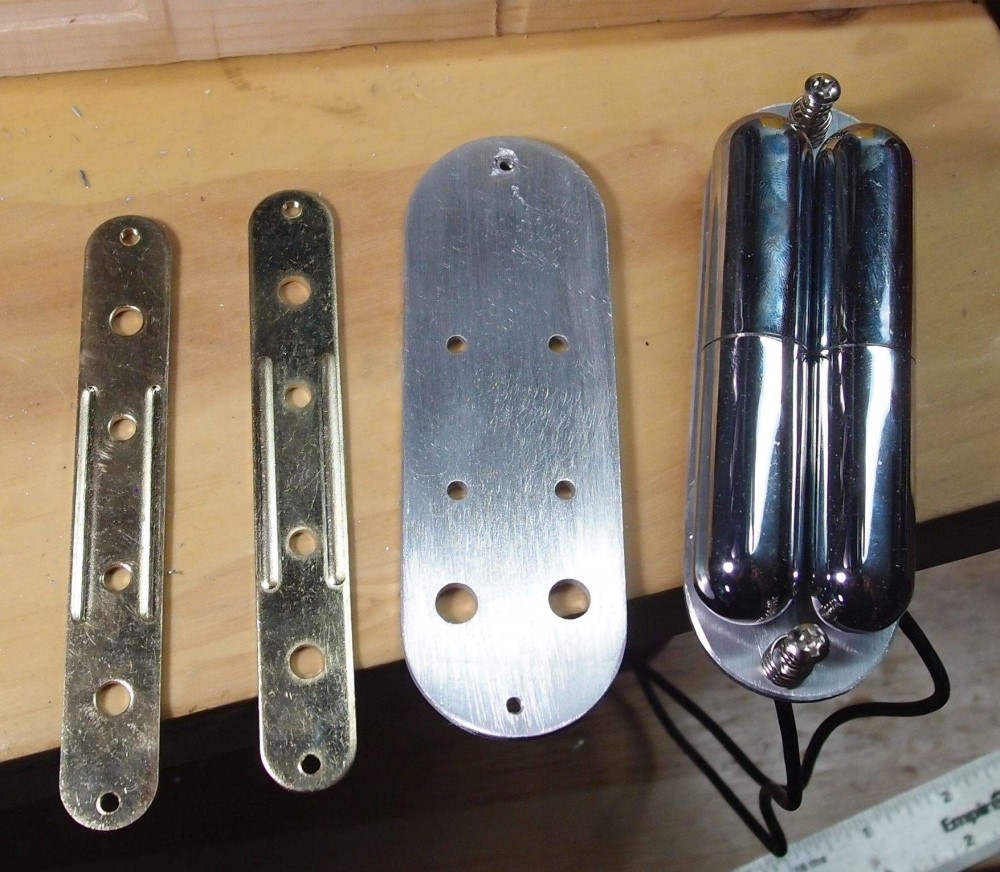
Just this today. On the left are the two original mounting plates. The mounting holes on the ends are some very rare thread, and naturally, these pickups came without mounting screws, and you can't get them anywhere. The normal thing to do is just ram a wood screw into the hole, letting it cut its own threads. This is not difficult at all, as these plates are soft brass.
In the center is my prototype double plate, in 1/8" aluminum, because that's what I had. Aluminum works a lot like wood, with the same tools, but it has one property that can really mess things up. Aluminum is 'sticky' - it will weld itself to saw blades, drill bits, and other cutters, gumming them up and often ruining them. I've thrown away more than one hacksaw blade with teeth completely filled with aluminum. Brass on the other hand is slick, and has no such problems.
For mounting screws, I reached into my little bin of Strat hardware. For Strat screws, a 3/32" hole is about right, and then drive the screw in, but oil the hole first. I had one screw seize-up and break off. I had to drill it out. It also helps to back out the screw and restart it if it starts to feel too tight. I decided to keep the prototype as a template, and made the second one in just a few minutes from it.
I cut the rough outline on the bandsaw with no problems, with the fairly coarse wood-cutting blade that was on it. I first tried the scroll saw, and the aluminum jumped right out of my hands on the upstroke. Final shaping was done on the belt sander. The holes for the pickup studs are 1/8", and the studs are long enough even though the aluminum plate is twice as thick as the original.
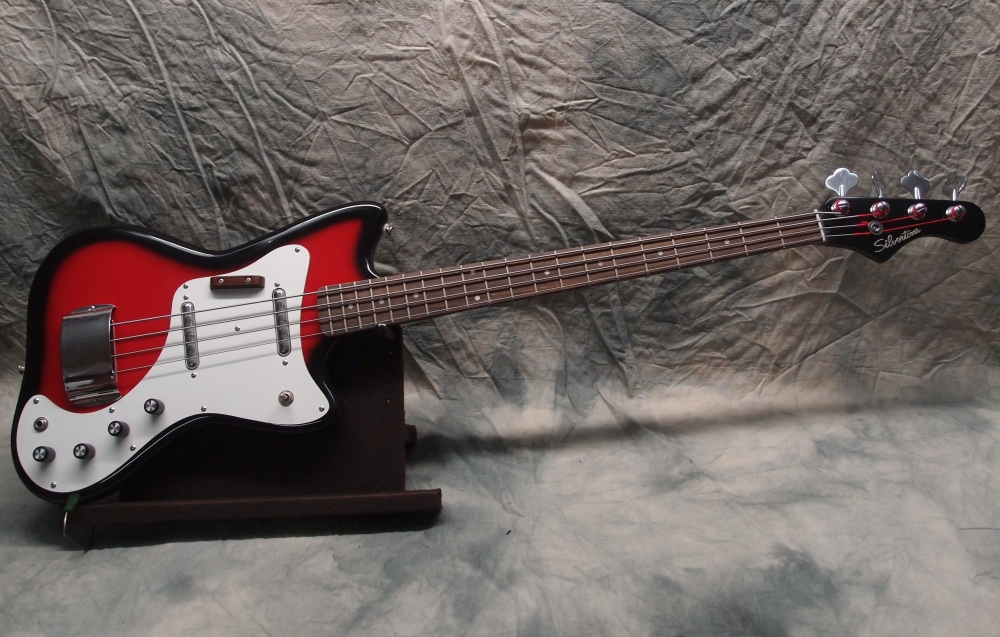
In the past, I have simply mounted two single lipsticks next to each other, but this is neater. Of course, you can buy double lipsticks - try GFS. But I had all these parts already, so this didn't cost a cent. These pickups are not RWRP, so not a true humbucker, but they are very quiet due to their shielding.
The pickups will be connected to an on-on-on switch, which will give series/parallel/single modes. This type of mode switching is the most powerful type of passive tone circuitry you can get. Phase switching is not a good option for two coils right next to each other, the cancellation will be almost complete. Phase switching on a bass is not a good option in general. You can inverse-phase two guitar pickups, pipe it through a mountain of distortion, and have it come out sounding pretty good - Brian May made a living out of it. But it just doesn't work on a bass, you end up with a tinny strangled sound. Might as well play guitar.
I love lipstick pickups. A guitar pickup is just a spool of wire wrapped around a magnet. I cannot comprehend how one spool of wire wrapped around a magnet can be $200 more than another spool of wire wrapped around a magnet. This construction also makes them perfect radio antennas, which is why they pick up so much noise. Danelectro solved this by actually shielding them. Lipsticks are pretty quiet. Being low-output single-coils, they are also nuanced in ways that a blaring humbucker never will be. Lipsticks work great on a guitar or a bass ( most guitar pickups work fine on a bass, there is a great deal of overlap in the frequency range. ) And finally, unless you think Seymour Duncan's spools of wire and magnets are somehow worth ten times anyone else's, lipsticks are inexpensive.
On a guitar with two lipsticks, they are typically wired in series. Together, they give a tone much like a humbucker. Individually, you get a Fender-like tone from the neck, and a Ric jangle from the bridge. On a bass, I think they sound remarkably like a Ric, but lower output. And they look cool - simply a genius piece of engineering.
Sep 21, 2018
Dry-Erase Pickguard
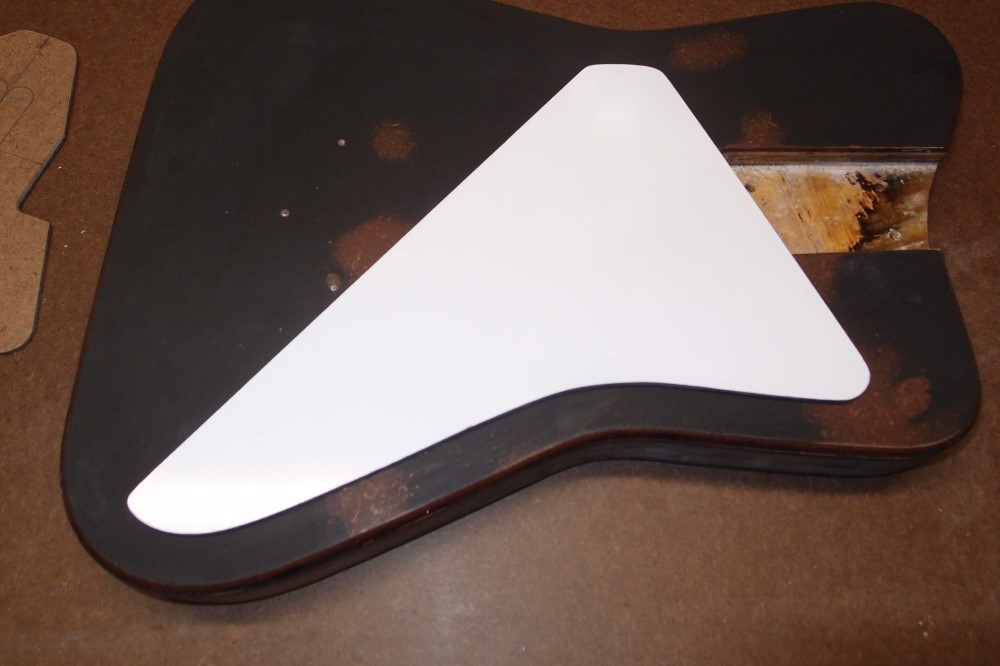
I made this pickguard from the dry-erase material I found at Lowes. The main problem with it is that you must do all your cutting and shaping without marring the surface. That's not easy. The white surface works easily, it does not chip around the edges when cutting or sanding. It seems to be very tough. I dulled it up with 1000 and then polished it back to a shine. It does have a graininess to it, from the underlying masonite. Also, if you get the masonite wet around the edges, it will swell permanently, which in this case will ruin the finish. Can you see the spot?
Oct 11, 2018

It sure is pretty when it's wet. Two coats of color, then two coats of clear. I re-coat as soon as the previous coat gets tacky. I'll let it dry, then flip it and do the back. The surface is almost dead level, so I spray it on heavy and let it flow out. This way the poly dries into a single layer. The sides don't matter, they will get binding. The surface was previously sanded to 320, and the poly is diluted with about 20% mineral spirits. The gun is now soaking in a jar of MS so it doesn't dry out before the second part of the job.

The pickguard is looking good too, all wired up. I used a special green "Apple Drop" capacitor for super tone. The "Apple Drop" is a very special capacitor. Its tone has nothing to do with its construction, which is no different from any other capacitor. Rather, the special thing about the "Apple Drop" is that the more you pay for it, the better you will think it sounds. I have a load of these that I am willing to sell for positively extortionate prices, so hurry and upgrade your tone. Remember, the more you pay for it, the better it will sound.
Oct 16, 2018
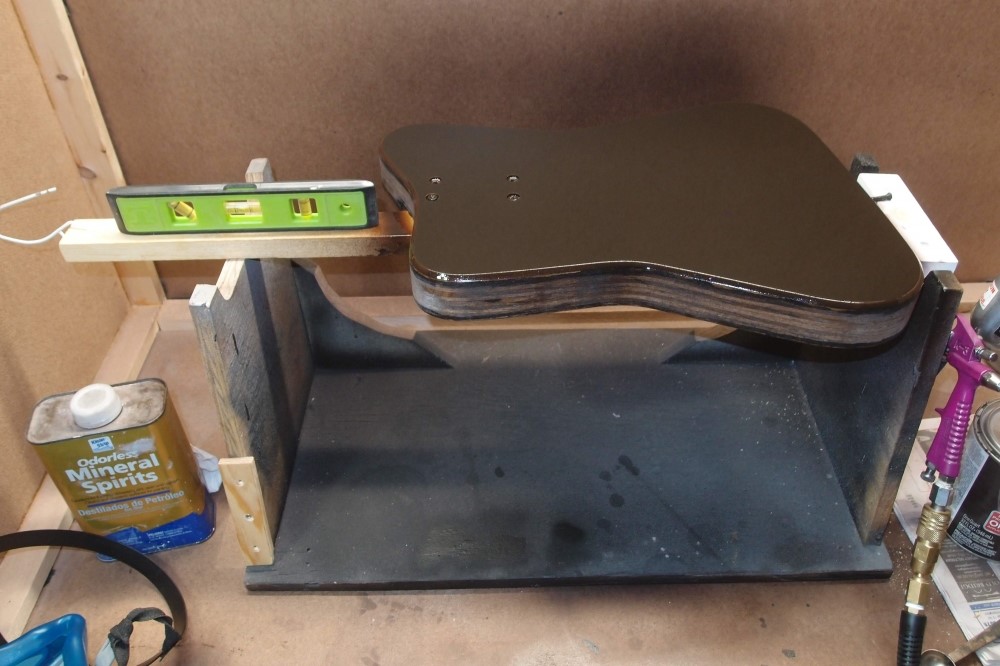
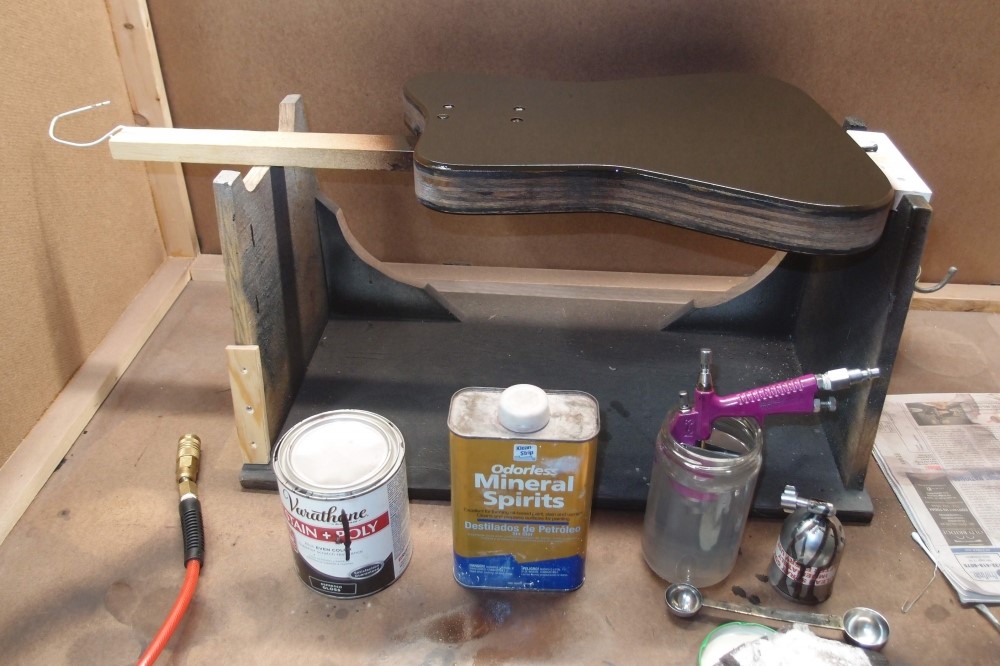
Here is the first color coat on the back of the Pro. Of note here are some small but important changes I've made to the painting stand. On the right, you can see a thick shim installed under the tail screw. On the left, you can see a thin shim stored on the front edge of the upright. These shims allow me to level the body almost perfectly. This is essential for the thick-coat flow-out method I am using, if it is not perfectly level, it will sag to the low side. Before I used to use pieces of scrap for this, and always had to worry about knocking them out of place. These shims are screwed down.
Unfortunately, the front had two fisheye depressions that would not be covered by the pickguard. I filled them with drops of clear poly, melted in with drops of MS, until they stand out. I will file them down and hopefully polish it all out, otherwise it will need one more skin coat to be perfect. All that will be at least a month from now, that is how long I wait for one of these finishes to be workable.
Last coat. Once again, it is just absolutely gorgeous when it's wet. Just look at the reflection - like a mirror. This should dry to a finish that will need very little polishing. The gun is disassembled and soaking in the jar.
Unfortunately, the back of the Pro didn't dry as nice as when it was wet. The important thing is that there is a good thick single coat on it, that will not be a problem to bring to a shine. I hung it up to cure for a month before I touch it again. I wrote the date on the handle. With a thick coat like this, a full cure takes more like a year. But with the Danelectro side binding, I won't have to wait that long before I can put it in a stand or a rack. The thin rattle-can coat on the neck dries very fast, after two weeks it is hard enough to go in a hanger.
The manufacturers use UV-cured finishes that are fully cured in a day. I don't have access to either the materials or the equipment. A thinner coat of non-UV poly would cure faster, but there are problems with finishing later. You only have to go through one spot to make the whole thing a do-over. That's the one advantage of lacquer - you can blend out spot repairs invisibly. And you're going to have to. A lot. Lacquer sucks.