Sandpaper
A subject so simple you hardly even consider it, yet really very mysterious. Just what is the roughness of sandpaper, and the relation to the number on the package?
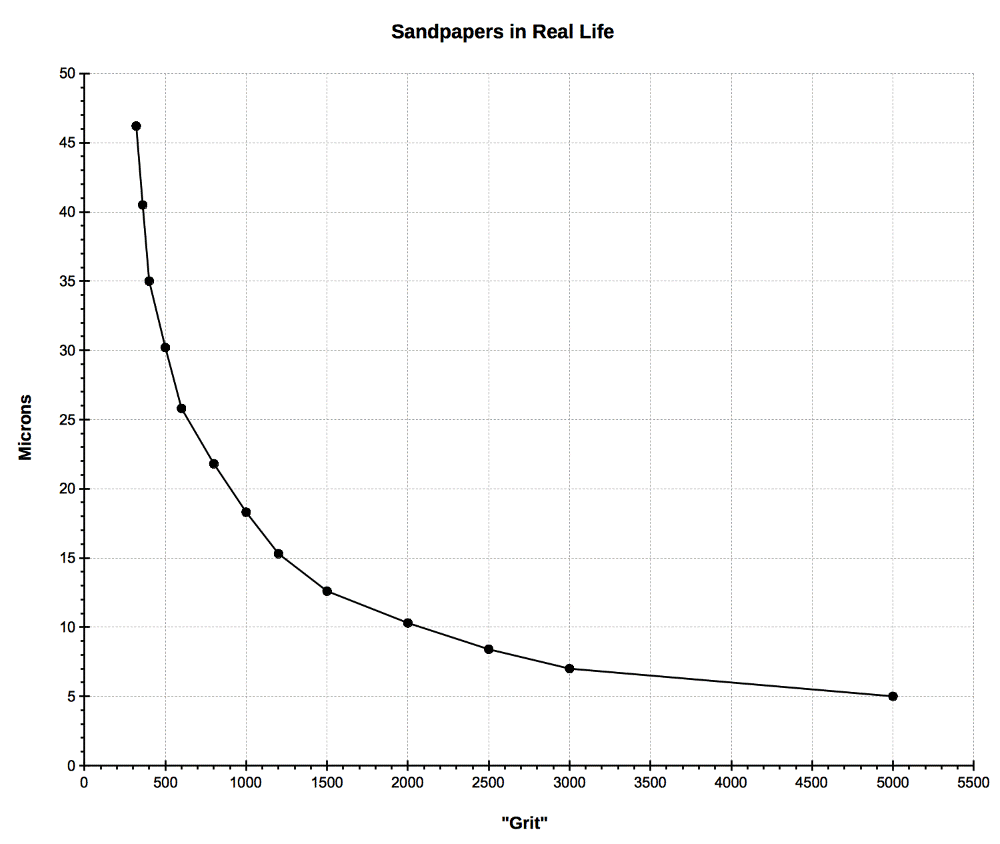
Here's a plot of some numbers I found online: sandpaper "grit" versus actual micron size. Interesting to see what size scratches you are taking out ( or putting in. ) The curve starts at 320, which is the coarsest grit that might be considered part of the finishing process. For final finishing like orange-peel removal, I start with 1500 and work up from there, I find that even 1000 leaves scratches that are difficult to remove.
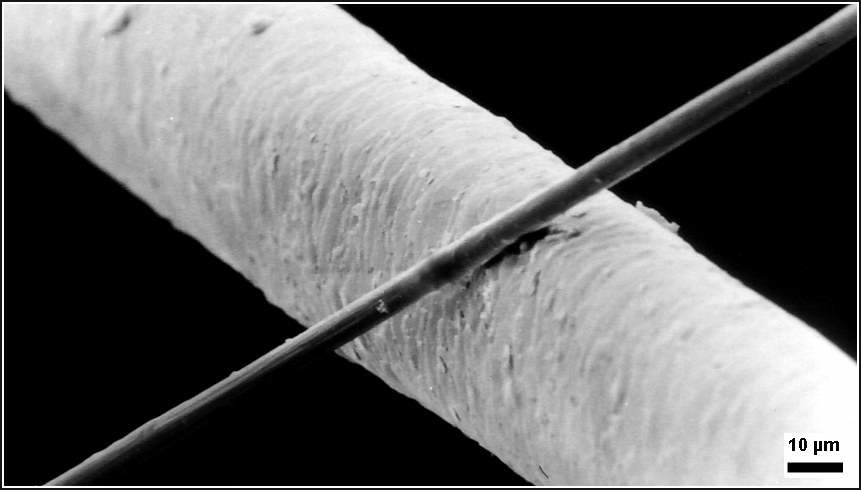
This picture that I stole from Wikipedia helps illustrate the scale of things. It shows a human hair with a diameter of about 50 microns, and a carbon filament of about 6 microns. Pull out one of your own hairs and take a look at it, or someone else's if you don't have one of your own. Another ready example: aluminum foil is typically around 15 microns thick.
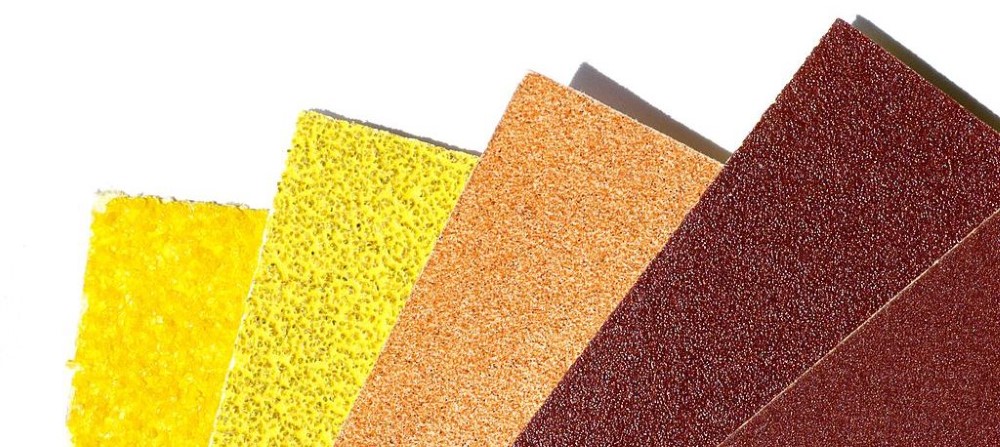
Sandpapers generally use one of two abrasives. The more common and cheaper one is aluminum oxide, and the other is silicon carbide. Aluminum oxide is weaker and tends to fracture during use, exposing new sharp edges until it is finally all broken down. Silicon carbide is much harder and wears down without much fracturing. It should not be inferred that silicon carbide is better than aluminum oxide - it depends on the job. Aluminum oxide is actually better for sanding soft materials like wood and plastic, as it maintains a sharp "cutting edge" much longer than silicon carbide. However, for sanding very hard materials like glass, aluminum oxide is nearly useless - it goes dull in literally seconds, while silicon carbide lasts long enough to actually do some work. Silicon carbide is the second hardest material known, after diamonds. Whether a sandpaper is "wet" or "dry" is a function of the adhesive and the paper backing, not the abrasive.
There are also two basic types of polishing compounds. One is self-limiting, the other is not. With a self-limiting compound, the abrasive particles break down during use, until eventually, the compound will cut no more. A non-self-limiting compound does not break down, or at least not as fast, and will go on cutting for much longer. Self-limiting compounds are designed that way to avoid going right through the finish, which makes them better for inexperienced users. Unfortunately, polishing compounds are generally not labeled with regard to this, but a little research can often turn up the answer.
Much of the technology of guitar finishing comes directly from the automotive industry. Even crappy nitrocellulose lacquer was once used on automobiles; I can hardly imagine how badly that worked out, under the sun and the elements. Your local auto parts store is a great place to find luthiery supplies.
Questions or Inquiries?
Just want to say Hello? Sign the .