Audiovox Stratocaster-Style Guitar (2/5)
Dec 6, 2017

This is a body blank that I just glued up from Home Depot 2x2 Radiata pine pieces. Radiata may not be labeled as such, but it is the 'good stuff', as opposed to the cheaper white pine they sell. Radiata has little in common with white pine. White pine is extremely soft and generally full of pitch (sap) and knots and gaps. There are a few woods out there that would make a worse choice for a guitar body, like the popular Basswood and Paulownia, they are all pretty bad. The softness means that your build will be covered with tool marks long before it is finished, and will ding up horribly in use. Unless you want something that will 'relic' real fast, stay away from any very soft wood. White Pine's pitch will result in random black marks in the end grain and possible long-term finish problems.
Radiata and southern yellow pine are much better, harder than some hardwoods, including Alder and Poplar. They are also strong, closed-grain, not too heavy or too light, and have a pleasing grain pattern. The drawback is that they are not available in guitar-sized pieces. However, the Radiata is available as finished lumber, and if you spend some time picking your pieces, you can get some very useful stuff. I originally got 1x2s, but I returned them after I found the 2x2s, which are obviously half as much gluing. If you like the look of the butcher-block bass and don't mind the extra work, use 1x2s.
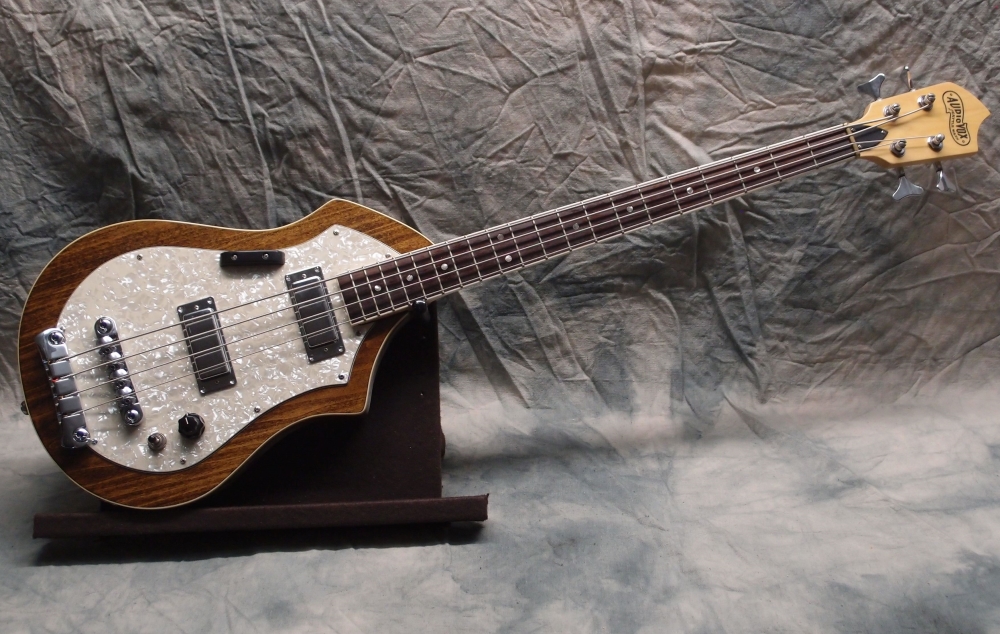
So here I have glued up a body blank for one of my Audiovox designs, like below. The Uke below is 1" white pine core capped with 1/4" Maple plywood, hollow. This sort of construction requires you to learn to do binding to hide the ugly edge of the plywood. Binding is not as hard as you would think, especially if you are only clear-coating it.
There are 8 pieces in this blank, for a total of 120", or two six-footers that you can easily fit in your car. I sawed up the pieces with a little hand saw. I recommend the Japanese-style thin pull saws for small jobs like this. Cut the longest pieces first, and the shorts from the leftovers.
My first impulse was to lay all the parts on the flat surface of my workbench and glue them all at once. It didn't take long to realize that wasn't going to work. So instead, I glued the pieces together into pairs and triples. When those were set, I glued them together into bigger pieces until the whole thing was assembled. Divide and conquer.
I drew each glue surface across a piece of 80-grit sandpaper to roughen it a bit, then wiped it with a damp rag to make the glue go on easier. Apply the glue with an acid brush, as thinly and completely as possible, to both pieces. I used Gorilla Glue, which is basically Titebond with a little less yellow dye. Any good wood glue will do. Put the glue on as though you were painting.
Clamp the parts together lightly, align, and tighten the clamps in stages, maintaining the alignment. Wet glue is a good lubricant, and the parts will slide around at first. Make sure the clamps are centered, otherwise one side will be tight and the other will be gapped. Wipe away the squeeze-out with the same wet rag.
At each stage take care to get the faces aligned as closely as possible. At best, you should not feel the joint at all. I tried to make the front face flush, with all the discrepancies between pieces on the back. When gluing just two pieces, use a clamp at least every six inches. Once the parts are bigger and stiffer, you can use fewer clamps. In the picture, I am doing the final joint in the middle, so just three clamps will suffice. You can see the line I drew as a temporary match-mark across all the pieces. The outline came after the whole blank was together.
When this has dried for several hours, I will block-sand the faces flat and smooth. The result should be a bit less than 1-1/2" thick - perfectly good for a solid body electric guitar. At that point, there are several options. I could use it as-is. or I could cap it with a piece of plywood as above if I want more thickness or a fancier face. That could optionally be chambered-out. A bound front edge and a radiused back would give a Rickenbacker-style body.
Finally, if I want a hollow-body, I could cut out the center and cap it on both sides with double bindings, exactly as above. If that is the plan, you could save some wood and glue by simply gluing up the outline without the center. Another advantage of this construction is that you get an un-erasable centerline to work off of - the middle glue joint. That was very useful on the Osprey build.
I also cut all the pieces for my Kubickish design, but I decided to do the simpler glue-up first, to work out the problems. This wood is a bit over a dollar a foot, so this body cost well under $20. You'd pay more than that just in shipping for a piece of California firewood, errrr ... I mean Alder. I think this is also better than the Poplar sections I have used as body blanks, and even cheaper than those.
Dec 6, 2017
Here is the blank with the faces sanded smooth. I used half a sheet of 80 on the pad of a broken pole sander, you can see it at the right. You can get the same effect with a thin mousepad glued to a piece of wood. For the most part, I held the 'sander' across the grain (as it is in the picture), occasionally aligning it along a ridge to carefully work it down. You have to look hard to see the joints now; the back looks even better. Next time I will make the blank symmetrical so that I can select either side for the front. The loss of thickness is hardly noticeable, and as I run my hands over it, it just feels smooth and flat - no ridges, hills, or valleys. And this is just the rough-in.
It took a good bit of elbow grease, especially the back, since in aligning the front I pushed all the defects to the back. I did not want to use a belt sander, because the power tool can easily dig away more than you'd want and leave gouges. Hand sanding took longer, but came out perfect, with the absolute minimum removal of material. Between the gluing and the sanding, this is really not all that much work. And not too much mess either - the sawdust didn't fly much, and will be easy to vacuum up. This blank right now weighs 5.6 pounds.
I have redrawn the outline and applied some mineral spirits to see the grain. This blank is beautiful, and I made no attempt at grain matching, the pieces in the store were selected strictly for straightness. The grain is nicer than Alder, and the color is nicer than Poplar, and as I said, the wood itself is noticeably harder than either of those. I think this is at least as nice as what you can buy, at a fraction of the cost. You can also see how little waste there is with this method. Next up for this project is to route the neck pocket.
If this works, and I don't see why it won't, it is revolutionary. A really nice, if not superior, easy-to-build solid wood guitar body blank from Home Depot, for less than $20 !!! I say revolutionary because, although I have seen people do this with white pine, the result of that is pretty crappy, while the result of this is better than standard expensive 'luthiery' materials. And while the teak cutting board worked out great, that is a $90 item, I only used it because I got it for free. I much prefer the 1-1/2" thickness of either of these solutions to the 1-3/4" or more of many 'proper' guitar blanks. For my next trick, maybe I'll build a guitar out of popsicle sticks.
Dec 17, 2017
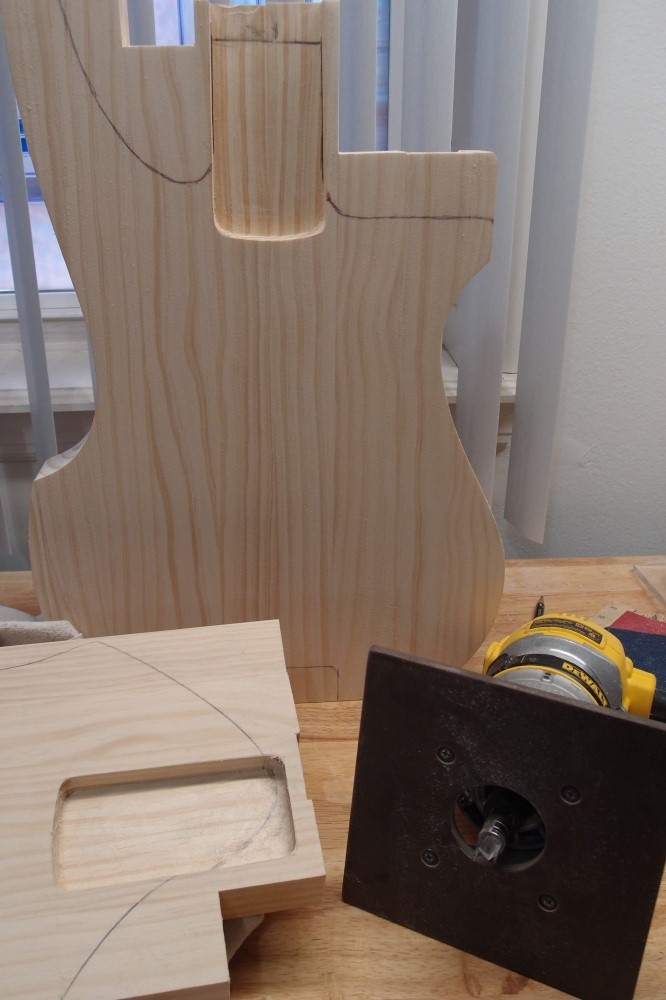
And here are both neck pockets all finished. Standard Fender neck pocket depth is 5/8", or 20/32" on my little ruler. I made these 1/16" shallower, because of the slightly thinner body. This is well within the adjustability of a Fender bridge. On a thin-bodied Mustang, the pocket is noticeably shallower and the bridge taller to allow for it.
I enlarged the hole in the router base to almost 2" so I can better see what I am doing. The bit setup is a 1/2" x 1/2" hinge mortising bit with 3x 1/2" bearings stacked under a retaining collar. The bit was actually in the router when I received it. I'm sure if the seller had the wrench to remove it, he would have, so lucky me. It is the perfect bit for this sort of thing, extra long shank, and came with a bearing and collar.
Normally, it is easier to hog out as much wood as possible with a Forstner bit on a drill press, and then finish the job with the router, but I wanted to give the new router a good workout. It takes 3-4 cutting passes to make the depth, and then one very thin pass to clean up the bottom. On the second body, you can see there is no place to work in from the side. Instead, just plunge the bit into the wood away from the edges, gently with a slight whirling motion, you don't need a plunge base.
This little router is perfect for this sort of work. It just feels much more controllable than the big one, even with just one hand. With this extra-large base, it is very solid, and the cuts come out perfect without the nervousness that always accompanies the big router. There are several small routers like this on the market, often called 'laminate trimmers'. The Bosch Colt is the classic, but this DeWalt is better in every way. These little routers only take 1/4" shank router bits, which is not a problem, long ago I decided to standardize on that size.
The Radiata routs beautifully, you couldn't ask for a better wood. Now it is back to the bandsaw and belt sander to finish the contours.