Audiovox Stratocaster-Style Guitar (3/5)
Feb 24, 2018
Audiocaster ?
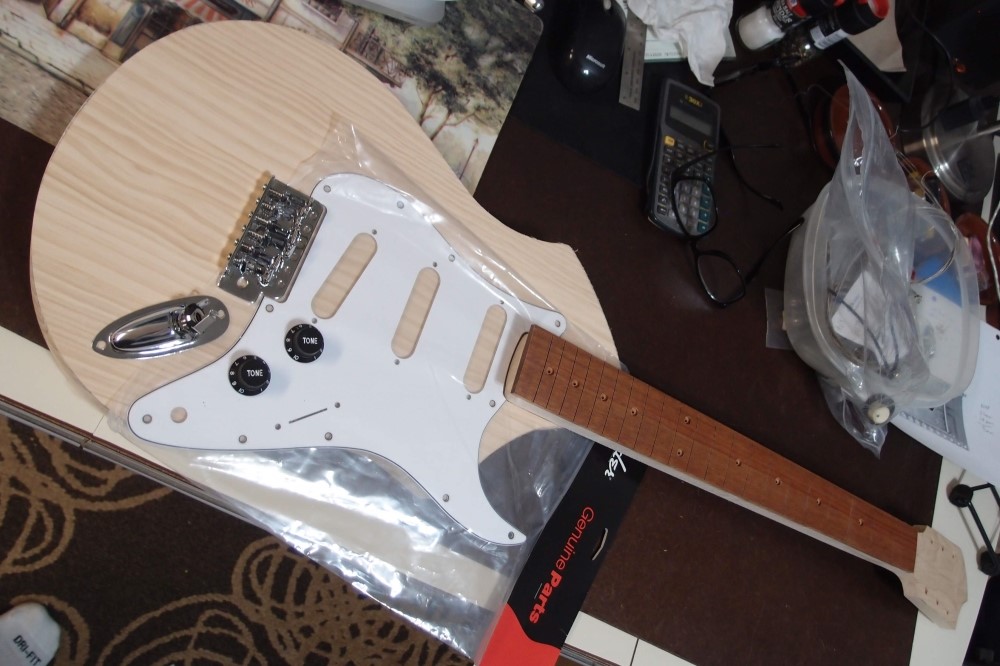
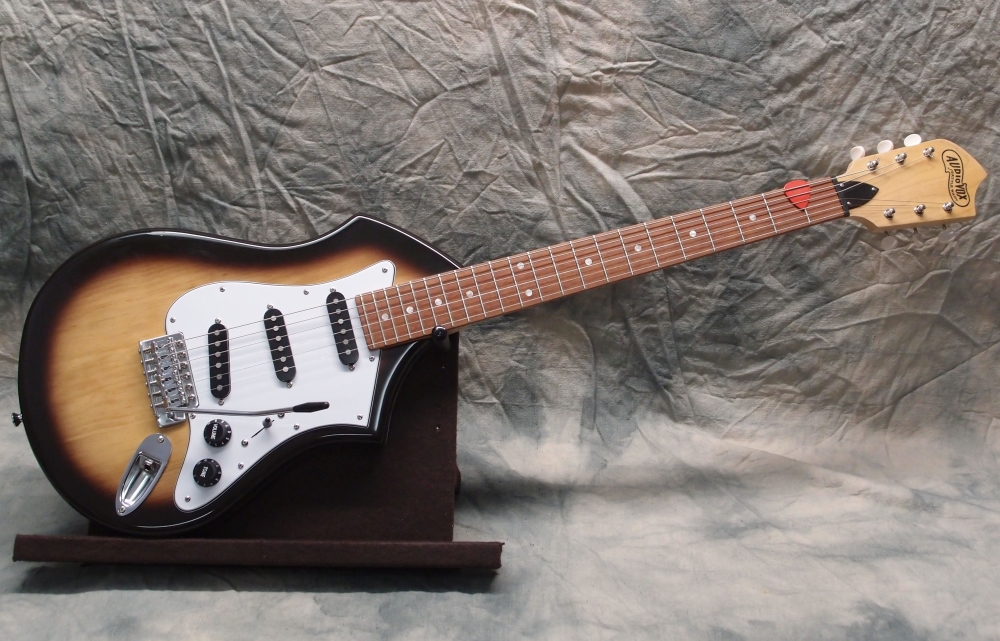
This body and neck have become surplus after changes in other projects. I could build it up with the rest of the surplus parts, but I always like to do something fresh, and this came to me. The body is only 1-1/2″ thick and will require some modification to the tremolo block. I had some short ones once, but I guess I tossed them. It will also need one of the cheap box-type switches, the normal ones I have are too deep. Need to find some proper pickups as well, unless I go with lipsticks. I’m thinking three-tone burst, and maybe even tort.
I did some searching, and this is not the first time Radiata has been used for a guitar body, but it is the first time it has come from Home Depot. Mostly what I found was a lot of clearly uninformed opinions of people who seem to think all pine is white pine. Another camp says you should only use white pine because Leo did. A group in Australia talks about Radiata being soft, knotty, and crooked, I'm not sure what they are talking about. None of these people actually seem to know anything about wood, although there is a great deal of expertise on tonewood.
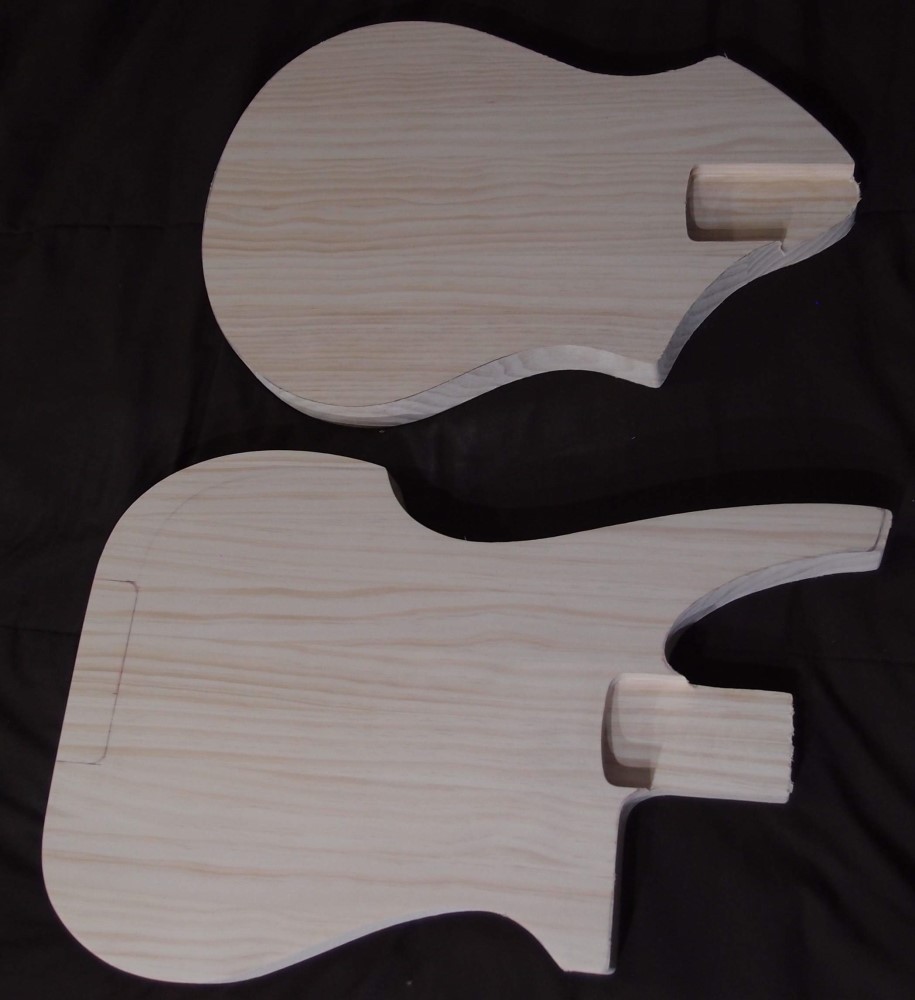
All I know is results. These two bodies are pretty much flawless. The glue joints are almost invisible, the grain is attractive if a bit linear. If I did a good job with the glue-up, these laminated bodies will be much more stable than a one or two-piece body. This wood is nicely hard, medium weight, and has no vices in cutting, sanding, or routing.
Both these bodies are about 4.1 pounds right now. If they were basswood, they would be 3.3 pounds, Alder 3.6 pounds, Poplar 3.7 pounds, Ash 4.4 pounds.
Mar 20, 2018
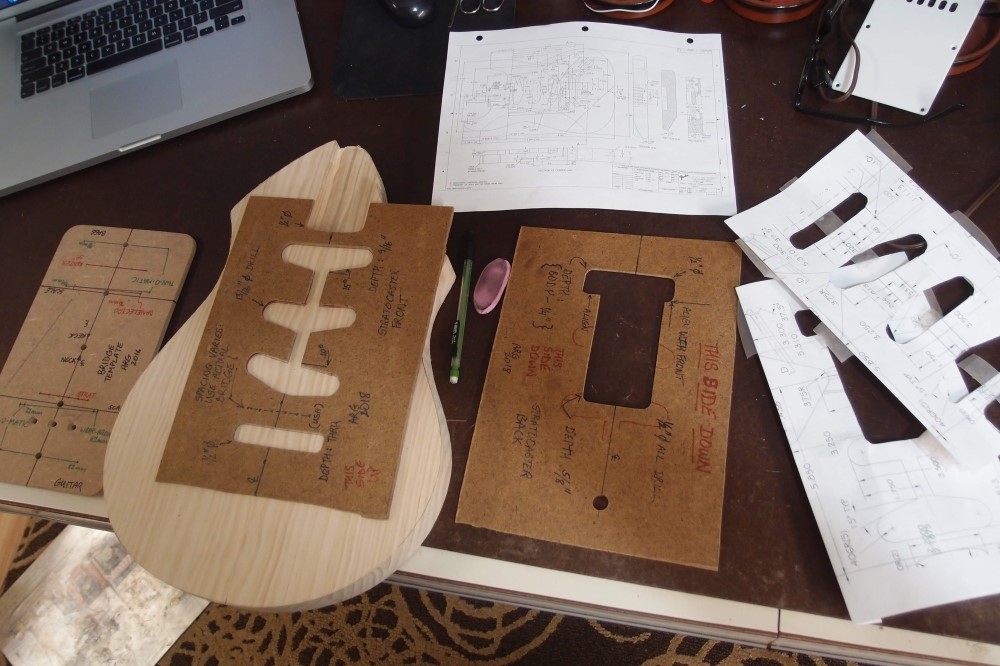
Making templates is always time well spent. Here I have transformed an old piece of scrap masonite into something useful. This material is thin 3/16" and very easy to work with. These are tracing templates, not routing templates. They are for laying out the design accurately. Right now, I only plan to do one of these, so I will just freehand the routs, they are all hidden anyway. If I was going to do several, I would probably make 3/4" routing templates as well.
To make these templates, first I found a dimensioned blueprint online. After some computer stuff, I got to where I could print out sections of it, lay a ruler on a dimensioned line, and it matched. I cut out the paper drawings with a razor, then traced them onto the board. 'Ole Leo was a clever and practical guy, all the ends and corners are either 13/16" or 1/2" drills. Then I connected the holes with the scroll saw and finished the job neat with files. The final check was against a couple of real Strat bodies, and everything is close enough.
The last step is to add any useful notes right on the template. That greatly lessens the odds of making a mistake. You can also see centerlines and other datums clearly marked. The extra 1/2" hole in the back template is so I can lay it over the front template and see the centerline. At the left of the picture is a template I made previously that has setups for every kind of bass and guitar bridge I might use. StewMac would be welcome to copy this, but not if they are going to split it into a dozen different templates and sell each one for 50 bucks.
As I said, Leo was a practical guy, and all the ends and corners of the cavities can be done on the drill press with the appropriate bit. That will save some routing, and also gives a good starting point for the router. After the picture, I added the output jack cavity as well. I don't need the control cavity though, as it won't fit into my project. I would not bother to build a Strat body from scratch, there are so many nice ones on eBay.
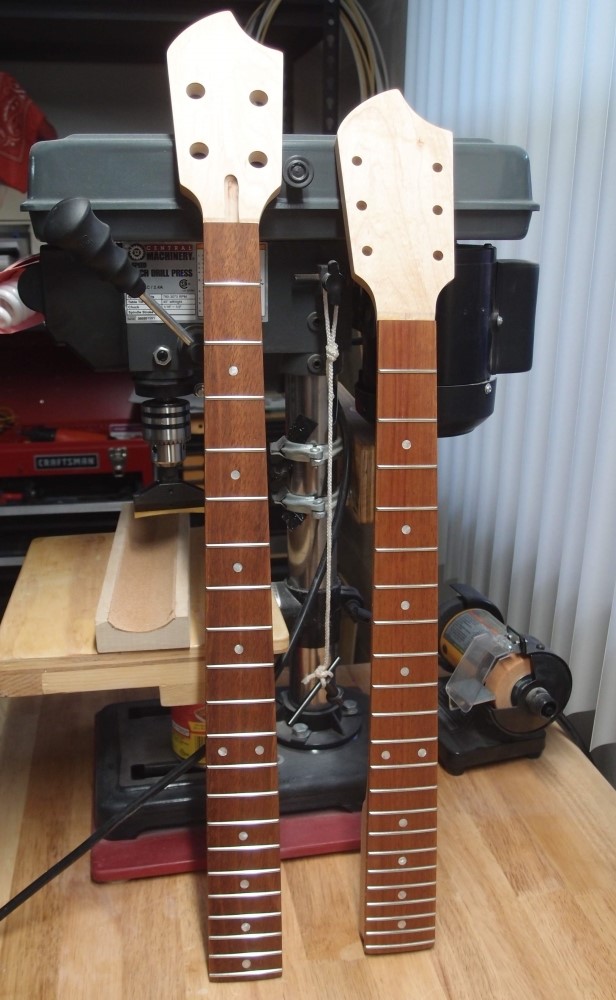
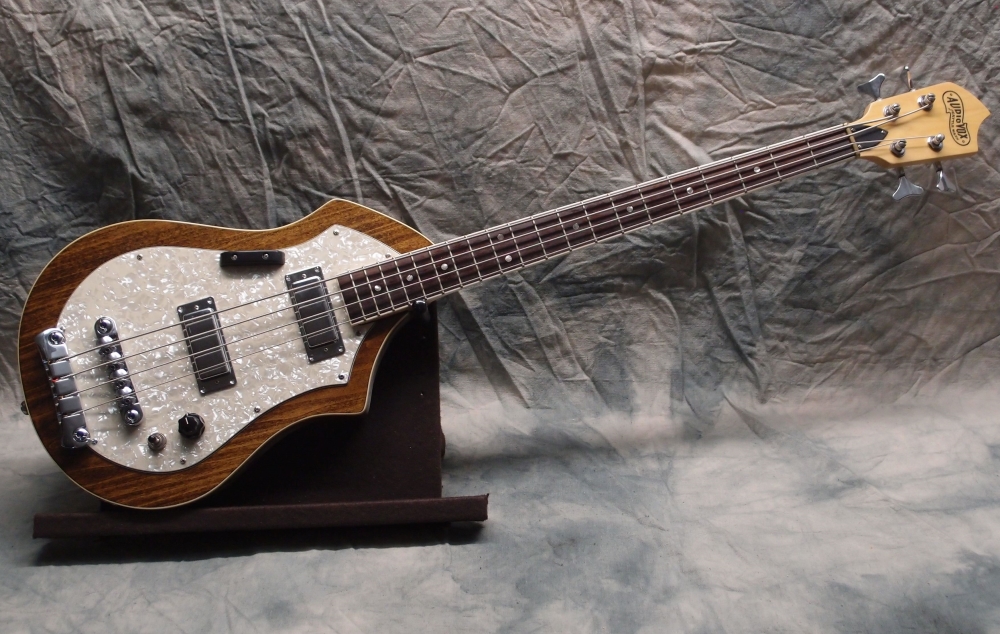
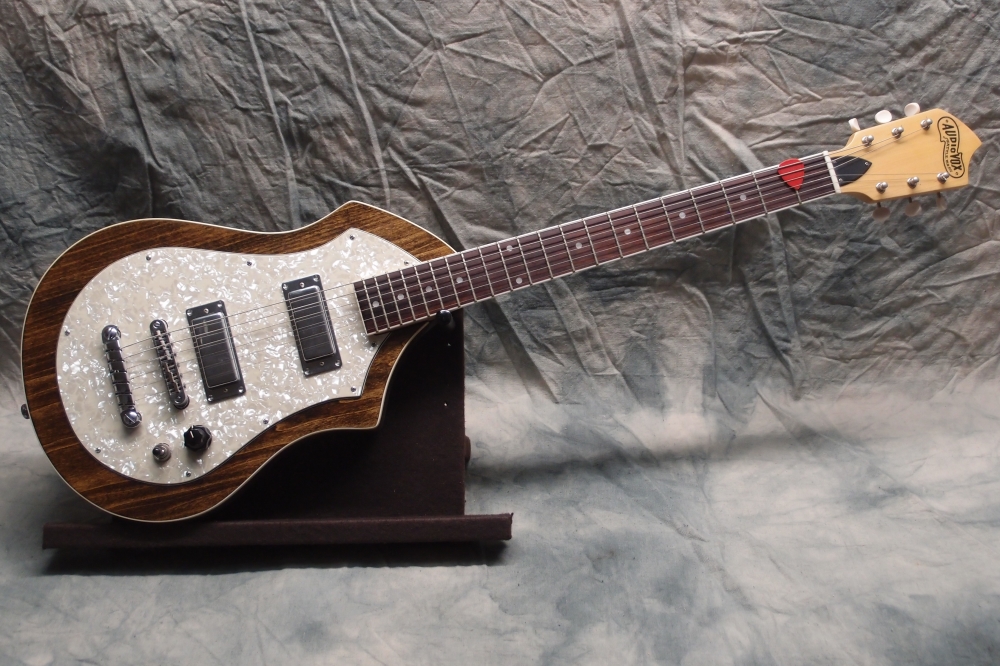
The last two Audiovox necks, 30" bass on the left, guitar on the right. The body for the bass is ready to go, the body for the guitar is started. This guitar neck lost its planned body to the 12-string. It will now get a solid Radiata body instead. The bass body is a twin to the 12-string's: Danelectro-style chambered Masonite-over-plywood with Tolex side binding. Now that I have finally figured out how to make and attach the binding, I can say that this is a terrific and very inexpensive way to build a guitar body. All the materials from Home Depot ( or a dumpster, as the case may be. ) For something completely different, apply a dark stain to the Masonite, then a shiny coat of polyurethane.
These necks are Home Depot maple with Brazilian Cherry or Jatoba fretboards. Brazilian Cherry is common enough to be used for flooring, so it should be fairly safe from CITES idiocy. It can be found very reasonably priced in useful sizes at WoodCraft. This wood is almost as hard as rosewood, with a better grain, but not naturally oily. The lighting is not doing it justice, the one on the right is especially nice. The fretboards will ultimately be finished with several coats of Tung oil, the maple will get satin poly.
The dot markers are 1/4" pearl from a lifetime supply I got from Taiwan. Install the dot markers so they protrude from the fretboard, then level them with a file, before installing the frets. The side markers are aluminum wire, which is even pearlier than pearl. The bass has a cut-down double-acting truss rod. The guitar has a 1/2" square steel tube inside that will keep it arrow-straight and true forever, a little heavy, but it will never need adjusting.
The frets are bulk fret wire from China. Buying in 8-foot lengths minimizes waste, as you cut each fret to the right length. I used to use pre-cut Fender fret wire, which is convenient, but if you add up all the cut ends, you could probably do half another neck. Before fretting, I gave both necks a final radius sanding.
I installed the frets with a combination of the fret press in the picture and hammering. I worked in groups of 2-4 from the heel up, setting them into the slots with the press, then hammering them home with a nylon hammer. Some of them I just hammered. After each group was in, I checked with the fret rocker and whacked them some more as needed. In the end, both necks came out perfect, no further fret leveling necessary.
The ends were dressed with a regular file and sandpaper, that's all. I don't do the ends individually, I do each side all at once by sliding the file lengthwise along the neck. First, maintain a squarish angle that doesn't quite touch the wood. When you get down to the wood, shift and make everything flush. Finally, shift again and bevel the ends at whatever angle you want, and polish them with 1000 and wipe clean with a damp rag. A surprisingly fast and easy process.