Audiovox Stratocaster-Style Guitar (5/5)
Jul 14, 2018

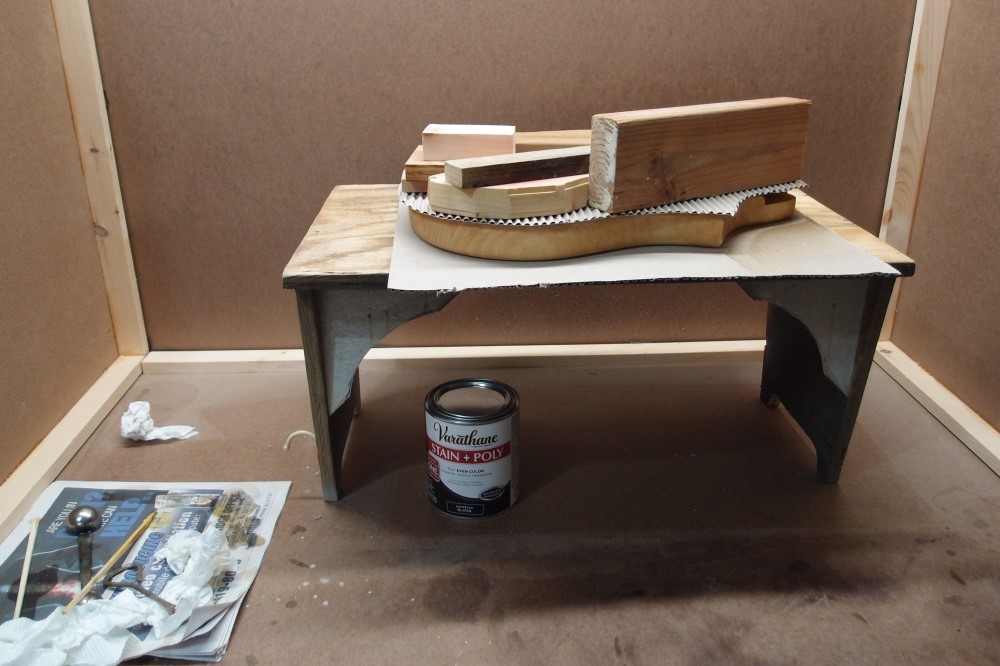
This is what the Radiata wood looks like under a thin coat of gloss poly. The discolorations are some experiments with stain that I sanded off, planning to spray a burst later anyway. Colored stain did nothing for this wood, it actually muted the grain. Natural stain makes the grain pop, and the oil-based poly gave it a nice yellow cast. Next, I will rough-up this coat for good adhesion and spray the burst over it, then overcoat with more clear. By then the center should be very yellow.
If I was just clear-coating it, a thin coat would suffice, since the wood is pretty hard and damage-resistant itself, unlike most "tone woods". I think it looks like ash, but without all the grain filling bother.
Aug 18, 2018
Continuing the previous post, here I am setting up to shoot the sides of the body black. Not quite black, actually very dark brown, free courtesy of my friends at Home Depot. The object here is to cover the sides and roundovers, without getting overspray on the faces. Since all the surfaces are vertical, it has to be done in many thin coats. The color builds up until it is finally opaque. That will hide the most obvious tell-tales of the glue-up, the faces look like a single piece. I ended up using about a 1:3 dilution of the poly with mineral spirits.
Before this step, I gently smoothed the whole body down with 320. Any bump or irregularity would show up in the burst. Basically, I used the first coat of poly as grain filler, although this pine needs very little filling.
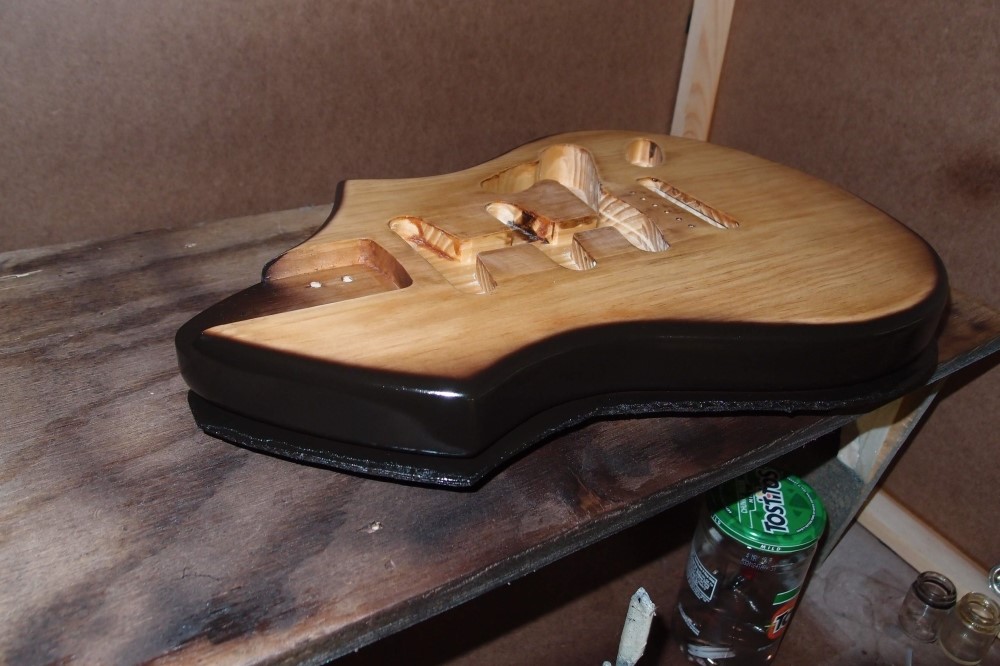
And the sides are done. You can see I trimmed the cardboard covers to fit closely. I'm using my painting stand upside-down to elevate the whole job so I can get into the crevices. What you can't see is that I stuck a piece of scrap wood to the cardboard underneath to make it easier to spin.
This was a two-day job. On the first day, I sprayed a base coat. On the second day, I sanded out the nits and two little runs and recoated. It's actually a nice effect already - a very narrow hard sort of burst. There is now enough poly on the sides to completely obliterate the end grain, and a little extra on the points.
Since I'm not finished with it, I shot some pure mineral spirits through the airbrush and dropped it in a jar of MS to soak. The airbrush is slow going compared to even the smallest gun, but in this case that minimizes the risk of spraying too much and getting a run. So far so good.
Aug 19, 2018
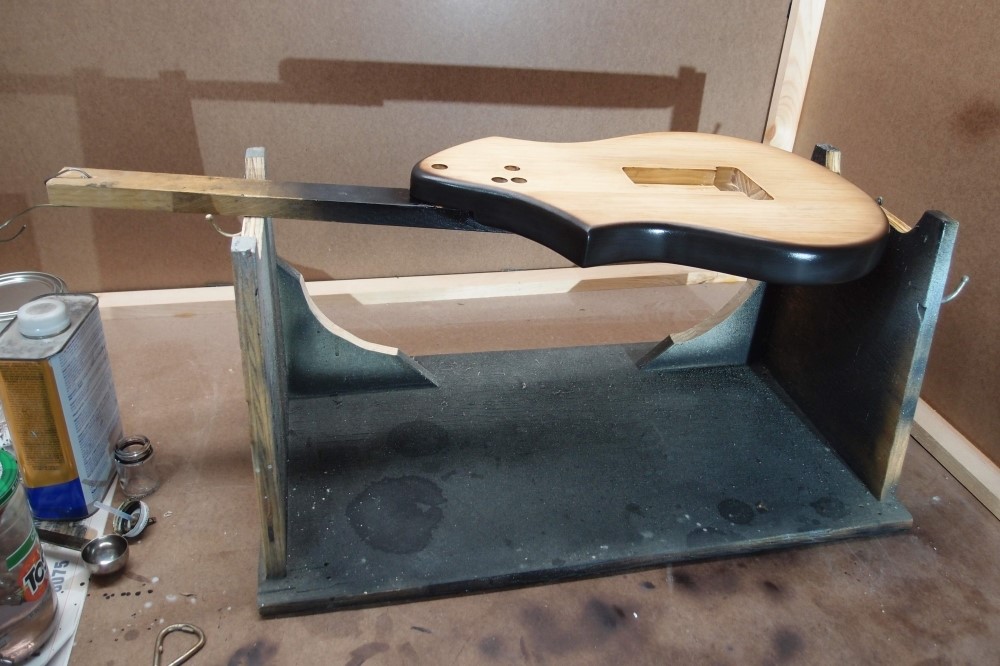
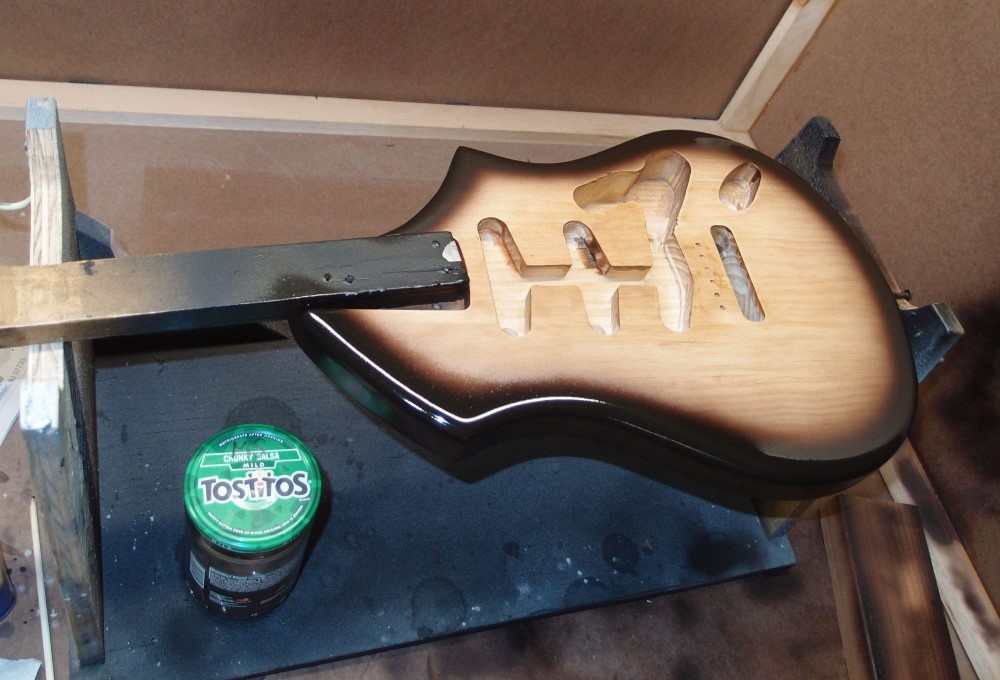
Continuing ... here is the setup to finish the burst. The handle is installed crooked because that is the only way to get this body to balance.
And the back has built up to a nice chocolate burst with a caramel center. You want to spray either straight down or outwards, never inwards. Even so, the center will get a light sanding later to remove any odd specks. Ultimately, the whole thing will get clear-coated, which will restore the nice yellowness that sanding has whitened, and probably warm the brown a bit..
The roundovers and corners now have an extra thick layer of color over them. Areas like that are problematic when polishing, so some extra thickness is helpful.
When this is dry, I will flip it and do the front, which is easier, as about a third of the perimeter is taken up by the neck and pickguard, so you don't need to feather it.
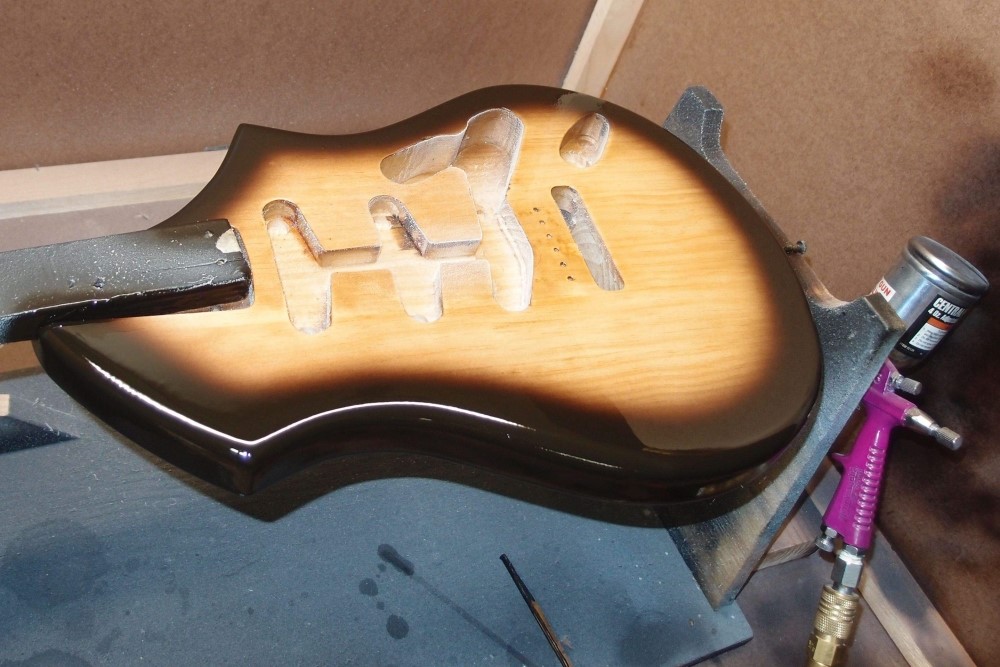
And here's the front, still wet. The airbrush is broken down and soaking in the jar. One nice thing is that if you don't like the way a job is going, you have an hour or so to wipe it off with mineral spirits. The day-old coat underneath is unaffected. Also, spraying like this has none of the time limitations of a rattle can, since there are no nasty solvents or propellants to attack the previous coat, just MS and air.
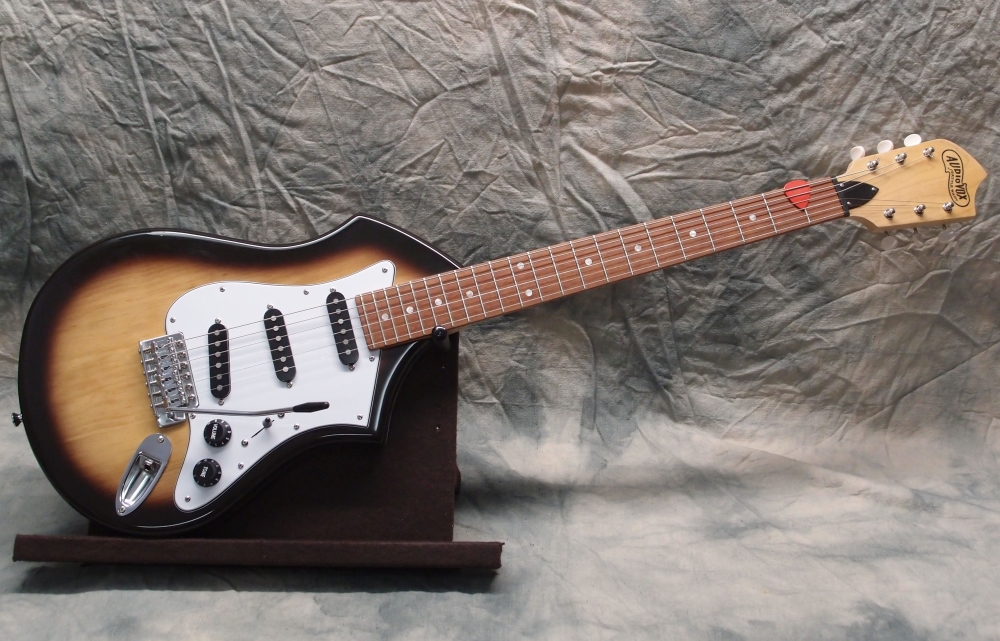
Looking pretty good, I think. Black and brown is a tobacco burst, I'm calling this a caramel burst. This accomplishes my goal of hiding the glue-up - it looks like a one-piece body. This will need to cure for a few days.
Aug 20, 2018
Laying out the parts. I like it.
Aug 22, 2018
It's beautiful when it's wet. This is two coats of clear poly, for a total of three - two over the burst, and one under it. These coats are sprayed wet on wet, with about an hour between them, as thick as I dare. No runs on the edges.
I did some sanding and touch-ups on the burst before clear-coating. One more coat on the back, and it's done. The ambering effect will become more pronounced as it dries. This works so much better than runny rattle cans.
I will hang it up for at least a month before I touch it. Even then, the poly is not fully hard and can pick up impressions simply from laying it down for too long. It's best to keep a new guitar in a wall hanger for its first year. The thin satin coat on the neck hardens-off much faster. Still better than lacquer - that junk never dries.
You can see the cheapo spray gun at the right. These things are so cheap, they're hardly worth cleaning, just throw it away after a few jobs. The airbrush is very expensive, and I clean that religiously. You can't let poly set up inside the tool, or you may not be able to get it out!
Oct 27, 2018
I finally got the body polished and finished the neck. To re-cap, the body is Radiata pine and the neck is maple, from Home Depot. The fretboard is Jatoba, or Brazilian Cherry.
Oct 28, 2018
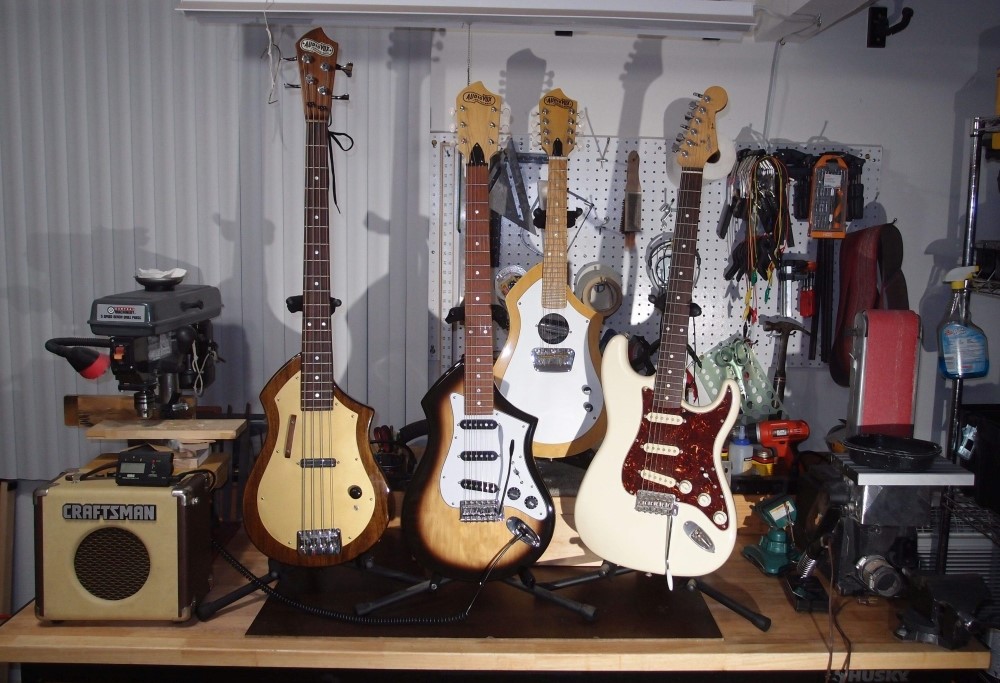
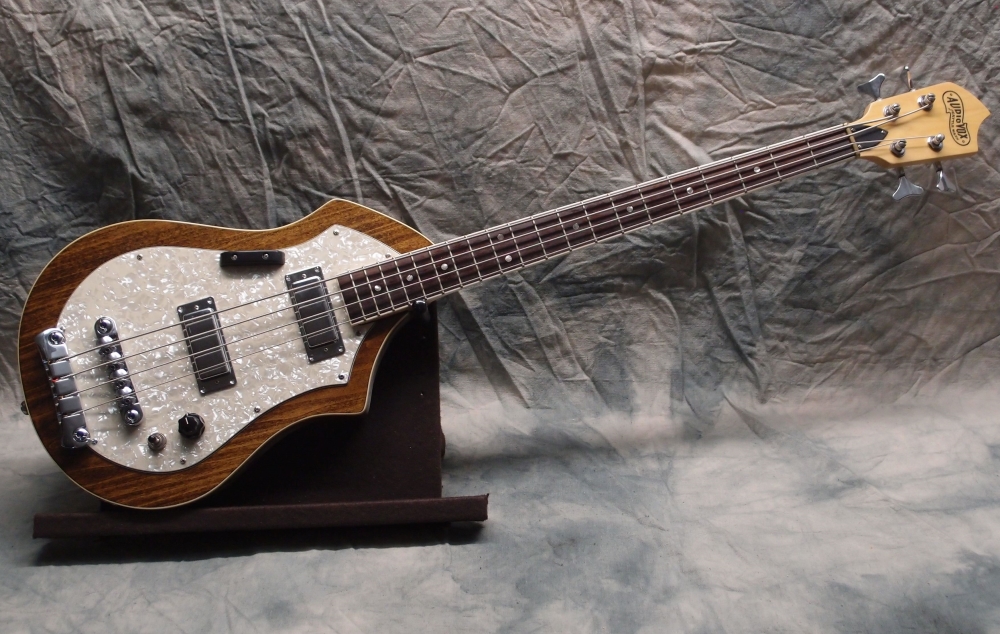
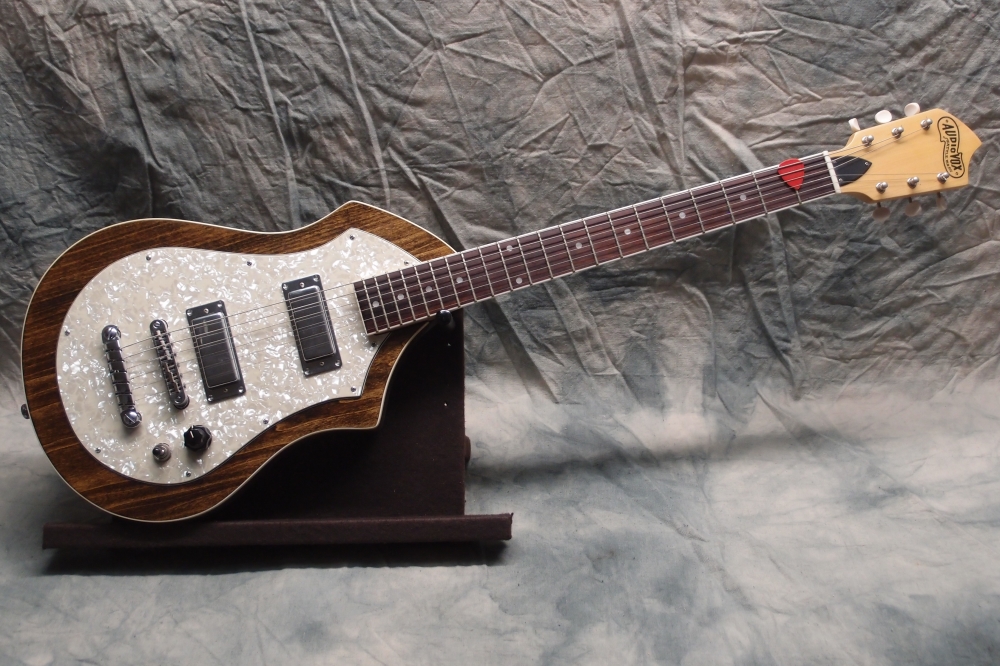
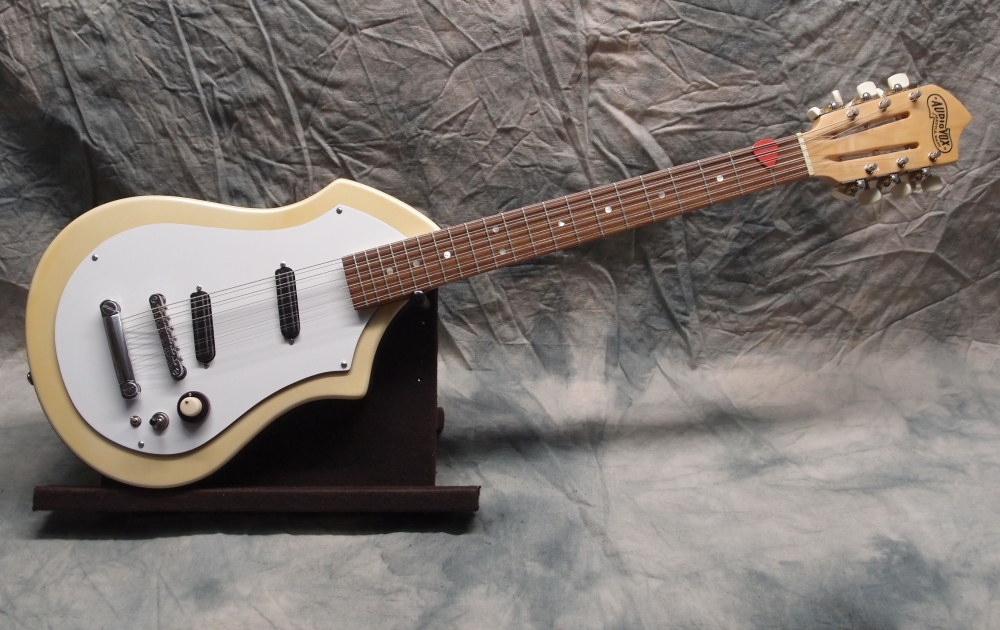
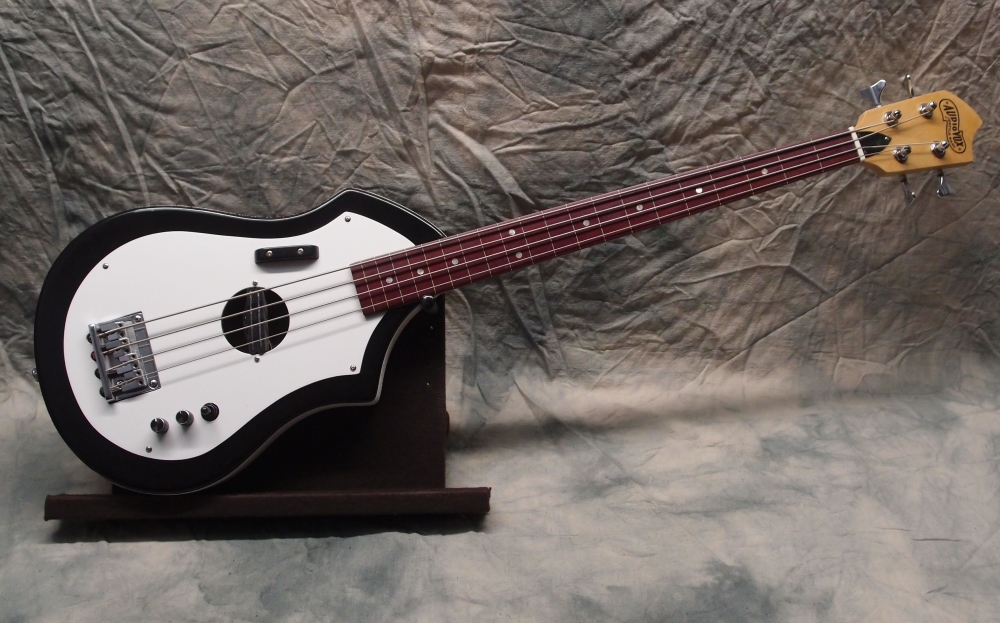
47 screws later, it is all together - man, Leo Fender really loved his screws. Here is a family portrait - daddy Audiovox on the left, mommy Stratocaster on the right. Behind is one of several other Audiovoxen I built, this one is an electric mandolin/uke.
This guitar is the result of changes to other projects that left me with a surplus neck. I also wanted to do another pine glue-up body, as I am refining that method. I have several Strat bridges in the junk box from other projects, so I decided to use one. I was also tired of working around the oversized Audiovox pickguards, so this one became more and more Strat, which is my favorite guitar anyway.
Close-up shot of the body. This is a glue-up of 2x2 (actually 1-1/2") Radiata pine pieces from Home Depot. It's a nice-looking wood, harder than alder or poplar, and very easy to work with. The finish is canned poly, sprayed with a compressor, let dry for a month or two, smooth with 1500-2000, and polish with automotive compound.
I ended up having to deepen the neck pocket, which I had routed a little shallow, and found out you can't get away with that on a guitar like you can with a bass. The router chipped the finish behind the neck a bit, which I fixed with a black Sharpie and Crazy Glue, and polished out to unnoticeable.
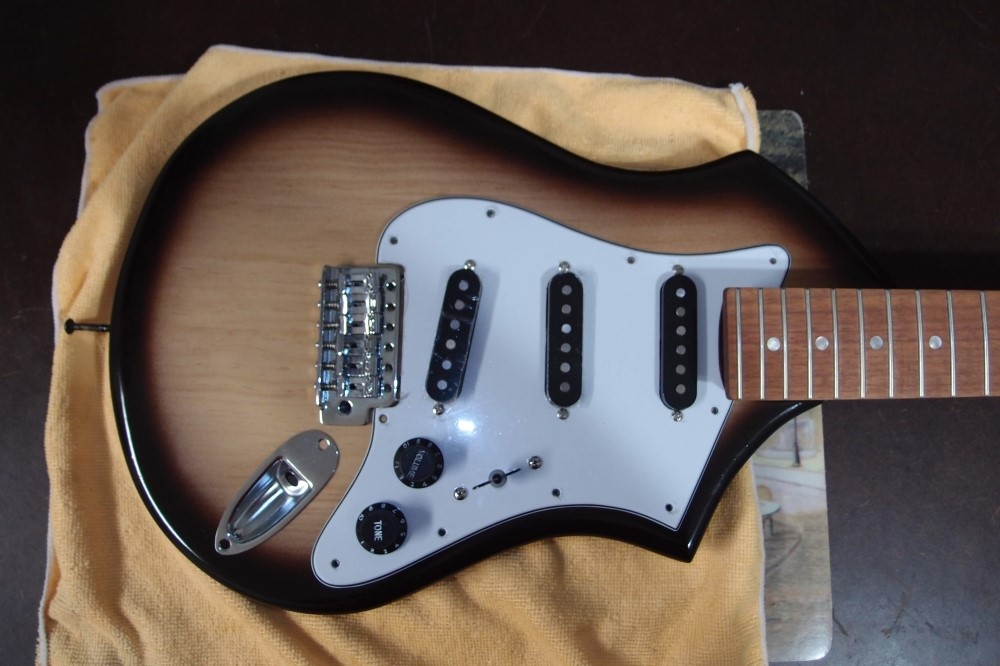
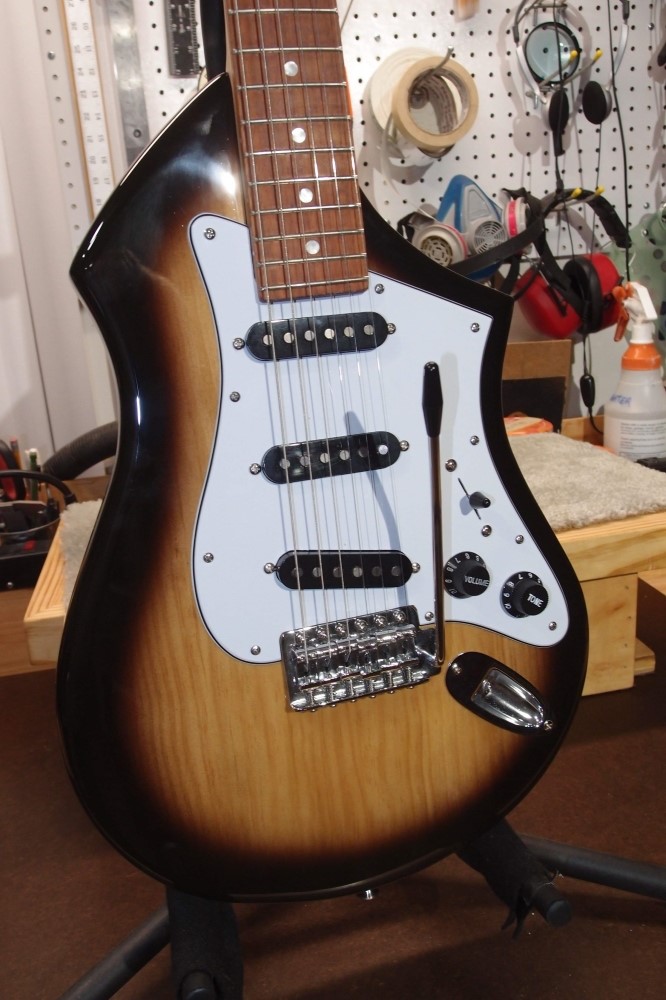
The electronics are simple volume-tone, with a pull on the tone to activate the bridge pickup regardless of the selector. This gives you the two forbidden combinations: neck-bridge, the Tele sound, and all three, which is also different. Although it is visually so similar as to seem identical, this body is actually an inch smaller than a Strat, and would not fit a third knob in this configuration. I always thought the second tone knob was useless anyhow.
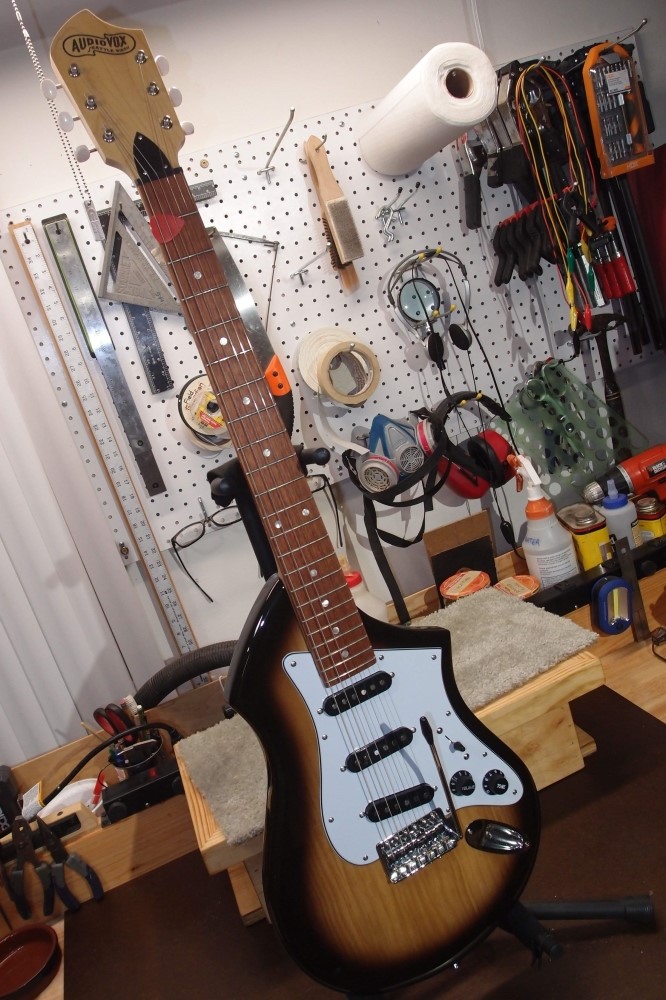
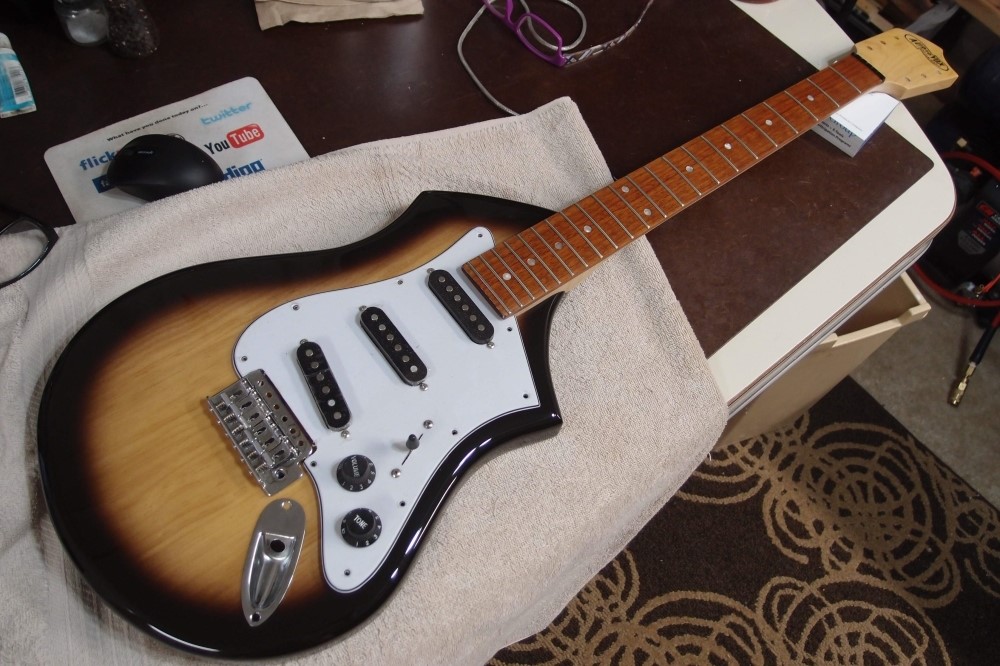
Here's the whole thing. I was troubled over how to adapt the shape of the pickguard without a lower horn. I finally just cut it off straight in line with the tab on the other side of the neck. I'm still not sure if that was the best way. The alternative would have been to use the Audiovox contours, but I wanted to retain as much "Strattiness" as possible. I fooled around with several paper prototypes; trying to reconcile the top and bottom always came out strange, so finally I decided on the straight 'sawed-off' shape.
The truss rod cover is just for looks, there's nothing under it, it just fills in a big blank space. The truss rod is non-adjustable. This is actually better than most adjustable truss rods, which have to be adjusted because they can be adjusted. Right now the neck is dead straight, but after a few weeks under tension the wood will sag until it reaches equilibrium with the steel bar inside, resulting in an almost imperceptible bow, which is all a guitar needs. A single-acting rod would be no help right now, a double-acting rod would allow me to crank in the bow right away, but I'd have to take it back out later.
The neck is also shimmed forward a tiny bit, which may come out when the neck settles-in. My experience, over and over, is that you cannot really set up a new guitar, it has to set under tension for a while and settle into its final shape. That's not to say you can't make it playable, this plays just fine, but it will be better after I tweak it again in a month or two.
The Stratocaster bridge is awful, I doubt I will ever use another. Simply tuning one is a recursive process. You have to keep doing it over and over, spiralling-in to a solution, as tuning one string throws off all the others. Eventually, you get sick of fooling with it and call it done. This is why rock stars take guitar techs on tour.
Setting up a Stratocaster from scratch is far worse. There are six strings and four adjustments - tuning, intonation, action, and claw or float. That makes 6x2x2x2x2 = 96 degrees of freedom, and every adjustment affects every other one. Mathematically that is a nightmare, but in practice, you can set up a few things pretty well and leave them close enough, and eventually spiral-in to a solution.
Another possibility is to set up the bridge flat rather than fully floating, by over-tightening the claw screws. This is the Clapton setup; you can even set a block of wood tight behind the bridge block to make sure it doesn't move. While locking down the bridge greatly simplifies setup and tuning, and makes the instrument much more stable, you can only do dive-bombs on the trem, you can't do the nifty quavering sound, and nothing does that better than a fully-floated Strat.
A third solution is a spring-loaded bridge stabilizer. I built and installed one in the Strat, and it works great. Unfortunately, the inventor of the design sold the patent to Gibson, who buried it, so you can't buy such a thing in the US. The Hipshot Tremsetter is unimportantly different enough to sidestep the patent, and although it works, it is over-complicated and difficult to install.
Weight is 7 pounds, balance is about the same as a Strat or Tele. The steel bar makes the neck a little heavy.
Oct 29, 2018
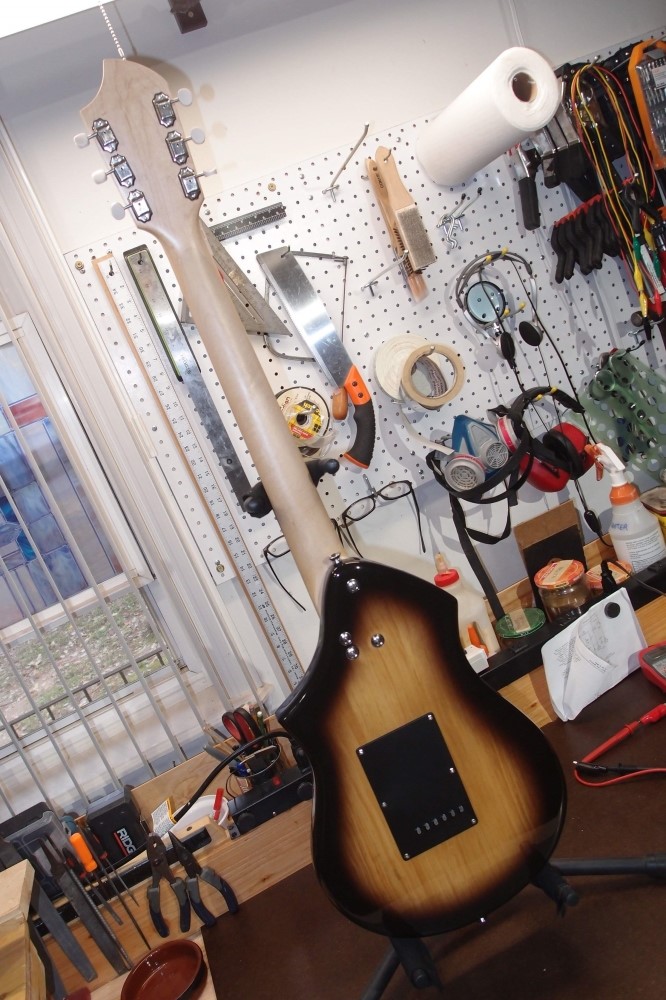
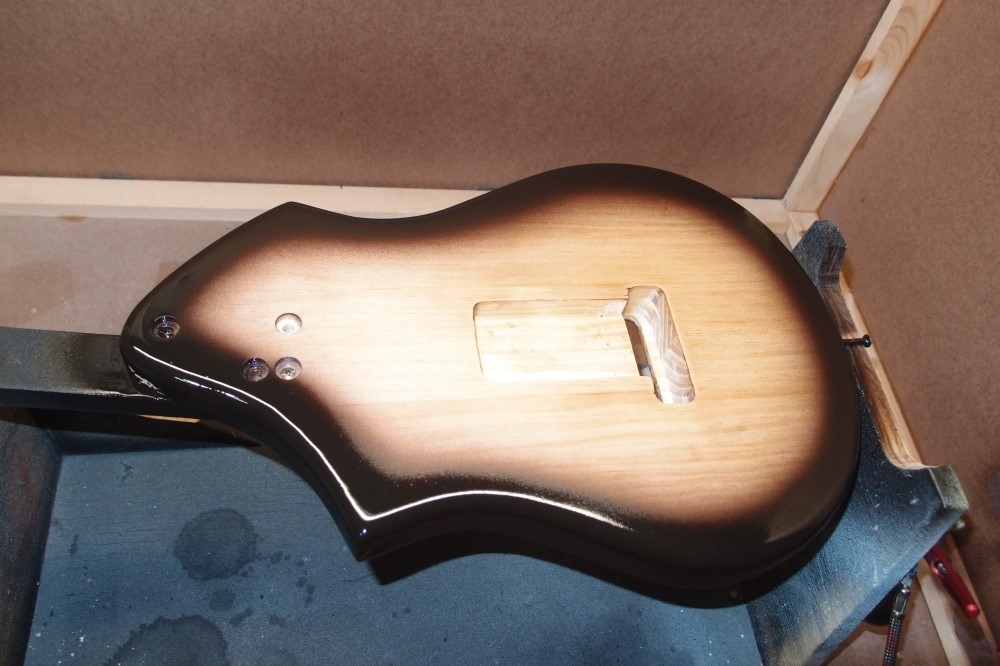
Here is the back side, to show off the burst and the wood grain. The burst is pre-colored 'Espresso' 'poly with stain' or 'stain with poly', very dark brown, not black. Some colors like this are available off the shelf, for others, like red and yellow, I tint clear poly. All these canned polyurethanes spray quite nicely with a compressor and a little mineral spirits dilution.
The body finish is actually very thick, to allow for leveling and polishing. It is almost impossible to fix polyurethane if you polish through it - the job becomes a do-over, so I always make sure I have plenty of thickness to work with, especially around curves and edges. The downside of this is the extended curing time. I give it a month before I polish it, and a year before I fully trust it not to pick up impressions. The thin finish on the neck dries much faster, so this guitar will spend the next year in a hanger unless I am fooling with it. This is really no worse than a lacquer finish, which basically never dries.
The body is actually strips of pine glued together, but you can't tell. This is much more seamless than most two-part alder or ash bodies. Radiata is a really nice wood for this. It is noticeably harder than alder, but not much heavier. If I wanted a bit more thickness, I would glue a nice plywood top on and single-bind it, like a lot of Rics. That would also lend itself to chambering.
The neck is finished in rattle-can satin poly. I use rattle cans for small parts where I don't want all the bother of setting up to spray with the compressor and clean up afterward. Rattle cans produce awful toxic clouds of propellant and solvent, but for small jobs that is tolerable.
The angled headstock uses a 15-degree scarf joint. This type of construction is both strong and economical, as you can use a narrow piece for the neck and a wider piece for just the headstock. A regular flat Fender headstock requires a piece with full width for the entire length, resulting in a lot of wasted wood.
The headstock logo is a laser-printed water-slide decal, heavily overcoated with poly that is then smoothed flat.
Since a regular bolt-on mounting plate would obviously not work, the neck is attached with flush bushings. Three would do, but they come in sets of four. The screws are spread around the central truss rod. A better design would be to use dual truss rods and three screws down the center, like an old Danelectro, but I was using whatever parts and materials I had on hand.
Access to the high frets is obviously excellent. The neck is actually offset and angled towards the lower cutout, which is evident from the back if it is pointed out, but not visible from the front. The neck is not exactly on the centerline, but my body templates take care of all the complications of that.
This is actually a pretty easy guitar to build, a good project for a first-timer, especially if you do it as a hard-tail. All the materials are inexpensively available from Home Depot, you could use maple or oak for the fretboard. You can screw up the first one and just chalk it up to practice and throw it in the fireplace; it's not like you have one expensive loothery body blank and you can't make any mistakes. This wood comes out a nice golden yellow under an easy oiled finish, but it takes stain poorly. Start at the beginning of this thread, and you can find all the details.
Oh, and it sounds just like a Strat, unless I put it in Tele mode, in which case it sounds a lot like a Tele. I must admit, I'm not that picky, I lump guitars into two categories: single-coils and humbuckers. Single coils have a high clear singing tone, and humbuckers have a thicker fuller slightly muddier tone. Beyond that is all hair-splitting, cork-sniffing, and pure imagination.
Most Fenders sound basically the same, the exception being the Jazzmaster, which was designed from the outset to be different. P-90s are slightly thicker than regular single coils. All dual-humbucker Gibsons sound exactly the same, from the Les Paul to the 335 to their most unergonomic eyesores. Danelectros have their own sweet jangly sound, like much more expensive Rickenbackers, which should really be an embarrassment to Rickenbacker.


Questions or Inquiries?
Just want to say Hello? Sign the .