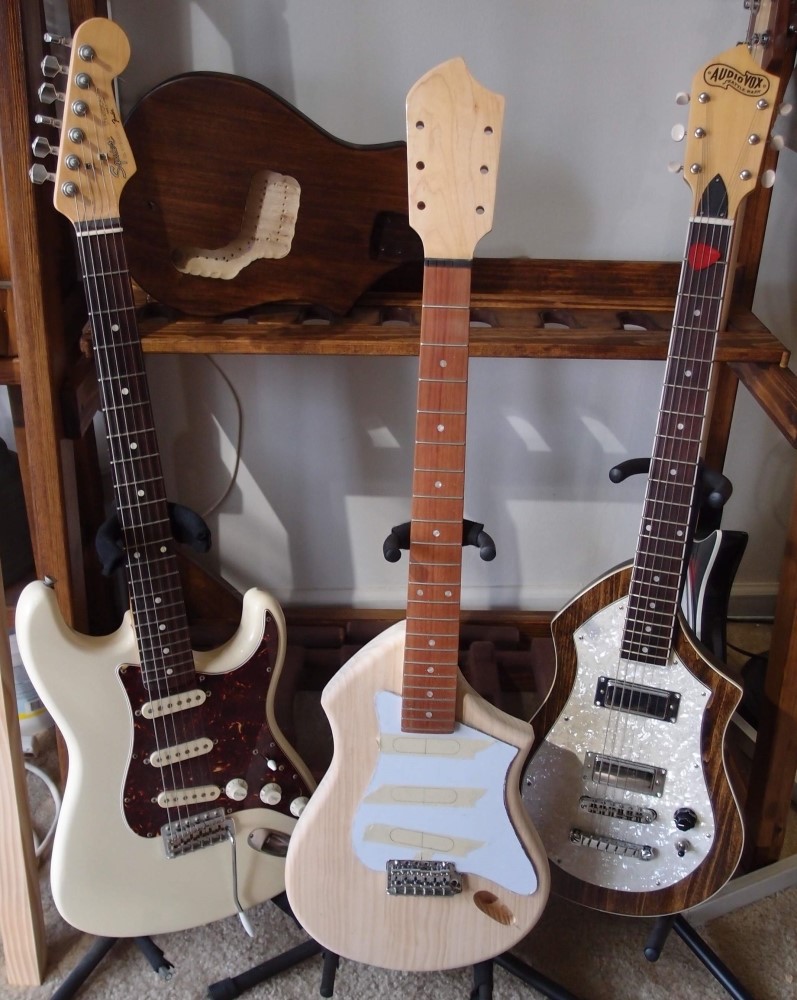
Audiovox Stratocaster-Style Guitar (4/5)
Jun 10, 2018
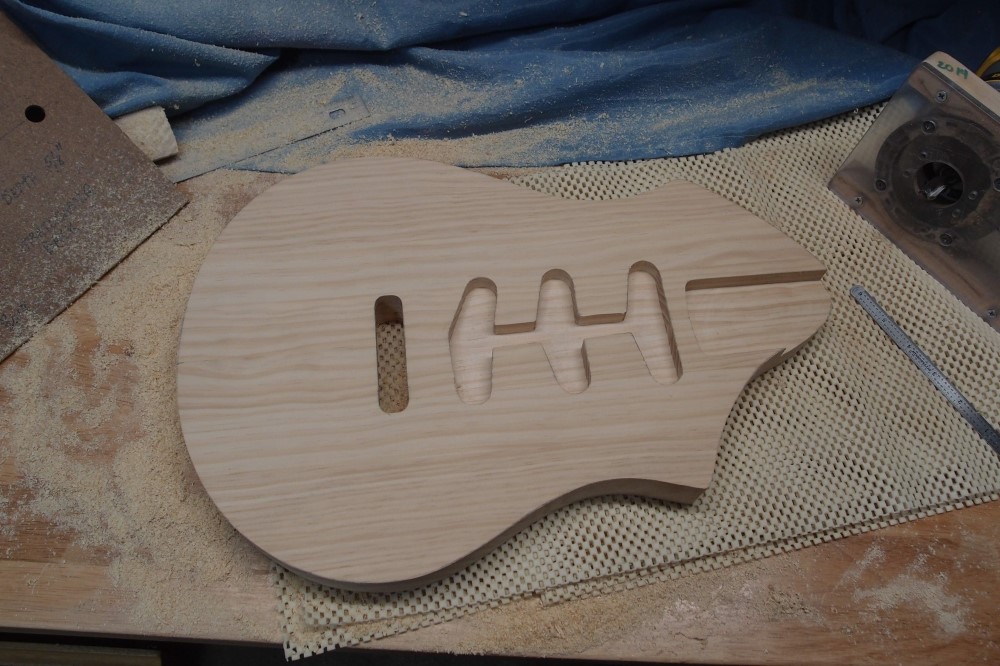
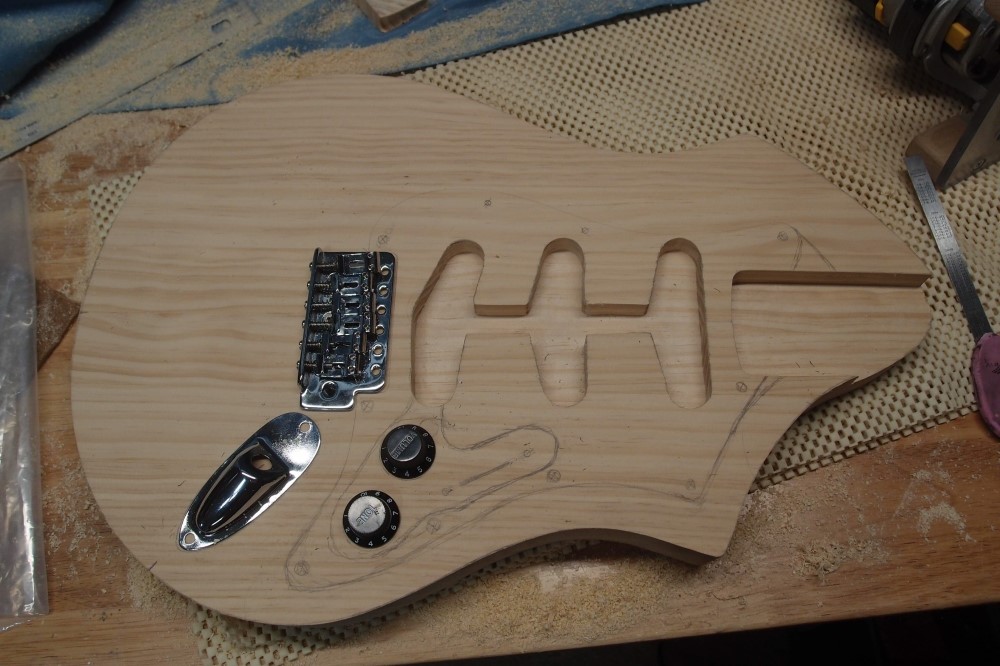
Who doesn't recognize this rout? And the back …
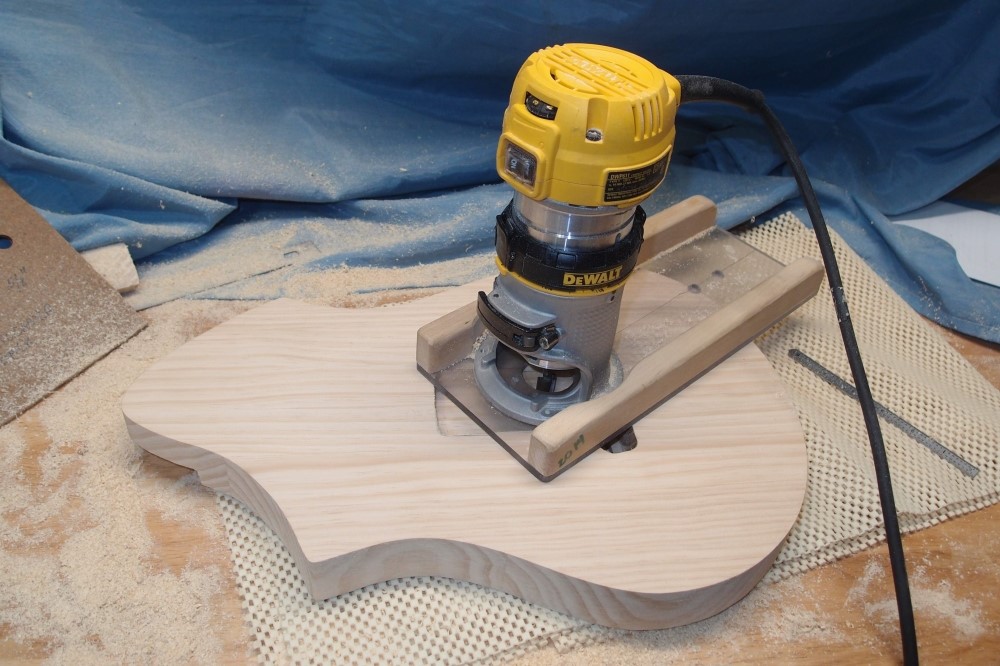
And my trusty DeWalt 611. These routs were all done freehand, after removing what I could on the drill press. This little router is all you need to build a guitar. It is so much easier to control than a full-sized router and has plenty of power. This pine is actually stronger and harder than alder, and the router went right through it at half speed, with no burning. A while back a woodworking noob asked router advice on TB and got sold a big expensive Porter Cable contraption. I'll bet he's sorry now.
The tremolo cavity was drilled through on the drill press. That's how you get the location on the back. Then I connected the holes with the scroll saw and routed it out to the final dimensions. The spring cavity keys off the tremolo cavity. I did that entirely with the router - what a mess, but the drill press wouldn't reach to the center of the body. Well, that's what vacuum cleaners are for. I also used earmuffs, safety glasses, and a breather mask, otherwise, I would be choking on sawdust right now.
I used an old 1/2"d x 1" long router bit, probably the oldest one I own, but recently re-sharpened on a diamond hone. I took all the cavity dimensions off my Japanese Strat. Since everything is covered up, none of it needs to be perfect, that's the genius of Fender. I calculate there is 5/16" of wood between the spring cavity and the pickup cavity.
I made templates for both the front and back from Masonite. They are tracing templates, not thick or sturdy enough to use as router guides, but otherwise quite accurate, and covered with notes, like radii, depths, alignments, etc. I tried to head off every mistake I might make. So far, so good.
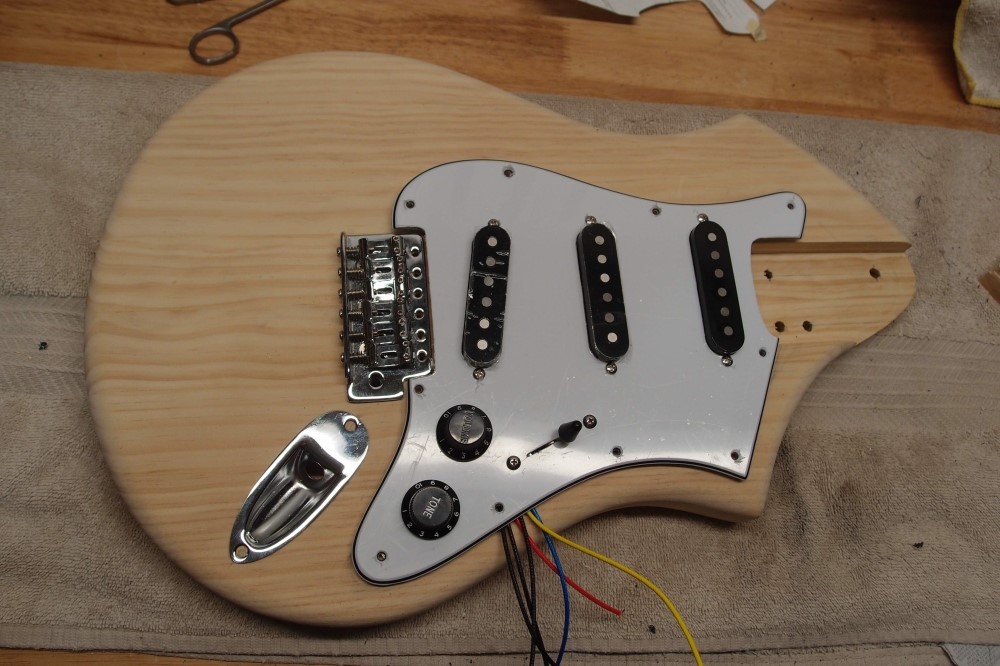
I've never done one of these tremolos before, I don't know where you need to be exact and where you can be sloppy, so the whole thing is as precise as I can make it. But the Strat pickguard, stretching from the neck to the bridge, covers up pretty much everything.
Now I need to figure out the control layout, which means starting on the pickguard, at least in cardboard. This body is smaller than a Strat, so everything is tighter, but I will fit in a Strat output tub somehow. Maybe something like this:
I tried a "pecan" stain on a piece of scrap, and I like it, so I will probably stain this body a little darker, then Tung Oil. The pine has a look somewhere between ash and alder, nice and stripy. The glue joints are only apparent on the edges. A sunburst would cover that.
Not going to do any Strat-style contouring, this body is so small it doesn't need it, and you really don't want to lighten it any. Not sure what sort of pickguard I want, probably just white. I had to hunt around on eBay to find a 5-way switch that will fit in a 1-1/2" thick body.
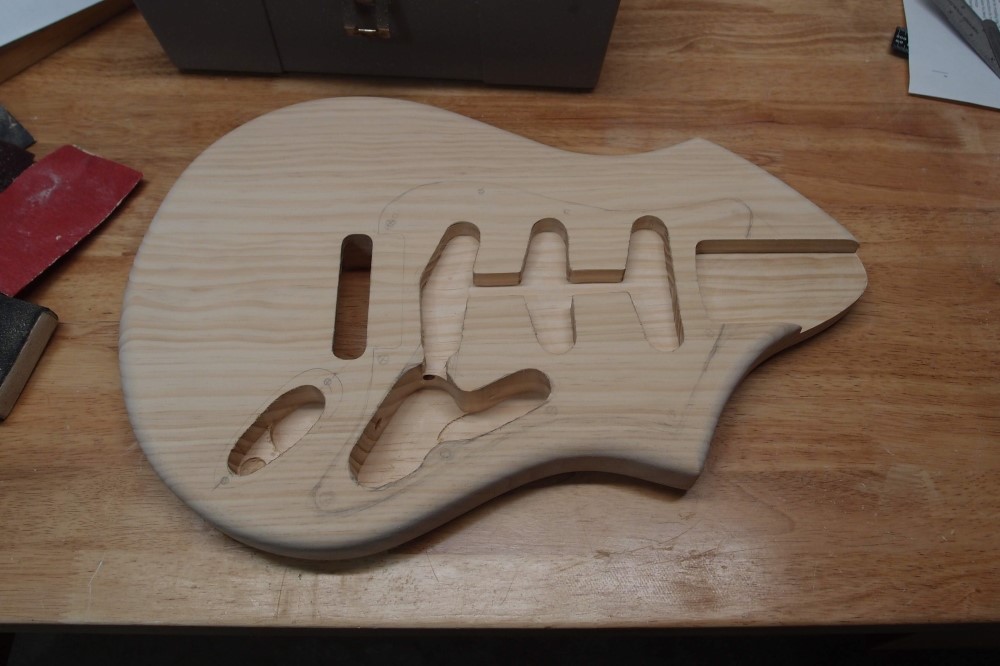
And then this. The only woodwork left is to drill for the neck mounting holes and bushings. It will have basic volume/tone with a five-way switch and a push/pull on the tone knob for the forbidden 1-3 and 1-2-3 combinations. Otherwise, I think I'll keep this simple and passive.
The control and output cavities were hogged-out with a Forstner bit on the drill press and then finished freehand with the router. The little router has much less torque reaction than a big one, which makes freehanding much easier, even with just one hand. Following a pencil line is as easy as drawing it. A foot-long 1/4" drill bit made the hidden cross-connects, you'll need one of those.
The pine routs nicely with a straight bit, but the 1/2" roundover left some rough spots where the bit met the grain the wrong way, even with the speed backed off. Can't do much about that except sand it out, and it came out fine. Almost no burning. This hard pine is a little more difficult to work than soft alder or poplar, which would be expected.
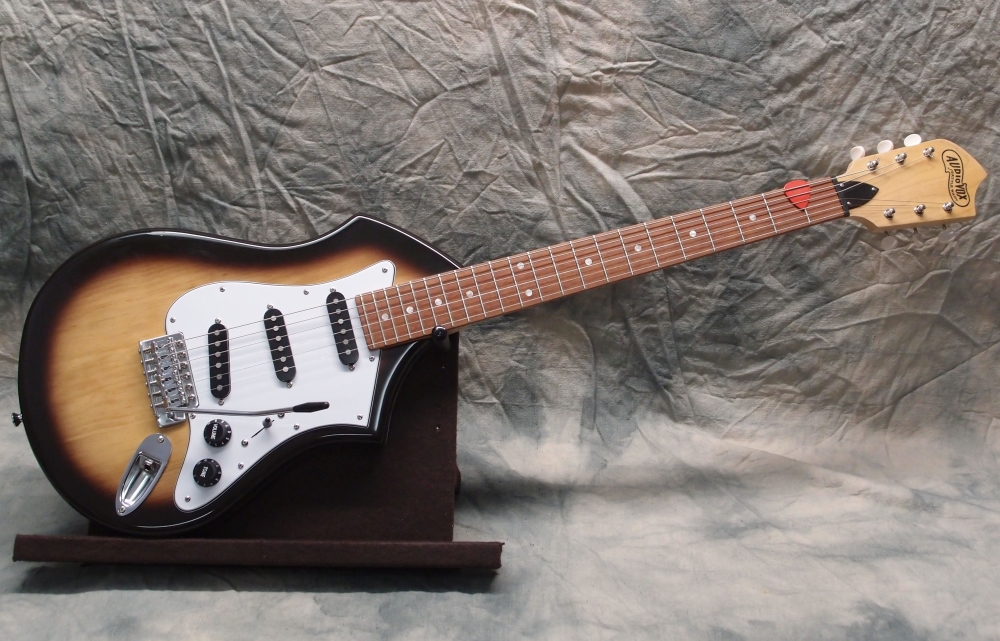
You can see the rough outline of the pickguard, Strat-like, but smaller and following the lower contour, without the horn, of course. Now I'm thinking about doing a two-tone burst in polyurethane. Experimenting is the point, and I haven't poly'd over this pine yet. A burst on a regular Audiovox would be pointless, as the enormous pickguard covers almost everything, but here it would work nicely.
Jun 12, 2018
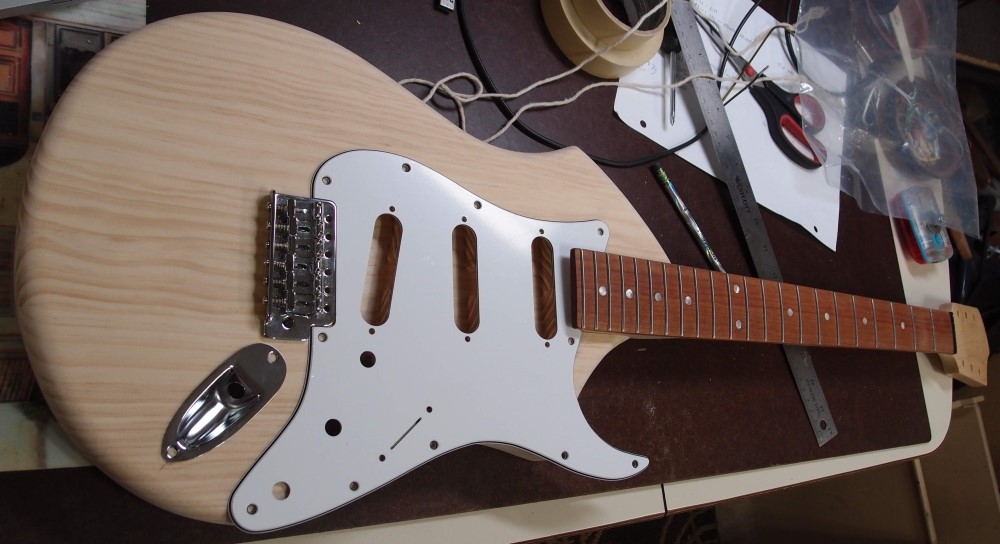
This is starting to look like something. I took some measurements from my real Strat and realized I needed to take about 3mm off the neck heel. With the overhanging 21st fret, I couldn't use the belt sander, so I sketched the outline and cut it freehand with the router. Once that was fixed, I laid out the holes for the bridge mount and drilled them. To do that, I first punched and drilled the two ends and mounted the bridge. Then I punched through the empty holes in the bridge, removed it, and drilled the remaining four holes. It came out perfect. From the 20th fret to the mounting holes is 7-1/4". I wish I could just get a Strat pickguard and cut it down, but the control holes would be in the wrong places.
Some more progress - the pickguard is a cross between the Strat and the Audiovox. I couldn't decide what to do around the neck, there was no good way to reconcile the two styles, so I didn't. Just a straight cut down to the corner. Adds some angularity to the organic rounded shape.
Jun 19, 2018
Pickguard all done - build process in the Workshop section.
Jun 23, 2018
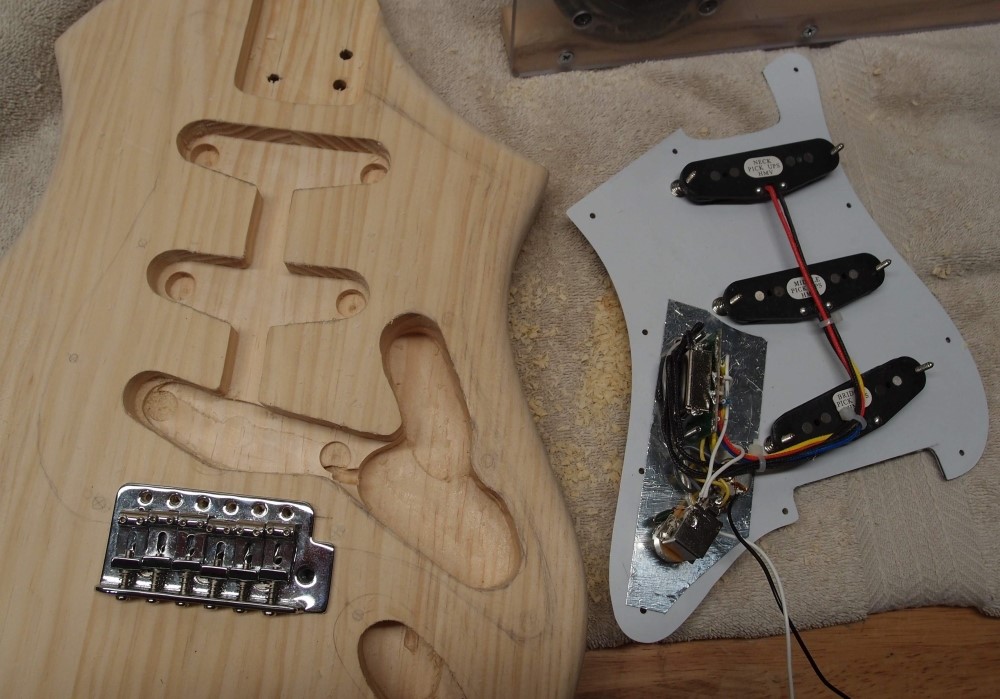
One of my peeves is cutting pickup wires. Another is pickguards that have to be mashed into place. After I connected everything, I widened out some of the cavities to fit the wires better. The excess pickup wire is tied to the switch body.
This is standard Fender wiring, with an extra switch to always enable the bridge pickup. A pull on the tone knob, and I can have the two forbidden combinations - NB and NMB. Parallel wiring gives that bright Strat sound and 'quack'. If this was a bass, I would use a 'superswitch' and wire the pickups in series. That would make the combinations much more powerful - it sounds great.
Series/parallel wiring, additional pickup combinations/locations, single-coil/humbucker, coil-tapping/phasing, strings, active electronics - these are all things that can have a very great effect on tone. Fussing with capacitors and pot values, woods, finishes, bridges, etc, are things that have about as much effect as changing the color.
This body is now ready for final sanding and finishing. The neck is moving along as well, with a heavy coat of poly over the decal, hardening off. When that is sanded flush and top-coated, the logo will appear to be floating in the finish.