Rickenbacker 325 Bass 2 (8/8)
Dec 16, 2018
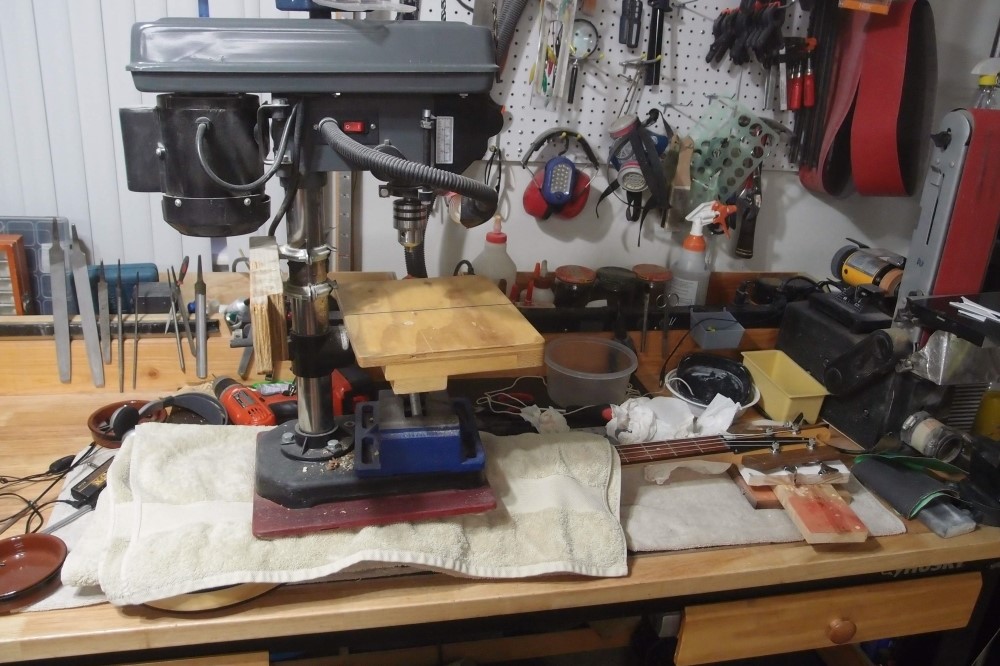
Drill Press
This neck has a back bow. Most of it straightened out overnight after I strung it and tuned it up a full step, which gives the same tension as a long scale. Eventually, it will pull forward to where I can control it with the truss rod, but, having all the patience of a jackrabbit, I thought I'd accelerate the process.
The back bow comes from a hard strong fretboard combined with an inferior grade of maple, some sort of western species, not the good eastern stuff. Pressing the frets in makes the fretboard want to grow a bit, and it pushes the neck back. The actual bending force from the strings is quite small, maybe 10 pounds, but eventually it would do the job. If it had a double-acting truss rod, I could force the issue, and eventually reverse the rod, but those are harder to make, this has one of my dead-simple single-acting rods.
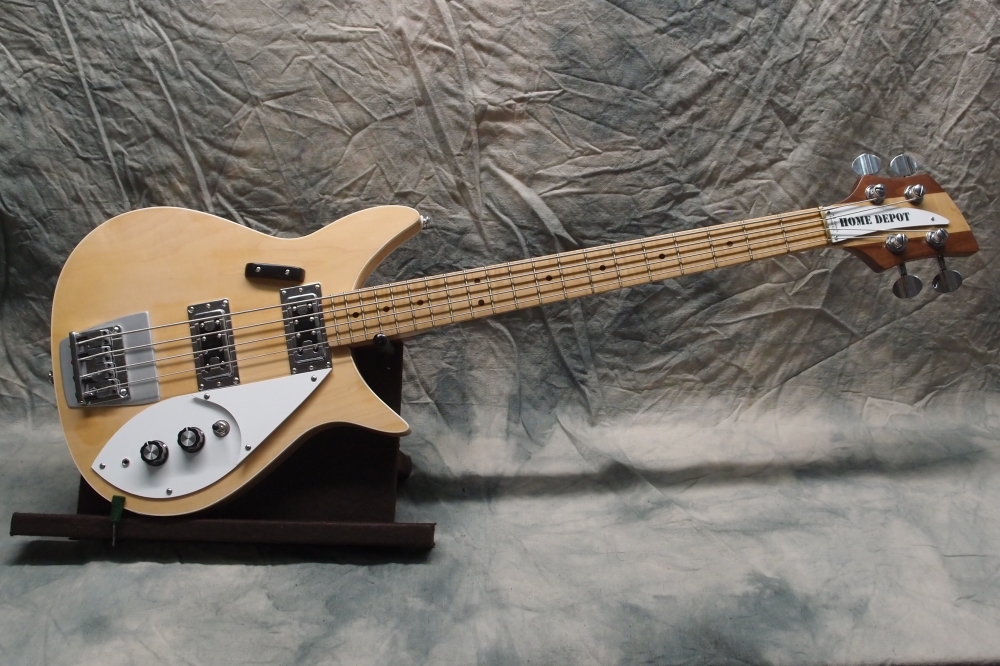
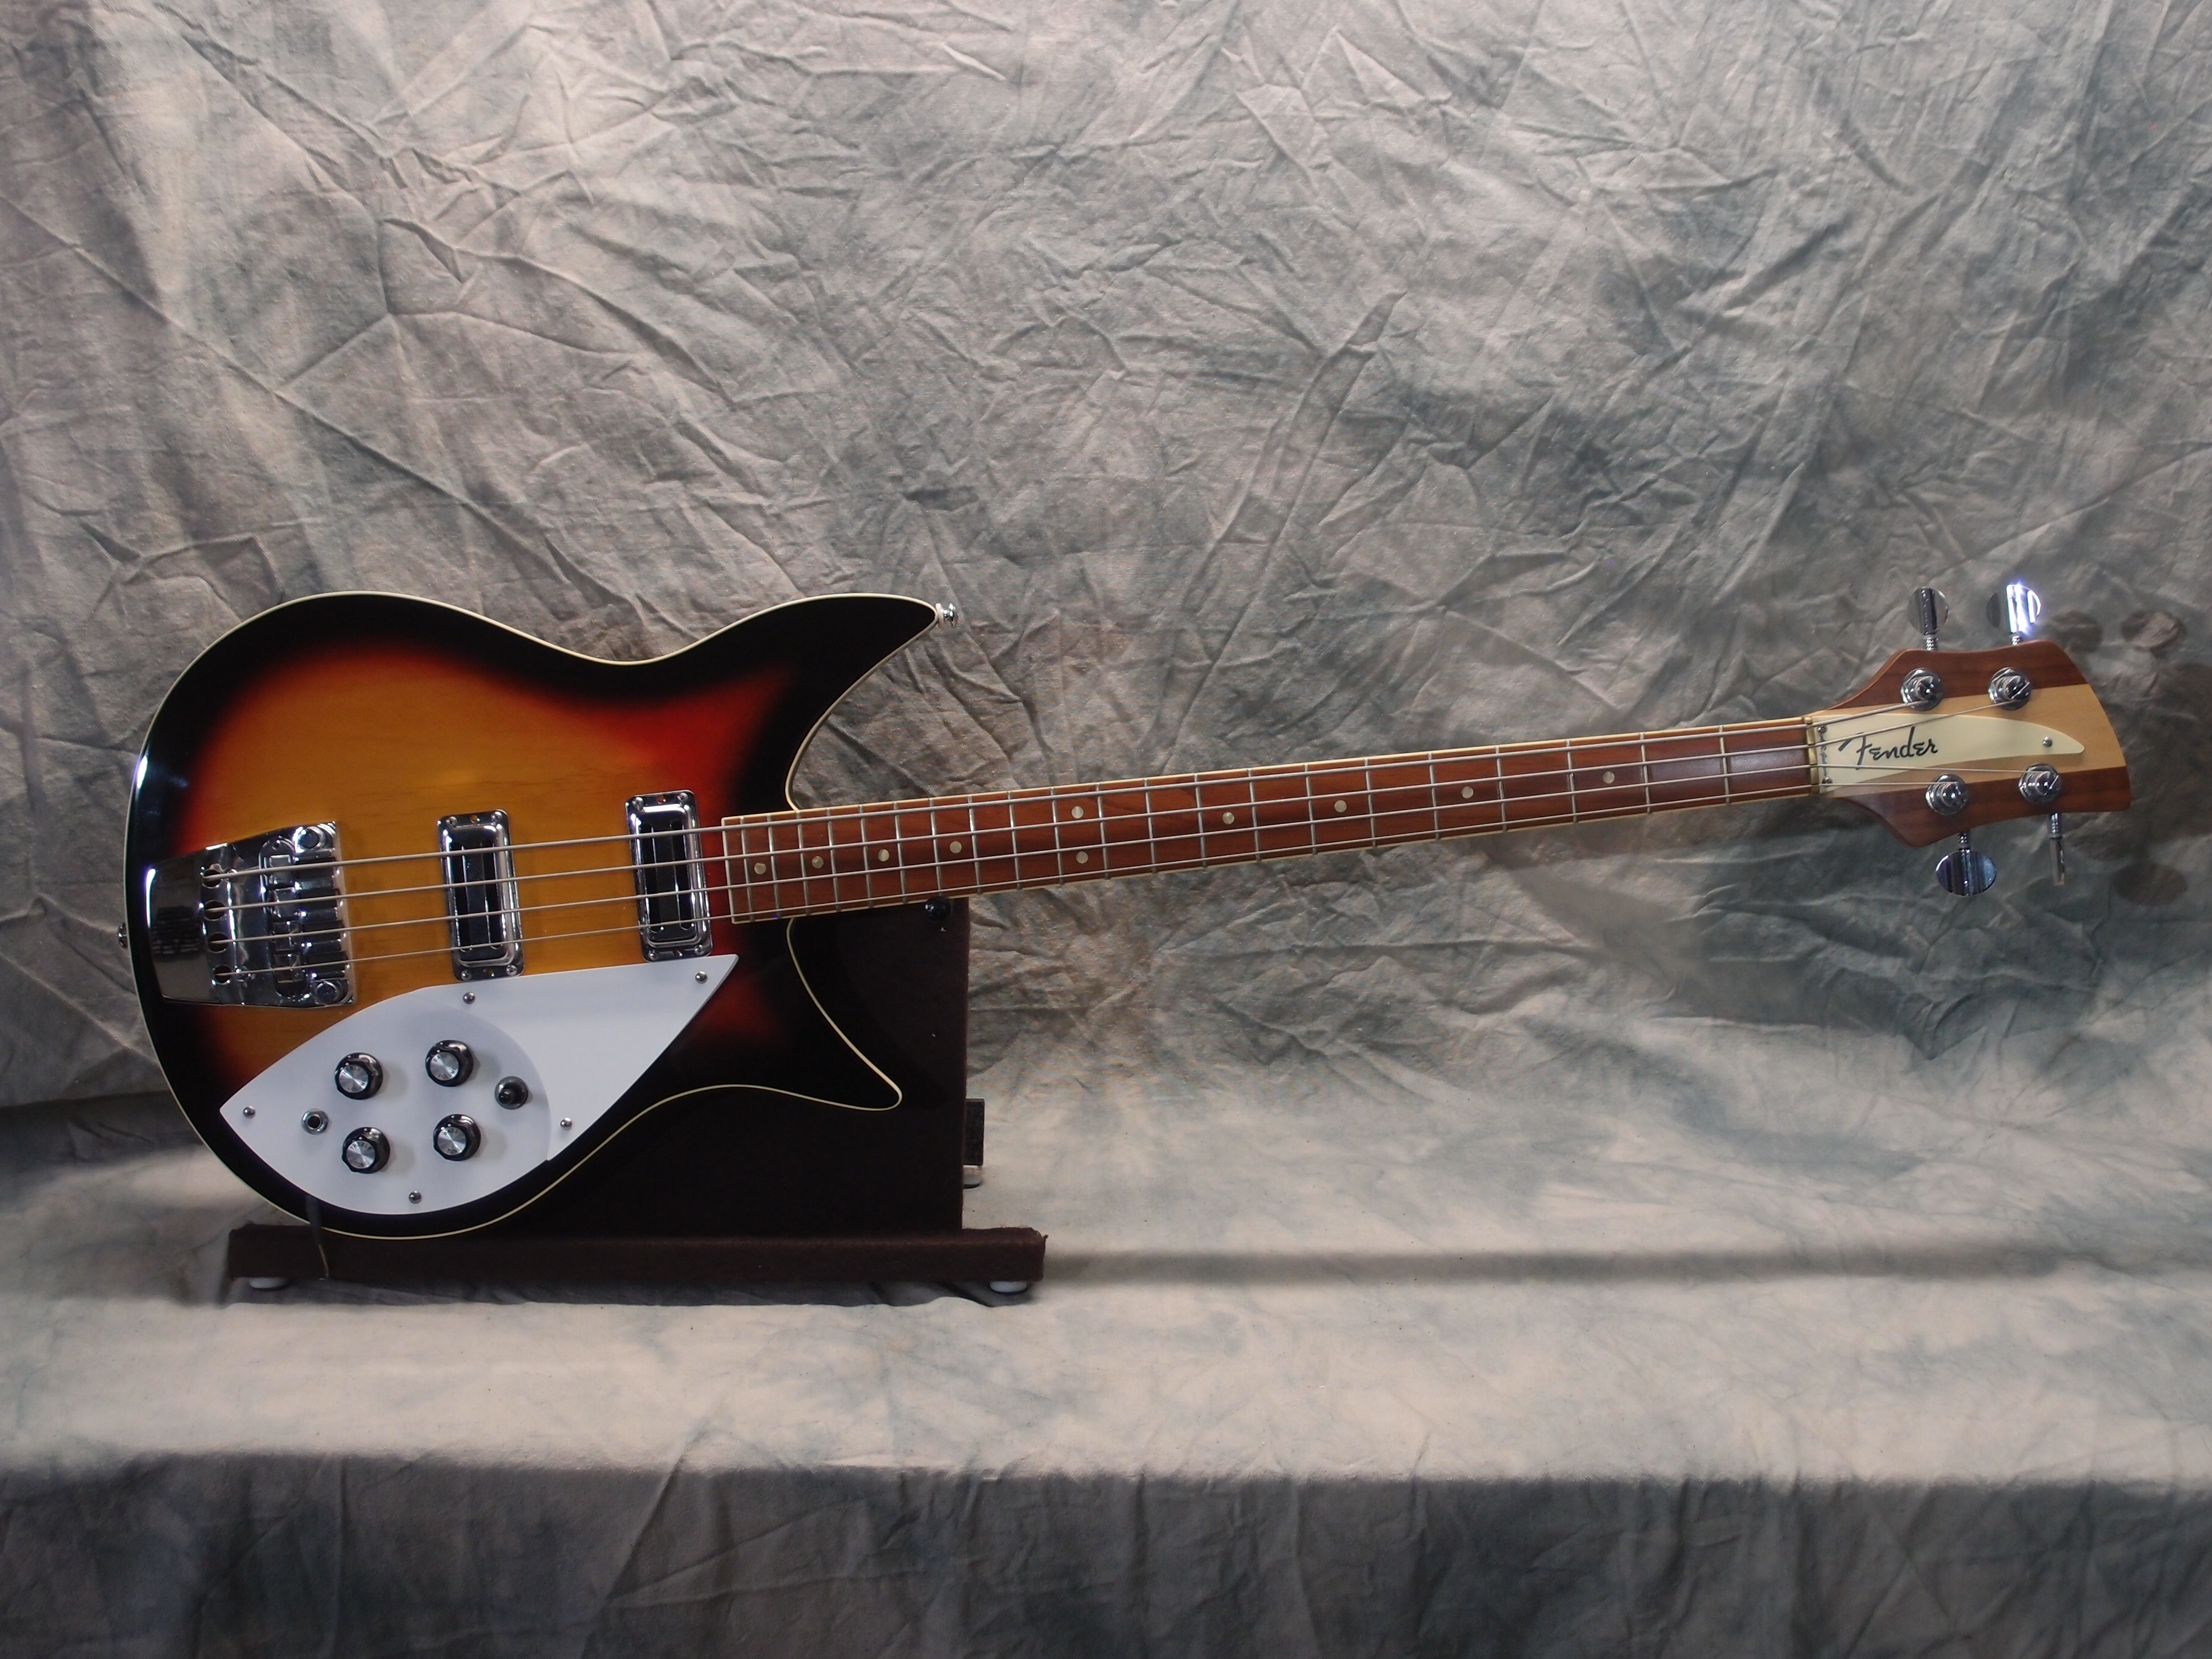
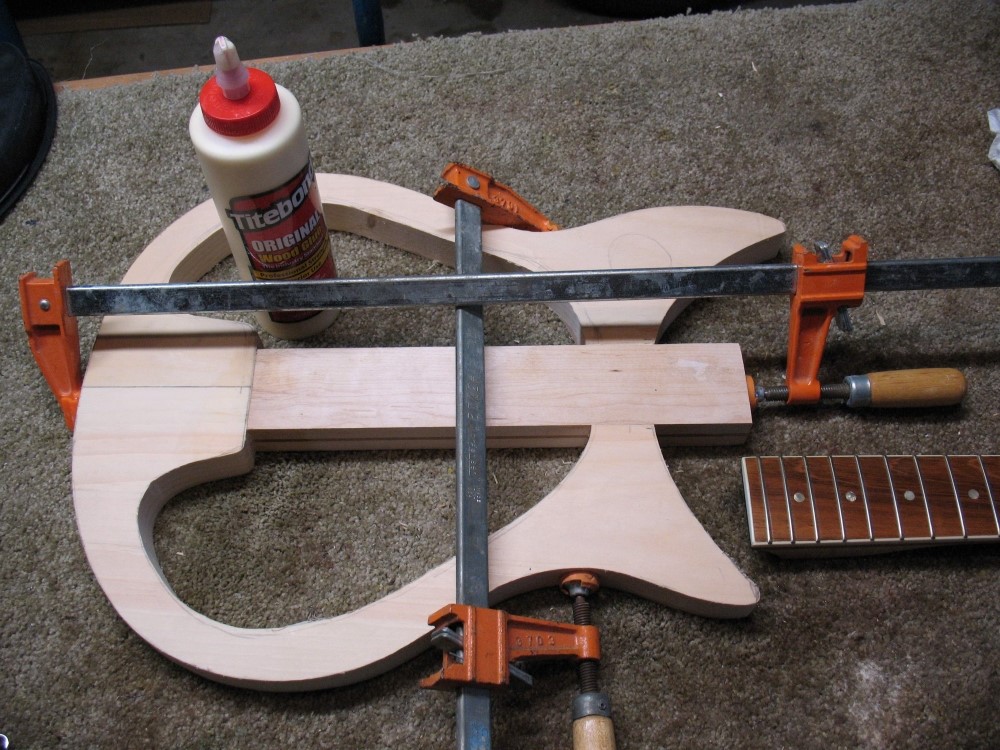
This body was made as a replacement for the earlier one. Despite being scaled up from that, it is actually lighter, as I got better at making things hollow. Along with the less-dense maple neck and lighter hardware all around, this bass actually weighs in a few ounces lighter than the previous one, even after I added some scrap metal and lead for balance. That's less effective than you'd think, it takes 2-3 ounces in the body to balance one ounce on the headstock, depending on where you decide the fulcrum is.
This body was also made for a different neck and a Ric bridge, both of which ended up on the Fenderbacker when a slip of the router ruined this one. Later, I routed off the ruined face and replaced it, and used it to practice binding on. If you look close, you can see that both of these were done by someone who was learning the trade, but from arm's length, they look fine.
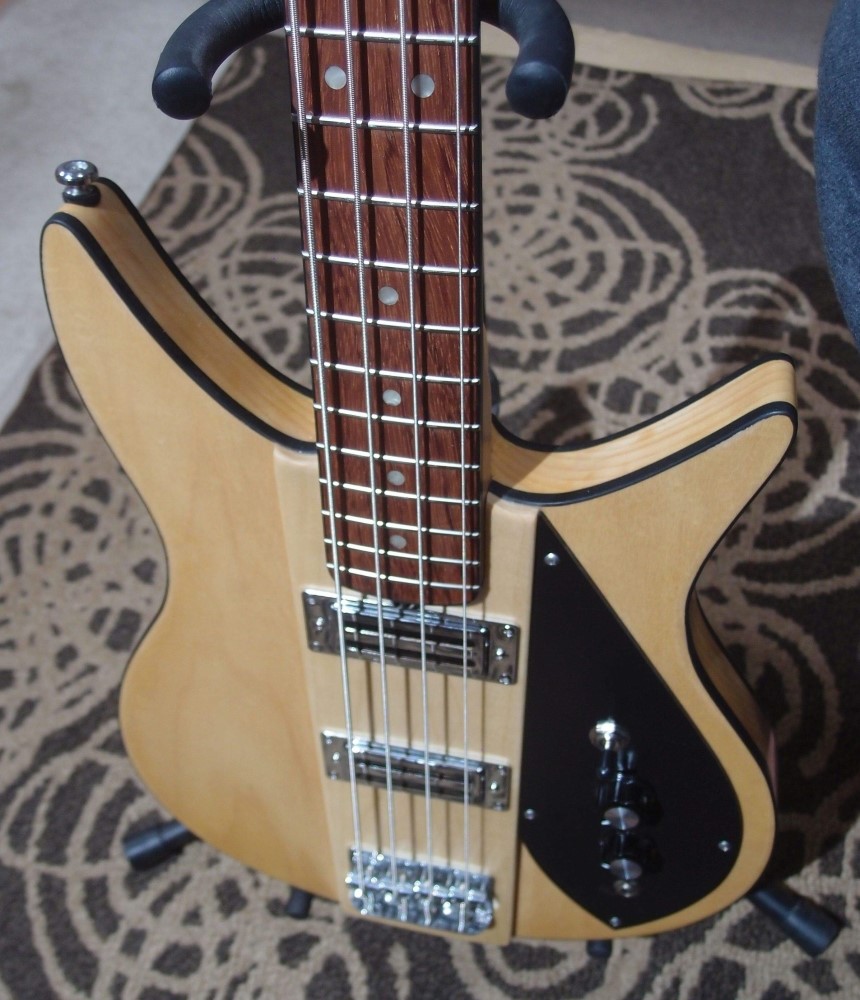
After I got the idea to fix the little one, I started thinking about this one and came up with the raised center board. The center board gives enough thickness for a Fender-style neck and bridge in place of the taller Ric-style parts. Routing the neck pocket down to regulation 5/8" was not an option with the unusual neck mounting made for a different neck.
The neck is two pieces of wood that I didn't like, put together. All the hardware except the pickups came from the parts box; the pickups are cheapies, so it is an almost free build. I may get a high-mass bridge just to give it a little more heft, although it balances pretty well as it is thanks to the lightweight tuners. The specs are: 32" scale, 20 frets, pure Fender setup. Mini humbuckers in the standard Ric positions should give a Ric-like tone when I finally get around to plugging it in.
This one is using the black side of the dry erase board for the pickguard, the previous one is using the white side. I think the Ric flying pickguard would be a little busy along with the raised center, but I laid out the screws to leave myself the option. Both of these are currently "No-backers". Somewhere I have some self-adhesive paper labels on which I can print up anything I want and apply to the TRCs, much easier than a decal. Or I can just scrawl on them with a Sharpie.
I have one more Ric travesty in mind, then I will leave Rickenbacker alone.
Dec 17, 2018

This neck is strong, the drill press was not having the desired effect. Figuring I was just using the wrong tool for the job, I tried the belt sander instead, but that seemed no better. Applying my keen loothyer mind, I designed a new tool, which I shall call the Loothery Neck Adjuster (TM). You can see the effect of this tool, and I can set it aside for a week, or a month, or however long it takes for the wood to creep into the right shape.
I guess any neck that is physically shorter than a 34" 20-fret with a hardwood fretboard should be considered short-scale and get a double-acting truss rod, just in case. A softer maple, oak, or walnut fretboard would probably not be doing this. I recently spoke to a guy who's been using poplar for fretboards, with no ill effects. I wouldn't do that though, poplar is real soft, and I told him so.
I've never had this problem this bad before, and I blame the funky non-Home Depot maple, which I actually bought as a real luthiery neck blank years ago before I knew what I was doing. So much for that. The fretboard is a last piece of Bubinga, a wood I don't like so much, Brazilian Cherry (Jatoba) is better looking and cheaper.
If this doesn't work, I have a couple of other options. I can pull all the frets, make a tool to widen out the fret slots, and re-fret it, or I can dig out the truss rod and replace it with a double-acting one. Neither one of those seems like a good option, I did not install this rod to be removable. From now on that's how I will do all of them.
While working on the Cowbell, which uses the same truss rod, I realized I could make it removable and reversible, which would solve all the problems with this neck. First, I took the nut off and widened the hole with one of those old-style Exacto knives with a long skinny blade. For once I'm glad this isn't real maple, this western maple carved pretty easily.
When I had enough side clearance, I switched to a small drill bit, keeping it clear of the threaded rod. When I was sure the brass block had a clear path out, I extracted the rod using its own nut with progressively more spacers under the head. The beauty of this truss rod design is that all the bulk is at one end, the rest is smooth and skinny.
The rod came out surprisingly easily, but not surprisingly without its shrink-wrap covering, which was glued into the slot. That had to come out too, so I straightened a coat hanger, put a small hook in the end, chucked it in the drill, and snaked out the truss rod channel like a plumber. At the very end, I couldn't hook the last bit out, so I cut the hook off and used the sharp end to pulverize it. I put some new shrink tubing on the truss rod, which slides in and out easily now.
I filed the neck opening a bit to accept the rod upside-down, stuck the rod in, and cranked a nice front-bow into the neck. No more waiting, now I can put that Ric back together. In six months, I may have to pull the rod and flip it, or maybe just back it off a bit. Eventually, it will settle down, one way or the other. Shouldn't have to do this more than once, that's acceptable to me.
This is awesome - I'll never build a complicated double-acting rod again, and routing the neck for a removable truss rod is actually easier. In hindsight, I don't know why you'd want to permanently bury the truss rod any more than you'd want to permanently bury the tuners or the electronics. It's bad planning and bad design.
Dec 27, 2018
I got a nice front bow in the last Ric's neck and reassembled it. The setup changed considerably - I lowered all the saddles about 1/8", and then backed off the truss rod a bit. I still haven't addressed the nut, for now it can just settle in under tension for a few weeks.
Did some nut filing, fret leveling, saddle adjusting, truss rod fiddling, and this is turning into a really great player, and it sounds good too. I wasn't sure about these cheap Chinese humbuckers. They weigh much less than you'd expect, but I don't hear any deficiencies. I had to re-connect the tone control, it wasn't working right. An A250 pot with a 0.047uf capacitor gives a nice smooth response. I used a B250 on the other RIC, and it doesn't do much of anything until you are almost all the way off. The volume pot is also A250.
Here's my take on pickups and tone:
The location of a pickup is much more important than the type (or price) of it. There are three good spots: near the neck (N), near the bridge (B) and in the middle at the "P" spot (P). Rickenbacker uses basically N and P, while a Jazz bass uses P and B, and a lot of Gibsons use N and B. In between these sweet spots are dead zones that don't sound so good. This happens to be exactly where the Stingray has its lone pickup. More on that later.
After location, wiring is important. Series-wired pickups are going to sound much fuller than parallels. This is the main reason that the P Bass sounds so much deeper and throatier than the Jazz, because the P has two pickups in one place, wired in series. Add a series/parallel switch to a P pickup, and it sounds eerily like a Jazz. Add a series/parallel switch to a Jazz Bass, and it sounds very much like a Precision.
Since all three of my Rickenmashers have the pickups precisely in the Ric locations, they sound a great deal like a real Ric, despite the fact that they are all using undistinguished humbuckers. Another bass I built with lipsticks in the Ric positions sounds just like a Ric, just with lower output.
On a guitar, the distinction between a trebly single-coil and a round humbucker is far more important than on a bass - bass just doesn't have the high frequencies to matter as much. I'm not saying there's no difference, just that it is less important than the points I've discussed above.
But the Stingray sounds great, how is that if the pickup is in probably the deadest spot you could find? And not just that, but the Stingray pickup is typically wired in parallel internally, unlike most humbuckers, which is going to throttle it even more. Well, the Stingray was one of the first active basses, and that is what saved it. It turns out that the crude active preamp in the Stingray had anything but flat frequency response, in fact, it was heavily EQ'ed to compensate for the anemic output of the pickup.
With the crude amplification of 50 years ago, high output was a necessity, especially if you wanted to overdrive your amp. With modern electronics, that is fairly unimportant, the fact is low output pickups actually sound better, less harsh, and more nuanced. If you want to make noise, there are hundreds of pedals to choose from.
If you want to do interesting things with your tone, without going active, try series/parallel switching. With single-coils, you can combine them externally in series or parallel. Both of these setups give two distinct tones. Humbuckers are typically wired together in parallel, as series humbuckers tend to be booming and overbearing. However, with a humbucker, you can switch the internal coil wiring between series and parallel. Parallel mode sounds much like coil tap, while preserving the noise canceling.
Other factors that influence tone include strings, action, pickup height, and playing style. Things that matter much less (outside of the marketing department!) include capacitors, bridges, nuts, and woods (for an electric instrument.) The only bridge I've ever noticed a difference with is the rosewood-saddled bridge on a Danelectro. The saddle actually touches the strings, and unlike the nut, the saddle touches every note. The rosewood takes the sharp edge off and gives a Danelectro its 'soul', so to speak. I may be imagining that, but that's nothing compared to all the imaginary nonsense built up around 'tonewood'.
Jan 1, 2019

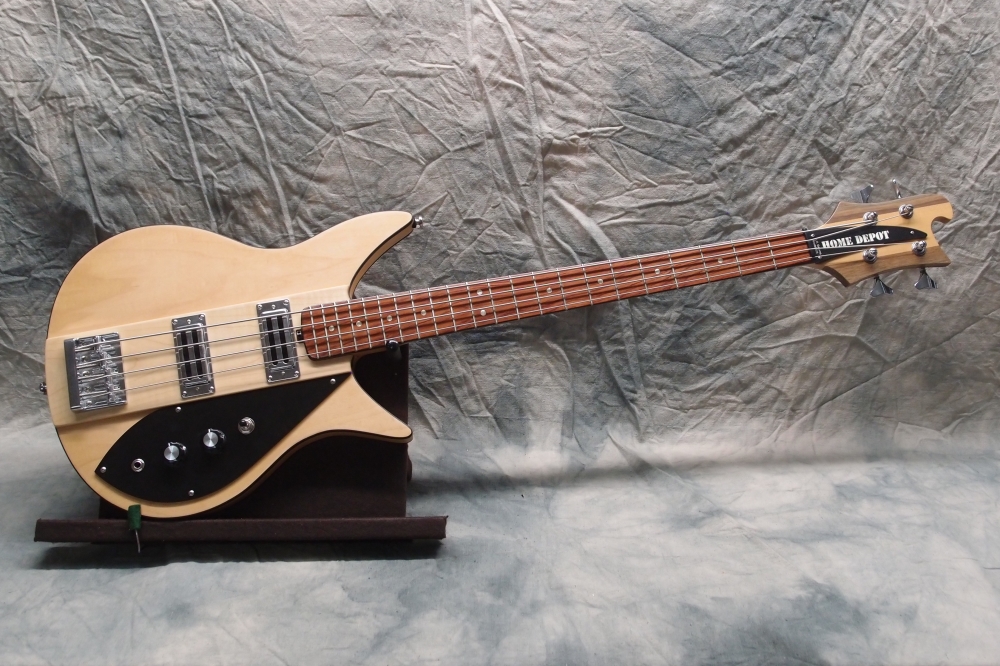
I received the new bridge for the "Big Ric" last year, and I like it. It is almost double the weight of the old one, a really nice hunk of zinc with mirror-like chrome. See how the back end is thick enough to swallow up the ball ends?
This kind of ruins the cheap-or-free theme of this build, but what the heck. Both of these basses came out a lot nicer than I ever expected or intended. And they were both relatively cheap, or at least I did not go out-of-pocket much to finish them.
Together with a bit more lead, the Big Ric now weighs as much as the L'il Ric, which seems right. I also replaced the strings, and in the process, I realized I had one last chance to tweak the neck, so it is off right now.
With both pickups engaged, all of these basses sound like my real Ric. The individual pickups are not as close, but not far off, probably because a real Ric uses overwound single-coils, whereas these use bargain-basement Chinese humbuckers. Still, this goes to show that pickup placement is the overriding factor in tone.
Now to figure out what to put on the truss rod covers.
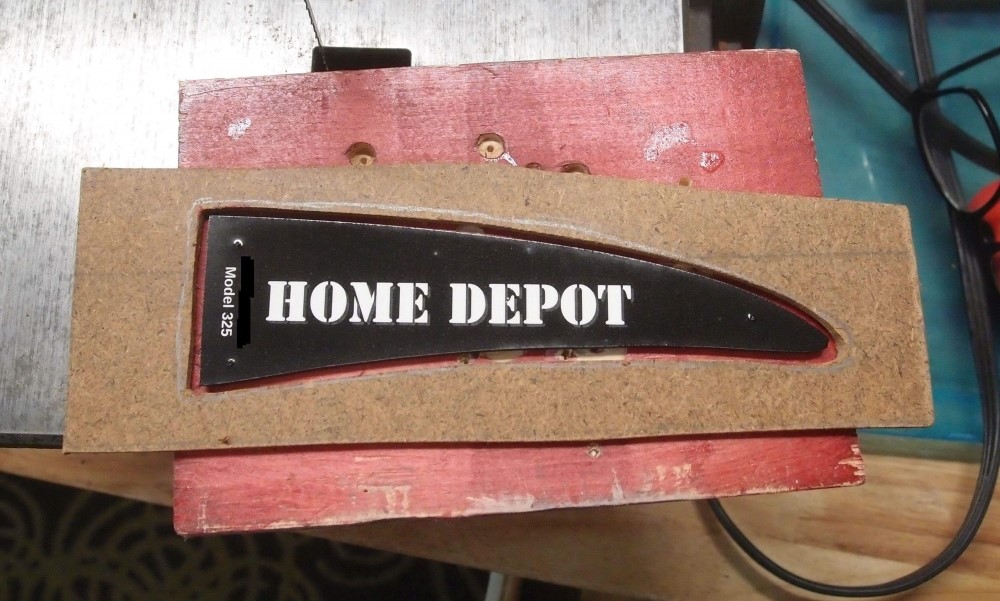
I made this oversized guide to help cut out the Rickenbacker stickers. The sticker material does not erase well, so you need to keep your pencil marks well away from the final product. The sticker entirely covers the TRC, with the excess trimmed off with a razor.
This black one took a couple of go-arounds before I was happy with it. I actually printed the black background, wasn't sure how that would work out. I put a coat of poly over it, to lock down all that toner. Looks like I'll need to buff out a few zits. The white one was much easier, and I didn't bother to coat it. The sticker on the "JL" guitar has been there for several years now and is still perfect, so this stuff seems to hold up pretty well.
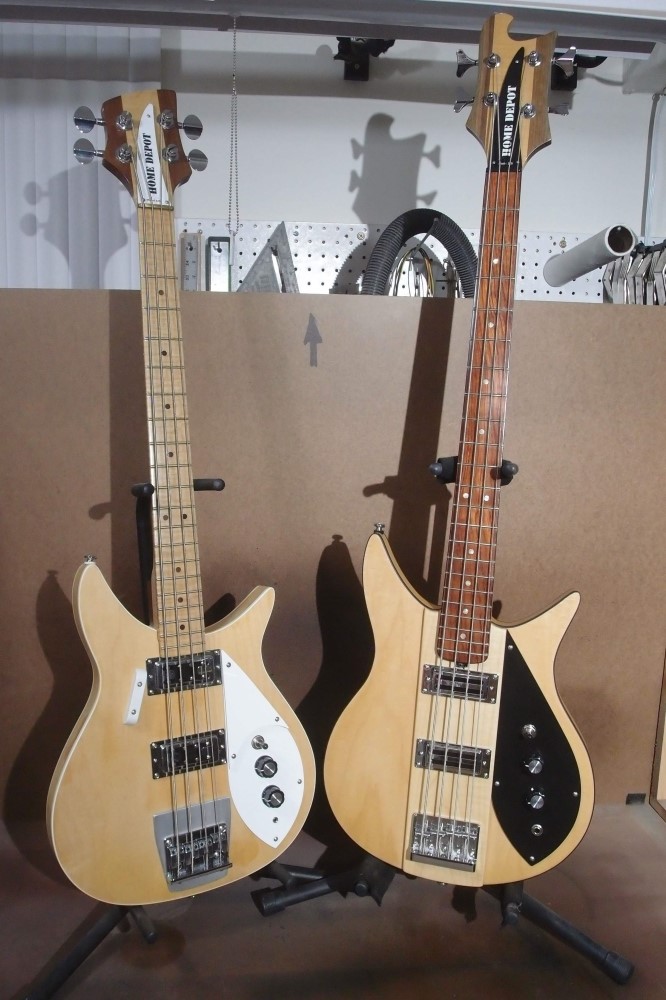
Both of the throwaway Rickenbacker Mash-ups, finished. Both weigh about 7.1 pounds and balance almost perfectly. On the right, sporting new bridge and strings, the left will get new strings today. Both are maple plywood over a white pine core.
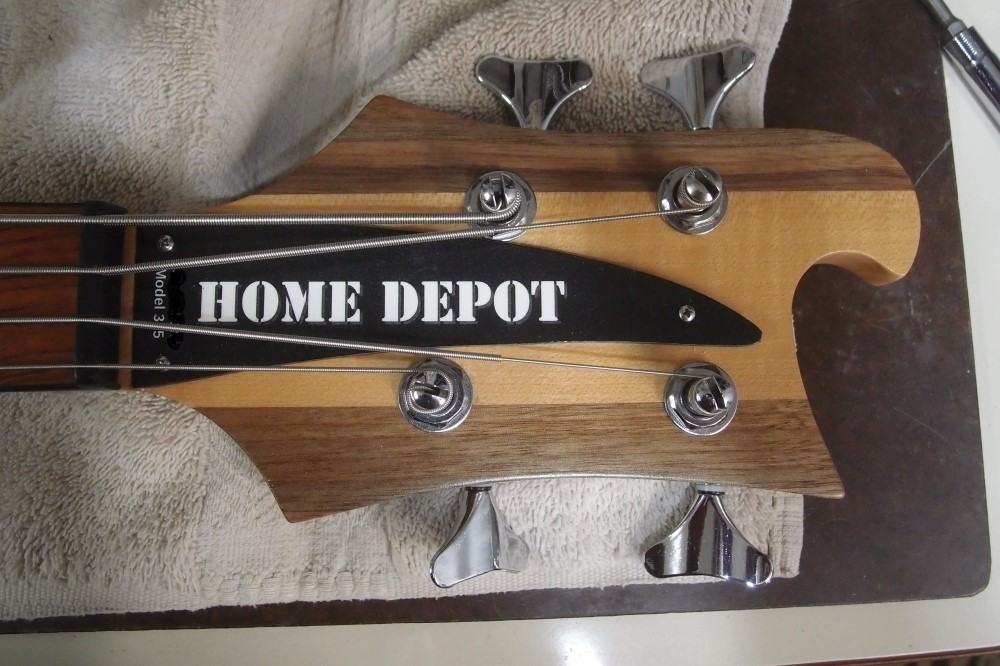
Detail of the headstock, showing printed sticker truss rod cover.

Questions or Inquiries?
Just want to say Hello? Sign the .