Rickenbacker 325 Bass 2 (5/8)
Nov 7, 2018
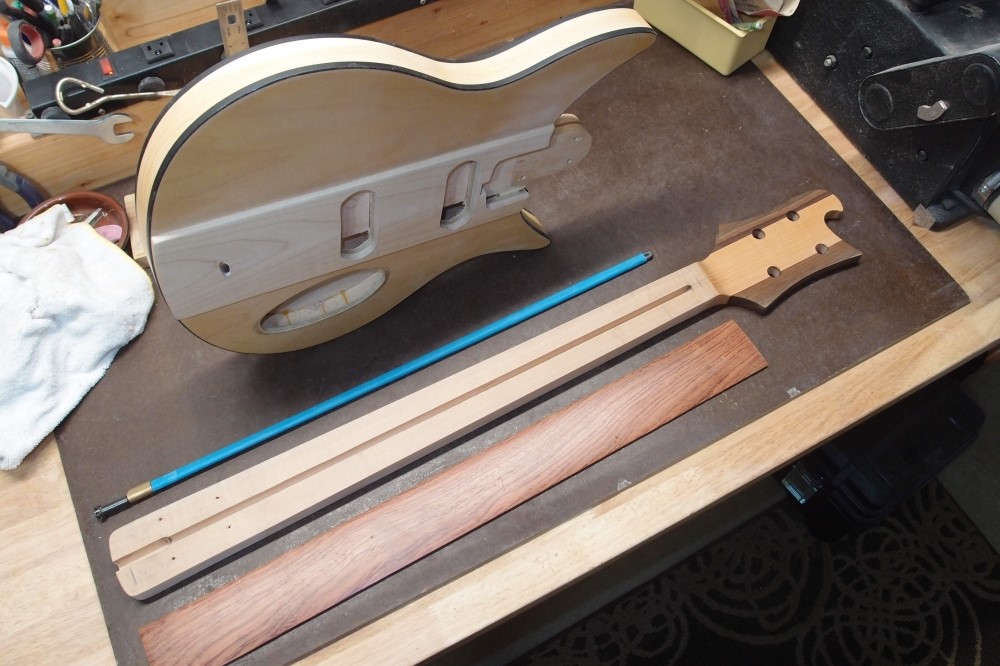
This is definitely looking like something. Both ends are shaped, and the sides are done. This piece of supposedly Bubinga is a bit too narrow for the heel, but with binding, it will fit. This piece was originally cut for a narrower neck and never used.
The 'loothery' maple is softer, lighter, and more orange-y than the good stuff from the hardware store. I'm glad I only fell for that trick once. This project is using up a lot of stuff that has been lying around for too long.
With 3/4" dimensioned lumber, I get the thickness I want with no work. This was a lot of extra work. The transition from the neck to the headstock is the original 15/16" thick, the rest of the neck is thinned to 3/4", and the headstock is regulation 9/16". Cut on the bandsaw, rough-sanded on the belt sander, then block sanded by hand to the final shape. A lot more work than it should have been.
It is drilled for sealed mini tuners, because that is what I have on hand. With the lightweight body, keeping the weight down at the end of the neck is important. I estimate the finished product will be about 7 pounds. Time to cut some fret slots. Tedious.
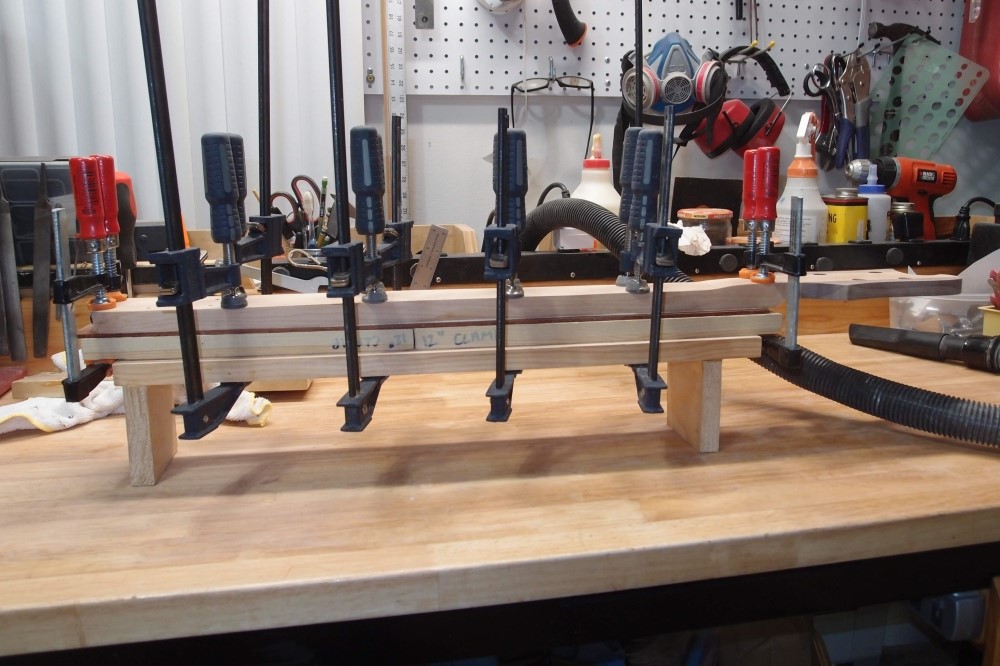
Fret slots all cut, gluing the fretboard to the neck. You can see how I used the extra thickness of the blank to make it snake at the headstock. The same effect can be much more easily achieved by gluing a 1/8" piece of maple or mahogany under the fretboard, or simply using a thicker 3/8" fretboard.
The clamping cauls are 12" radiused soft pine, similar to radius sanding blocks, which are hard maple. The clamps are set in pairs along the edges, to make sure I get a nice tight seam. A dozen clamps is plenty, given that the thin flexible fretboard is sandwiched between the stiff maple neck and the clamping jig.
Since the adjusting nut on this single-acting truss rod is removable, there is no need to make the entire rod removable, so I am not taking any measures for that, it will be glued-in for life. The heat-shrink tubing will allow it to slip and do its job even if the glue gets all over it.
The back of the neck is still square. That makes it easy to route the channel for the binding, drill the front and side markers, and even install the frets. After doing many necks, I am confident enough in shaping the back that I can invest all the work and materials without worrying about losing it all if I screw up. When I first started, I tried to do things so that the riskiest steps came first. That way, if I had to discard something, I would not have a lot invested in it.
The first time I ever did a neck binding was to cover up mis-drilled side markers. At that point, the neck was already rounded, so it was kind of difficult, but it came out perfect. Neck binding is actually pretty easy, although it complicates the fret installation.
When the glue is set, the next step will be to take the sides of the rectangular fretboard in to the neck profile. I'll band saw away the thicker parts, and then block sand it almost in. Routing the binding slot will finish the job, but I want to be routing as little of this tropical hardwood as possible. The harder the wood, the more likely it is to react badly to routing.
In general, I prefer to sand a contour to routing one, I reserve the router for doing inside cuts and cavities. Sanding is safer. I'm not trying to bang out a thousand of these a day like a factory.
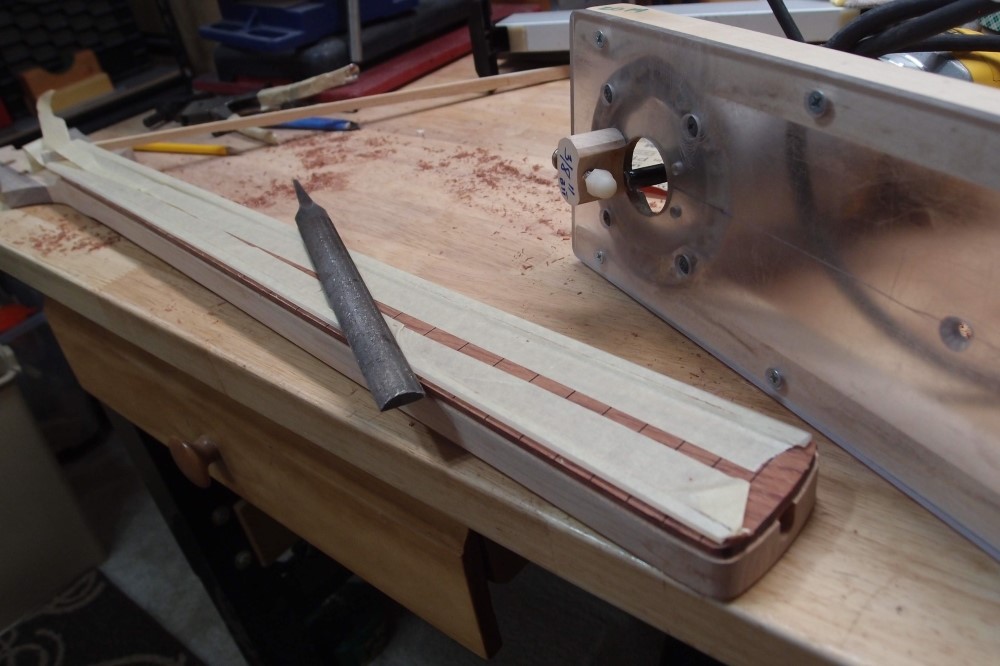
This is how I routed the slot for the binding: I cut two long strips of plastic from scrap ( you could also use leftover pieces of binding, but I was all out ) and taped them to the fretboard. This makes flat guides over the curved surface. A couple of test cuts on scrap established the depth, then I carefully aligned everything in an out-of-the-way place and established the height. You need to set the height so that it covers the high spot over the truss rod nut. A few bits of double-sided tape secure the piece to the bench and then have at it. Clean the slot out with a file afterward, and fix any small jogs.
The router pulled a chip out of one corner of the heel, which I set back in with Crazy Glue. There are a few small chips around the fret slots as well, nothing that will show when it is finished. That's why I hate routing hardwoods. I was going to leave the heel corners square, but with the protruding spoke nut, that would have been tricky to rout, so I just rounded the corners. That is easier to bind, one continuous piece.

Now's a good time to do the dot markers too. If you want them to come out nice and crooked, use the "X" method. I draw a centerline and check it, then mark each spot with a ruler. Finally, snap the spots for the drill.
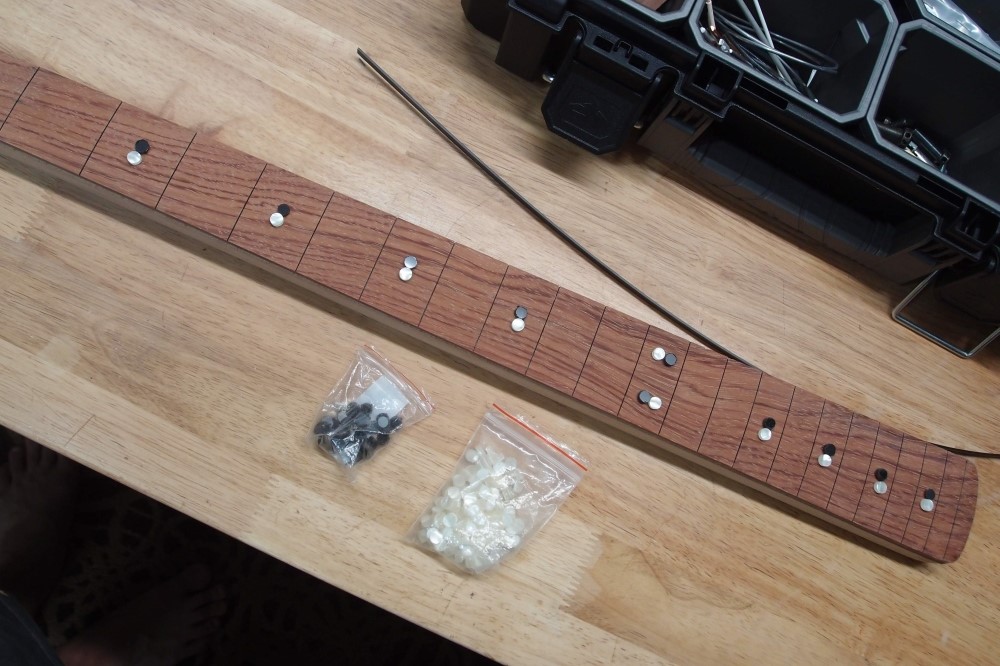
Black or pearl? I have a lot more pearl dots, I think that's what I'll use. They'll look nice with the white pickguard and TRC. I'll use aluminum for the side markers, looks like pearl when it is finished.
So far so good. A mistake now would really hurt.