Kubicki Factor Guitar (2/8)
Nov 17, 2018
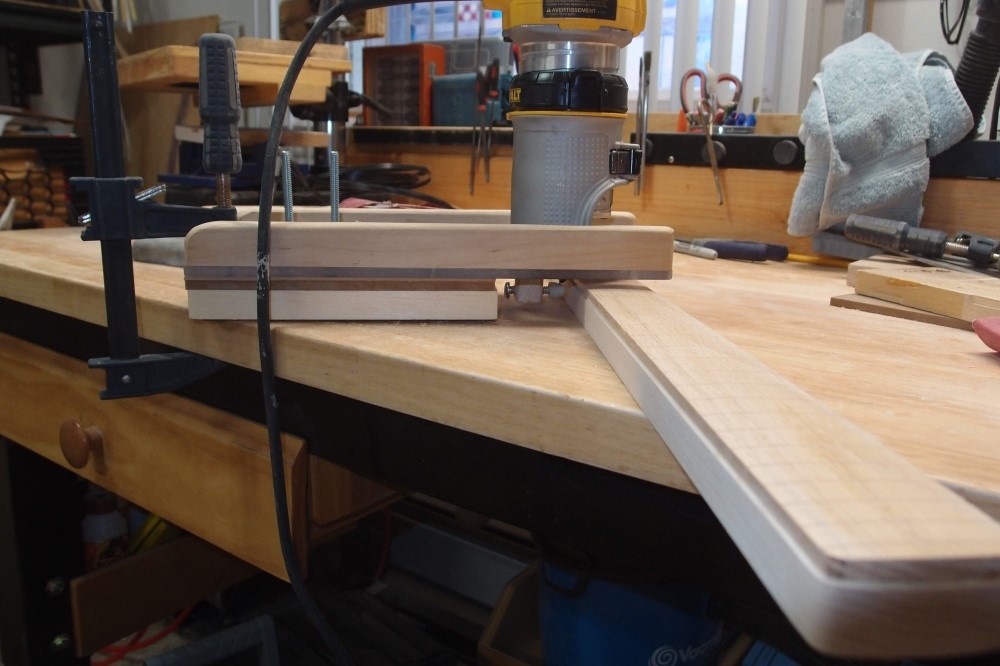
Last time I did a binding like this, I stuck the workpiece to the surface and moved the router around it. This time I stuck the router down and moved the workpiece. I think the first way works better. One goof cost me the extra width I had left at the nut, so now it is down to regulation size. Then at the end the router pulled a chip out of one of the corners at the heel, even though I sharpened the bit beforehand.
In this case, the little stub of a headstock presents a problem, as taping tracks to the fretboard isn't going to work very well there. This method gives a constant height of cut all around, if your working surface is flat and true.
Anyway, the chip is glued back in and will be invisible, and the binding slot is perfect after some cleaning up with a file. My edge follower is based on StewMac's, but is much better. As usual, StewMac's is over-designed, and also oversized, and won't fit inside a typical horn, which makes it kind of useless. Mine will fit right inside a tight curve if you are using the surface of the workpiece as a support.
Also, mine is designed with the radius of the follower slightly greater than the radius of a 3/8" bit. This way the bit cuts maximum depth only at a perpendicular angle, and loses contact when crooked. This makes it somewhat foolproof, although there are plenty of other ways to screw up.
I have a stack of support shims enough to do an acoustic body. That is why the bolts are so long.
StewMac's new binding cement is awesome. I'm sure it is something else repackaged and marked-up double, when I figure out what it is, I'll post it. If anyone knows, please share. Even if you get it from StewMac, it's not that expensive.
Here's a secret about your router: it hates you almost as much as it hates wood. I think this one was extra pissed-off at being clamped down, a router is naturally a free spirit, and wants to wander the open range. Loosen your grip for even an instant and you'll see what I mean.
Nov 18, 2018

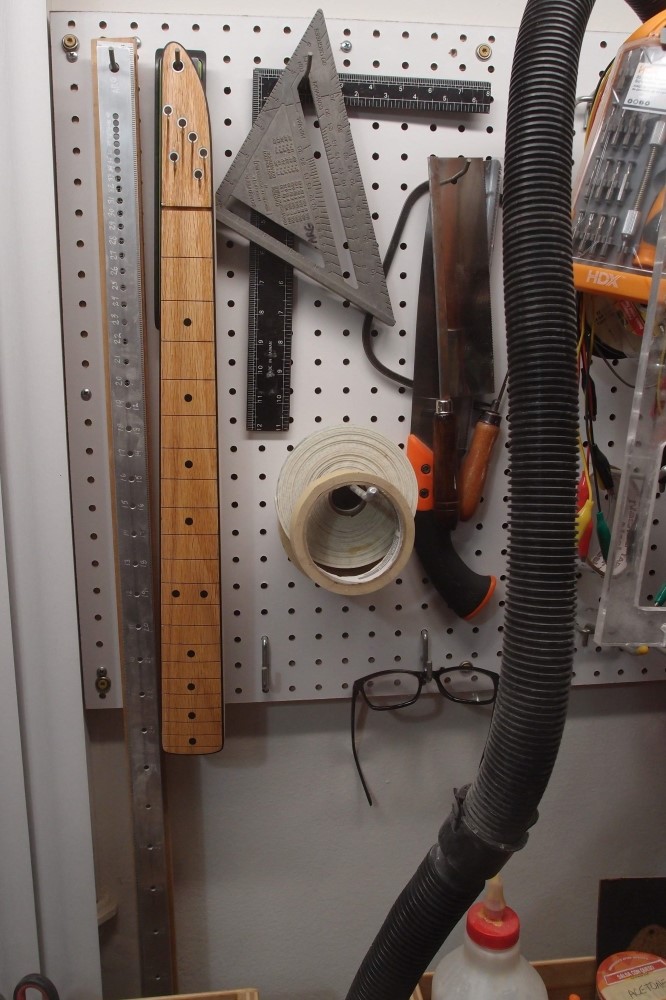
The next step is tricky. It was fairly simple to fit four string retainers on the bass, but six, even though they are smaller, is a very tight fit. I came up with two schemes and made a template for each. At the upper left is a rather pedestrian design, and at the upper right is the design I went with. The aluminum tubing at the right is 8mm OD. 8mm is almost interchangeable with 7/16", which I have a Forstner for. Likewise, 10mm is almost interchangeable with 3/8". I also made an 8mm circle guide from an old credit card.
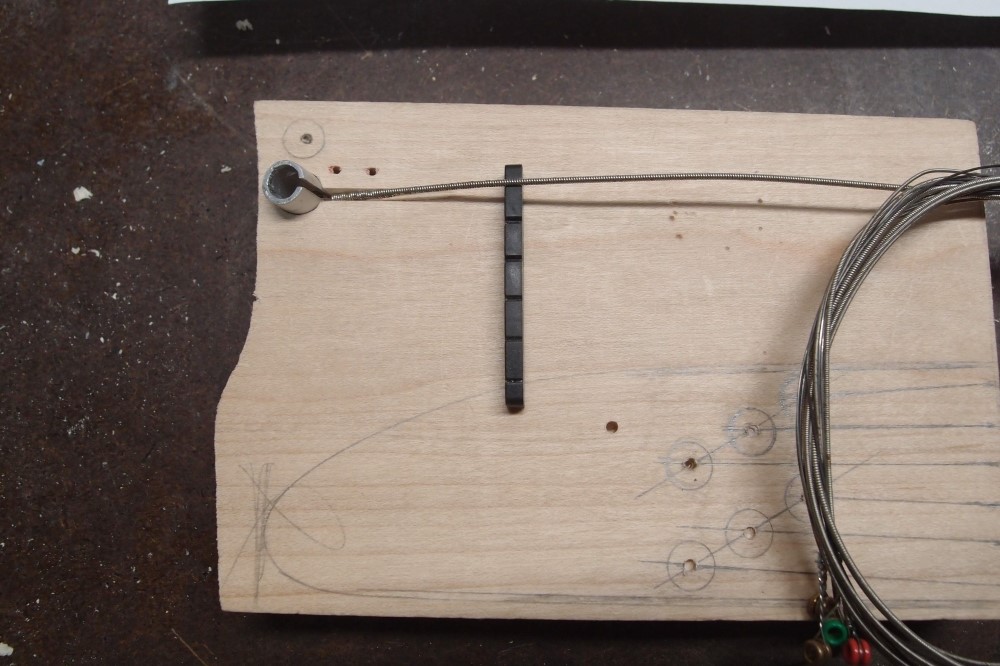
The string retainers are angled 15 degrees to ensure the strings don't walk out. I tilted the table on the drill press, and made a test hole in hard maple scrap, into which I fitted a prototype barrel and cut a channel for the string. No problems, can't put this off anymore.
By shifting the weight of the tuners from the worst possible location to the other end, you get an instrument that balances almost perfectly, without weighing a ton. I was shocked at the difference it makes. I'm not crazy about headless designs myself, I prefer the little stub on this to a squared-off stump. Go back to near the start of the thread and you can see the first one.
I wouldn't expect to see a lot of these hit the market anytime soon. This is a lot of extra work.
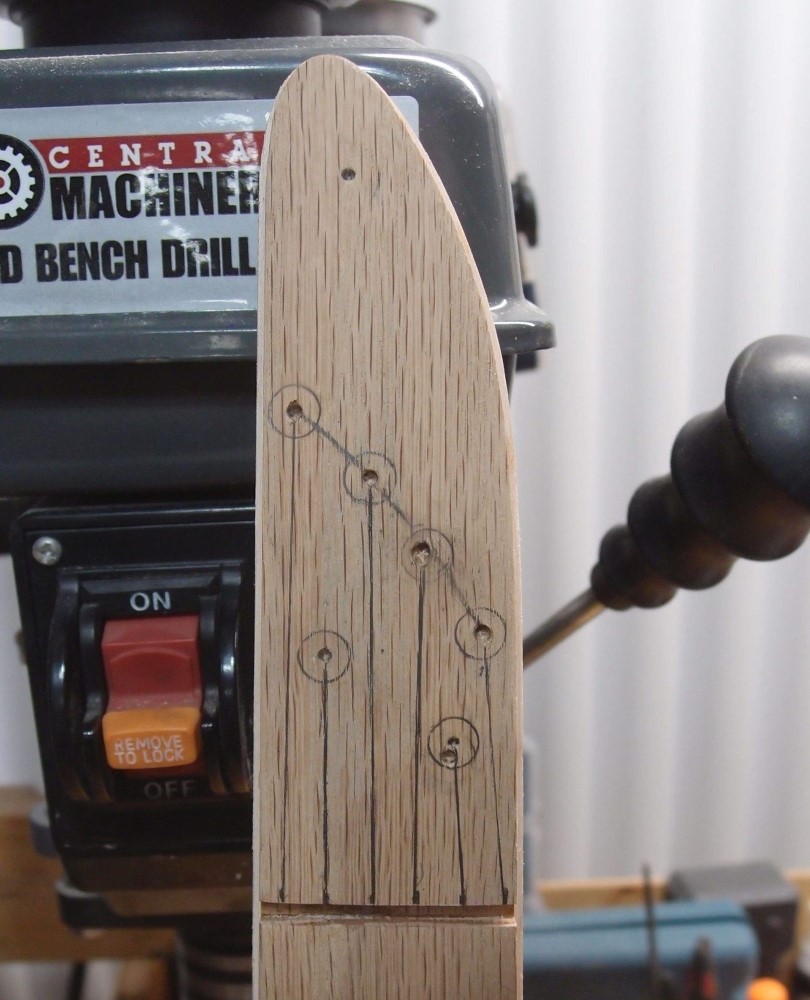

This is a relief. All the string retainer holes came out perfect, as well as the channels. I used the prototype barrel to protect the holes as I cut the channels. I started the channels with the fret saw, the end of which is still very sharp, then widened them out with a handheld hacksaw blade. The E, A, and D channels had to be further widened with a needle file.
A modern factory could probably punch out hundreds of these a day with no problems, but doing all this by hand is a lot trickier than simply drilling for regular tuners. Up to this point, I haven't committed anything to this project that can't be easily replaced from Home Depot. Now I can install the binding and markers. I also need to make six slotted barrels for the string retainers.
Break time.
Nov 19, 2018
Nov 20, 2018
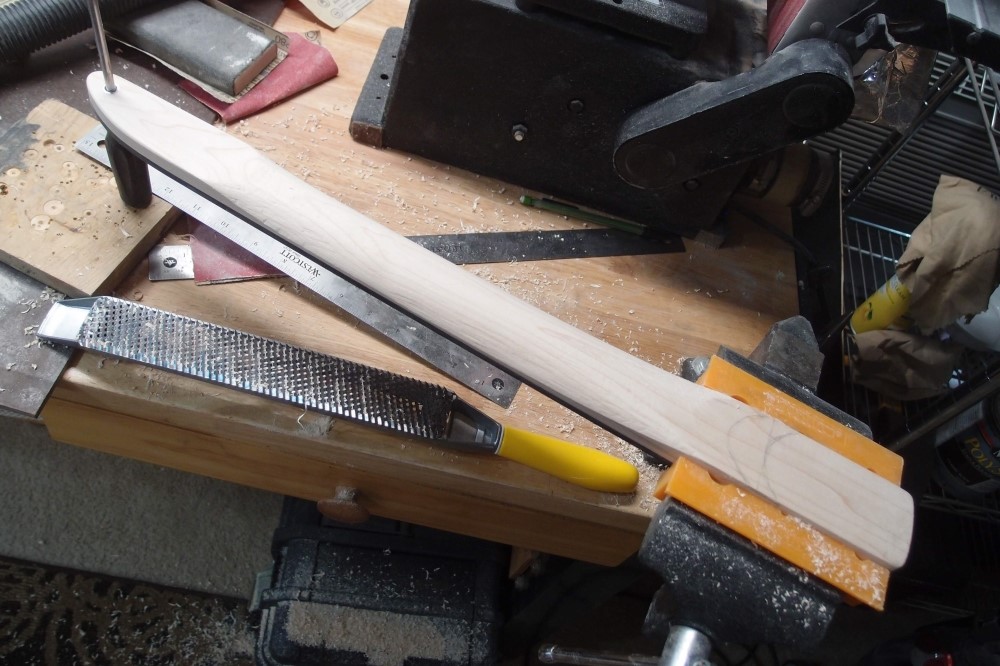
I can't believe how fast this was done. I skipped my usual step of band-sawing the corners off, and just went at it with the file. The Surform file tears right through this hard maple, in no time I had a nice round back, and started working on the taper. Much less effort than the Japanese files, much less hand strain, excellent control with both hands. Also, the Surform makes very coarse shavings rather than dust that flies all over. I really like this tool. And best of all, new blades are seven bucks at Home Depot. That's much cheaper than a new Japanese file. Curved blades are available online, I ordered one, but I'll finish this job with tools on hand. Once the rough shaping is finished, the Japanese files will clean up the surface and make the final contours.
A really nice thing about using long files for shaping is that straights naturally come out straight, no lumps that you need to take down afterward, or dips, that are much more trouble.
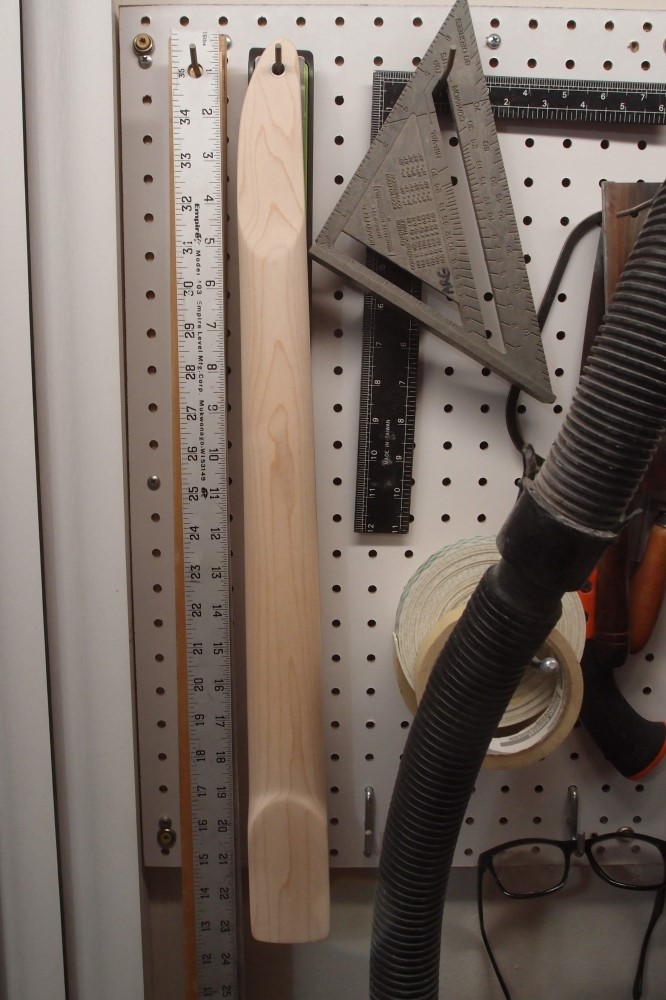
I went back to the belt-sander to thickness the 'headstock'. The belt-sander supplied the missing sawdust and noise.
On the other side, I ended up removing all the finish and filling from the fretboard. Pre-finishing is a waste of time, I'll have to do it all over again. A good use for my can of Varathane.
I have never banged out a neck this fast. Kinda takes the fun out of it. The Surform file is without a doubt the best way to do this, especially for a beginner.
The Surform won't get you a finished result, in fact, it makes a pretty rough surface. The trick is stopping before you get where you're going, while you have enough wood to smooth things out. From the Surform, I switched to Japanese files, really rasps, then to coarse files, and finally fine files and sandpaper. But the Surform did more than 90% of the material removal, and when it gets dull, I can throw a new blade on for seven bucks. That saves a lot of wear and tear on more expensive tools.
This is even faster than the belt-sander, and cleaner and quieter. The belt sander takes a good deal of experience to master, I think you could get a usable result on your first try this way.
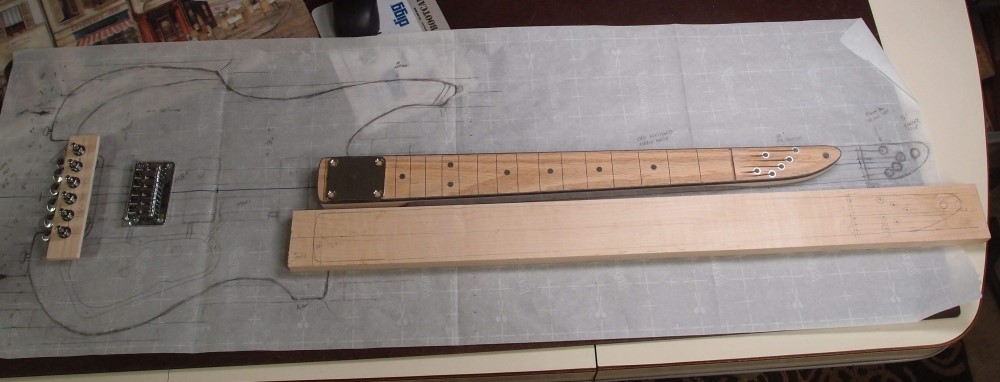
This concept is approved. The rest will wait until winter, but the guitar neck is already useful for laying out the plans. This is my original drawing for the four-string bass. Also, the neck for the Bass VI, which will interchange with the guitar neck. If I get inspired, maybe someday I will build a second body.
The 30.3" Bass VI neck adds 3 frets to the long end of the 25.5" guitar neck, for a total of 24. It's really not magic that the two should be interchangeable. The same way, a 23-fret 28.5" or 22-fret 27" baritone neck would also slot right in. My fret jig will make any of these, but two necks are enough for this project. The Bass VI neck will be about an inch shorter than the regular bass neck.