Rickenbacker 325 Bass 1 (3/5)
Aug 30, 2018
Things have been kind of slow around here, and they're getting slower. I'm literally watching paint dry.
But ... there are still important lessons to be learned, and next, we'll be learning possibly the most important lesson in all of luthiery:
How to turn your mistakes into features !!!
All the big boys do it - Fender covers their mistakes with a long strip of walnut, Rickenbacker charges extra for their goofs, and Gibson wouldn't even exist !!! Truly great luthiers turn mistakes into designs. As Pee Wee Herman would say, "I meant to do that!"
So let's get started:
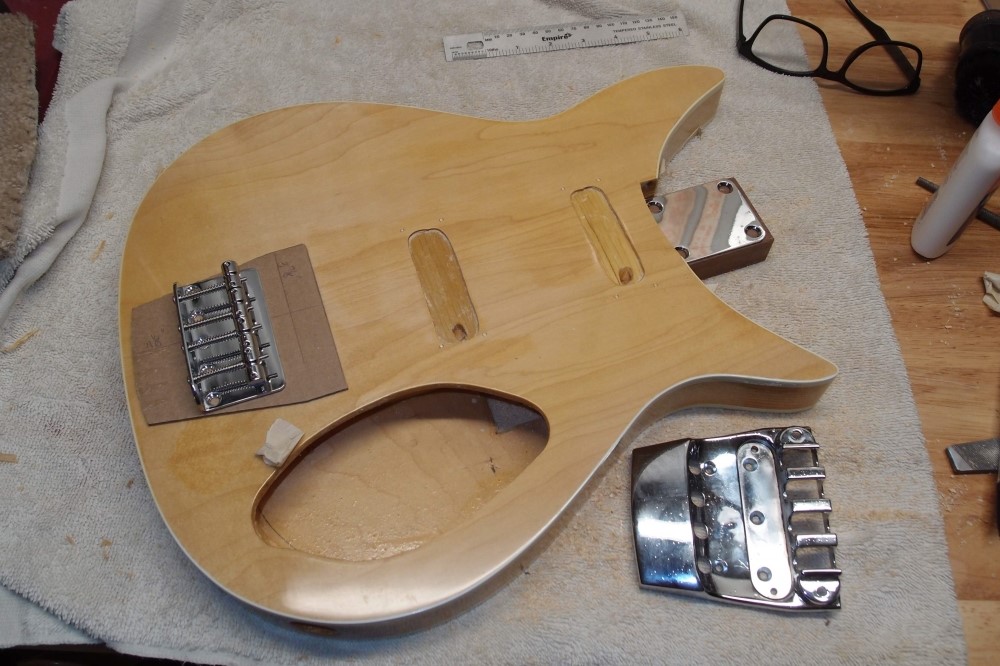
Here's a body I made years ago. The whole thing was an experiment, and ultimately I stole all of the hardware for another project. But this came out pretty nice, my first binding job, and every time I tried to throw it away, I ended up putting it back on the shelf.
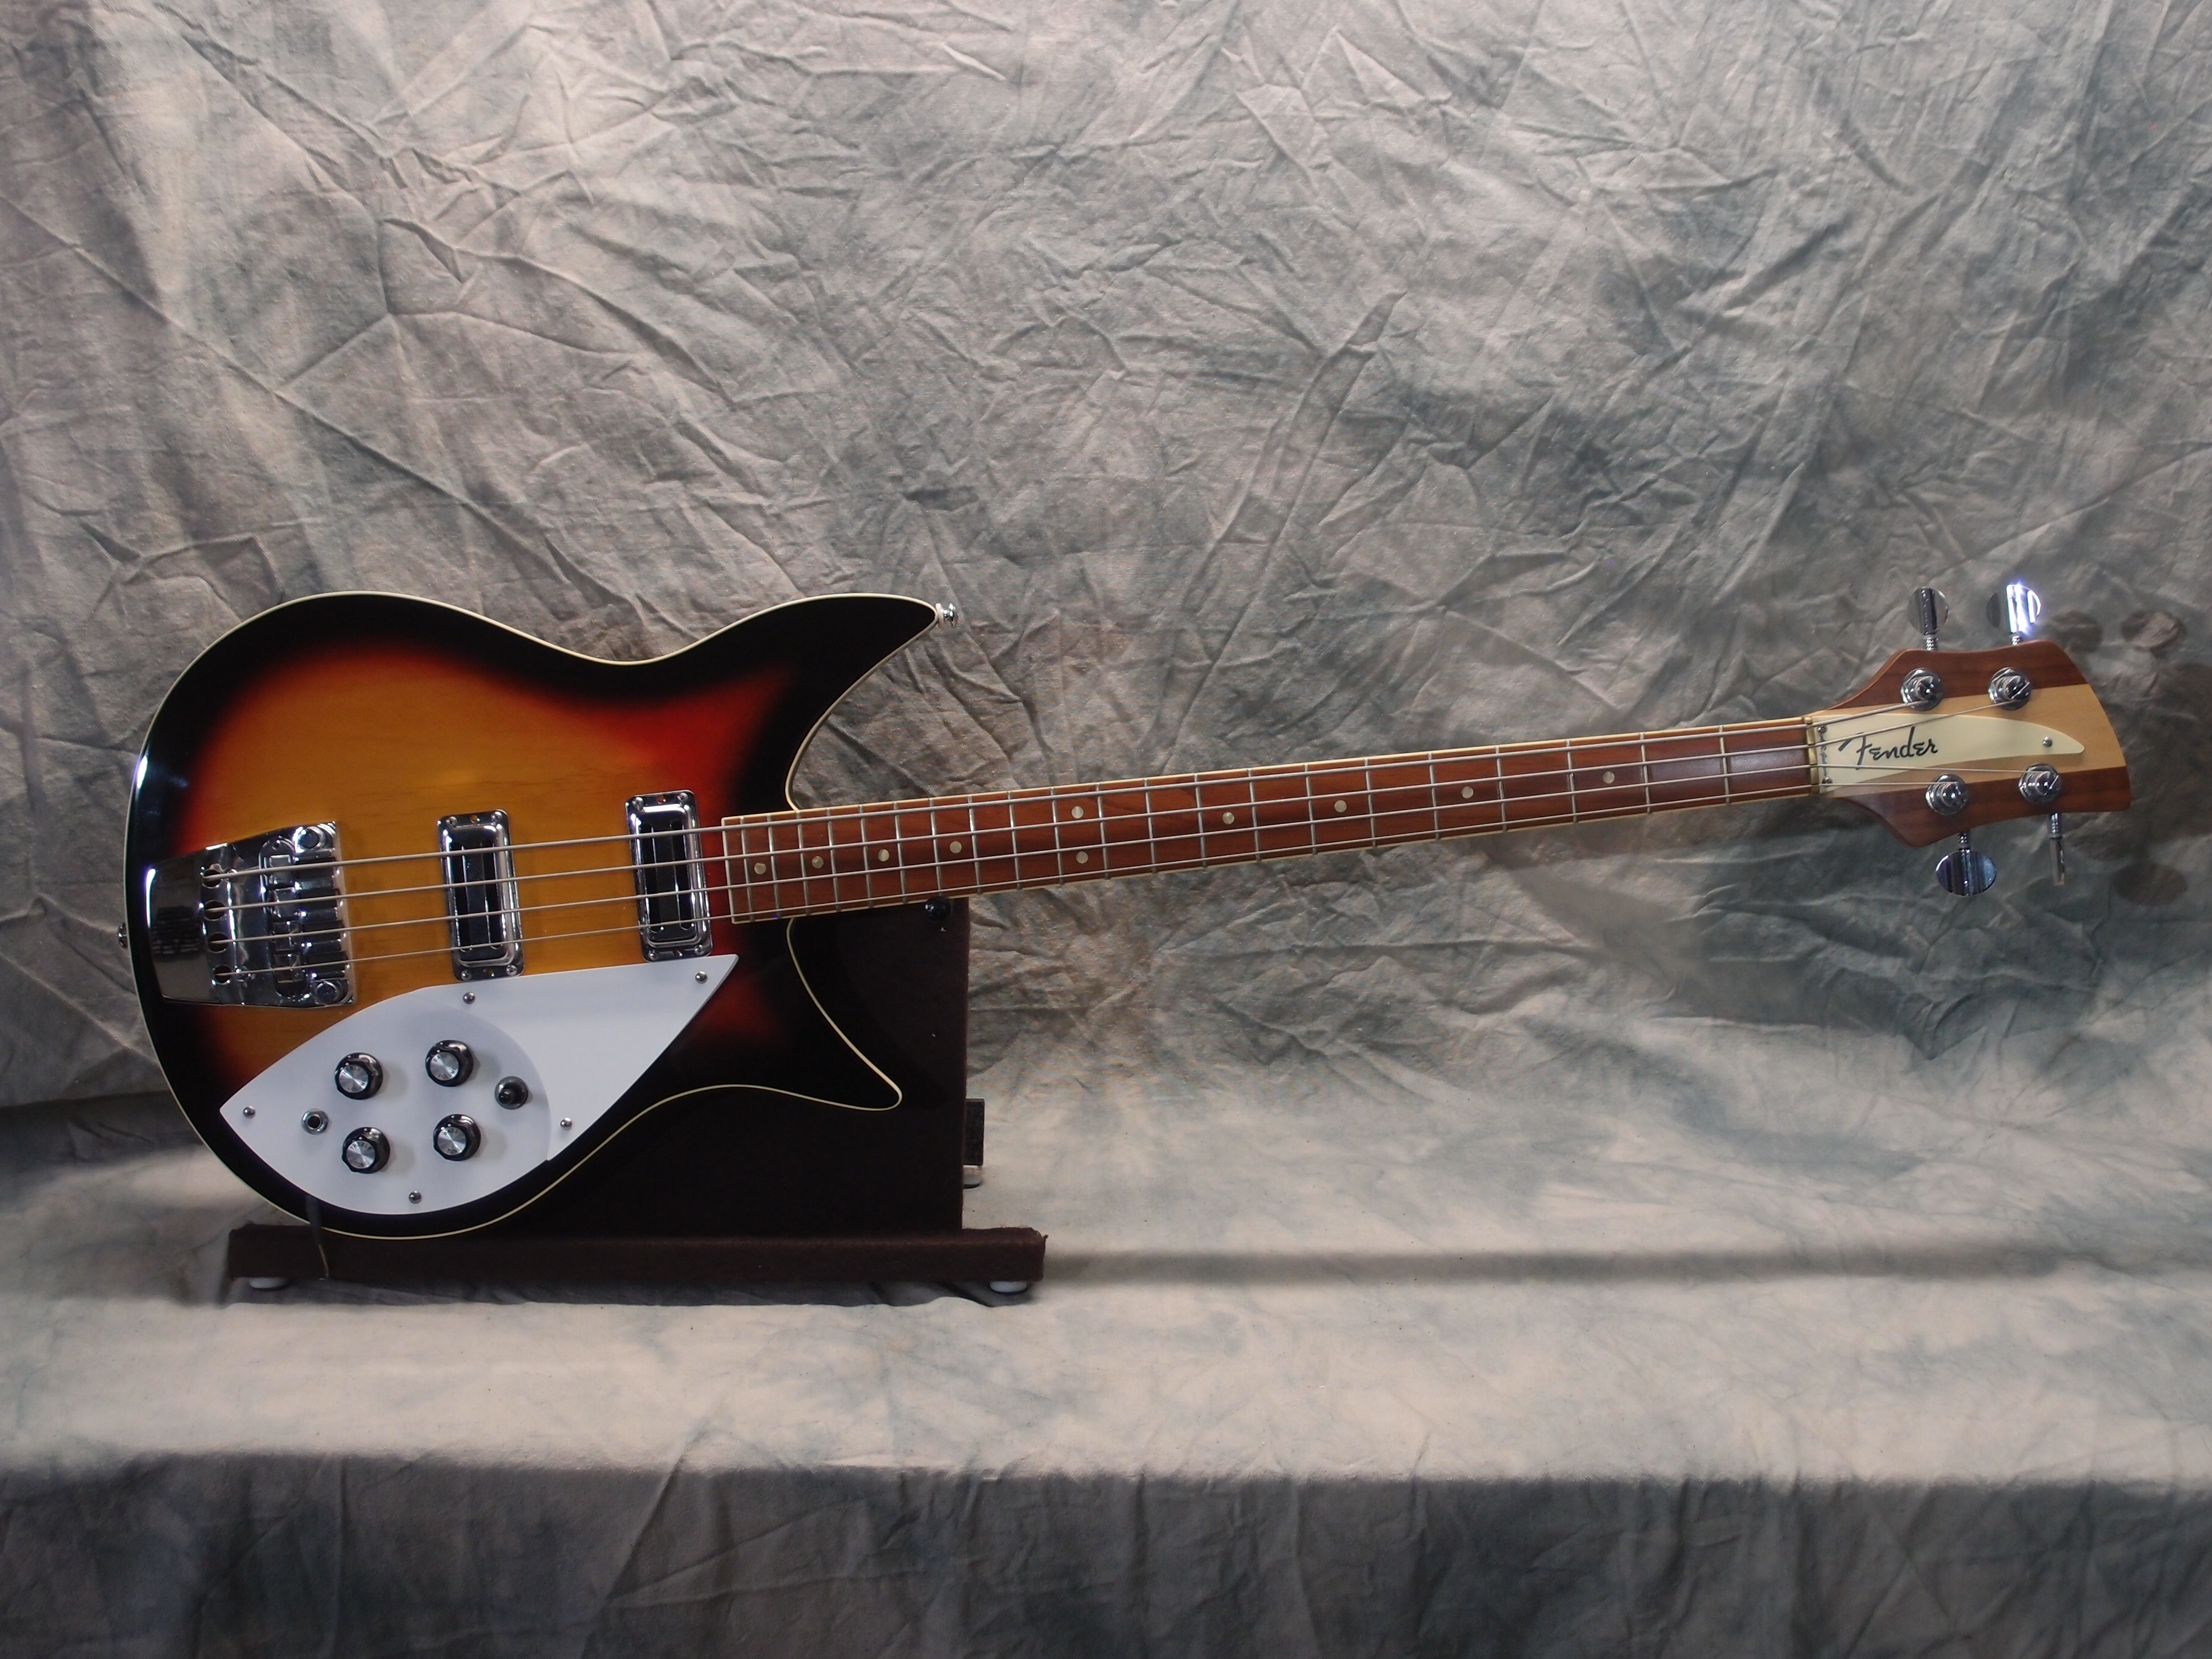
Unfortunately, the front is already routed for a Ric bridge. You can see an old one in the picture, all tail-lifted and corroded and all the things we love Rickenbacker for. $3000 zinc castings. The new bridge I bought got used on another project. Sure, I could just get another from AllParts for sixty bucks, but this is basically a salvage mission, and I don't want to. So instead I traced the Ric onto a piece of cardboard and set a Fender bridge on top. Of course, I'm not that cheap, cardboard won't do, I'll get a nice piece of aluminium. I already had the bridge, so the total cost of this feature will be about a buck. It will come out looking kind of like a Hipshot, except that I will be liberated from Ric's narrow string spacing. This mistake has turned into several features!
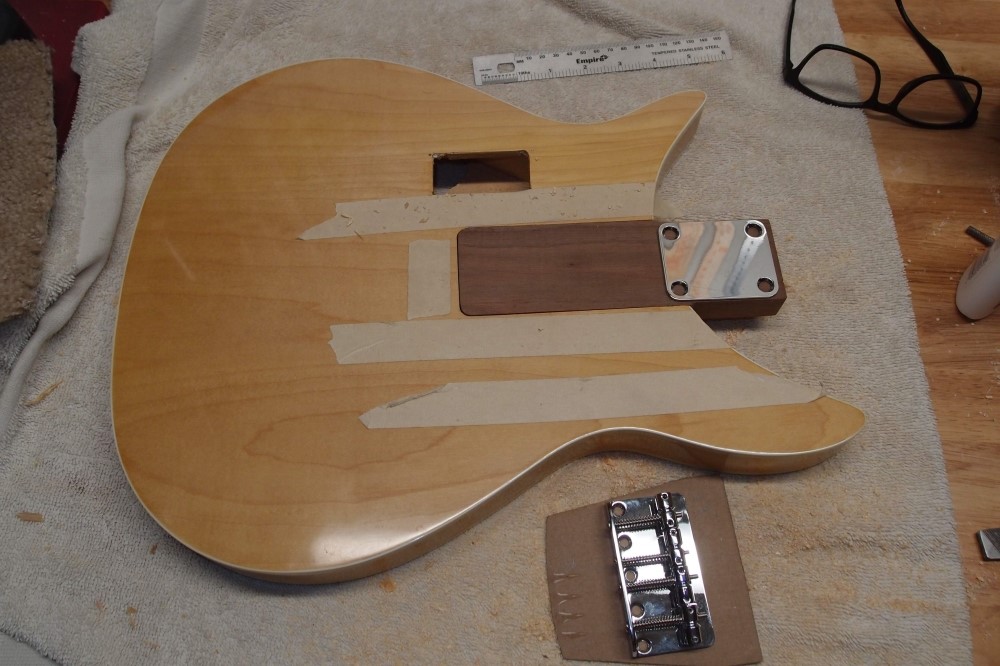
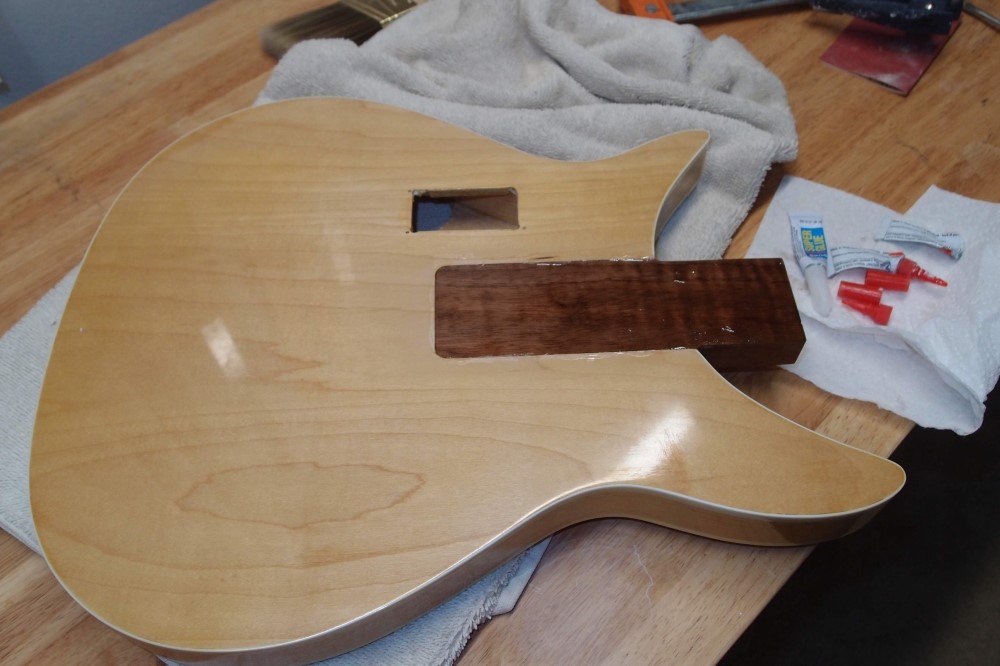
Here is the back. I originally intended to do a novel kind of neck mounting, but in the end, I didn't like it. I fished around in the scrap tonewood bin and found this piece of walnut that almost fit. An ugly butt joint between two pieces of maple is obviously a mistake, but a smooth seam between contrasting woods, now that's a feature you can charge extra for. Are you starting to get the idea? So I spent some time with the belt sander and the router and made the two pieces come together.
This body is plywood over pine, and I would never trust the pine to be strong enough to support the neck. Walnut is more than strong enough. I'll glue it in and it will make a proper neck mounting. I'll use a biscuit to reinforce the tail end where the glue would be under tension.
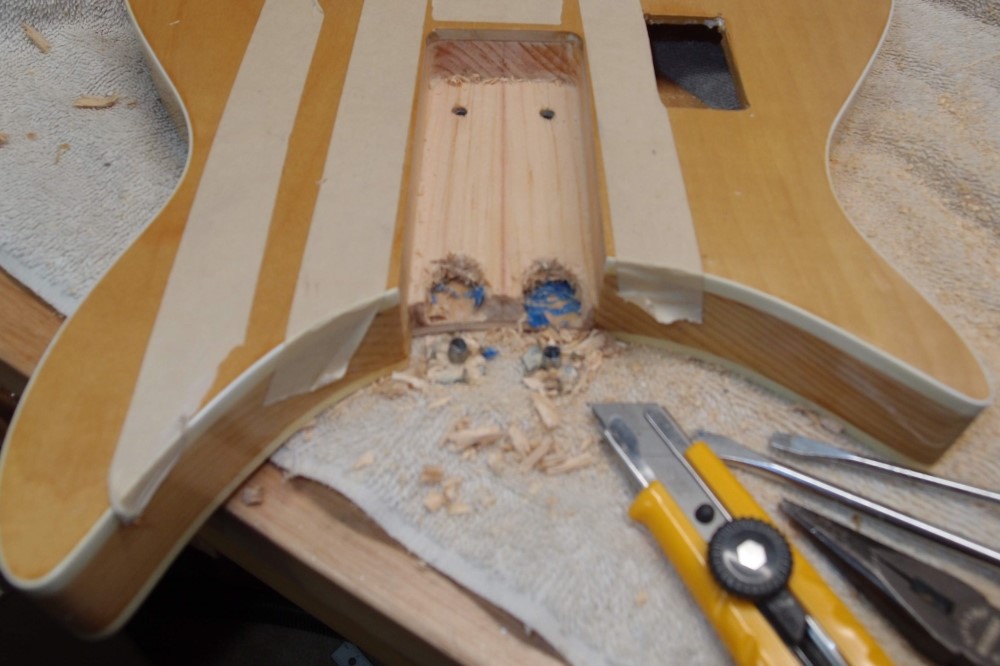
Awww drat !!! There are some metal bits in the way, so I carved them out with a razor knife and 'chisels'. I'll clean up the mess with the router later. You don't want to go anywhere near metal with a router bit. This will be a hidden feature. See how much you can learn in this thread?
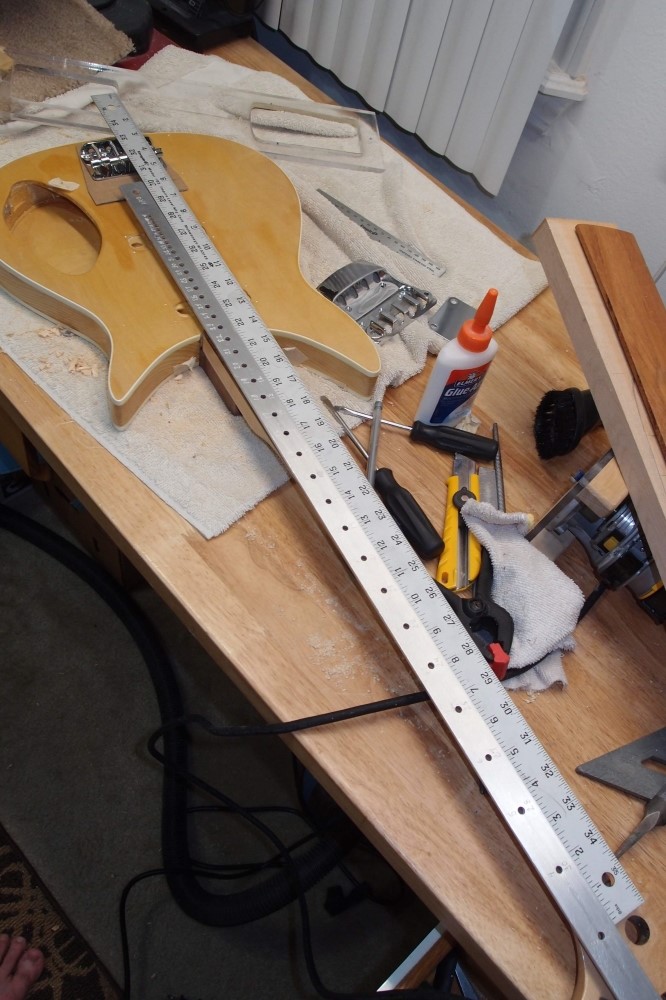
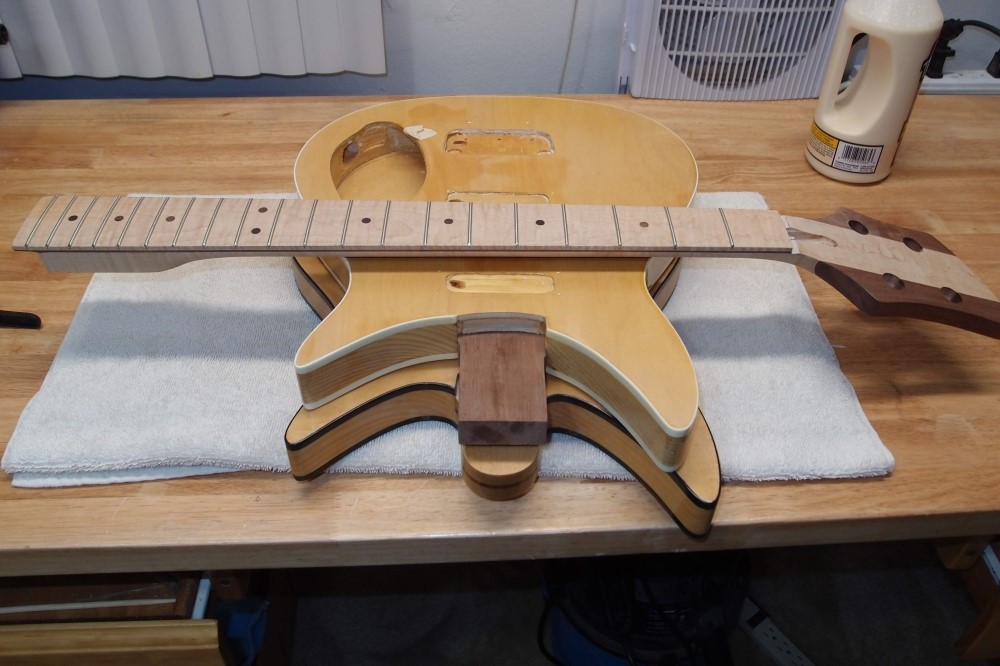
I'm using my fret scale and a yardstick to lay out the neck and bridge. Since the bridge is pretty much fixed in position, you pick your scale and choose the number of frets to make it all fit. I'm going with a 32" scale. The yardstick is lined up on the 32" hole of the scale, which is #3. At the other end, the 32" mark of the yardstick lies on the G saddle, which typically requires no intonation. Hole #25 on the scale is the last one that fits, so 25 - 3 = 22 frets.
I could also make this a 30" with about 20 frets, but I have enough of those. The neck heel is going to be Fender width since I'm using a Fender bridge. I'm not entirely free to place the neck, there is a pre-existing pickup rout that I will have to work around, but I want to set the neck about 1/2" into the body, where the original design was flush. Sometimes it's hard to make all the features fit.
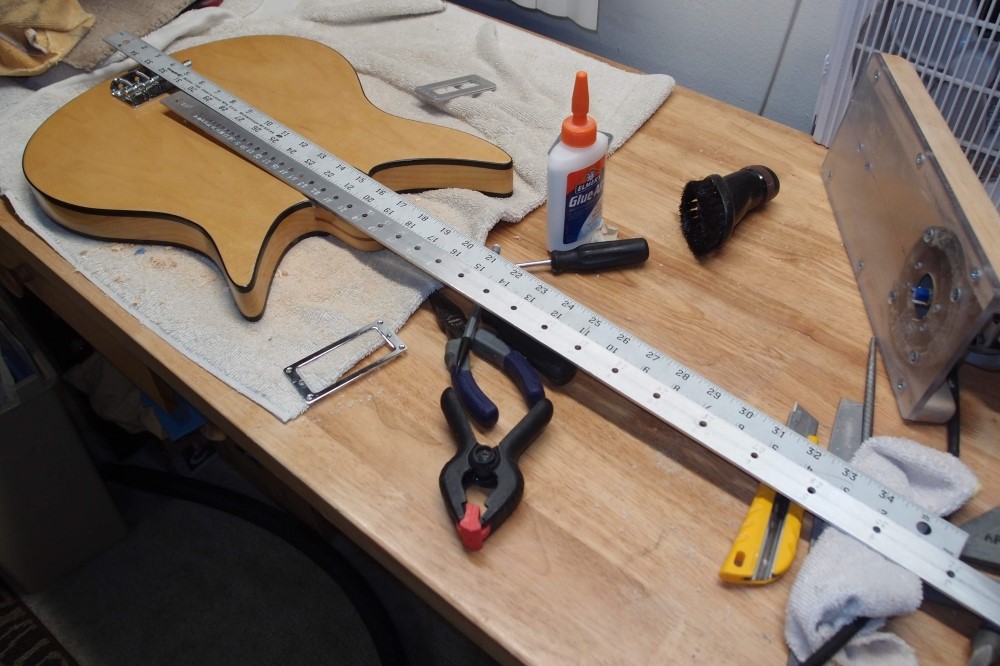
When I used the Ric bridge that I originally bought for this project, it turned out to be a nightmare of tiny adjustments to the neck mounting to make everything line up. There will be no such problems here, Fender geometry just falls into place. I'll make the neck heel a tiny bit thicker to allow for the metal plate under the bridge. Yet another feature !!!
The only thing I don't have for this build is pickups. I am awaiting a set that will probably work. Everything else should come from materials already on hand.
Aug 31, 2018
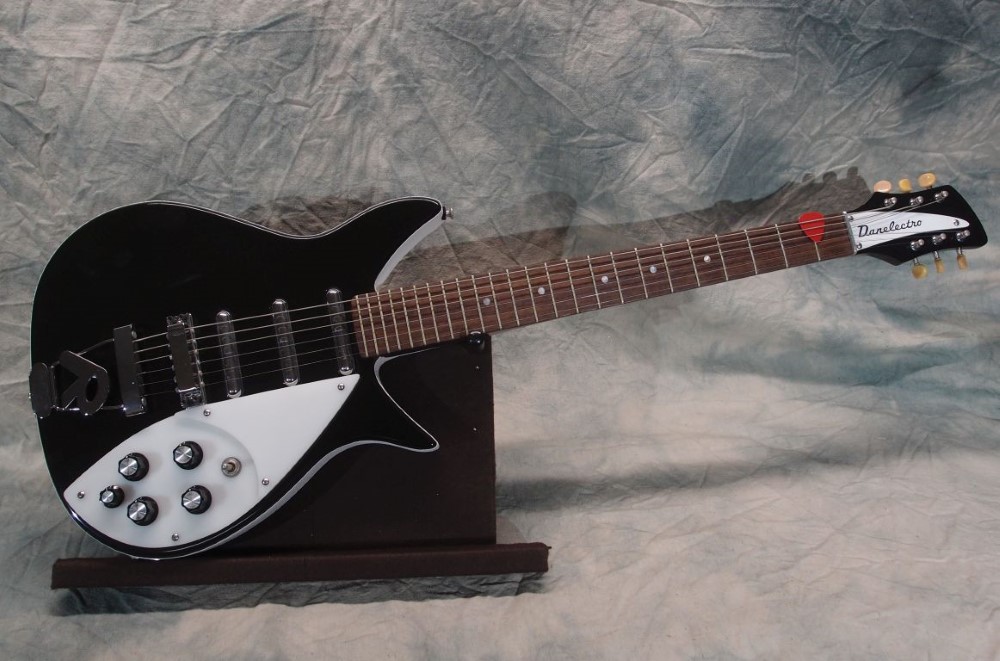
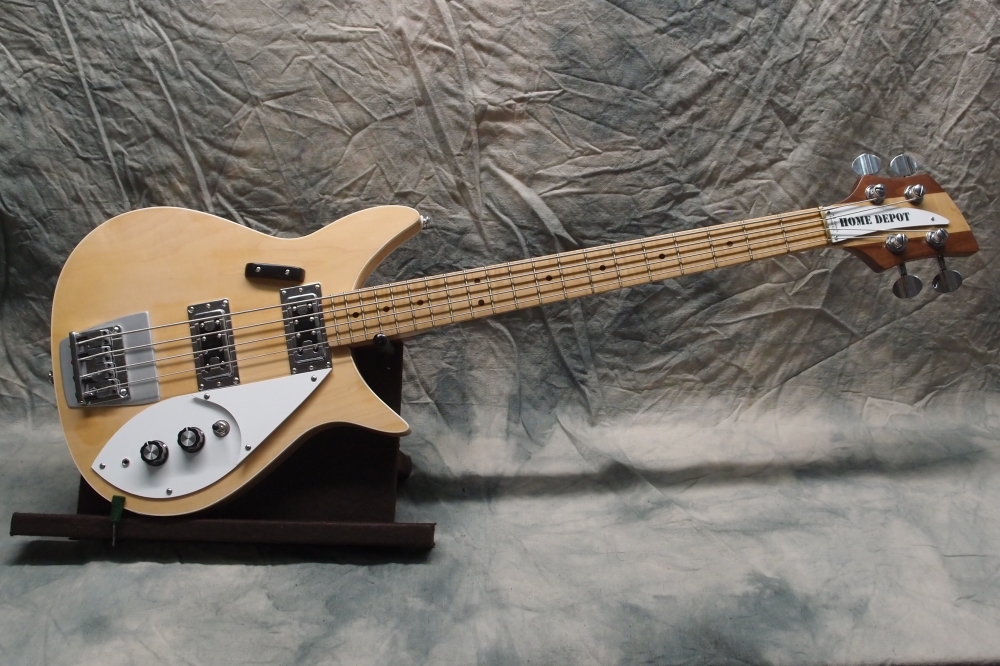
Here you can see the black body is a good deal bigger than the white one. This neck is 30". It will fit much better on the smaller body, so change of plans, I will make a 32" neck for the larger one. This neck is all flamed maple with a walnut stripe and wings. I think the fretboard is an early test article that came out too thin, so I backed it with a piece of walnut from the hobby shop, resulting in a new feature - the stripe. The dots are drilled from rosewood scrap with a 1/4" plug cutter. The angled headstock is not kosher for a Ric, just another experiment feature.
You can see I made a plug for yesterday's damage to the white one and glued it in. The 1" white pine gives an interesting body edge but results in a rather thin and light body. I built a pair of Audiovoxes like this, and they came out too light to even balance a guitar neck, so one became a uke and the other became a mandolin sort of thing. Both are nice instruments after I converted their problems into features.
These are mostly experiments and scrap, so I'm not going to spend a lot of money on the parts I don't already have. I think it is much more interesting to see what you can do on a small budget than to go unlimited.
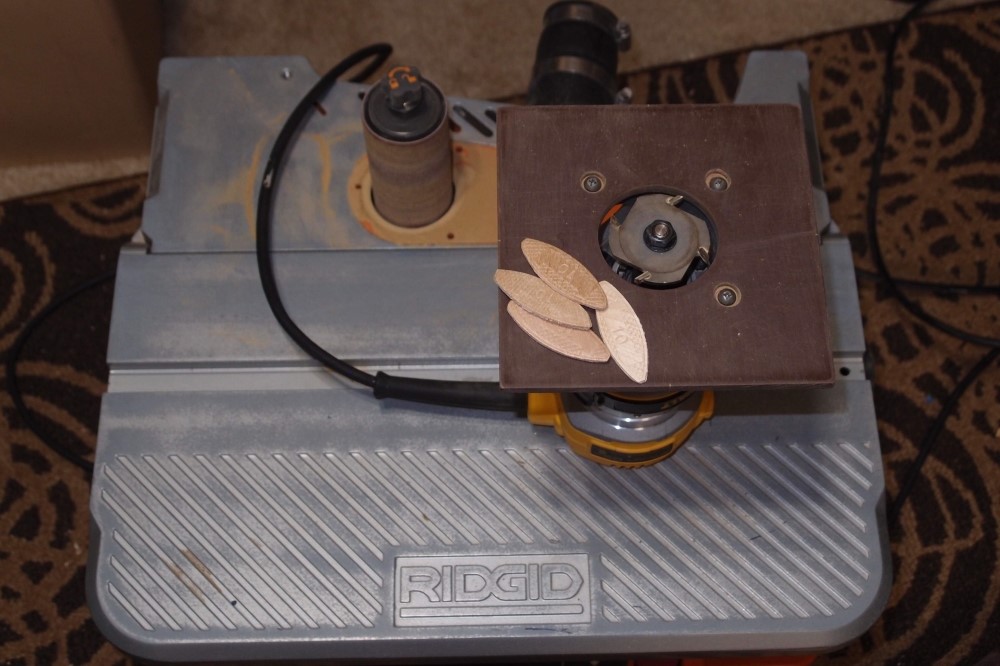
For those of you that don't know what a biscuit is, they are the little wooden bits in the picture. They are super useful in cabinetry and furniture building. Biscuits are a much better alternative to dowels - they are stronger, easier to use, and give a near-perfect alignment of the surfaces.
Biscuits are glued into matching slots to join two pieces of wood. The wood of the biscuit is crushed, and the moisture in the glue swells it to make a tight fit in the slot. Normally I'd use a special slot cutter machine, but in this case, it wouldn't fit, so I have to fall back on a slot cutter in a router.
I had to enlarge the hole in the router plate to fit the 2" wheel. On the other side of the wheel is a bearing, which limits the depth of the slot. It's kind of a pain to do this with a router, the biscuit machine does it in a snap.
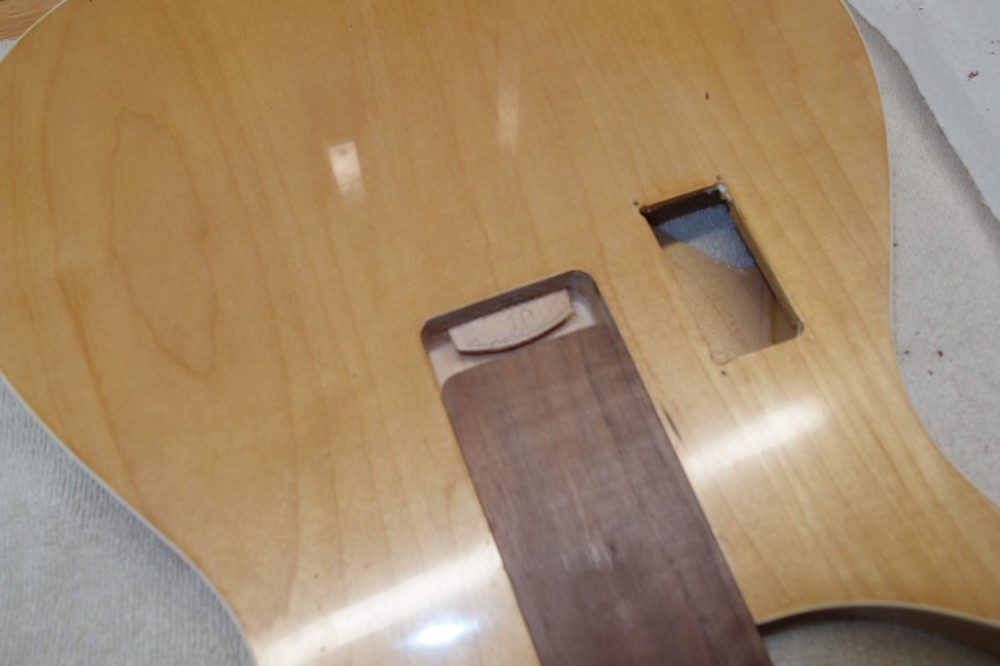
I've cut matching slots in the body and the heel and cut down the biscuit to fit. The biscuit will serve as a mechanical lock, to prevent the heel from being pried out of the body by the neck tension. It's just a tiny force, but over a long time, the glue could creep. Now it can't. I don't want any screws showing, that would be the alternative.
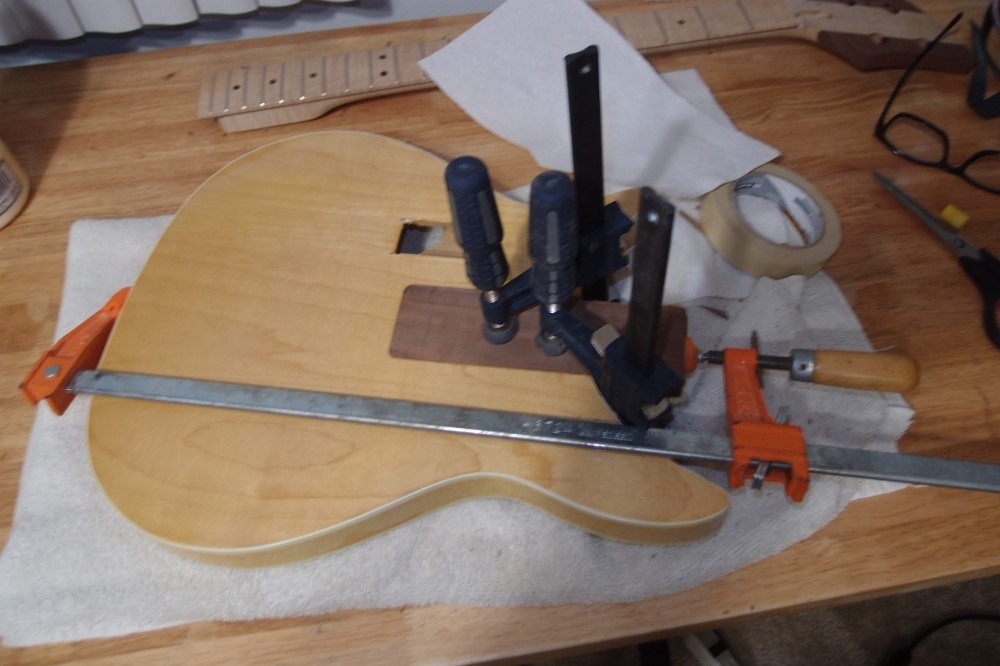
Slather everything in glue and clamp for a while. The heel is a tiny bit below the surface of the body to allow for finishing. I filled any gaps with Crazy Glue. Next, I will start brushing on polyurethane to finish the walnut. Finally, I'll smooth and re-spray the entire back side to get an even finish. It should come out nice. I think I've saved this piece.
Since I know what a bother it is to get walnut smooth, and I'm already messing around with Crazy Glue, I decided to try coating the entire piece. I only intend this to be sealer and undercoat for the poly. I just squeezed out the entire tube and used the square end as a squeegee. I set up a fan to blow away the fumes, otherwise, they might make a white mist over everything. When this is hard, I will scuff it up and start layering up poly, much like doing a headstock decal.
Except for a bit of sanding, this random scrap of walnut was exactly the right size for this job. I'm glad I never threw this body away.
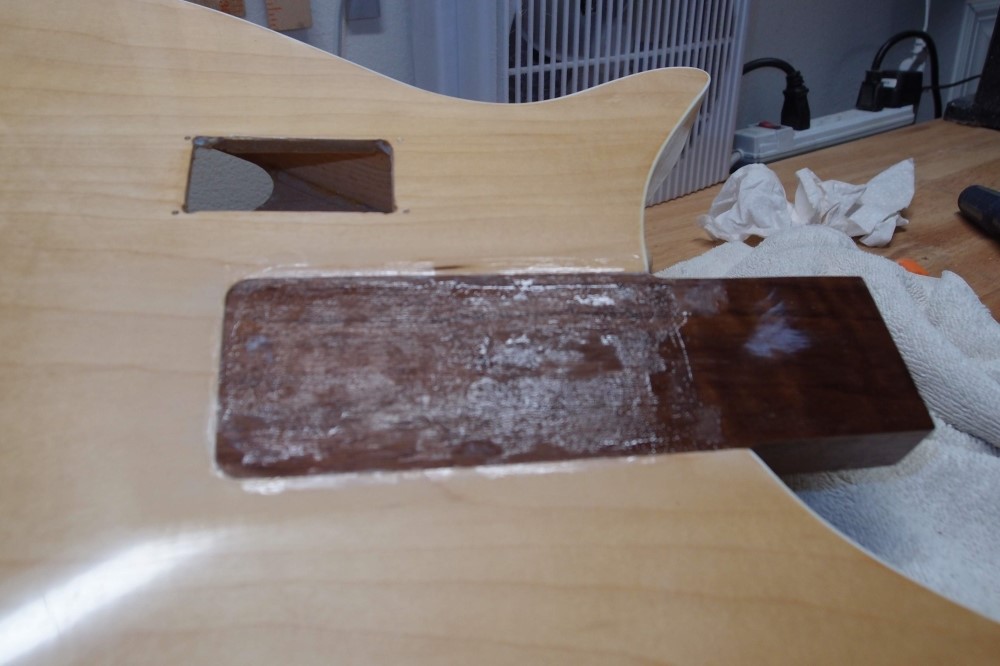
First, the Crazy Glue dried like this. I must have done it wrong. I sanded it smooth.
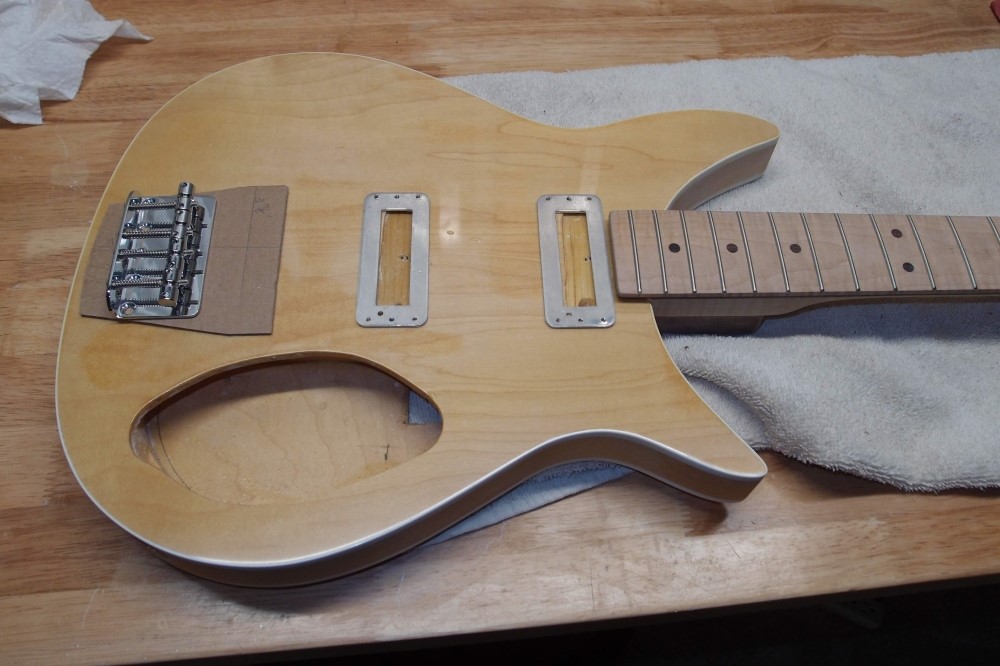
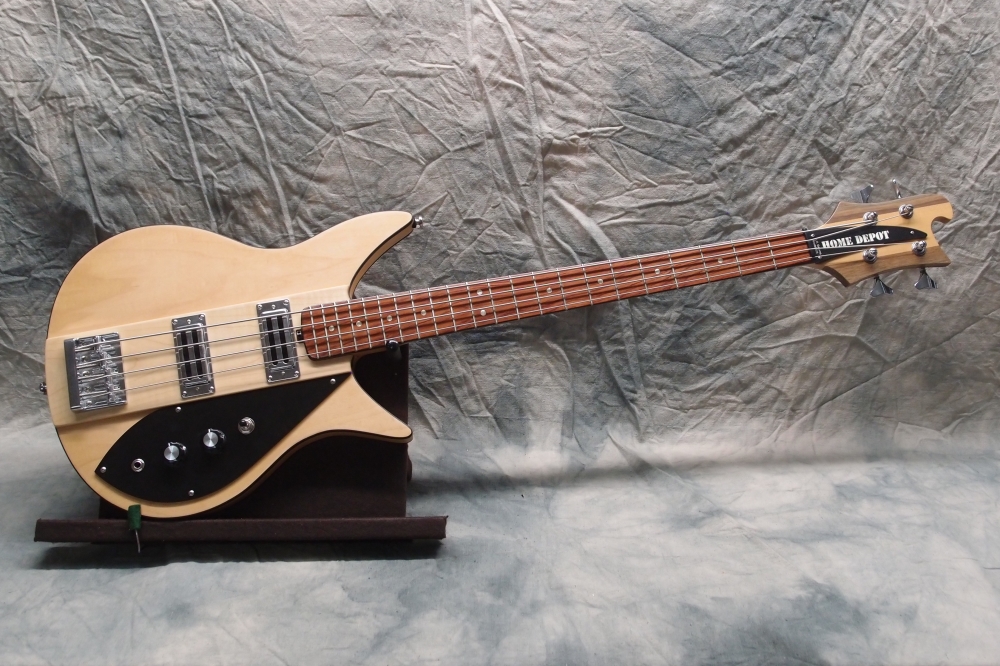
I routed a bit of neck pocket into the body. The body was originally made for a square neck, and this one is round, with an overhanging fret. Also, the walnut tongue is a bit short, this gave me a little more length for the joint. Some filing and the two pieces fit like they were made for each other. You can see stray screw holes in the pickup routs. That is how I attached the routing template.
I can't remember why I made the neck that way, I think it was to retrofit onto a body that was originally going to be 32". In which case, it is perfect for this. The black body will get a new 32" neck, someday. Right now, it is going to be donating parts for this build.

Here's the back - a standard Fender neck plate. Most of the finish is sanded off the back and sides. I think the walnut looks good set into the maple body. It is rock solid, already.

A long shot. I'd be tempted to spring for a Ric bridge after all, but it will no longer fit since I altered the neck mounting. Even at this stage, it feels good. Short-scales just naturally balance.