Rickenbacker 325 Bass 1 (4/5)
Sep 1, 2018
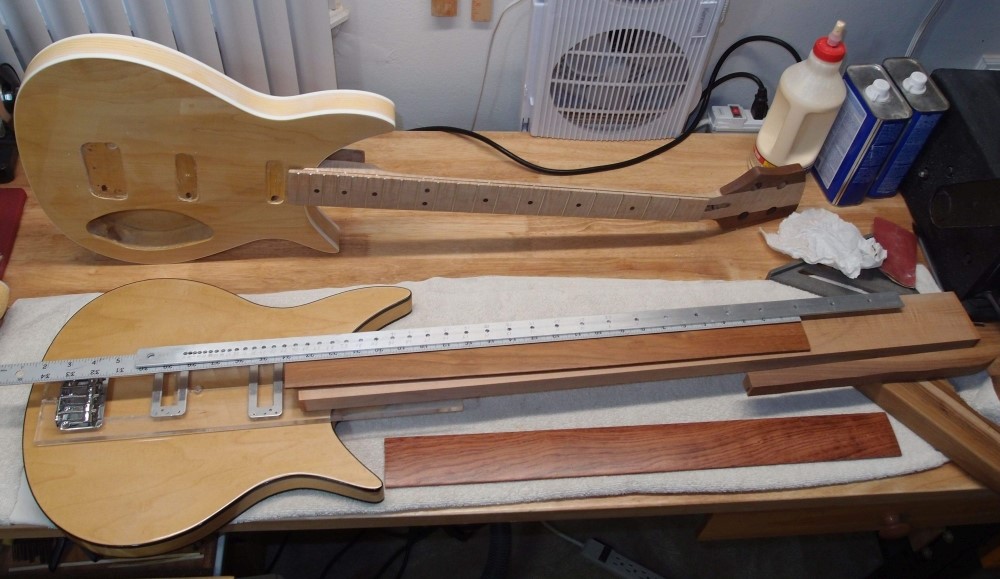
Laying out a new neck. The fretboard piece is 24" long. A two-octave 32" neck would be 16+8=24" from nut to fret, and so require a longer board. I could get a 48" piece of maple or oak from the hardware store, but I want to use this nice orange wood which is already radiused and finished. So instead I will make it 22 frets, about an inch shorter. That will balance better as well. I have a great deal of freedom with this, since nothing is routed, there is plenty of space to locate the bridge and pickups. I need a truss rod.
The neck piece is a full inch thick, which will allow a bit more breakover for the headstock. I've been wanting to use up this piece since I bought it many years ago. It is the only actual 'neck blank' that I ever bought. I later realized the standard 3/4" stuff from the hardware store works better, for a lot less money. For the headstock wings, I may try some scrap teak instead of walnut. For tuners, I have a choice of elephant ears or minis, which weigh half as much. Since this body is very lightweight, it will be the minis, and I will shrink the headstock as well.
I just ordered another set of toaster-looking humbuckers for under $20. I thought about using some lipsticks that I have on hand, but the humbuckers will be much easier to install directly in the body. I also got a narrow bridge for it for $10. I don't feel like beating myself up over these two builds, so no tricky routing, finishing, or wiring, just parts and materials on hand, and nothing expensive. Remember, at one point both of these bodies were headed for the fireplace.
The little one is going to get simple passive volume-tone controls, just two knobs, and a switch; big silver-topped knobs that I already have. To make some use of the battery box, I will install a little headphone amp, which will make it a nice practice guitar. I haven't decided on the big one. Both will get simple white pickguards.
Sep 19, 2018
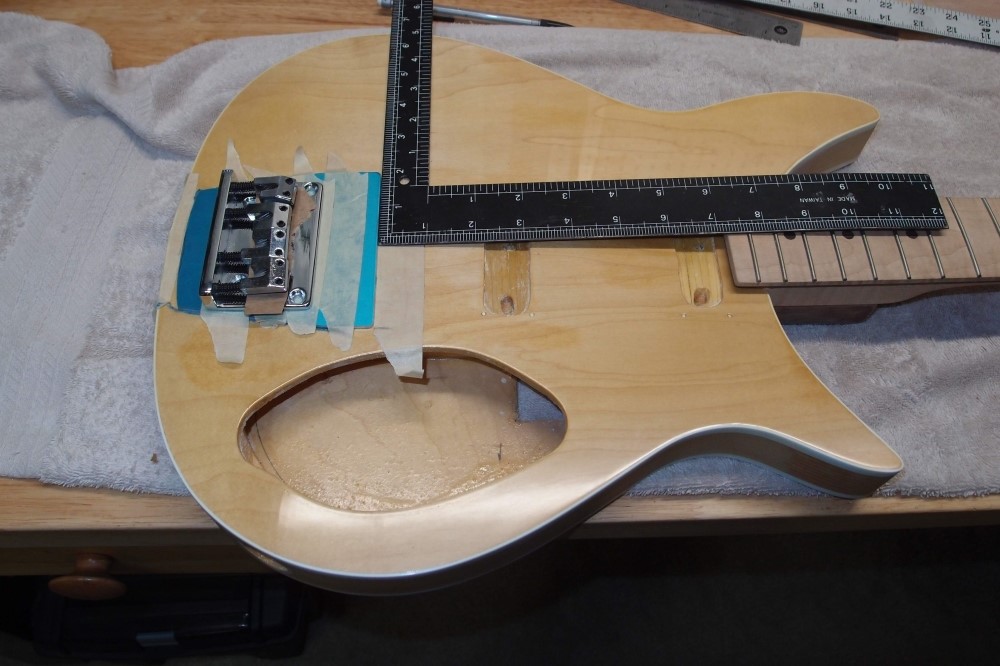
Little Ricky is getting his bridge set up. The blue is the covering on the aluminum plate that will cover the rout. I shaped it like a Ric bridge. I made a shim from a piece of my favorite tonewood and deepened the bridge rout to fit it, so there will be solid wood under the bridge. I'll also need to re-do the pickup routs, as the pickups I got for this are regular humbuckers, not the surface-mounts I originally intended.
Sep 19, 2019

Here is L'il Ricky's bridge. It started out as a 100mm square aluminium plate, 2mm thick. I traced a Ric bridge outline onto it, which doesn't quite fit. I removed the bigger parts on the bandsaw, then made the final outline on the belt sander. The wide area at the front just barely covers the rout.
I broke over the hard edges with a file, and then sanded, 600-2000. I also hit it with some polish, but I didn't like that and put the scratches back for a satin finish. Aluminium is too soft - you can polish it, but it won't stay that way for long. Over time this will probably dull some more.
The bridge is from eBay, the only 4-saddle narrow-gauge bridge available. I just realized that individual single-string bridges would have been perfect here, but the holes are already drilled for this bridge. Technically, this is still a better bridge than the real thing. It fully intonates, you can adjust string heights individually, and it will never lift up. I'll probably have to shim the neck back a bit to compensate for the thickness of the plate.
Sep 20, 2019
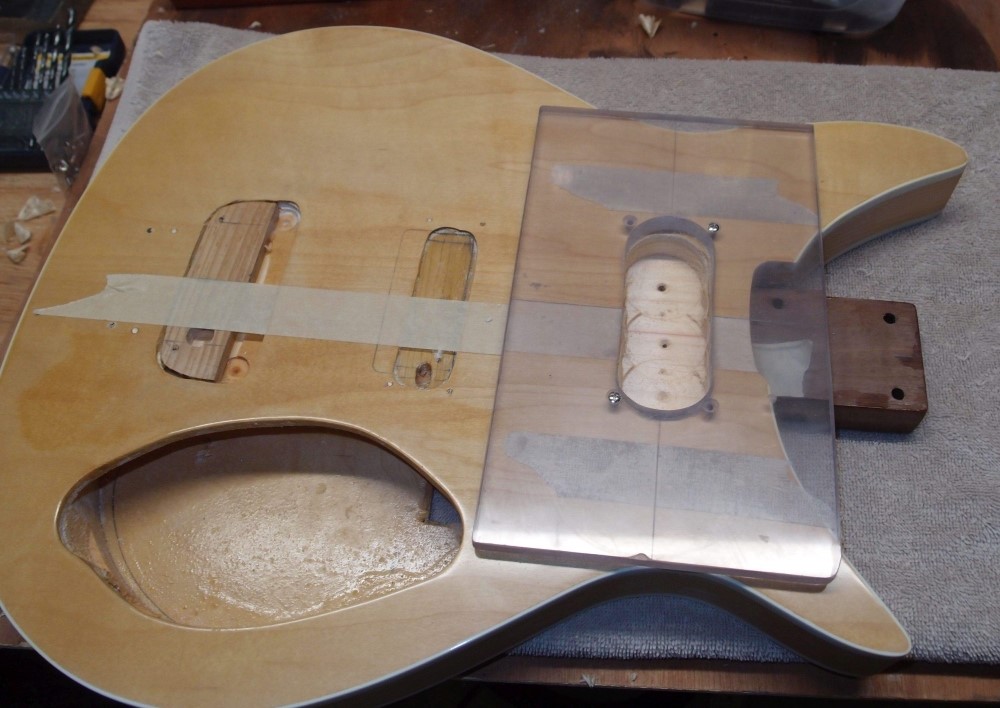
I made this template over the last few days. You can see it has countersunk screw holes at the corners. This is great, because not only does it mark out the screw holes for the pickup mounting ring, but it provides a much better way to attach the template than double-sided tape. You can see that I marked the centerline with the edge of the tape, and also put some tape on the back of the template, so the hard plastic doesn't actually touch the body. This body still has a pretty nice finish on the front, and I don't want to mess it up.
In the picture, I have already hogged out the opening with the 1-1/4" Forstner bit, which I also used to make the template, so it barely fits. I kissed the template in one spot, but it could stand a little straightening there anyway. The pickup ring will cover all sins. This location was reachable with the drill press. I used the big Forstner bit as its own depth gauge and did not drill the full depth of the cavity, but most of it.
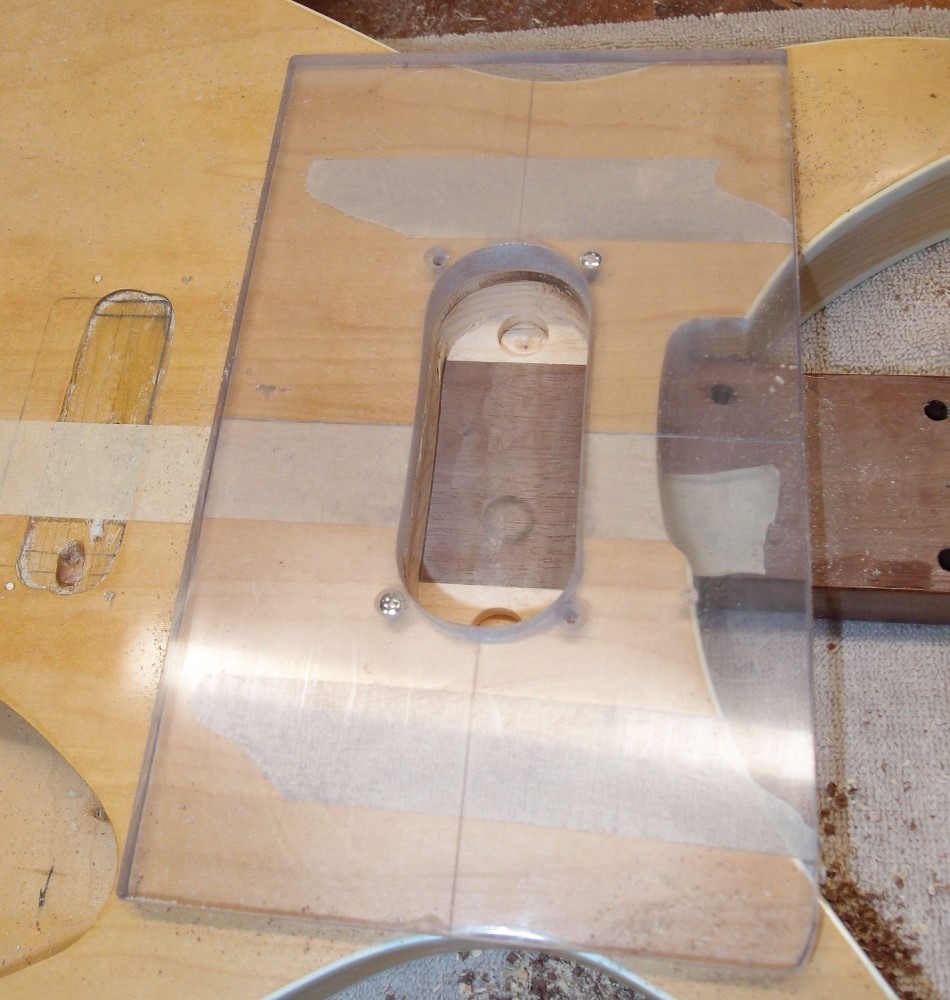
And here's the finished cavity after routing with a 1/2" bit, about 3/4" deep. Drilling out the cavity first makes it much easier to start the router, otherwise, that first pass inside the template would be difficult.
The pits for the height screws drilled were by hand with a 1/2" Forstner. Again I used the height of the bit as a depth gauge. On the router, I had a stack of 4 hearings tight to the collet, and I went in passes one bearing deeper each time.
It's interesting that I got down to the walnut, so I can inspect the joint from the inside. You don't often get to do that. It is tight. There was a spark or two that made me immediately stop routing, but I looked and couldn't find any metal in there.
Now I am really glad that I fixed the tail of the walnut with a biscuit, as I just removed a lot of the glued joint. I think I will glue some popsicle sticks across the joint. Popsicle sticks are actually pretty strong and hard, and I don't need the full depth for the pickup, I'd rather reinforce the neck mounting. I want to see someone build an entire guitar out of popsicle sticks. It could be done.
The template is made from an old scrap of boat window. This stuff is incredible, I think it would stop a bullet. No kidding. I hope this template is useful in the future. The template box is getting pretty full from all my loony projects.
This template is different from the ones I used on the Osprey and the Factor. Those were tightly form-fitting, as the pickups were mounted right in the wood with no pickguard. To make things easier on those, I undercut the cavity walls. Here, I have a pickup ring to cover the cavity, so it can be much looser. But not sloppy - the ring is pretty narrow, and it has mounting screws in it. The short edges are very tight. That's why I made a template, rather than try to free-hand it.
Looks good to me. The second one should be a repeat of the first. Inshallah.
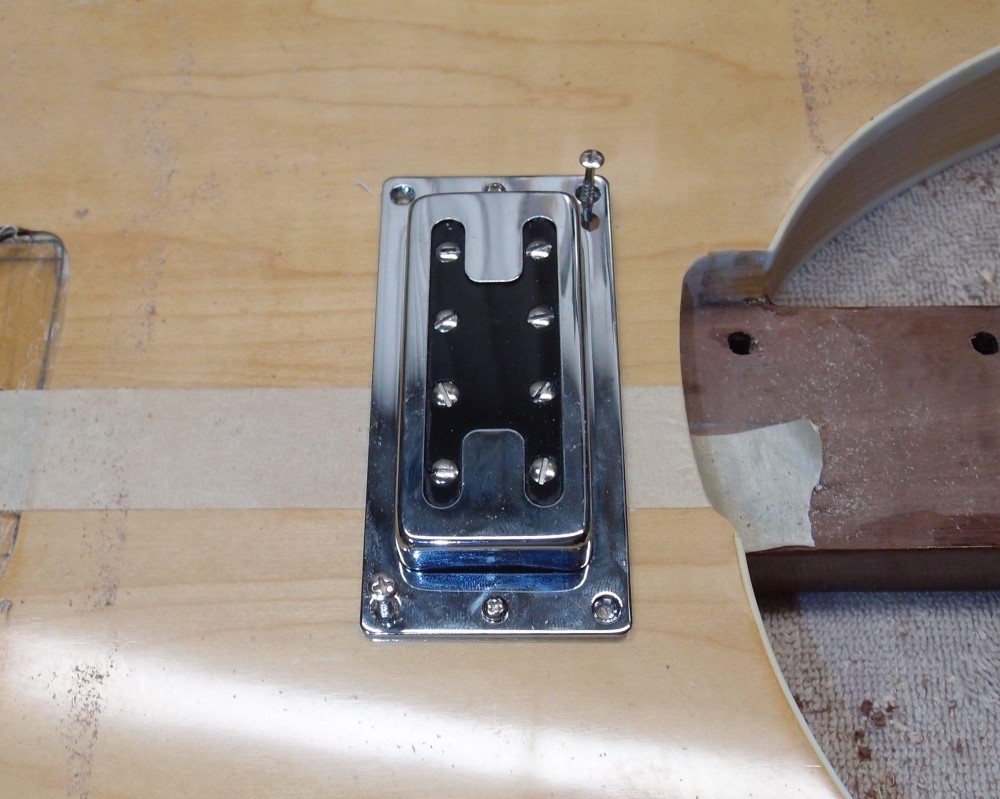
These pickups are very light. Probably not a lot of copper there. You get what you pay for, and for this salvage job, I did not want to pay much. I'll bet they sound fine, and they certainly look cool.
The sound of a pickup is overwhelmingly influenced by its location. Move the same pickup from the neck to the middle to the bridge, and you can hear it change from a mudbucker to a P to a J. Not 100%, but a whole lot. I built a bass with lipsticks in exactly mathematically the Rickenbacker spots, and it is uncanny.
In this instance, I was constrained in locating the pickups by the existing body routs. Fortunately, they were shallow, and are now completely obliterated. Did I mention I also changed the scale from 32 to 30, moved the neck, and rebuilt the mounting? With all the changes I've made to the original plan, this thing is going to be a miracle if it works. But that's what makes it interesting. It could still become firewood too. Anyone placing bets?
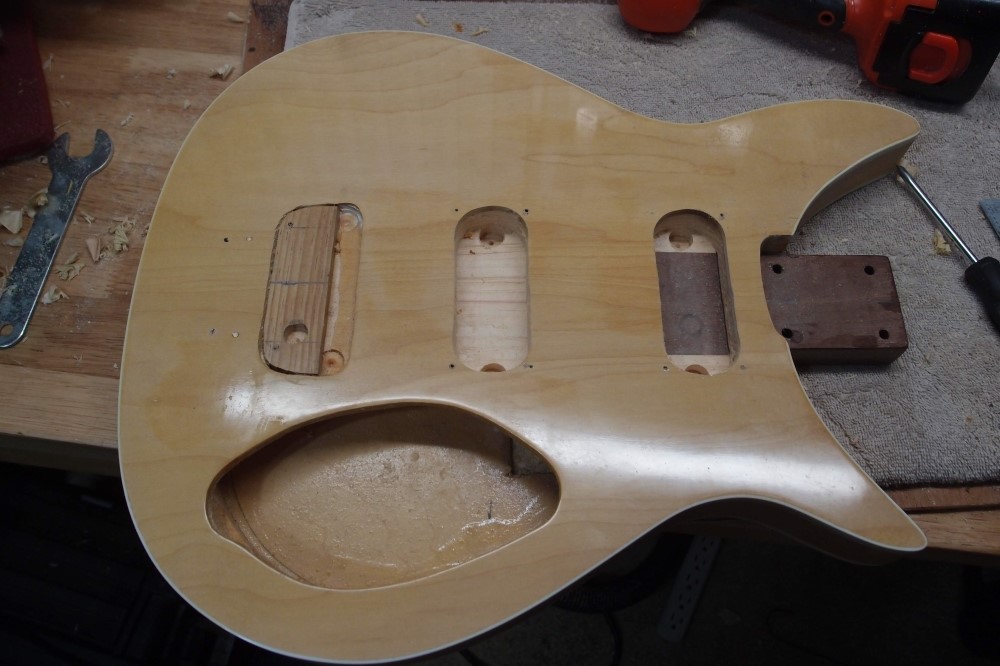
And the finished product. I had to foster the second cavity by hand. I used the weak little cordless drill, which is more controllable. You can also see the bridge shim, with a 1/2" pit drilled down to the existing ground hole. That concludes the woodwork for this body, I think. I'm glad I never threw it away, it's going to be a neat little bass.
Before I did the pickup routs, I "toothpicked" the old screw holes that were too close to where the new ones would go. "Toothpicking" is much like doweling, except much smaller. Put some wood glue in the hole, break a sharp round toothpick in half, tap it in and break it off. Toothpicks are typically very hard wood, and perfect for this. This is also useful for larger holes, like say a stripped hole in a door jamb. Stick a few toothpicks in, and optionally some glue, and you can drive the screw in like it was new.
That's all for tonight, I have a big mess to clean up in the morning, plastic shavings and sawdust all over the shop ( and me. ) Sawdust causes cancer in California. Seriously. Now it's time to work on Big Ricky, and I have a really cool idea.
Nov 10, 2018
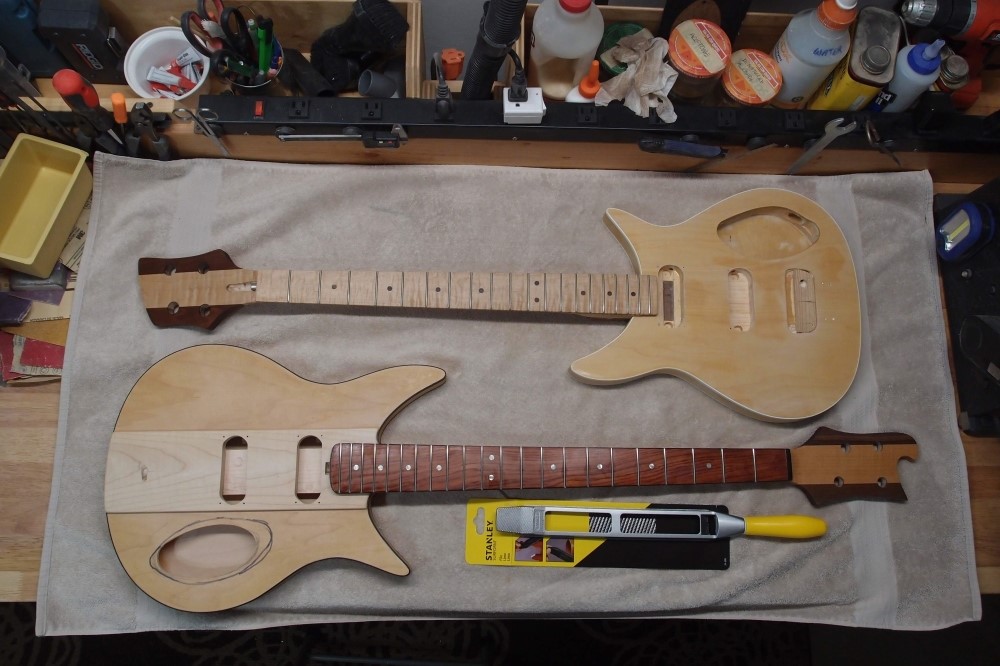
These two builds are coming to synchrony. I want to do all the finishing together. I need to fiddle with the neck mountings and make up the pickguards.