Mosrite Bass (9/10)
Apr 14, 2019
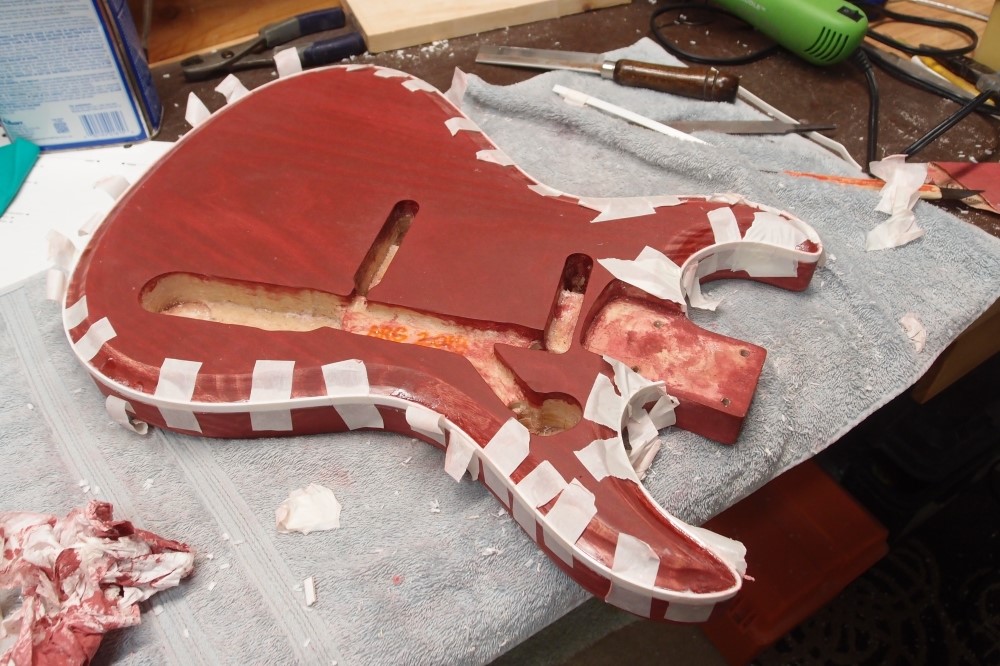
I did a pretty good job of not wrecking the binding on this body when I stripped off the water-based crap. But it still looked rather messed-around, so I routed it off and replaced it with new. At least I did get it tighter this time - those pointy horns are tough.
The old binding would have been ok, but I want better than ok. And I want 100% recovery from the water-based fiasco; I don't want regrets every time I look at this piece. Never use water-based polyurethane for anything, it is just EPA-mandated garbage.
Apr 20, 2019

Got the binding all scraped clean.
Apr 21, 2019

Final cleanup of the binding, then I jumped the gun and brushed-on a coat of oil-based polyurethane on the front to seal the grain and the binding. When this dries, I will install a handle and do the same on the back and sides. The wood looks great, I think. When this is all polished-out, with pickguard and silver hardware installed, it is going to look really sharp.
I'd be finished by now if I had not embarked on the water-based disaster first. Even brushing it on, I can feel the quality of the oil-based finish compared to the water-based garbage. Use water-based paint on your garage, not your guitar.
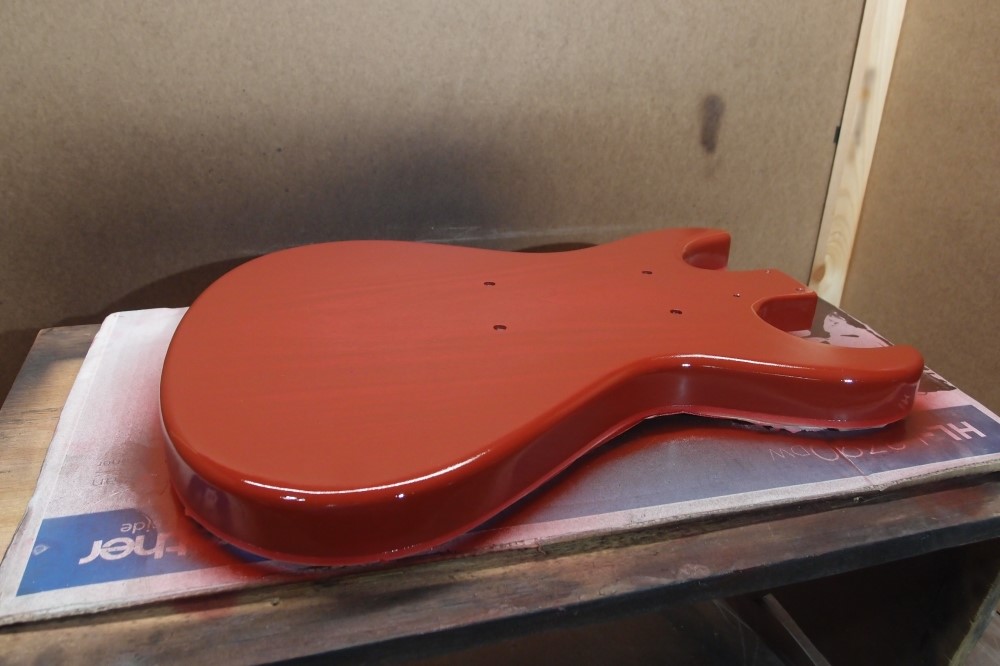
Now fully encased in soon-to-be plastic.
Apr 23, 2019
Dec 1, 2019
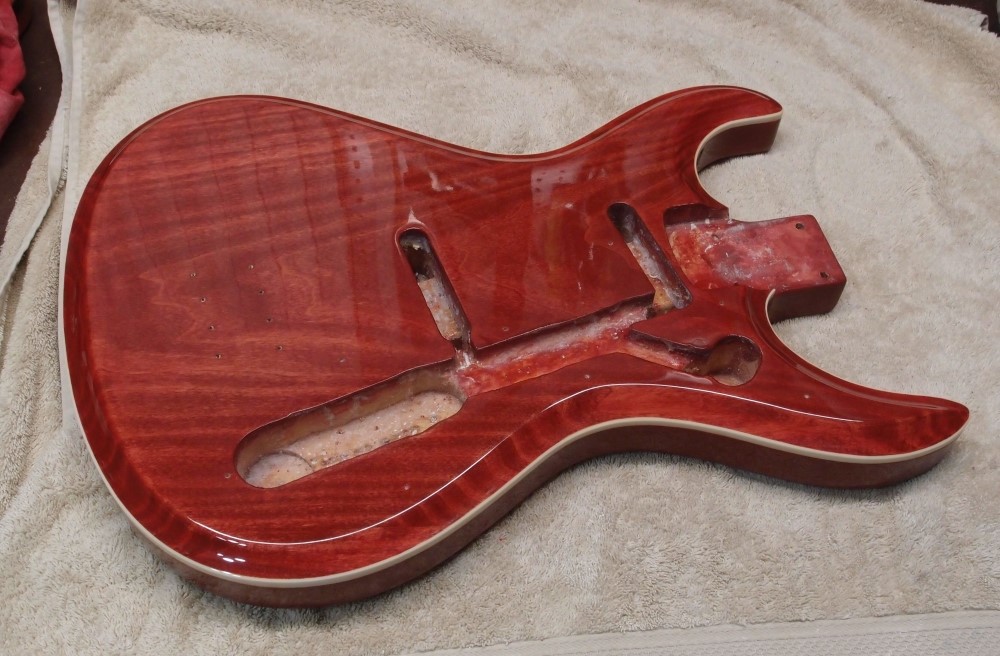
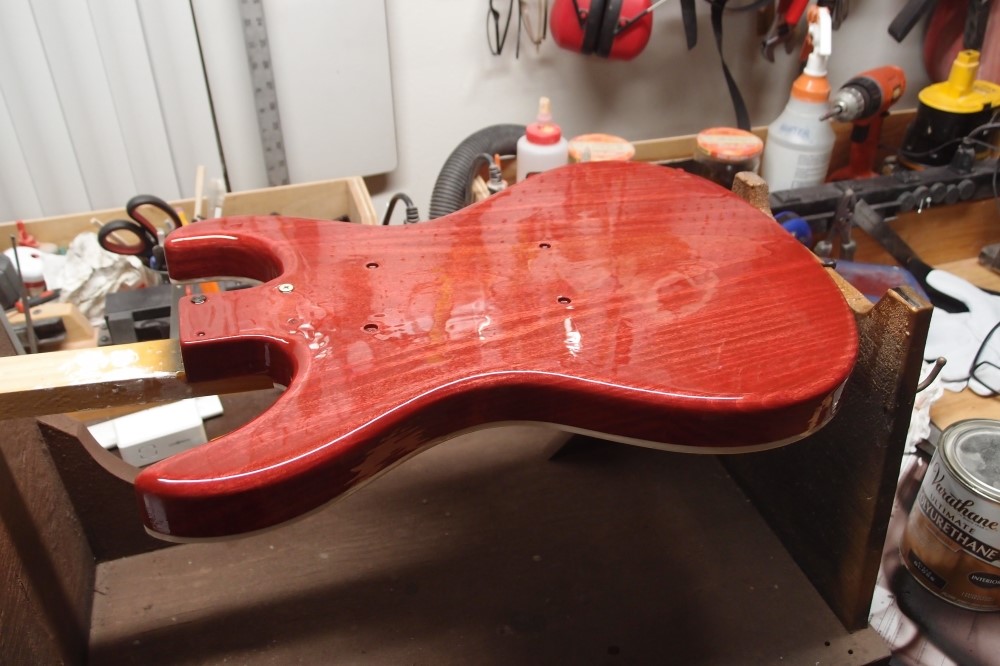
It's been a long time, but I finally got back around to this. The body is all polished up. There was one small divot in the poly on the front. I filled it with nail polish, which worked pretty well. I'd probably have to point it out for anyone to notice. Compare this with the water-based garbage previously.

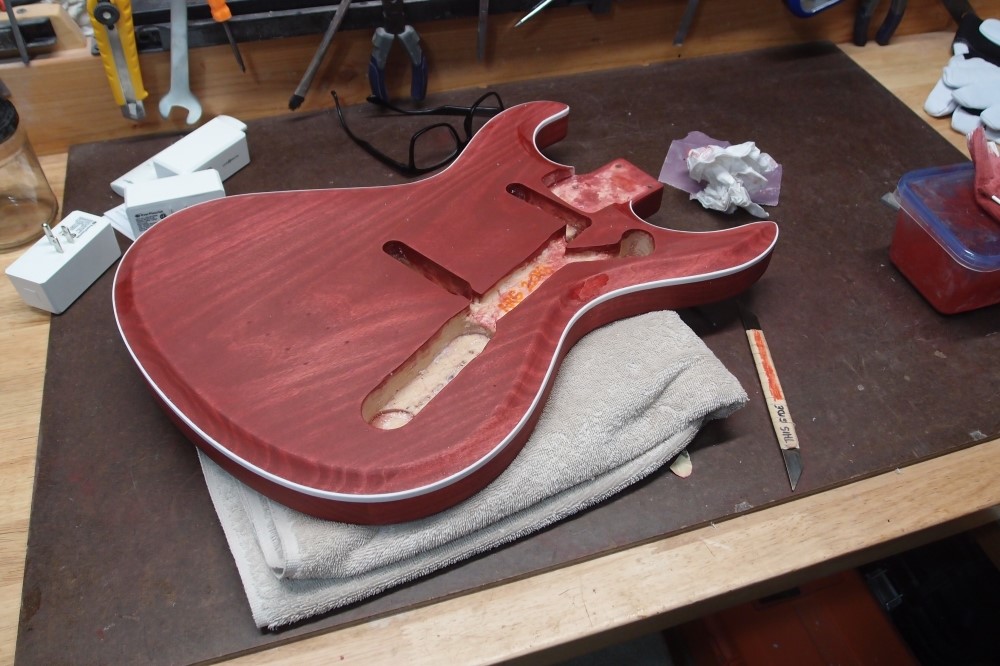
This is the stain - Varathane "Barn Red" from Home Depot. It came out nicer than the name would suggest.
Here is the body ready for final assembly.
March 1, 2020
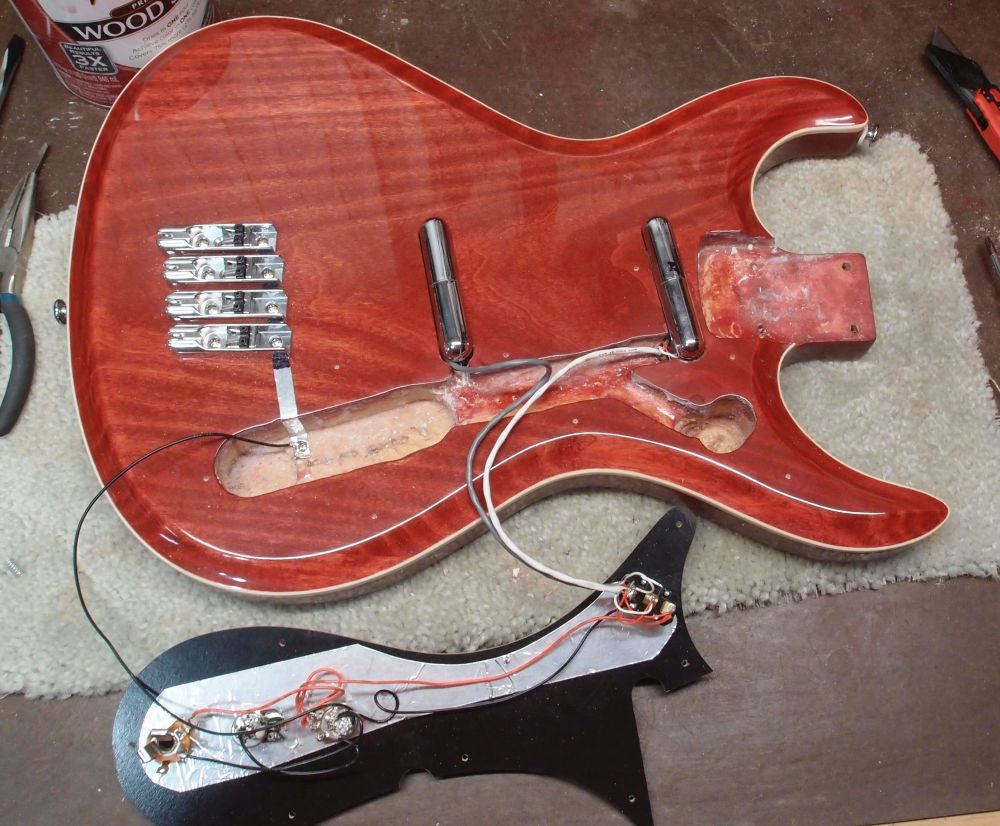
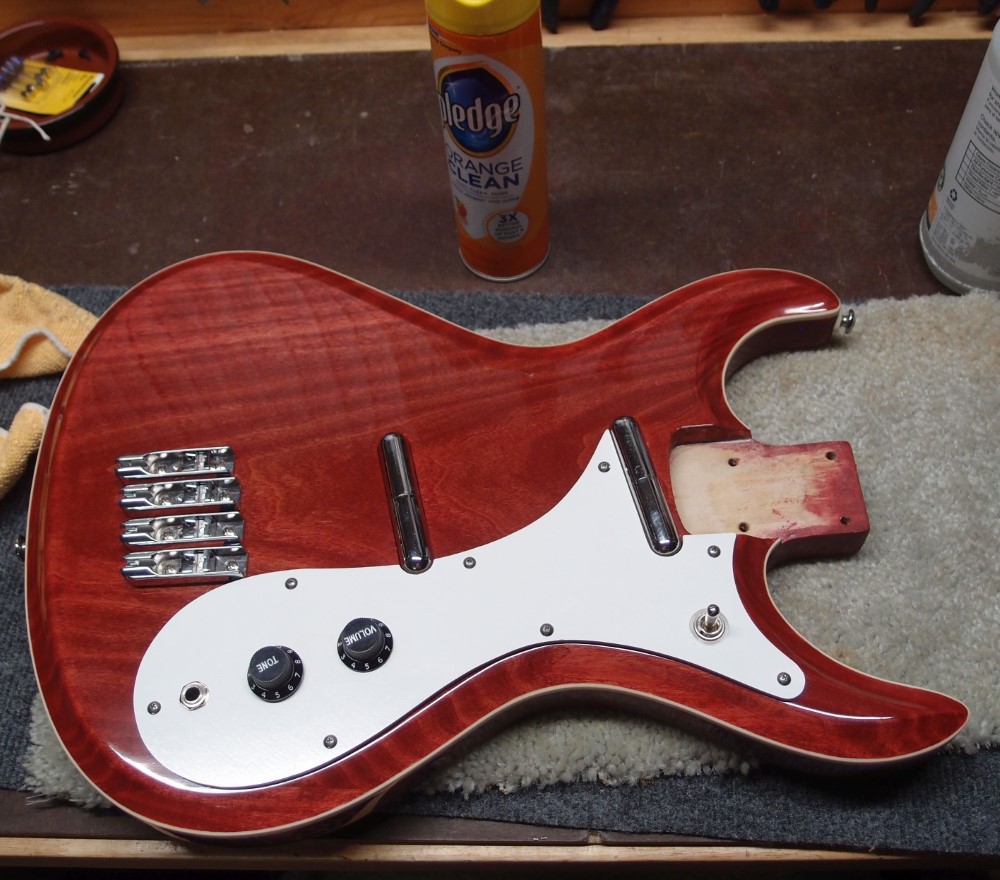
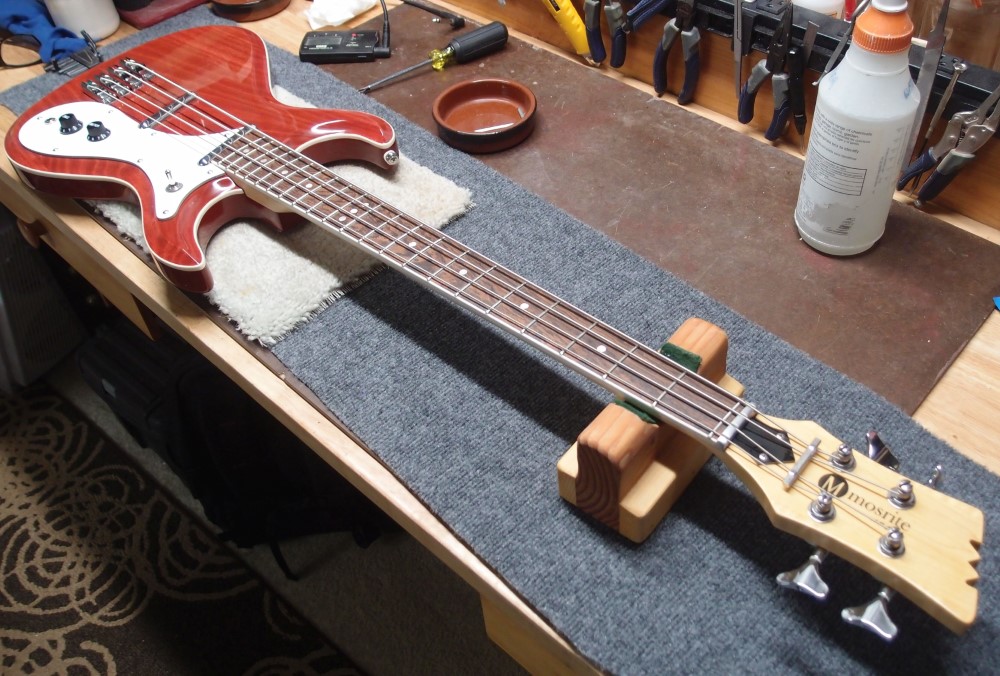
I started assembling the Mosrite, finally. The routs are all so precise that I had to spend quite a while filing polyurethane out of them to make the neck and pickups fit again. Then I had to chisel out the pit for the output jack. You can see my solution for grounding the four individual bridges - a strip of aluminum tape, the same stuff as on the back of the dry-erase pickguard.

And it all fit together, and I'm going to bed. I'll assemble the neck tomorrow.
June 3, 2020
Today I put a final polish on the Mosrite body, hand-rubbed with Meguiar's. The initial polish was with my cloth wheel setup. Very shiny now, and ready for final assembly.
June 5, 2020
The Mosrite is back together and looking good. It plays well enough, but as usual I will let it settle for a month before fine-tuning the setup.