Mosrite Bass (4/10)
Dec 6, 2018
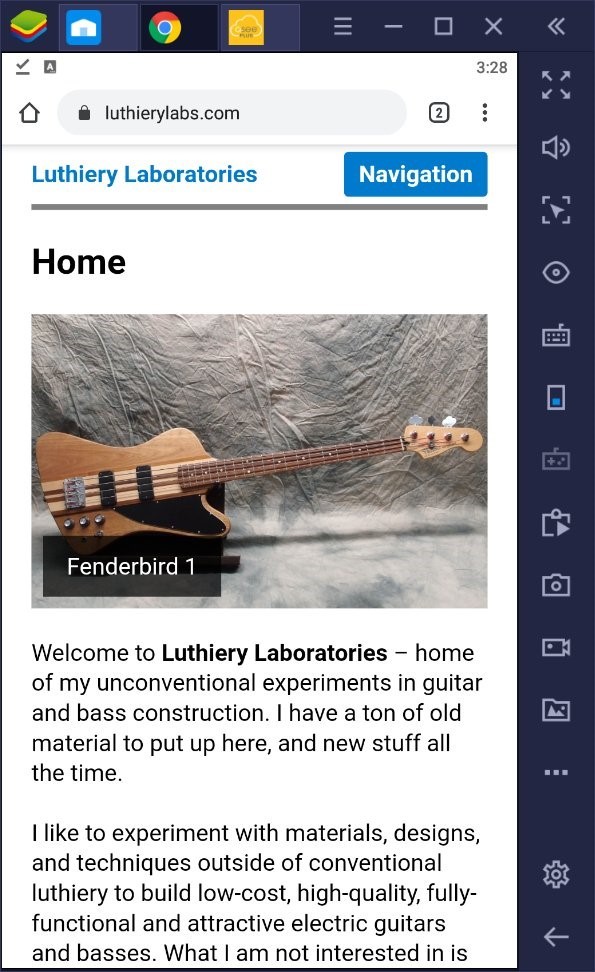
Glad this is done. Not going to try to explain how to do this, you can find videos on YouTube. Mostly it's just experience. I peeled off one or two of my earliest jobs, scraped out the channel, and repeated, but that hasn't happened in a long time. Once you start one of these jobs, you have to work through to the finish, so no intermediate pics either. I recommend starting out by binding a neck, which is obviously much simpler.
Horns sure make everything more complicated, binding my Audiovox design is a snap. That is a good design for a first-time builder. Like everything, you can get plastic bindings cheap on eBay. This piece was maybe a dollar. The dimensions are 6mm x 1.5mm x 5 feet, which will do one edge of a body or an entire neck. 6mm will cover the edge of 1/4" plywood, as long as it is somewhat less than 1/4". This binding is purely decorative.

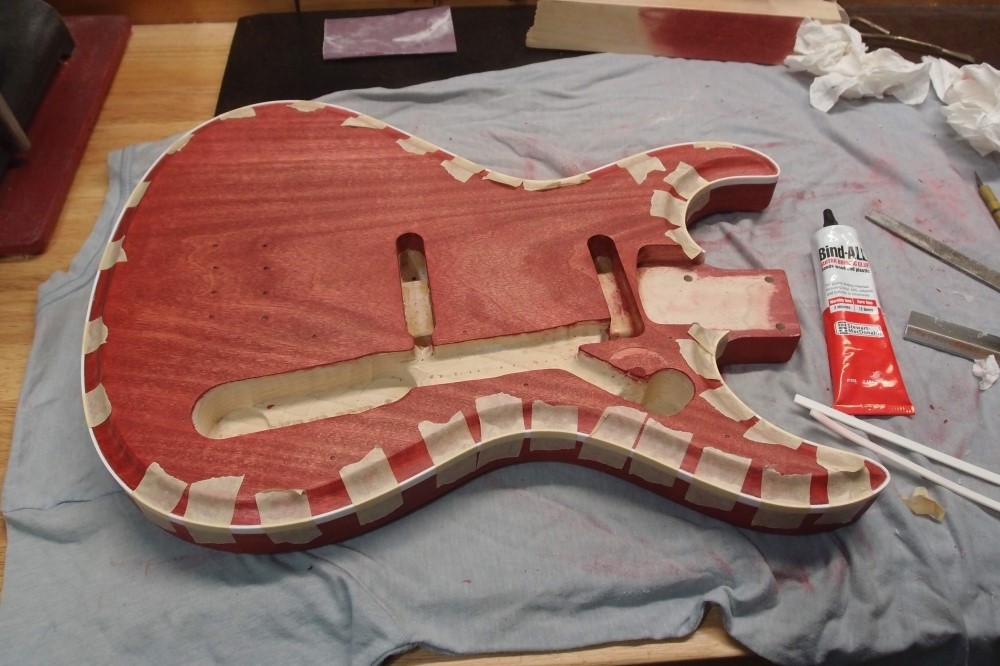
Some heat really helps to turn the tight corners at the ends of the horns. Otherwise, there is a good chance the binding will snap, and in any case, it is very difficult to get it to stay, unless you want to hold it by hand for 30 minutes. Even then, the residual stresses will make it want to pop off or break. A little heat gun like this is invaluable for loothering. You don't want to incinerate the job ( and your fingers ) with a big gun, this is just right. You can get one cheap on eBay. Also great for shrink tubing.
Damn BindAll is a runny mess. When getting it out of the tube, it has three modes: nothing, random drip, and uncommanded gusher. The problem is that it is much too runny for the size hole in the tube. Turn it head down and it pours out like water. I actually like the consistency of the stuff, the extra wetness gives you a few minutes to set things up. My solution was to pinch the end of the tube around a tiny jeweler's screwdriver, to make a much smaller hole. Not perfect, but much better, and the cap still fits after I filed the corners down. I got a tube of Duco, good old-fashioned airplane glue, I will try that on the neck. Duco is much thicker than BindAll.
Nice thing about BindAll is that you can roll the excess off the stained surface with your thumb while it is still fresh. That's the reason I tried to keep the stain out of the binding channel - you don't get as good adhesion as with bare wood. Eventually BindAll gets quite hard.
Looks like some mode-2 BindAll found my pants leg. Luckily, it cleans up pretty easily with acetone. I suspect this stuff is nothing more than toluene and a thickening agent. The tube says MEK - just as bad as toluene. Don't sniff it, kids !!!
This will have to set for a couple of hours, then I can file and sand the joints smooth and touch up the stain. Finally, I'll go over it with a magnifier and drop-fill any gaps with Crazy Glue. You'd think the poly topcoat would fill those in, but often it avoids them. I'll also soak some Crazy Glue into the back sides of the ends, where they get very thin. This will reinforce the wood and the joint with the binding, don't want anything springing loose or breaking later.
Another way to do a German carve from the hardware store would be to edge-join two pieces of 3/4" maple or whatever wood you like. Two 8" widths would give you 15" to work with. Build some sort of body behind that, maybe even a Danelectro. Or do a Radiata body. The glue-up would give some wild grain patterns in the carve.
Dec 11, 2018
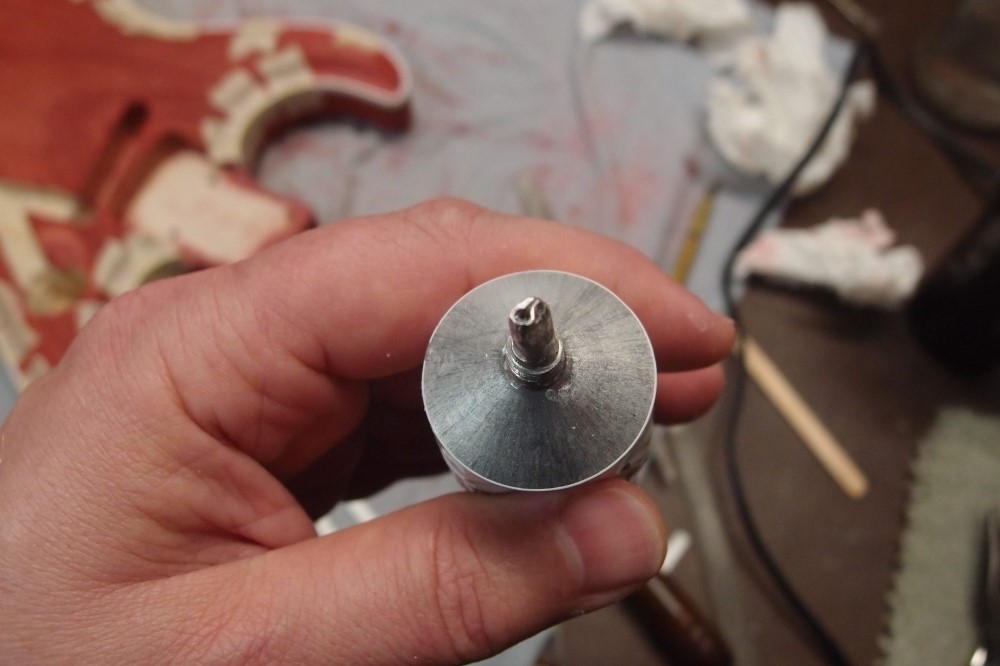
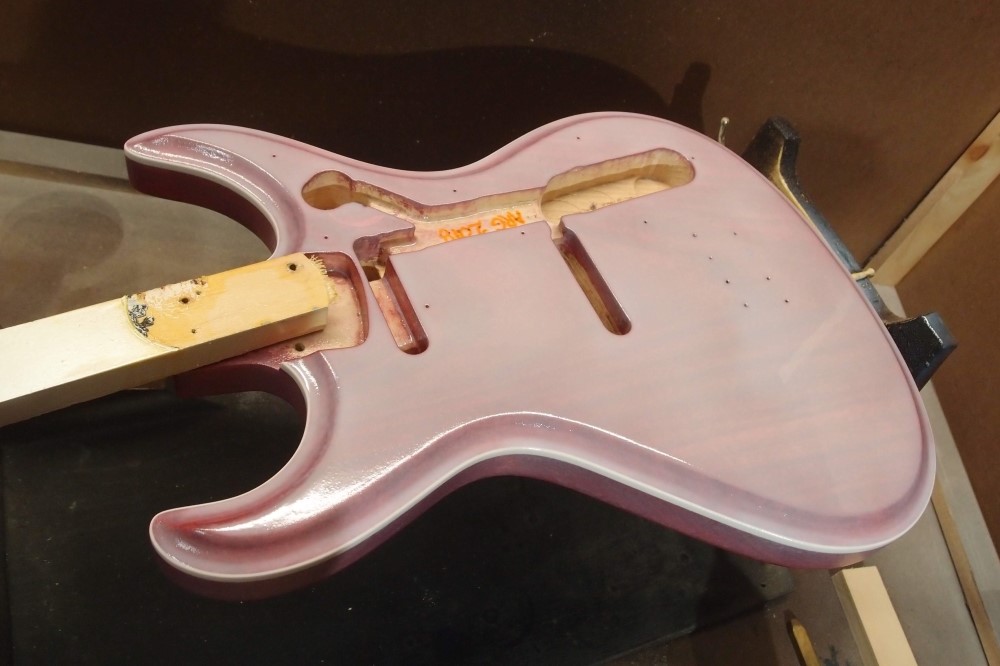
I'm trying something new - water-based spray poly. Never seen this stuff before, figured it would be good to try before I start experimenting with spraying brush-on. It goes on milky, but clears up when it dries and does not amber like oil-based poly. It thins a great deal when it dries. I am applying multiple coats on the front and sides, applying a new coat as soon as the old one tacks-up. This is my usual way, it results in one thick coat, rather than several distinct thin coats, which is what you would get if you follow the directions.
This stuff flows out nicely on the horizontal surfaces but tends to run on the verticals, so those are getting many thing mist coats. The result of that is a rather lumpy finish, but as long as it is thick enough, it can be polished out. I'm laying it heavy in the carve, I'm not looking forward to polishing in there.
Looks like I am going to need another can for the back. I'm going to let the front dry solid before I flip it and do the back. The sides will get even more coats then, I want everything well covered.
I want a finish that will dry crystal-clear, as I do not want to turn the red into orange. I'm pretty pleased with this stain. It turned out to be more of a blood-red than a barn red, as the name would imply. It seems to have reddened since I put it on. The color depends a lot on the lighting. Also, I want the white binding to stay white, not turn yellow under the finish.
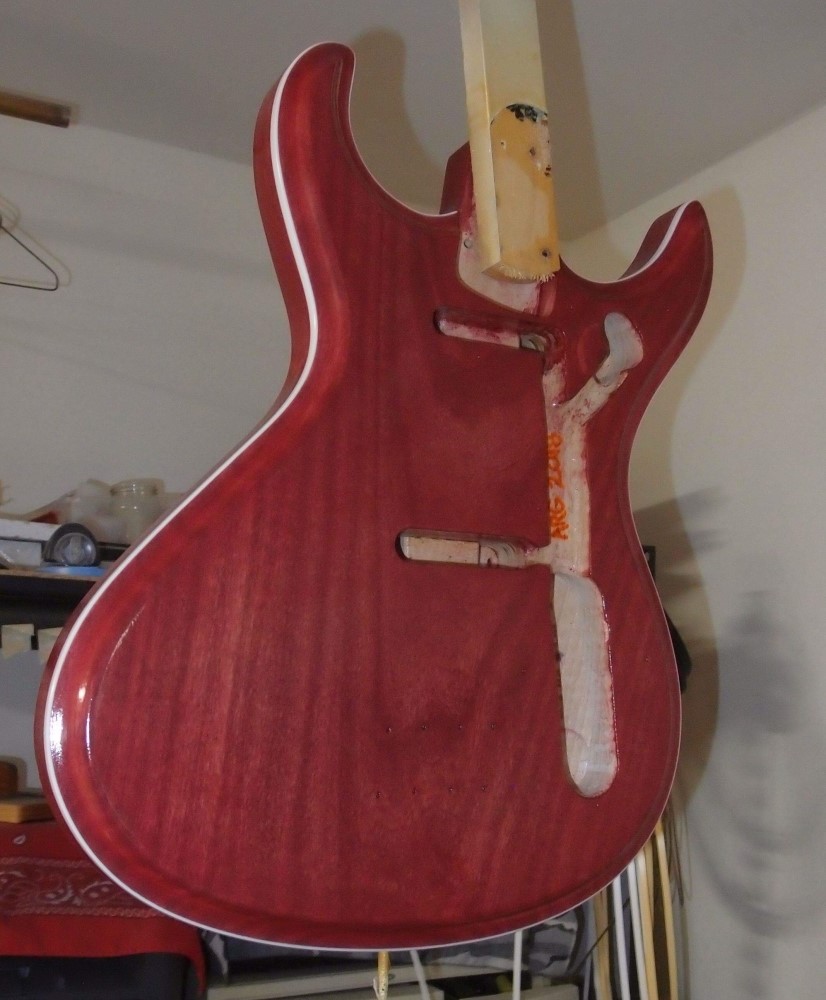
Diluting the stain and applying multiple coats got a really nice result on the poplar, similar to my previous 'walnut' projects. Poplar can stain very badly, dark and blotchy, but this came out very even and saturated. End-grain always stains darker than edge-grain, so the color varies a bit around the sides. The dark heartwood streak on the back is pretty well covered.
If this really was milk, it would still be better than nitro. I did the back and let it dry until I could flip it, then did the front again. All the while, I am doing very light mist coats on the sides, so the running is minimal. The coat before this had dried very thin, and the grain had lifted and was pulling through. The water-based formula must have caused that.
This stuff flows out nicely when you ignore the instructions and put it on thick like this. In the carve, it tends to flow down to the bottom, but enough is staying on the slope. I forgot to mention, whatever they used for propellant is not nearly as noxious as oil-based formulation, and of course, the solvent is just water.
I used water-based poly once before, which I applied with a brush. I still have another can. It took forever and a few touch-ups to rub out the brush marks, but in the end, the result was good.
Next time I do a build like this, I am going to use white spackle as grain filler. Why not? That should really make the red pop. I also see no reason why a slightly watered brush-on product should not spray just as well as this, and a lot cheaper.
There is also a wipe-on version that I have not tried. If I end up with too much grain, I may smooth this down and top-coat it with that. There is an entire thread devoted to water-based poly, but it is over 40 pages long, and honestly, TLDR. Hopefully, in a couple more posts, I'll be able to tell you if this works or not.
When this is ready, I'll flip it and do the back again. I use a little baking timer between coats. Water-based is supposed to dry faster than oil-based, but I think it is slower. One nice thing is you can smooth out a fresh run with a wet finger. Initially, I shot the sides to get a feel for this stuff and made a runny mess that I wiped off with a wet rag.
Well, I shot out a second can. Time to walk away from it. Tomorrow I'll see what kind of mess I've made. I may chicken out and put a coat of flat over this. It seems to dry very thin and polishing it looks to be a real PITA. In the future, I'll work out how to spray brush-on. That will be much more economical. This may turn out to be a $20 undercoat! I wonder how "Triple Thick" sprays?
Dec 12, 2018

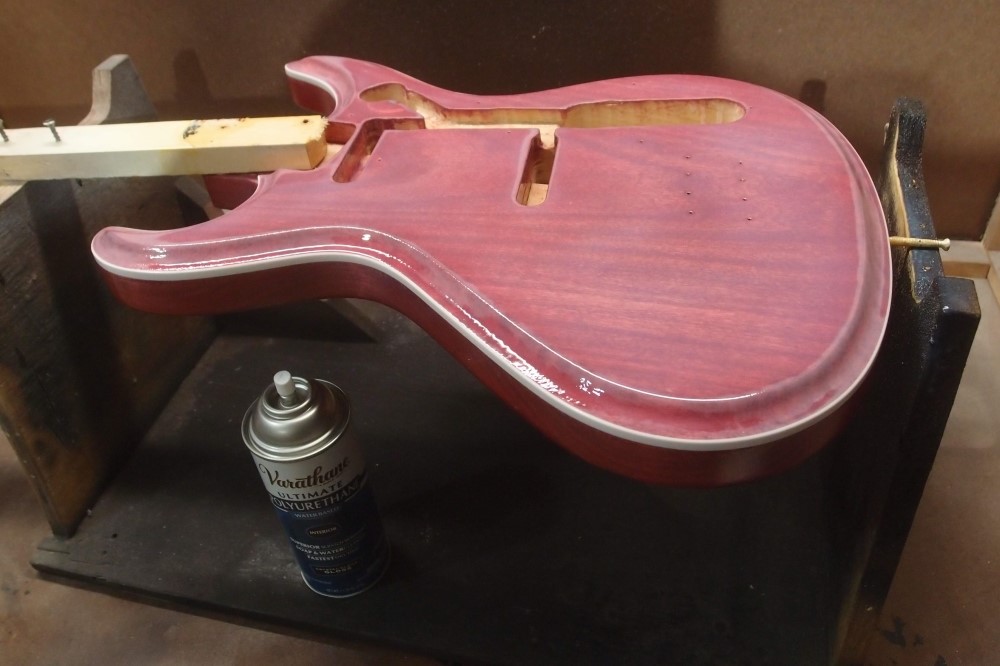
Well, this was an interesting experiment. This is the front, showing some serious orange peel, and also some wood grain, although that is typical with poplar. Two whole cans on one body, and it doesn't look all that thick. These cans are mostly water. Expensive water.
In addition to the wood grain, the glue joint has pulled through. It was smoothed down flush, probably all that water swelled the grain.
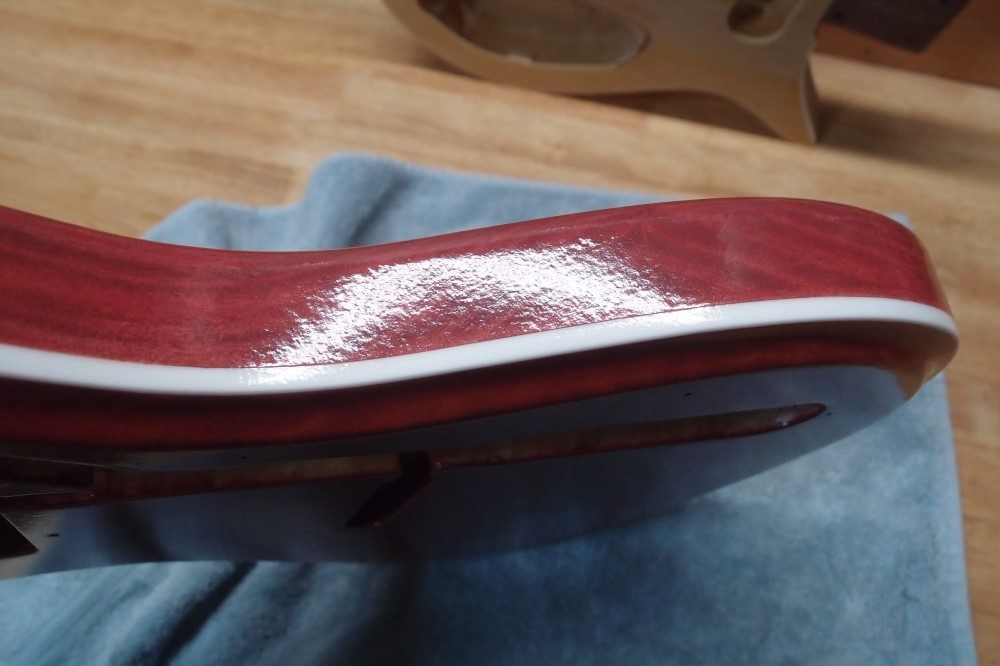
The sides were done by the instructions - many light mist coats, and this is the result - more orange peel, even worse. The faces were done in thick flood coats, with much the same result. This stuff is not going to give a smooth finish without a lot of sanding and polishing. Also, the joint between the wood and the binding has pulled through. It was perfectly flush.
The color is somewhat muted, but it has only dried overnight, and I think it will clear up in a few days. No yellowing, the red still looks red.
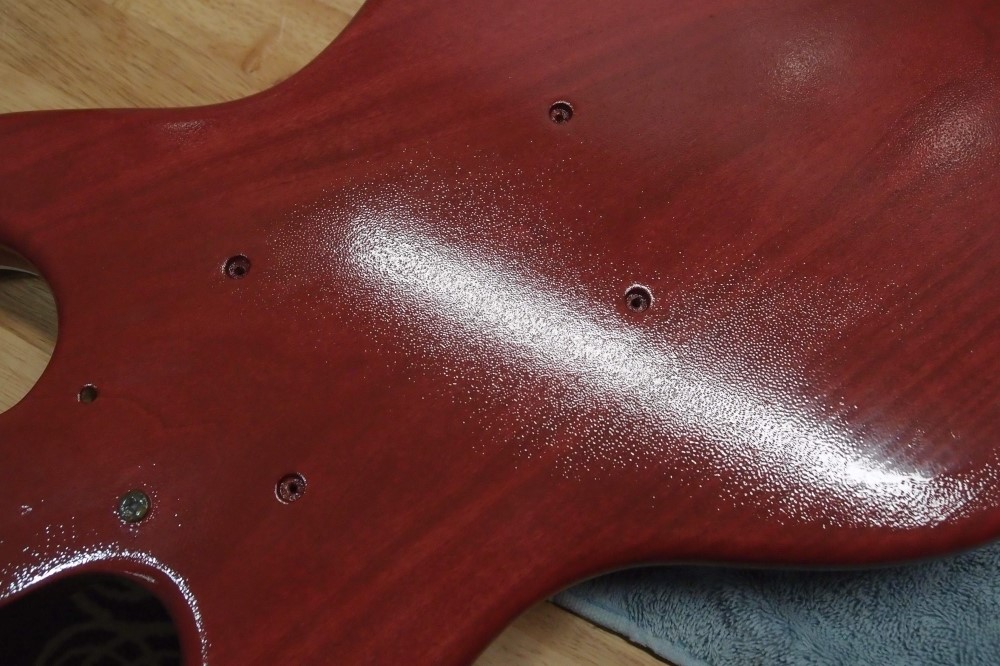
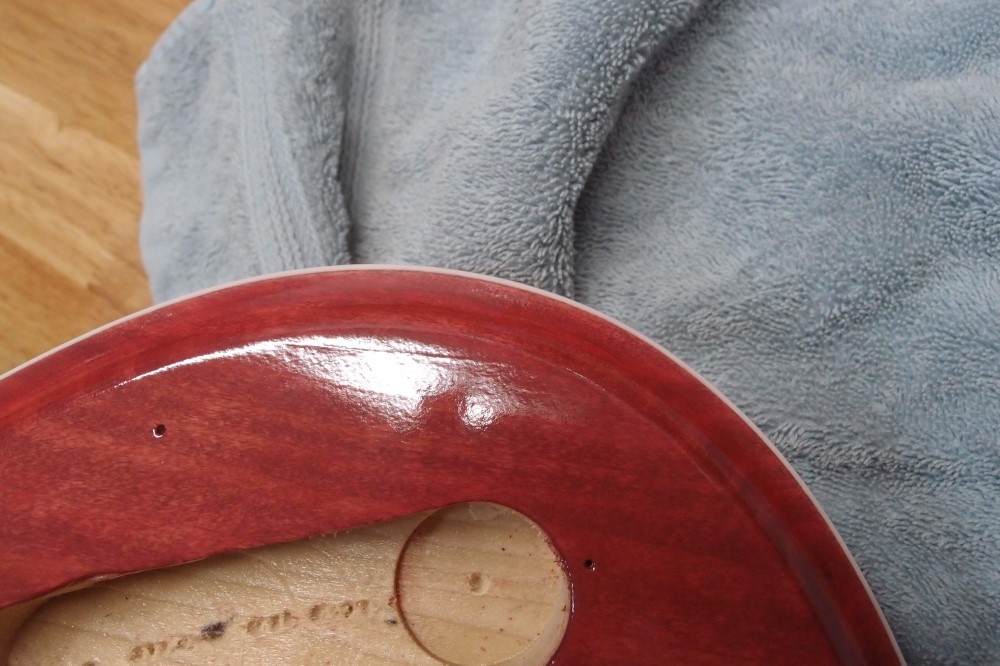
This is the worst. I shot fewer thicker coats on the back, and it dried in all these little pockmarks, except for one area which weirdly flowed out. It was mirror smooth when it was wet. This would be avoidable, but I was testing things and wanted to see what would happen. In that regard, this was a success, but overall I am not too satisfied with it.
It's really too soon to judge anything. I'll hang this up for a week, and see what it does. It is already quite hard, and as it cures fully, it may pull tighter and thinner. The goal of this method is to get a single thick coat that can be polished out without resulting in a lot of rings, but this cr@p may be too much for that. A problem with a stained finish is that if you sand through the stain, that is very difficult to fix.
Polishing this out looks very risky. I think I will scuff it up and recoat it. That will also let me flatten out the wood grain and the pulled joints. I won't be buying any more of these water-based rattle cans, they're not worth it for results like this. Time to start experimenting with the compressor. I have both flat and gloss brush-on that I can spray. Which one will depend on how smooth a finish I can get with this.
As far as the finish getting thicker and thicker, you really can't be too thick, especially over a soft wood like poplar or alder. The thicker the finish, the better chance you have of rubbing out scratches later. The trick to the one thick coat method is you can't stop. You have to keep recoating as soon as the previous coat tacks up. That's where the painting stand is useful, you can flip the piece and alternate faces while doing the sides as well. If you let the poly dry fully, you are finished. You need several hours to do this, coming back to it every 20-30 minutes for a re-coat.
The can says recoat after one hour, minimum of four coats, wet sand with mineral spirits. Coverage 10-15 square feet. Four coats? Not likely. There is no mention of time-to-use, but I would give it several days at least if you put it on as I did. I give oil-based a full month to cure before I polish it.
When it comes to wet sanding a finish, I now start with 1500, or 1200 if 1500 is too slow. I don't use 1000 at all anymore, it does more damage than it is worth, and greatly increases the risk of sanding through. I go up through 2000 and 3000, beyond that doesn't seem to do anything. For polishing, I have abandoned the rotary sander and gone back to the random orbital, which is much gentler. It's too easy to mess up with the rotary, although it does give nice fast results. Meguiar's 105 compound gives nice results, and is self-limiting, meaning it won't keep cutting right down to the wood. The stinky 3M stuff I have is not self-limiting and can do some damage.
When the can was very fresh, the stuff came out almost like a foam. Later it became big drops. I sprayed a mirror-smooth wet surface each time, but it did not dry that way. Not at all. With oil-based, it pulls into a tight skin as it dries, this stuff just globbed and pockmarked. Might as well have brushed it on.
30 coats, one every 20 minutes, that would take 10 hours, continuous, if you want one layer. Times two, for both sides. Ouch. How many cans was that?
How long did you let it dry before polishing?
I just tried the rattle cans to see how they work. Next up will be figuring out how to spray it properly.
I did some reading on Floetrol. It seems it has a yellowing effect. That would defeat the entire purpose of using water-based poly for me. Another product, XIM 11071 Latex X-Tender, would seem to be the same without the yellowing. Any experience?
I got a bright idea and filled all the open screw holes with white glue. That will keep any liquid out. Next time I'll just punch dimples and save the drilling for last.
The WB poly specifically says to remove shellac. Oil-based will bond right through it.
This WB poly does have some good points. It's not even a day old, and it already seems to be really hard.
The brush-on "Triple Thick" poly is water-based as well, but the spray appears to be oil-based. Of course, a little water should make triple-thick into single thick. There is also a wb wipe-on poly. As far as I can tell, that is just the same stuff pre-diluted, you're just paying for extra water.