Mosrite Bass (3/10)
Dec 3, 2018
I'm doing a different order of operations than usual. I did the neck mounting so I could lay out the bridges. Mainly to make sure the centerline was still the centerline. That's where a little wiggle in the neck mount is very useful.
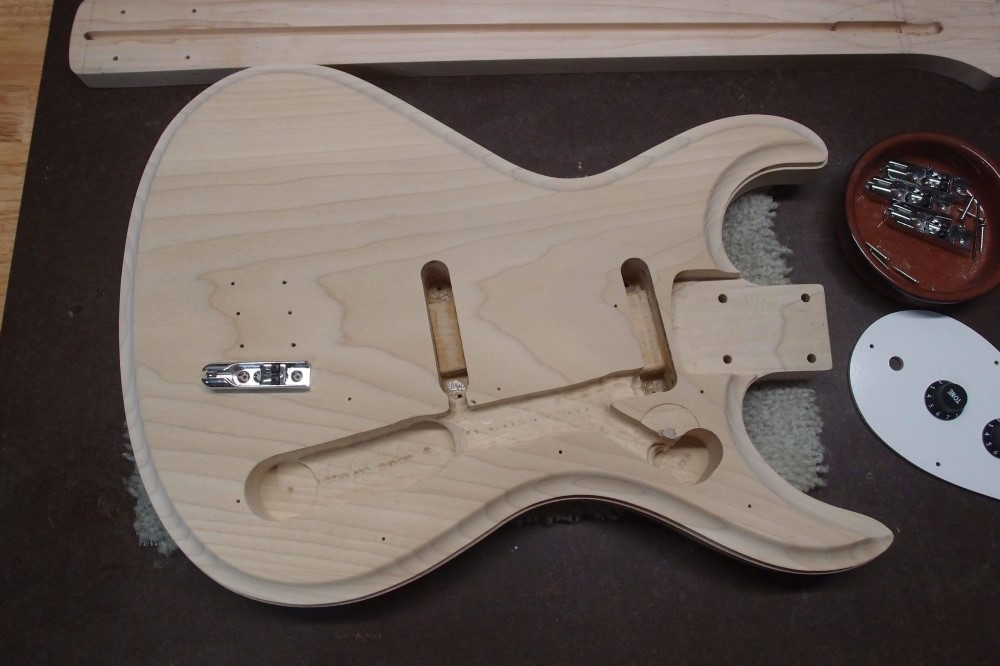
This is the first time I've used one of these bridges. These are inexpensive top-loaders and were very easy to install. That was a bit fussy because I wanted to rake them at the same angle as the pickups. I did the front set of screws first, set the bridges down snug and got everything straight, then did the remaining screws.
Stylistically, these are going to look great with the chrome lipstick pickups. I originally got them for a narrow 17mm spacing, for which it is hard to find bridges, but this is a standard 19mm. Obviously, you can do anything you want with them. I'm going to order another set for the parts box. Let's see ... they're $18 each on AllParts, and $9 a set on eBay. I wonder what the difference is?
Grounding all four of these is going to be either hard or easy. I'm going with easy - a strip of aluminum tape. I will shape the pickguard to almost hide it, that's why I wanted to get the bridges on now. Trying to bring a wire up underneath each one would be a nightmare.
I also turned down a piece of 3/8" dowel in the 'lathe' and plugged the remaining hole, just because. The block in the second pickup rout is not for strength, but to act as a spring guide when installing the pickups.
Poplar is not very strong, even some pines are stronger. You can make a neck out of it, but it takes some care forming the headstock or it will bend.
It seems the switch on the horn is a Mosrite thing, so I'll have to do it. Semie would want it that way.
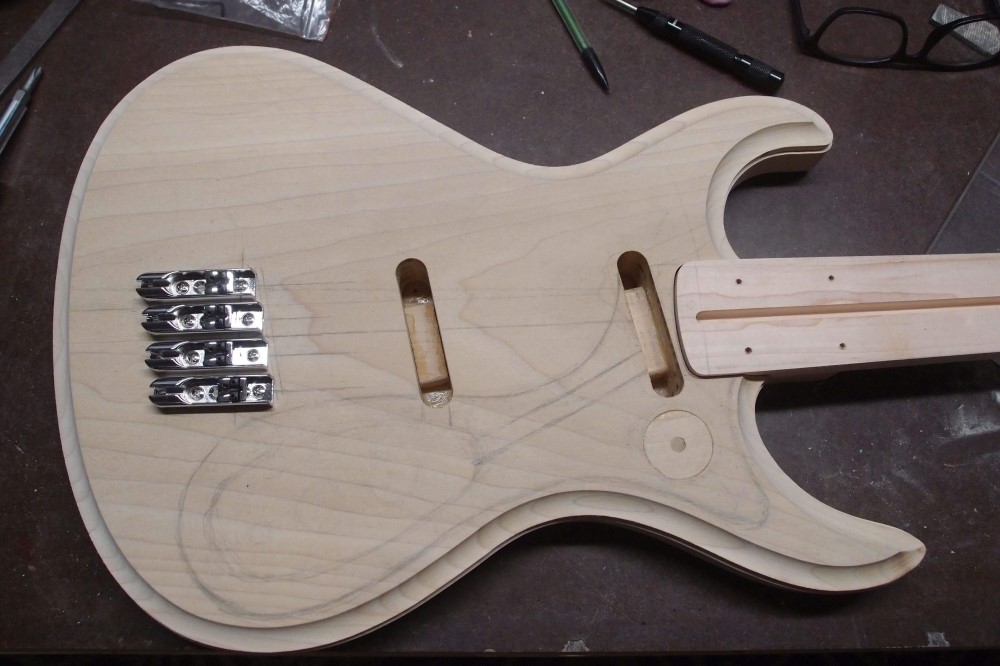
The Mosrite bass body above is clearly a stretch of the guitar body. I'm using a guitar body, with a shorter-scale neck. I don't like big massive bass bodies anymore.
I'll have to do the switch smarter. I fished around in the electronics bin and found a switch with a smaller body. I folded up the contacts so it is less deep. Once I had the pickguard made, I found a spot further down the horn and made a smaller cavity there.

Here is the dry-erase pickguard. I broke over the hard edge on the carve and sanded the front clean. The carve should widen around the upper bout, but I'm going to leave it as it is. Not as pointy, not as good for metal anymore.
Here are the control cavity and inter-connects. I preserved most of my plug, so there is plenty of wood on the south side, as well as the block right behind the neck. Vintage Mosrite neck mounting uses a neck extension under the bridge pickup. I'm doing this standard Fender. I have no worries now, and I got the switch in the right place.
You can see why I made the pickguard touch both pickups and the bridge. I thought about this for a while, how I was going to assemble it, and what if it ever needed repair. This allows the most of the pickup leads, with plenty of room to fold them up rather than cut them. The bridge ground strip will be almost invisible. This wiring is going to be dead simple, volume-tone-output, with the pickups in series. All the wires are in open channels, so if I pull the pickguard, everything will lift right out.
Today was a whole bunch of interconnected tasks: fitting the neck so I could install the bridge so I could make the pickguard so I could cut out the cavities and start sanding. One thing that is interesting is seeing the quality of my repair. That plug is in there real tight, might as well be one piece of wood.
My only brain fart today was drilling the pot holes in the pickguard to 3/8" when they should be 5/16". So I taped off the back, filled the holes with sawdust*, and dropped Crazy Glue on it. A puff of accelerant to set the glue, and I re-drilled the holes right. Like my previous mistake, it will never show.
The nice thing about dry erase board is that if I screw it up, I just go cut another fifty-cent piece off the sheet, and use the old one as a template. It's not like I just wasted my last piece of three-ply. The dry-erase finish is resistant to just about everything, including acetone, but the masonite underneath has problems with water. You could always seal the edges.
That's the last of the major woodwork, nothing is going to change the weight of this body much now: 5.4 pounds.
* I have lots of sawdust.
Dec 5, 2018

Finish sanding. I found this old grain filler and decided to try it, even though poplar has a tight grain that really doesn't need filling ( as does alder. ) This stuff comes from Australia, so it's probably made from kangaroos or koala bears. Actually, it seems to be mostly clay. It had dried out quite a bit on the shelf, but a little warm water and a lot of mixing and I got it back to the consistency of pudding. If this body was something that actually needed filling, like ash, I would scrape the filler on with a piece of plastic, but in this case, I wetted the wood with a sprayer and rubbed it in with my fingers, like kindergarten.
There are a whole range of colors, these two are labeled natural and walnut, or light and dark, which is the truth. I applied some of the walnut to the two scraps, poplar, and maple, just to see what happens. When it was dry, I sanded it 220-320. The filler dust fell straight down - heavy like clay - whereas wood dust flies all over. It was a pain sanding out the carve, but the real pain was cleaning out the binding slot. I think the grain filler did little more than tell me where I'd been and where I needed to go.
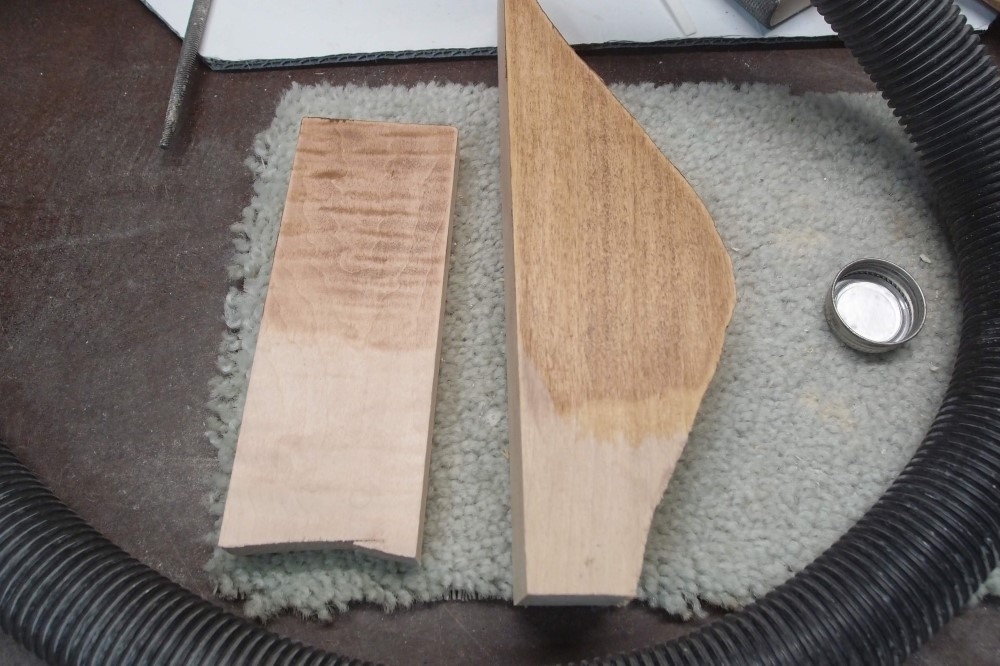
Here are those two scraps, sanded down quickly. Almost like stain.
I wiped the body down with mineral spirits to find the spots that needed more sanding, and spent a while filing the edges of the binding slot nice and sharp.
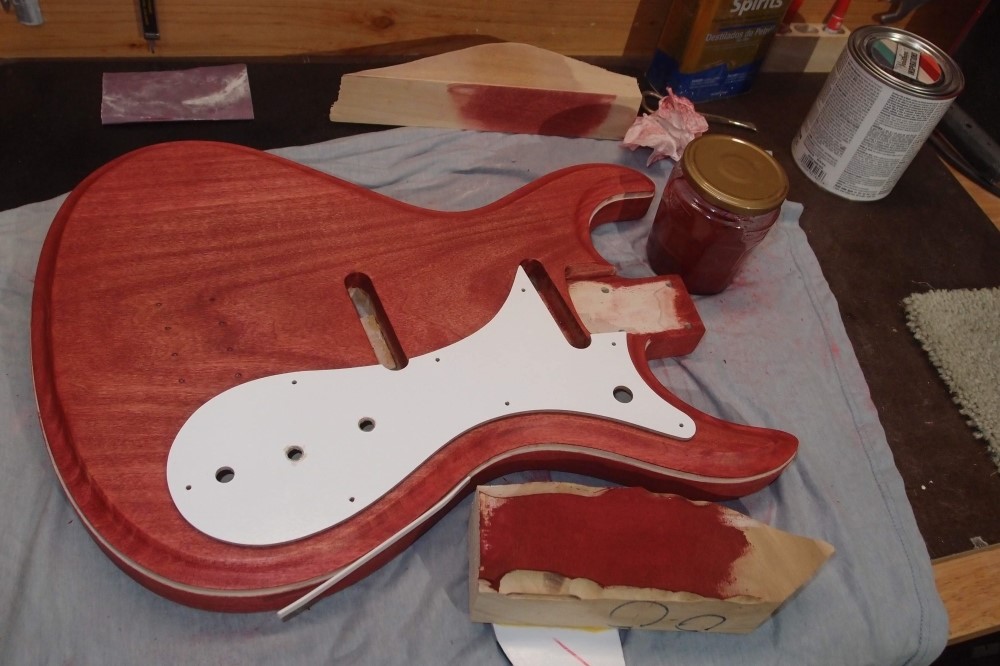
No turning back now. This is the reddest stain you're ever going to find at the hardware store. "Barn Red", not the usual hurts-your-eyes Fender red, but at least it's not brown or yellow again. I diluted it 2:1 with mineral spirits this time, and it went on as a translucent wash, with the grain showing through nicely. This is about 3 coats. Very little blotching, a slight spot on the lower horn that will probably fade away. The scrap shows full strength - no grain at all, might as well be paint.
The small piece I scabbed onto the lower bout has almost disappeared. I should have flipped it, but at the time this orientation seemed to give the best grain match on the front. After I routed the carve, that went to hell. That's why I put the extra piece on the lower bout, where it is not so noticeable. On the upper bout, it would have been staring right at you all the time. This required cocking the whole body slightly on the blank. For a body, a small angle really doesn't matter.
I tried to keep the stain out of the binding slot. That will be the next step after I clean out the slot one last time. You can already get an idea of how the binding is going to look. I think I'll try a rattle can of Varathane triple-thick water-based poly for a final finish. Water-based poly doesn't yellow like oil-based, so the red will stay red and the binding will stay white.
This would have looked really amazing in a 3TS, but that's so much work, and I'm trying to find simpler faster ways to build things, like dry erase board. This Varathane stain doesn't smell nearly as bad as Minwax, and the color actually matches what's on the can. I like this stuff.
I'd like to point out a spelling error some people are making. Yes, there is an "i" in loothery, but it is not only silent, it is invisible. If you must be explicit about it, I suggest using a "y" for the "i", for example: "I are a loothyer, I do loothering."
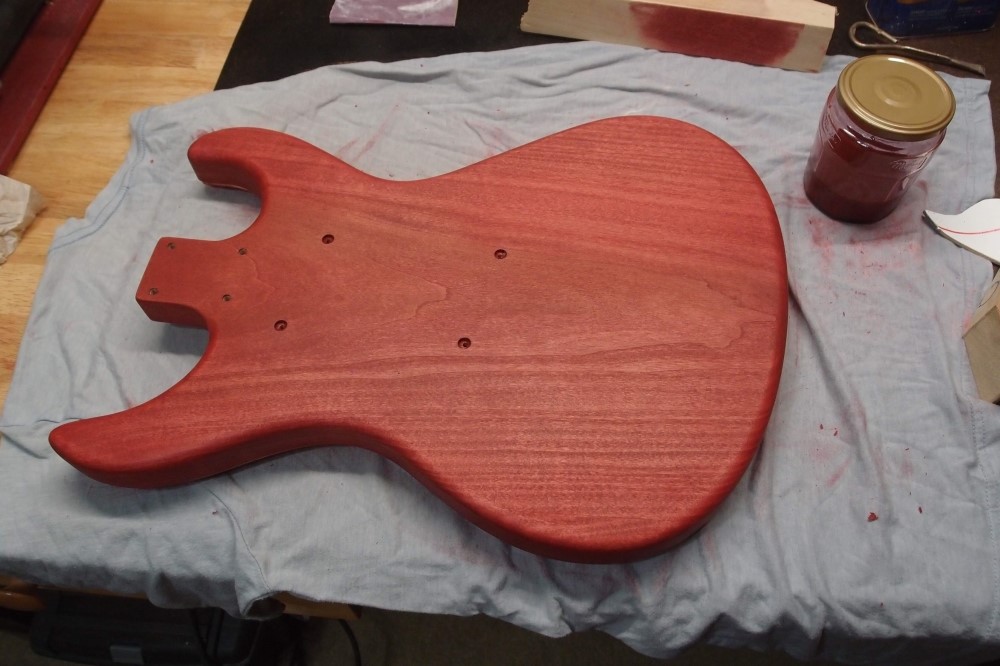
The back - the red is not fully covering a streak of dark heartwood the way brown would. That's why I made this the back. If I had shot a sunburst on the front, I would have made the back solid black, because a yellow center would never have worked. This is pretty common with large pieces of poplar.