Mosrite Bass (6/10)
Dec 23, 2018
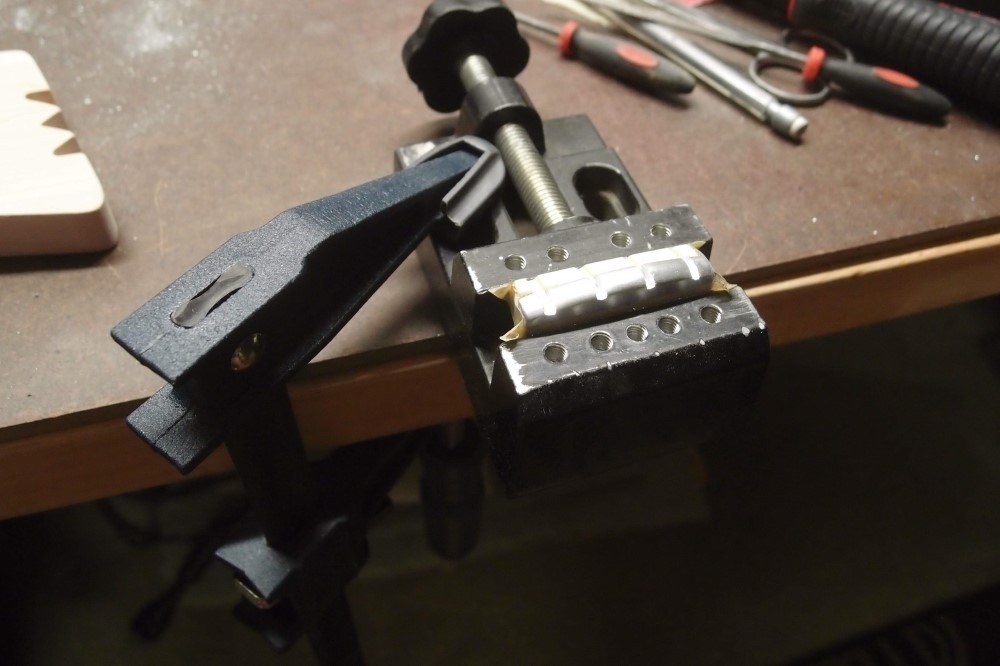
Making the nut from 1/4" aluminum. The tiny vise is invaluable for small parts. You can get one on eBay - the great loothery supplies store in the sky. I taped the aluminum blank to a standard bass nut for a guide and clamped both in the little vise. I started the slots with a hacksaw and finished them with needle files.
Don't know what Mosrite actually used, but it looks like aluminum in pictures. Could be a zinc casting too. I doubt it was stainless steel, and they never seem to rust. A real Mosrite nut sits on top of the fretboard, but I ran out of wood, 24" was barely enough to make the neck I wanted, so I did more of a Rickenbacker-style nut.
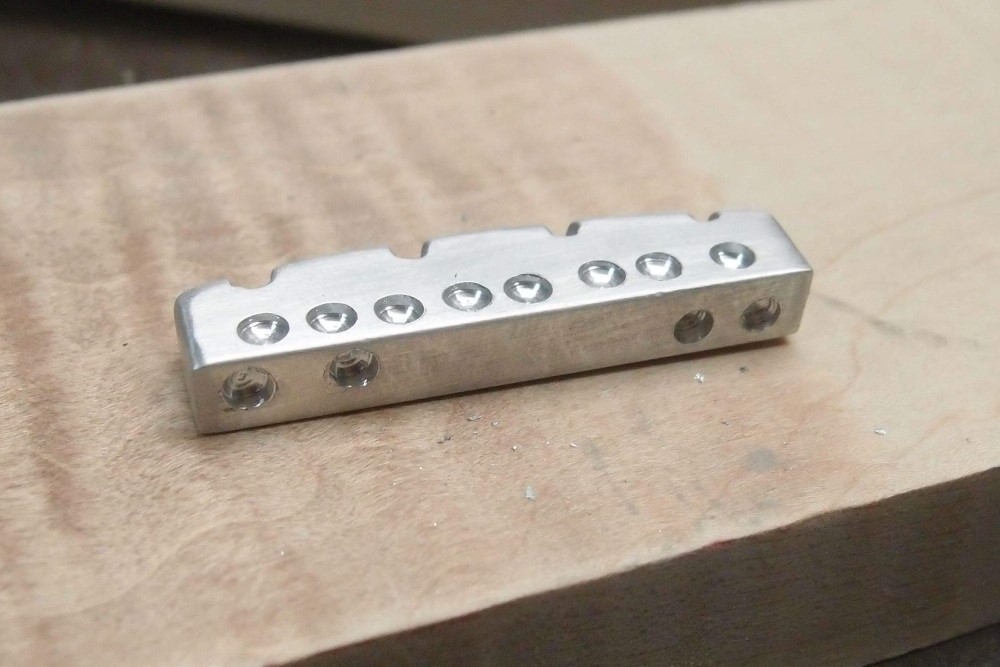
One last detail: I drilled some holes in the front and bottom of the nut. Aluminum is famous for not taking paint well. The same goes for glue. Danelectro used to use a screw. These holes will let the glue get a mechanical grip on the nut. On thinner nuts, I just scratch them up real good to give the glue something to hold on to.
This must be aircraft aluminum, it did not want to drill until I switched to my cobalt bits. Aircraft aluminum compares in strength to steel, it is pretty incredible, until you overheat it. This is definitely not the same stuff you get from Home Depot.
The holes will no doubt also increase sustain and alleviate dead spots from the neck, and all kinds of other luthiery BS.
Finished nut and truss rod cover from scrap. Going by online pictures, there doesn't seem to be a standard Mosrite truss rod cover, but this five-sided shape is pretty common, and I like it. I made a batch of them, because you never know ...
I think that is the last of the parts I need to make for the Mosrite, except for printing the decal.
Tough to get a small part like this to come out symmetric. The first one came out crooked. so I decided which side I liked better, traced it, flipped it, and traced it again. These are drilled and countersunk for Fender pickguard screws, otherwise SS #4 x 1/2" by the gross from the marine supplies store. I need another box.
Another small project ... the Mosrite used up my last set of long-legged lipsticks, and I have another idea brewing in my head, a nice mash-up.
eBay used to be awash in Danelectro parts, but not anymore. You can get flat-mount lipsticks at pretty decent prices, but if you want long-legs, you have to hunt down overpriced old Danelectro parts, or shell out for Seymour Duncans. And those are truly insane - what could Seymour Duncan have crammed inside the same lipstick tube to warrant ten times the price?
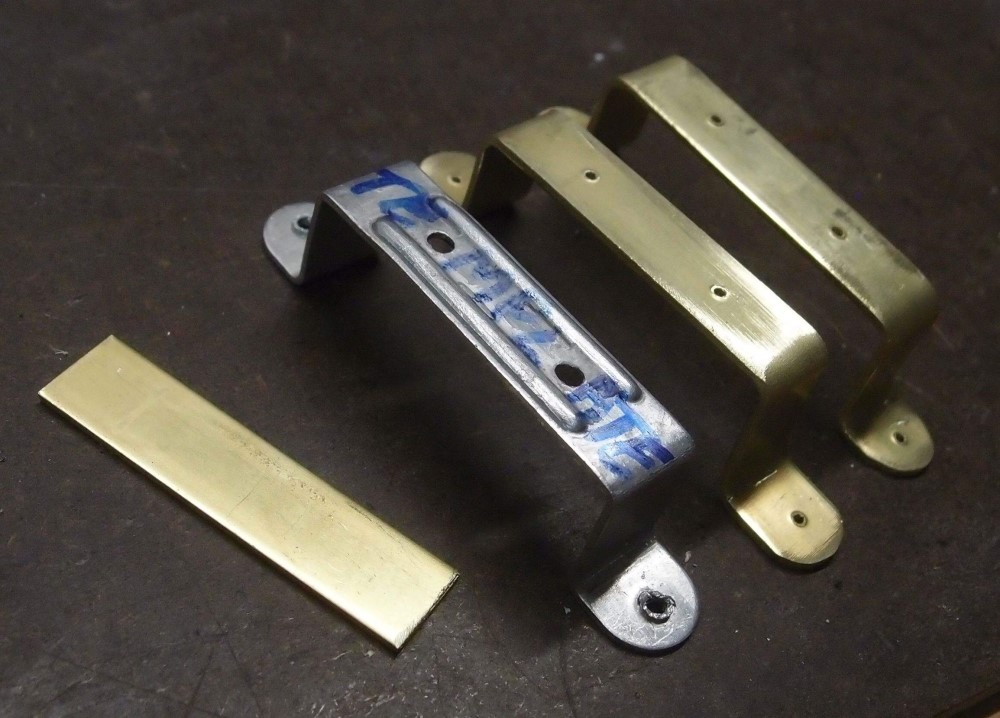
So, off to the Hobby Store for a piece of brass stock, three bucks. Aluminum would have worked just as well, but the model train folks seem to like brass, so brass it is. Home Depot doesn't have 1/16" flat stock, but you could cut strips from an angle if you had to. This is easier.
Brass is easy to work, but bending metal in a vise takes a little practice. If possible, do some test bends on scrap first to figure out where to offset from your mark to get the bend to come out where you want it. These came out good enough, with a useful-looking piece left over.
The nice thing about Danelectros is that they were engineered for production. Wherever possible, they were designed to fit together no matter what, tolerances be damned. These pickup mounts are a prime example - as long as everything is in the ballpark, it will work fine.
That's not to say the old Danelectros were shoddily made. Typically, everything fits together perfectly. This is the difference between engineering and luthiery. Fender adopted many of the same design principles to make a superior mass-produced guitar, while Gibson remained firmly mired in the Middle Ages; modern production techniques have rescued them somewhat, against their will, I think. The new Danelectros are very well made, my only complaint is the orange-peel-y finishes that you find on many things nowadays.
BTW, the mounting screws on those legs are M3, you can get them at Home Depot. That gave me fits for a long time until I figured it out. Now I have taps for all metric sizes as well as standard sizes. Or you can just shove a small wood screw through it and let it cut its own threads. Be careful doing that with aluminum though, it is sticky, and the screw may break off, what with modern Chinese quality and all. Most of the threads on import bridges and other hardware are also M3.
That extra piece of brass might make a good shim. Just think of the sustain !!!
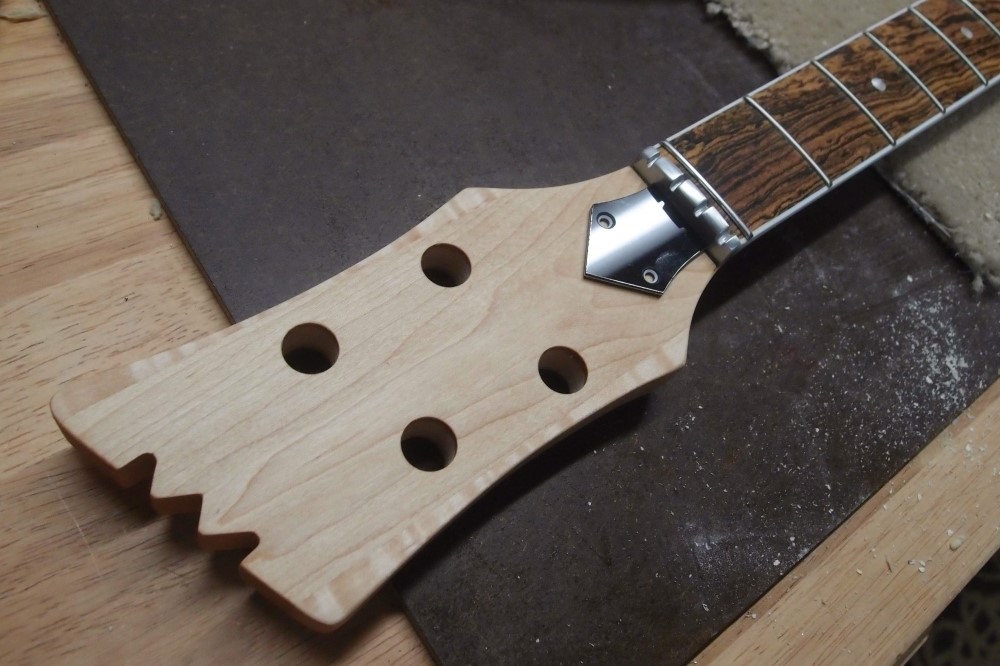
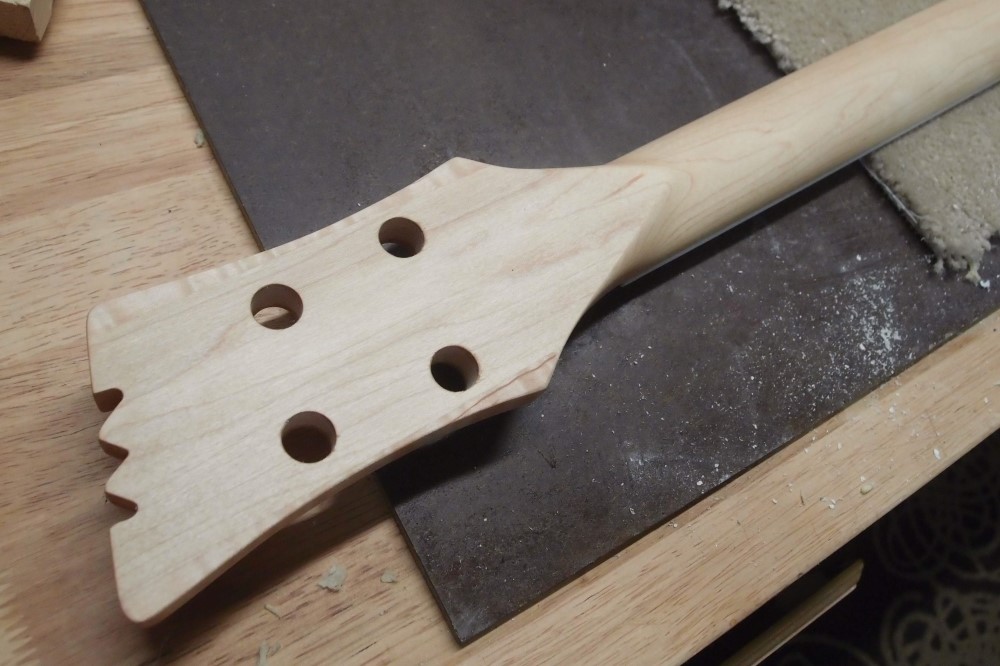
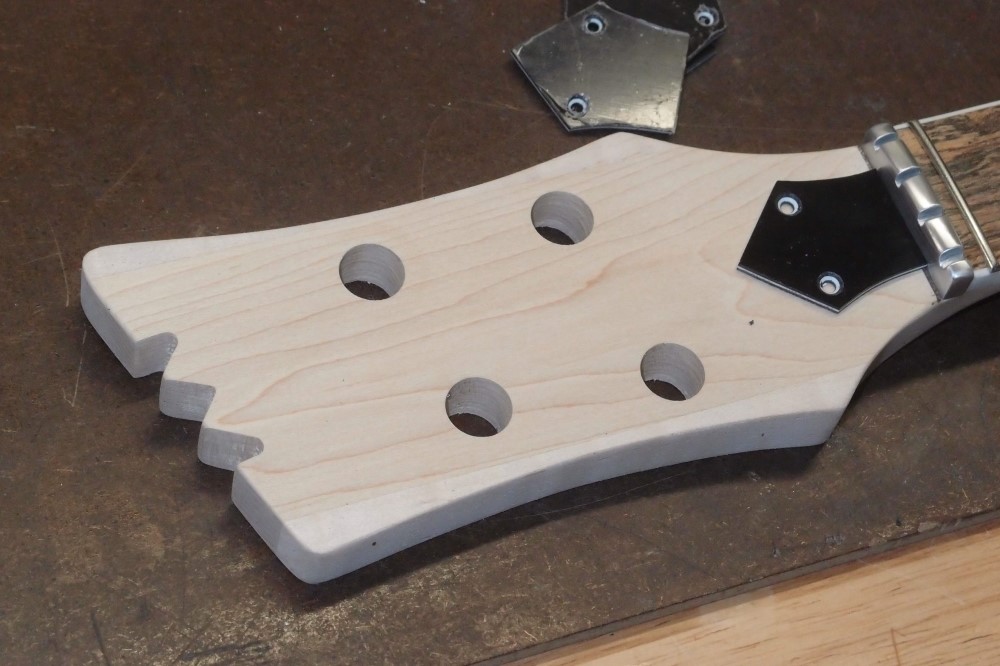
Sanded and "stained", the Bocote is really looking good, as are the flamed wings on the headstock. All Home Depot maple - the best you can buy. The pearl dots have finally popped out too. I ordered a sheet of white 3mm ABS to make pure white dots from.
I'm going to treat the Bocote just like rosewood - linseed oil. This freshly-cut surface should oxidize back to a darker overall shade in the next year, judging from the other piece I have, but it will remain much stripier than rosewood. Rosewood + natural stain + linseed oil = ebony. Try it.
This feels like one of my thinner necks, which is fitting for a Mosrite. The Surform really makes it easy to take off a lot of material in a very controlled and even way.
One thing I've learned with this build is that a properly done maple-maple joint looks just fine. In the past I had always avoided them, using a piece big enough to cut the entire thing from for a straight headstock, which is wasteful and costly. Or using walnut wings, or a two-piece scarfed neck. I am going to do this again, but using the same piece of wood joined to itself for the wings, rather than an obviously contrasting piece as I did here.
I also like the smooth ramp down from the nut to the tuners. That is another feature I am going to repeat, as it is not only much stronger, but lets you use a flat truss rod cover, which simplifies the truss rod installation. It looks good and was easy to make too. Combines all the best features of flat and angled headstocks.
Note how there is a big volute on the back of the neck where it is hollowed out more for the truss rod mechanism. This headstock is probably the strongest I have ever made, and a lot stronger than any Fen-Gib-Ric. This is not going to snap off if it falls on the floor. Gives it some nice curves as well.
The zero fret also worked out well, I hope. I have a full package of SS frets that I got a long time ago just for this purpose. They are a bit taller than my usual fret wire, for a little clearance over the first fret. If need be, it can be filed down. Now I really want to get this thing together to see how that works.
Mar 11, 2019
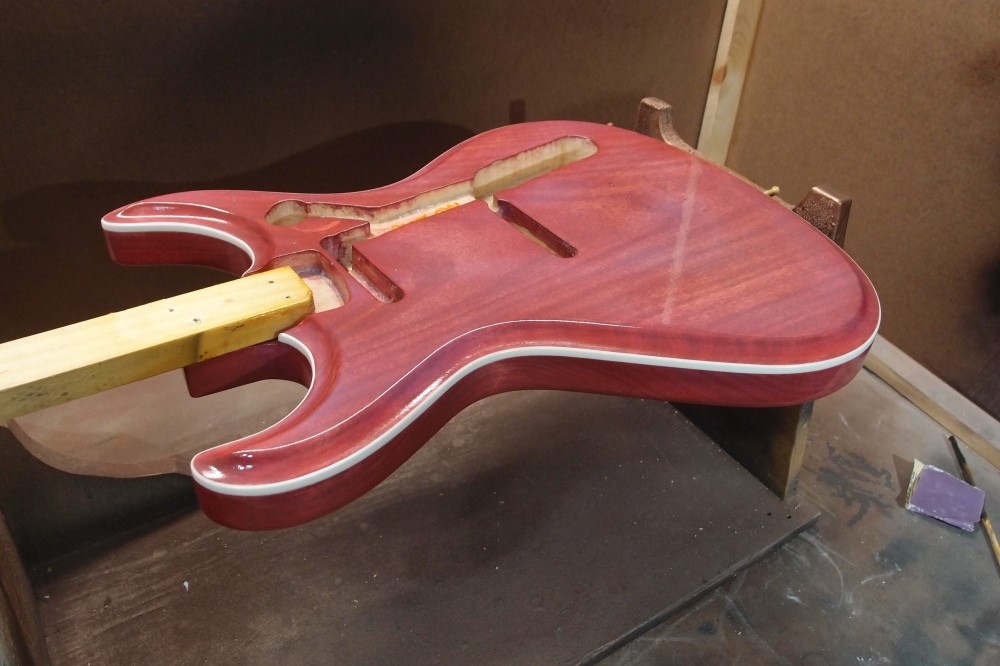
After the WB-poly fiasco, I cleaned this up and set it aside. Today I sanded it very lightly all over with 220, wiped it good with alcohol, and started spraying water-based Varathane. After wiping off my initial attempts with a damp rag, I think I have a feel for the stuff now. This is the first coat. I'll put a fresh coat on every 10 minutes for a couple of hours, so that they all dry together as one. This piece already had a good undercoat, so what I want is one thick clear topcoat for polishing.


