Mosrite Bass (2/10)
Dec 1, 2018
This piece of wood is not quite big enough.
Now it is.

Same thing for this piece of wood. Can't make the headstock on 2-1/2", so I fished around in my big bin o' tonewoods, pulling things out and tapping them until I found this flamy piece of maple that sounded like a choir of angels tapping on pieces of wood. I glued cheater strips on either side of the main piece. I have photos of vintage Mosrites that are made just this way, so this is authentic.
Set up the band saw to rip the fingerboard to width, about 2-1/2". Radiusing by hand is a lot of work, don't need to be doing any extra.
Bocote fingerboard all radiused, with a coat of minerals spirits to see what it looks like. This board had darkened over time to almost rosewood, and I expect it will again, but look at it now.
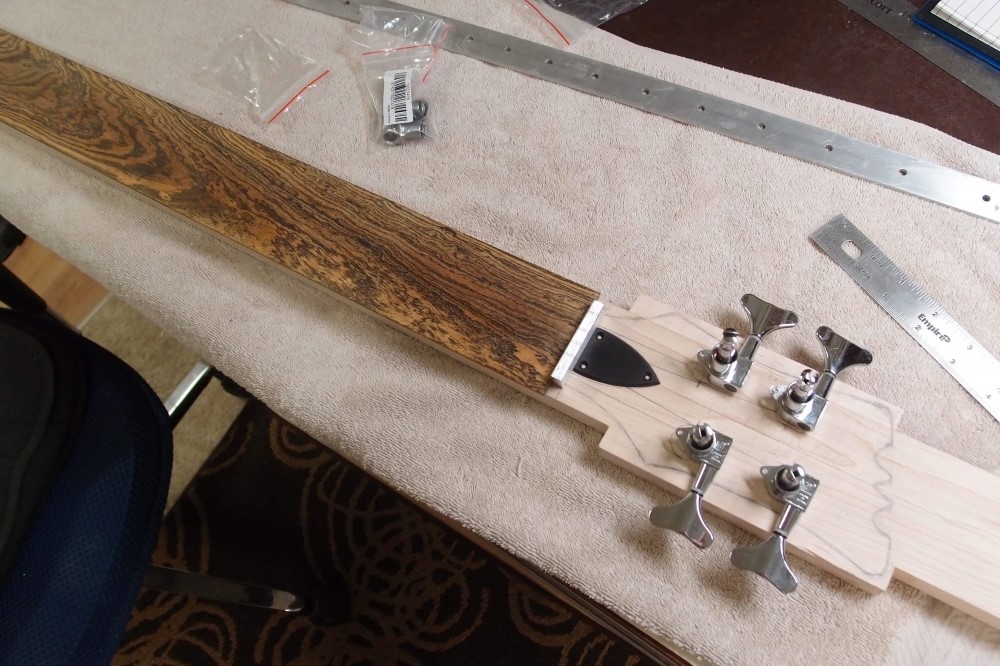
Laying out the headstock. I made it a little shorter than a vintage Mosrite. Mosrite appears to use a metal nut with a zero fret. Don't see the point of that, I'm just going with an aluminum nut, from a piece of 1/4"x3/8" stock. Precision width. As there will be no access to the heel, I will use my last Chinese truss rod, adjusting at the head.
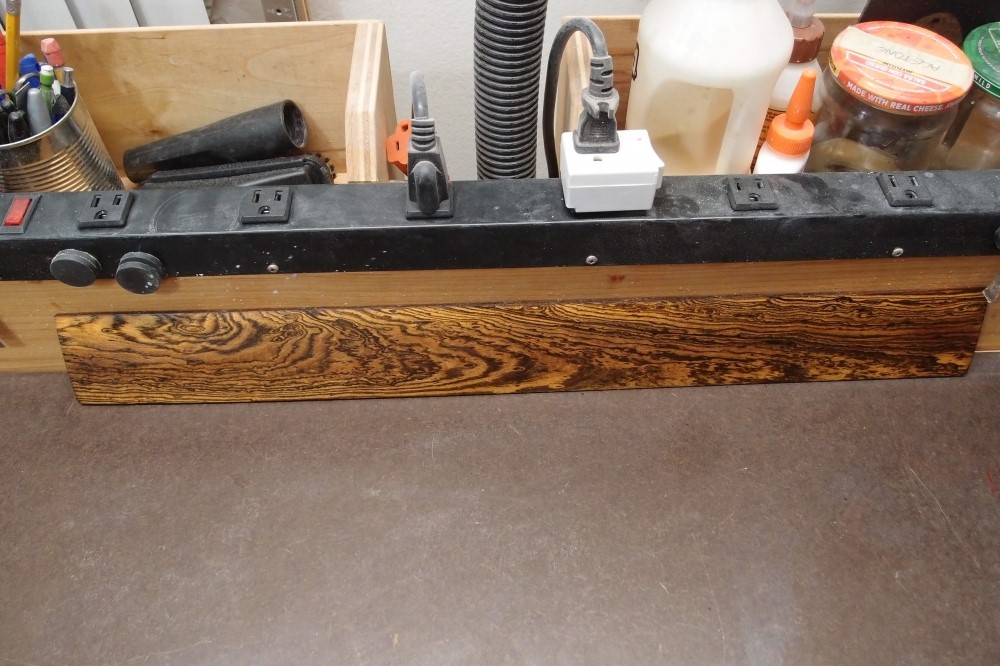
Some natural stain on the Bocote. I wonder if it will stay this way? The grain is much like rosewood, very hard, and not as oily. I'll probably just oil it up for a final finish, linseed, not lemon. I got two of these pieces, the other one is nicer.
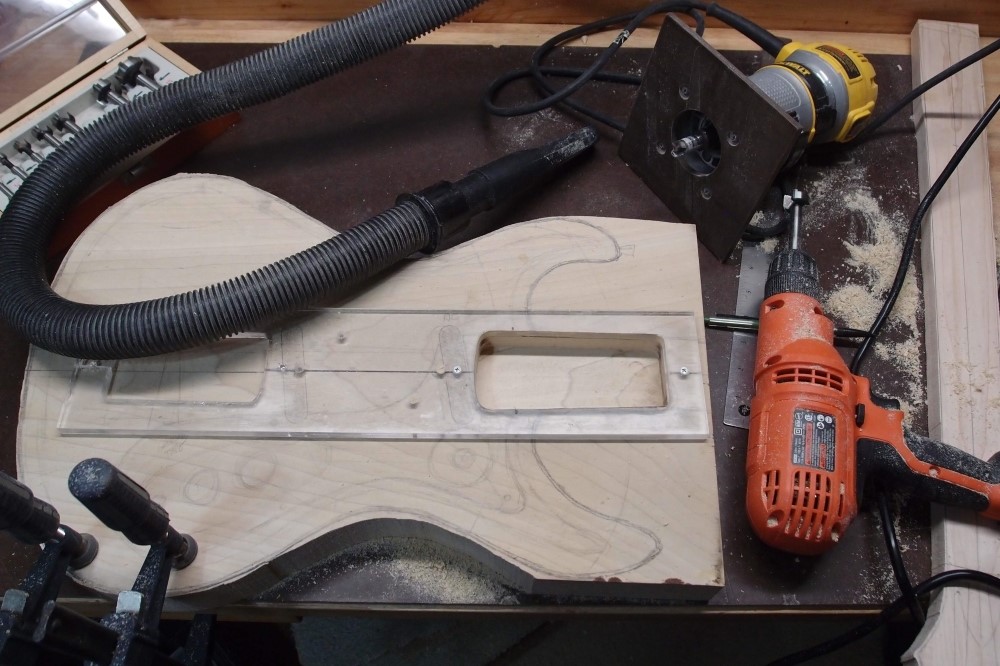
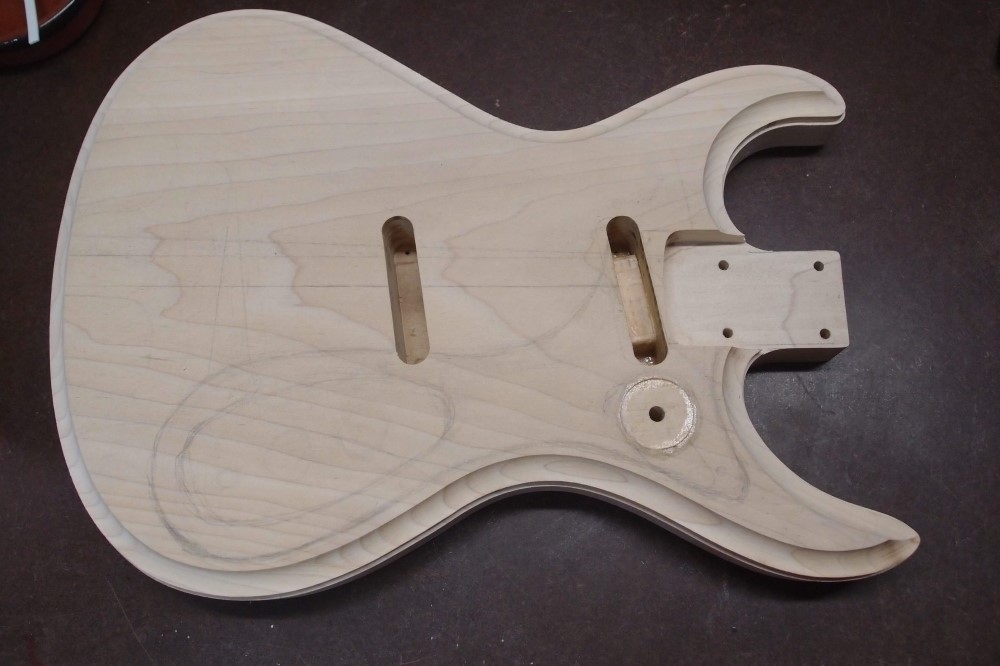
Band-sawed the sides, and dug out the neck pocket, standard Fender. Note how the template is screwed down into scrap and the pickup rout. I add new holes to it wherever I need them. Building a vacuum into the workbench was a great idea, IISSM.
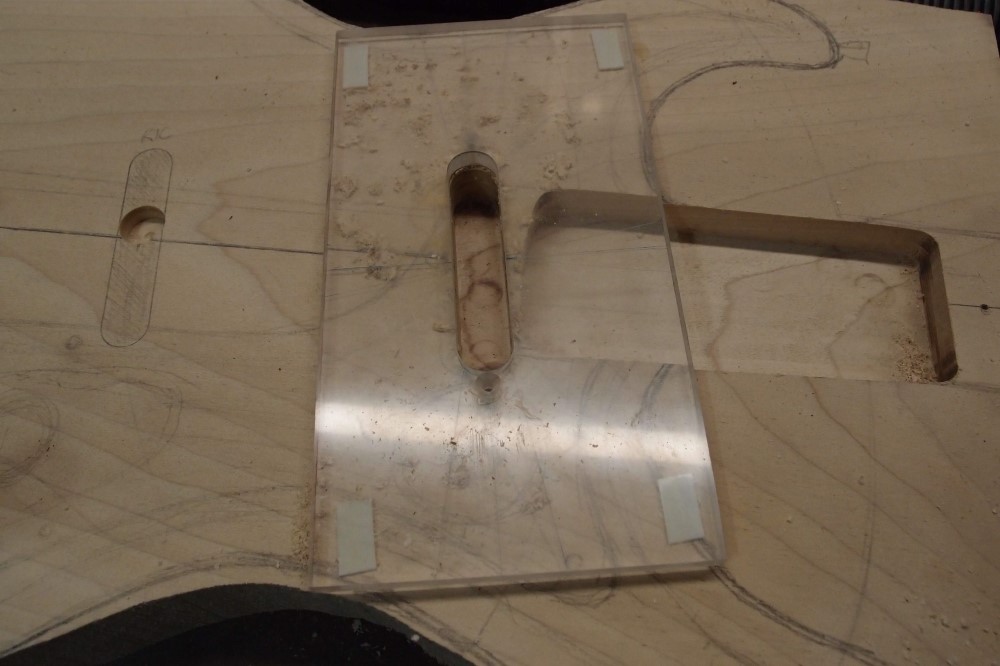
The routs for the lipstick pickups are very deep and narrow. I had to constantly stop and vacuum out the sawdust. These pickups are made to mount through the back of a hollow body, so the cavity comes to about 1/4" of the back. It's going to be fun assembling these things. If it can't be done, I have a pair of mounting rings I can use, but I really want the chrome lipstick tubes mounted right in the wood.
The router bit started smoking and burning partway through the job, so I took it off and sharpened it on my diamond hone. After that, everything was fine. A good diamond hone is like a bench grinder, it will pay for itself on the first day from everything you sharpen. Mine is a 1/4" slab of steel with 400 on one side and 1000 on the other. Next time I'll get 1000 on both sides. It's not so good for sharpening knives, but it sharpens carbide router bits like a charm, and it is very easy to do, find videos on YouTube's. Also good for Forstner bits.
And we have horns. Semie Moseley spared no expense on horns. Legend has it when he got his hands on his first Stratocaster, he flipped it over and traced the body out. Probably not true, although it looks like it. It's actually not a very good fit, I tried it.
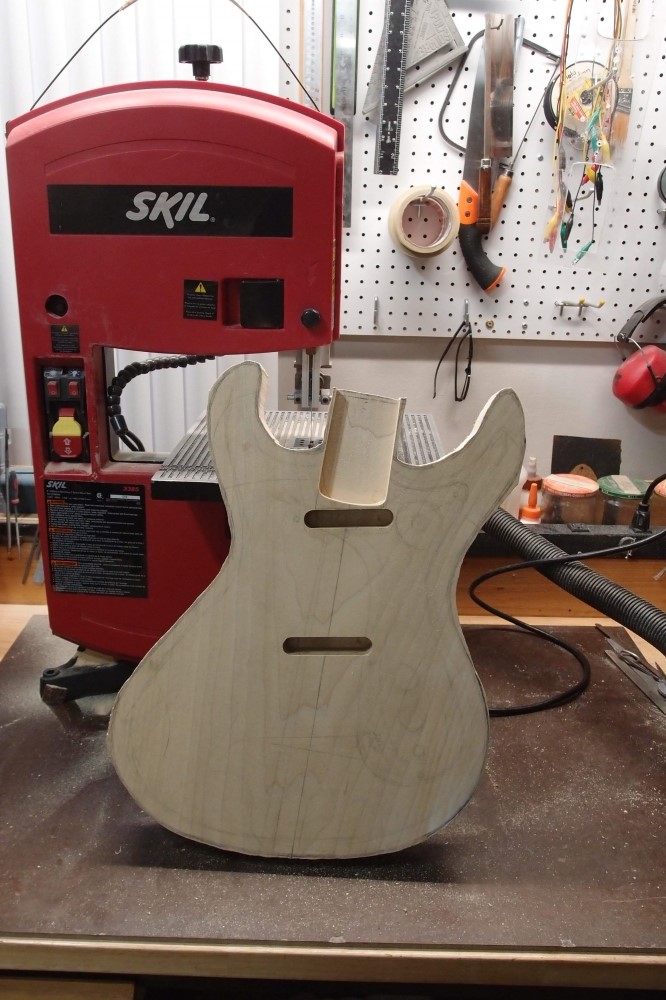
I added a handle to the top of the bandsaw, as lifting it by the big knob on top got it all out of whack, and it took me a while to get it set up again. You can also see the big hole I drilled so I can reset the breaker without opening the case. Eventually, I replaced the breaker, and haven't had to reset it in a long time. I don't think Skil still offers a model like this, but a Ryobi will do you just as well.
A bandsaw is a fussy thing, it takes a while to get the hang of it, and until you learn all the ins and outs, you will probably spend a good deal of time cursing at it and wondering if a $400 one would work better. Probably not. Expensive tools don't necessarily give better results, that's up to you. Expensive tools last longer, but that doesn't matter to me, as often as I use it, this will last me forever. Also, grow a third hand now, you'll need it to put the blade on.

A slab on The Slab (TM). I did most of the rough sanding on the benchtop sander and finished with the spindle sander. 50-80-120. I drew a line about 1/16" inside the tracing, so this is a bit smaller than my model, which I intended. I like guitars smaller, I don't understand why many of them are so massive. Gibson actually had the right idea with the Les Paul, but then they made it three inches thick and blew it.
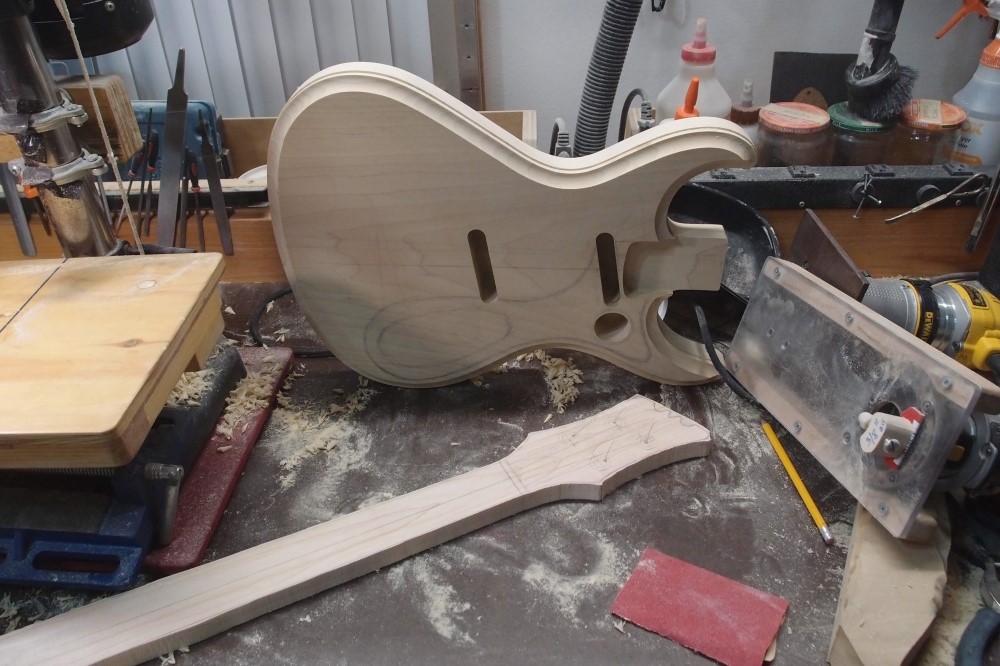
German Carve, and, because I must hate myself, binding. The carve is limited to the cutting width of the router bit. First I cut the rough carve, then I cut the binding channel under it, then I recut the carve using the inside of the binding channel as a guide. This way I get a little bit more width on the carve. I'll probably just break over the hard corner and leave it at that. I've seen all sorts of "German Carves", there's no one right way to do it.
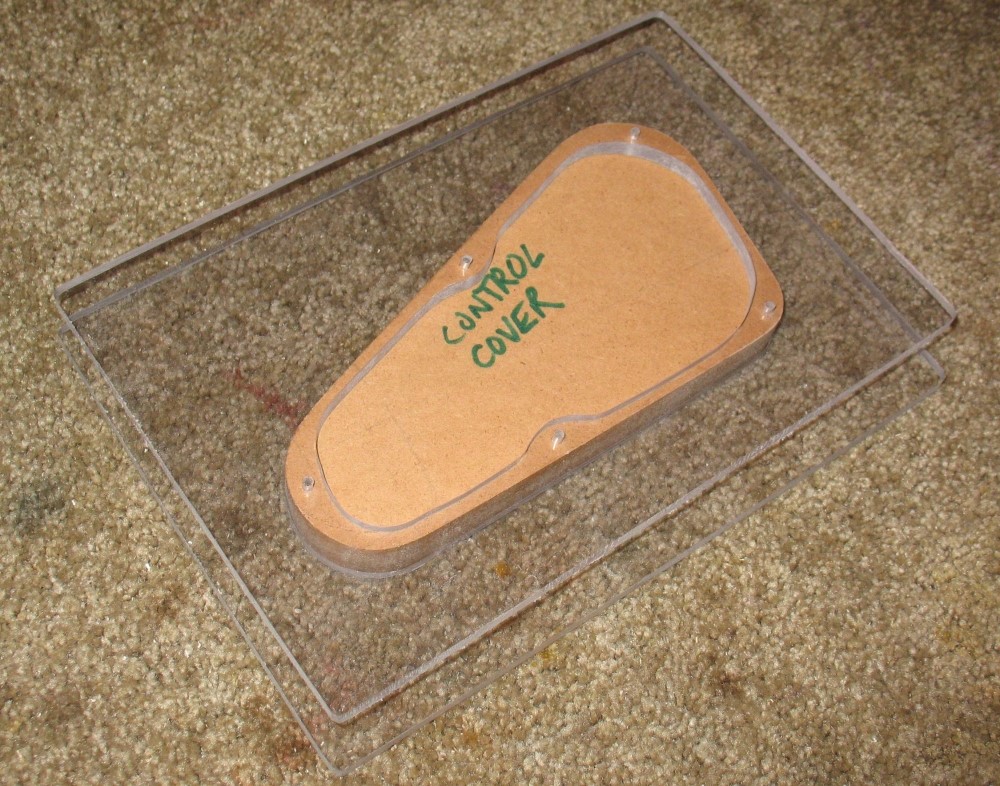
On the back, I gave it a generous roundover. I debated doing a relief contour, but I can't find a single example of a vintage Mosrite with one, so I'll leave it. Right now this body is 5.6 pounds, which is really not bad, and I still have the control cavity to do.
Using both routers at once, lets me keep the setup on one while doing something else with the other. The smaller router plate is set up for the big carve bit, which won't fit in the bigger plate. The bigger plate is set up for the binding channel. The follower needed a bit of a shim to get below the carve, some folded cardboard did the trick. Sorry StewMac, my binding jig is still better.
All day I've been using that big block of scrap to support the flying end of the router plate. This works really great, otherwise routing around those crazy horns would have never succeeded. I should have drilled some extra holes in the router plates so I could actually attach the block to the router. The other reason this works is the very smooth and flat work surface, on which everything slides around easily.
I also hacked out the neck, so I can put the bandsaw away. For some reason, I drilled the hole for the switch as well. Does anyone know the coefficient of expansion between wood and sawdust? Must be at least a thousand.
The neat thing about this carve is that the horns are rounded and pointy at the same time. So this bass will be suitable for both music and heavy metal. The pickup locations are scaled off my Ric. Past experience is that this will sound just like a Ric, but with lower output.
Next, I will make a white pickguard from more dry-erase material, then I can sand the surface, which will remove all my marks. Enough for one day.
Oh, BTW: this is a poplar blank from the lumberyard that I've had for several years. I got two at the time, the other became a reverse Fenderbird by angling the design a bit to fit.
Dec 2, 2018
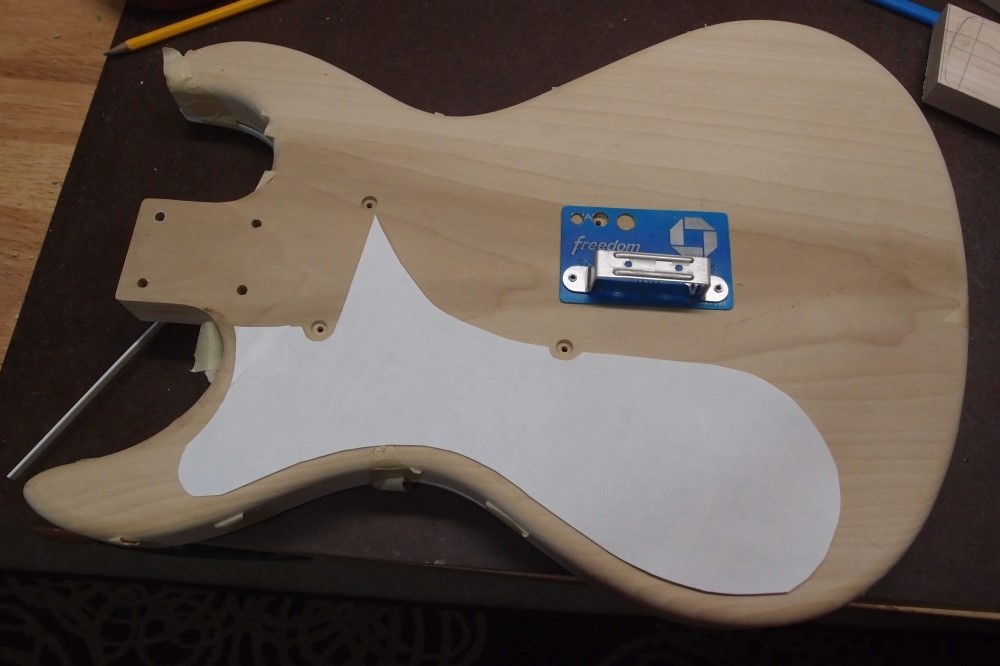
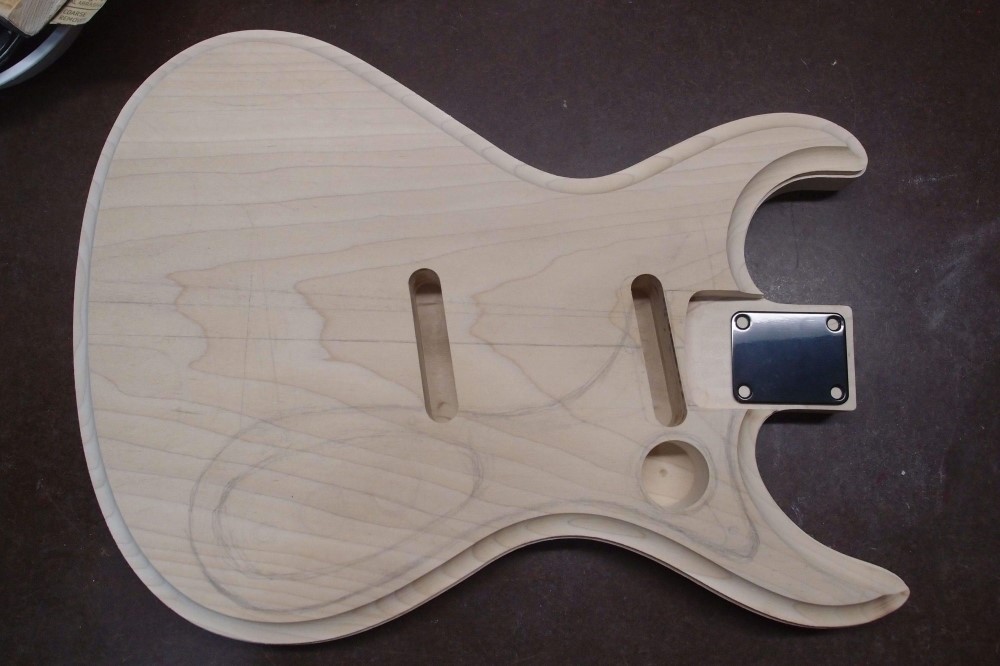
I marked the pickup holes inside the cavities using a spare mounting bracket, and drilled the holes from the other side, a 1/8" bit is just long enough. Then I made myself a circle guide from an old credit card and marked out countersinks for the screws on the back. Also, a rough paper mock-up of the pickguard, Moseley's unique globular shape.
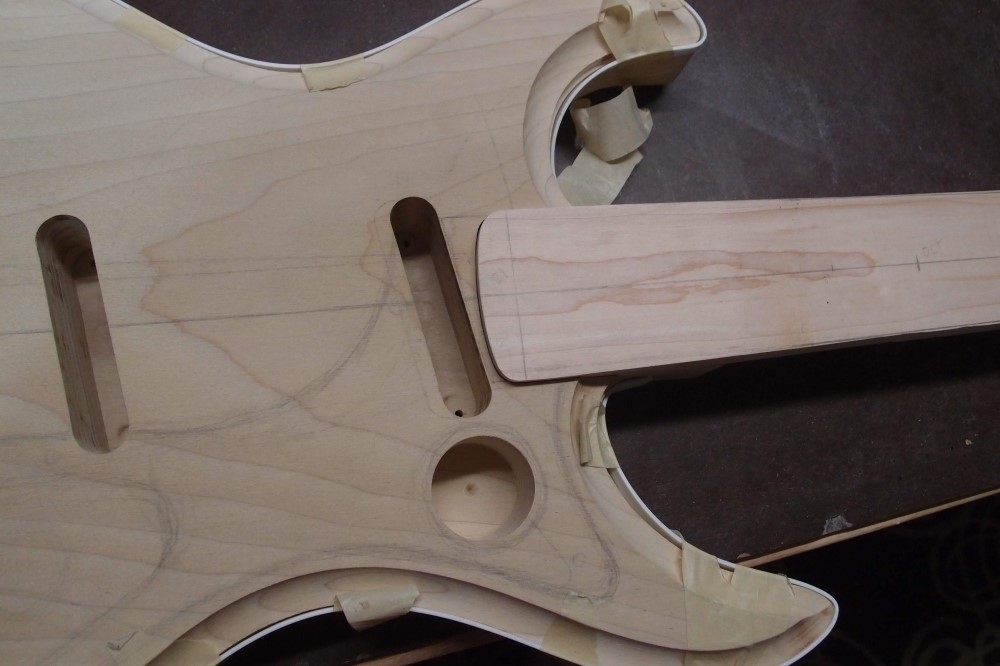
Fitting the neck to the body. There is a little bit of wiggle room, some of which will be taken up by finishing. You actually want to be able to jockey the neck a little bit, so you can line it up perfectly and then tighten it down. This is the whole reason for the rounded heel - so you don't open up an ugly gap if you have to set the neck a little to one side. Fender had factory production of guitars down to a science. If Gibson builds a crooked neck, they just ship it. I like Fender's approach better.
A real Mosrite appears to have the neck routed right into the pickup cavity, which has a funky reverse slant to it. I'll mimic that by overhanging the end of the fretboard right up to the pickup. Of course, my choice of pickup is all wrong. This is a tribute, not a copy. That would actually be a neat theme for a build-off: it should copy the style of the original as closely as possible while being completely different construction.
The binding has been on there since last night, I'm trying to pre-form it.
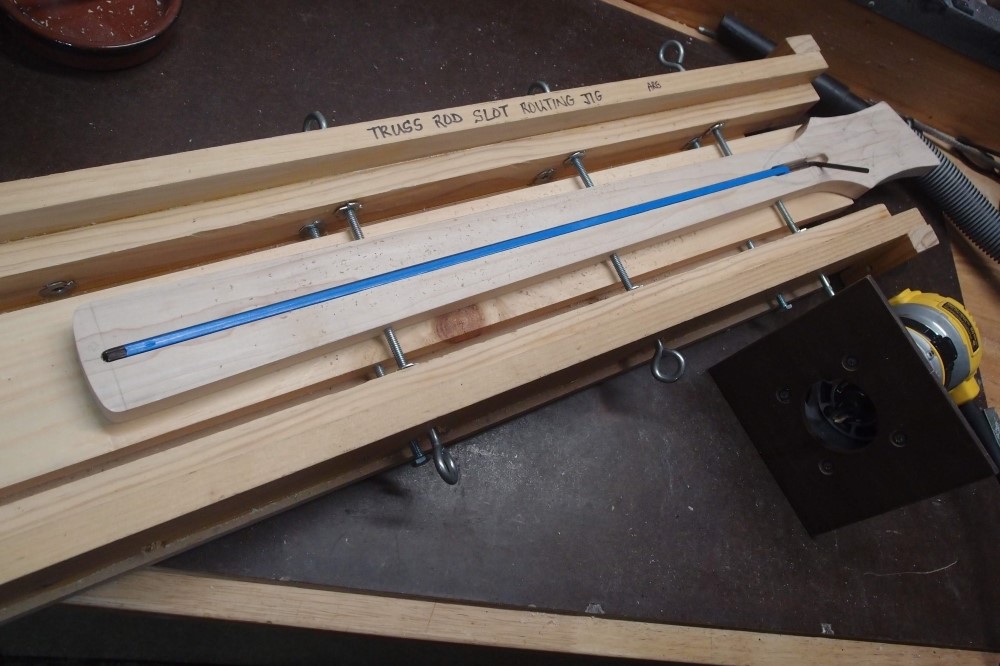
You've seen this before: a nice neat slot for a double-acting truss rod. In this case, a standard 580mm truss rod fits perfectly. This neck is 21 frets, 32" scale, and is about 1/2" shorter than a standard 20-fret 34" scale.
There is plenty of room for the wrench to swing ( something you couldn't say about my Ric ! ) and I have sketched in a nice volute all around the bulky adjuster mechanism. I've gotten much better at forming shapes like this, doing them by hand with files. I'll make a curved truss rod cover like the Osprey.
I've also got a nice Mosrite-ish headstock shaped, just by eye. I need to decide how to cut the "M". Yes, I'm putting it on there, and a decal too. This thing isn't going to fool anybody. I dedicate it to Semie Moseley. I hope he's not turning over in his grave !!!
That's enough for now.
I just realized that I don't have a hell of a lot of wood carrying the neck. I'll add a block inside the neck pickup cavity. I think I'll plug the switch cavity too, and mount the switch with the rest of the controls. The engineer in me won't let this be. That switch cavity was stupid, it leaves almost no support for the neck on that side.
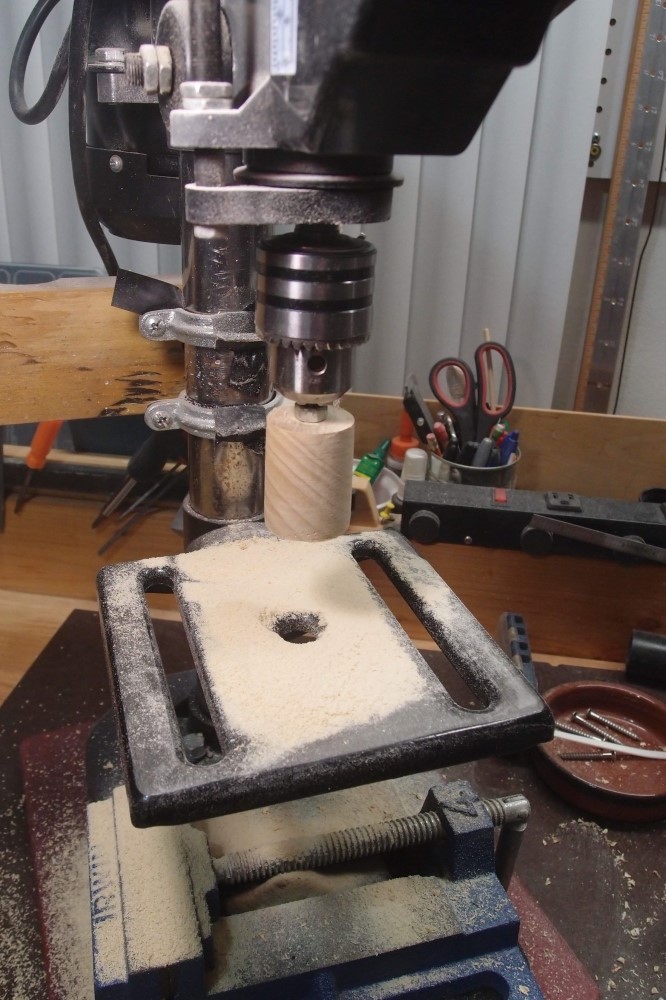
The pickup block was easy, I sawed it out of neck scrap and sized it on the belt sander. The switch plug took a little more cleverness. I sawed an octagon out of body scrap, and then drilled it to take the spindle of a sanding drum, tight. Then I chucked it in my mini vertical lathe, above, and turned it using files. The Japanese files worked the best, the Surform had way too much grab, and the others were too slow. I sized it to go in and out easily, and marked the height to cut. Not too tight leaves room for glue to squish around. When the Titebond dried, I dribbled Crazy Glue into any crevices and let it do its thing.
If you've ever broken a glued joint, if it was done right, the wood generally breaks around the glue. I feel much better now.