Angled Headstock (2/3)
Here is another view of the joint. You might think a joint like this would be pretty hard to make, but it isn't. You want to make your jig as precise as possible. After building a number of these, I would say the degree of precision I can achieve is actually overkill for the job, but there is nothing wrong with overkill.
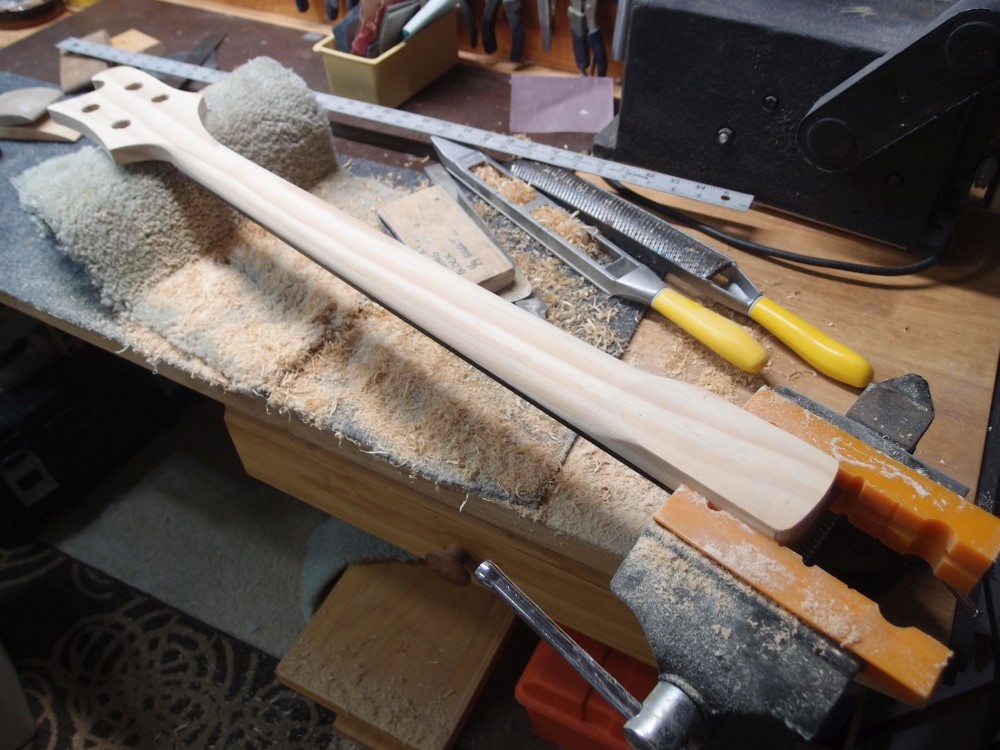
There are several more steps, obviously. Next is to route the truss rod slot, then rough out the neck and headstock outlines. The headstock is then thinned to about 9/16", which is also the standard for a straight neck. A straight headstock is thinned on the front, but an angled headstock is thinned on the back, which is rather counter-intuitive. This leaves the scarf joint under the first two frets.
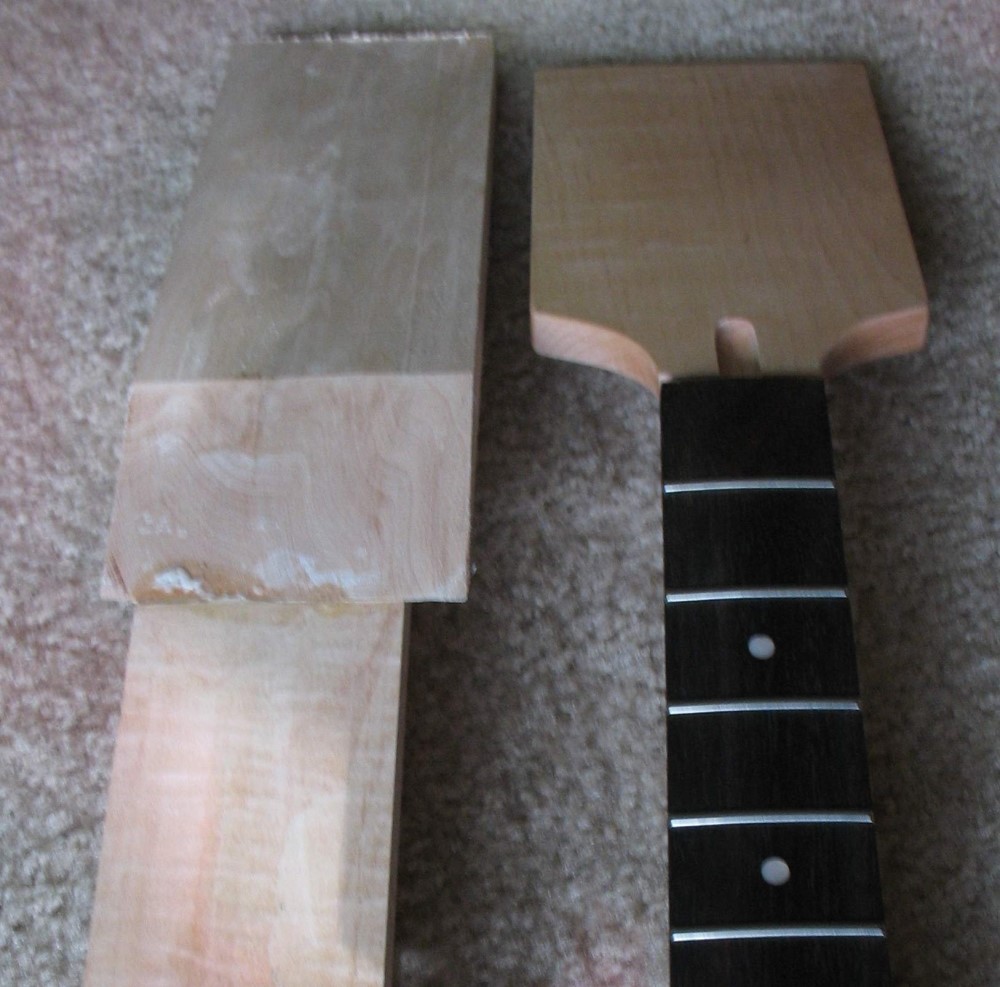
I am using flat-sawn lumber here. Occasionally you may find a piece that is quarter-sawn or nearly so, but it doesn't matter. I have never seen a quarter-sawn Fender neck. Pick your piece for straightness and attractive grain and figure. Another way to build a neck blank is to sandwich it up from narrow pieces. You can make an angled headstock from such a blank, but for strength, keep the angle under 10 degrees.
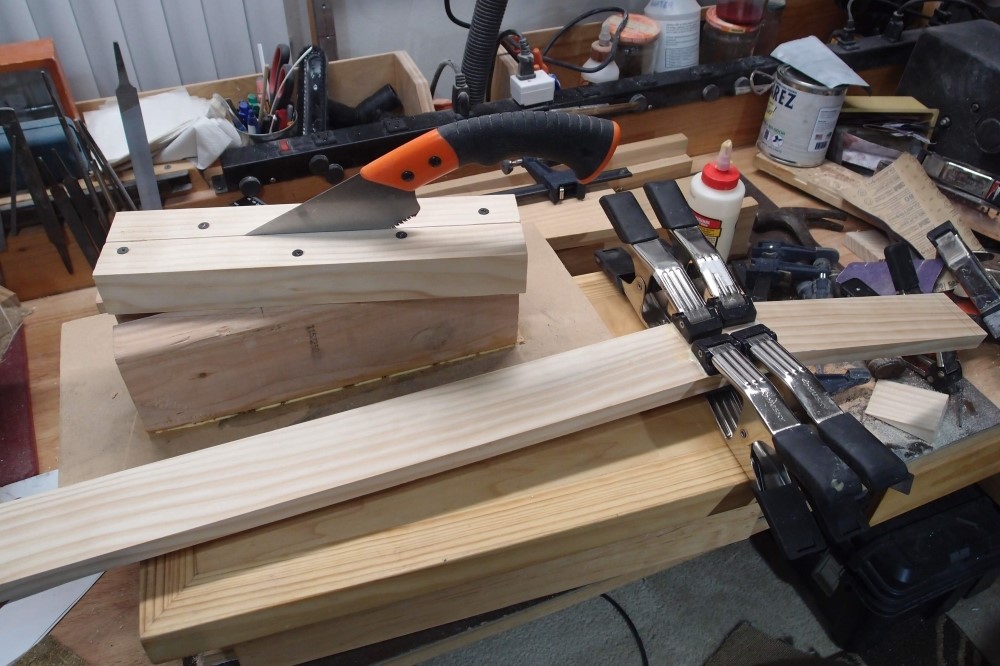
Don't have a mitre saw? This is a jig I made that cuts a pretty accurate 15-degree bevel in up to 3-1/2" material with a hand saw. You can see my test piece in the foreground. After a little cleanup on the belt sander, it is perfectly usable and will go into some future project.
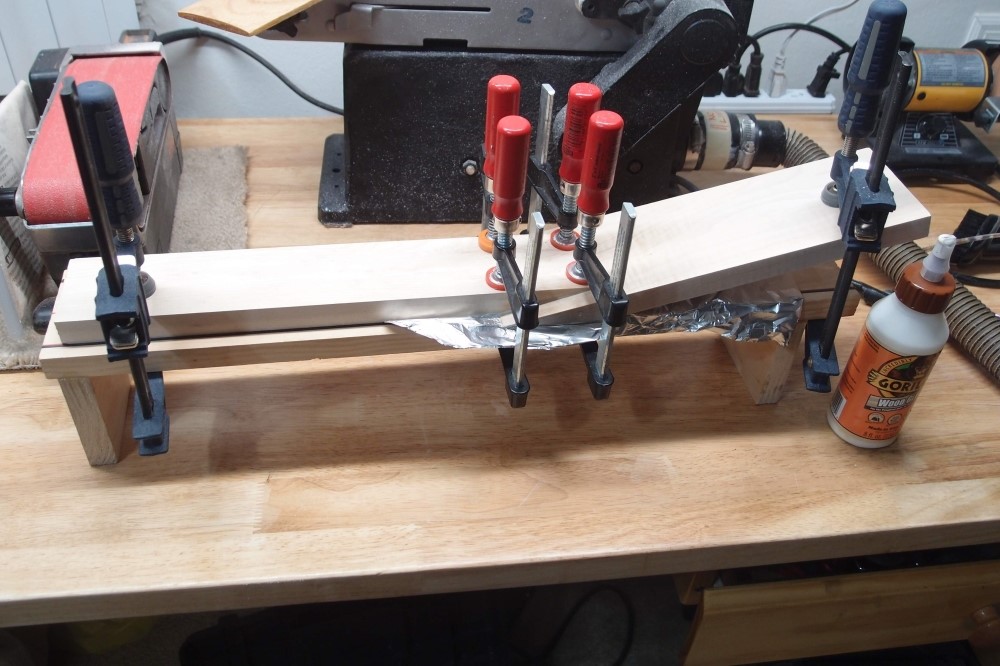
Here is how to glue up an angled headstock. The neck is on the left, upside-down, the headstock is on the right. The jig is a simple thing from scrap wood that makes it easy to set up the clamps and align everything. A good straight piece of pine will do. Alternately, I could just clamp the whole thing to the edge of the workbench, but this way I can set it aside and let it dry overnight.
The four clamps in the center assure that pressure is applied across the entire joint, especially the thin corners ( even though those will be sanded off later. ) The clamp on the right is not very tight, it is just there to rotate the headstock piece into the joint. The clamp on the left locks in the alignment of the neck piece.
Apply glue to both pieces, and look for good squeeze-out all around. The tinfoil is to prevent the workpiece from being glued to the jig. This is an unusually short neck with a long headstock. Guess what that might be for?
The two parts don't have to be perfectly aligned. In fact, unless you cut them absolutely perfectly, they won't be. It is more important to get a tight fit, and if you have to make the joint a little crooked to close up a gap on one side, so be it.