String Nuts

Here's a freebie nut spacing rule I made some time ago. Just print it out on a piece of paper, and fold it over on the centerline. Don't worry about the printer scaling, it doesn't matter. To use the rule for a guitar, mark the two E strings on the nut and slide the rule until the marks line up with 4 between them. Et cetera.
Each tick mark is about 5% wider than the previous one, something like that, I don't remember. That means each long mark is 10% bigger than the previous one. So if you use only the long marks, you get one scale, and if you use both the long and short marks, you get another scale. Knock yourself out. While this works in theory, in practice it is easier to just buy a pre-slotted nut and keep it for a template to copy. The rule is big enough to do bridge spacing as well.
Nut-making is something of an art. There are lots of expensive gauged saws and files on the market for cutting string slots. You don't really need them. A razor saw will cut approximately 0.010" slot. The fret slotting saw will cut approximately 0.020". You can work it around to make 0.030". For slots bigger than that, you can resort to needle files from the hardware store.
Also useful are welding tip cleaners, which are often sold on eBay as fret files, and work well in softer materials and even aluminum, although they don't last long in anything other than plastic. Cheap "fret file" sets from China are useless junk - save your money. Real ones come from Japan and are expensive.
Most of the time I just get pre-cut nuts and tweak them, rather than do the whole thing from scratch. The exception is if I want a brass nut, which is expensive and hard to find. I make those from brass bar stock. A Dremel with a fine cutting wheel can also be useful, but you have to be very careful not to over-cut. Aluminum is an often-overlooked material for nuts but is not suited for tremolos as it tends to bind.
Brass nuts are prone to buzzing if you get the bottom angle of the slots wrong. Softer materials are less likely to have this problem. As I said, it's an art, and you're probably better off just buying it.

I spent some time today fitting nuts to the several necks I have in work, as well as fixing nuts on a couple of guitars. I need to make my fretboards a little thinner in the future. Not only are they too strong, but they are too thick for a standard Gibson-style bought nut. For one neck I ended up carving a nut from a bone blank. A guitar neck took a stock nut.
I knocked the hand-made nut off the fretless Audiovox and lowered it, then glued it back in. For the last neck, I decided to kill two birds with one stone. The nut in the 325 came out a bit too low after I got the string slots filed deep enough to keep the strings from jumping out because the pulls are so crooked. Everything on that bass is an experiment, the geometry is all weird, not like a nice Fender where everything just falls into place.
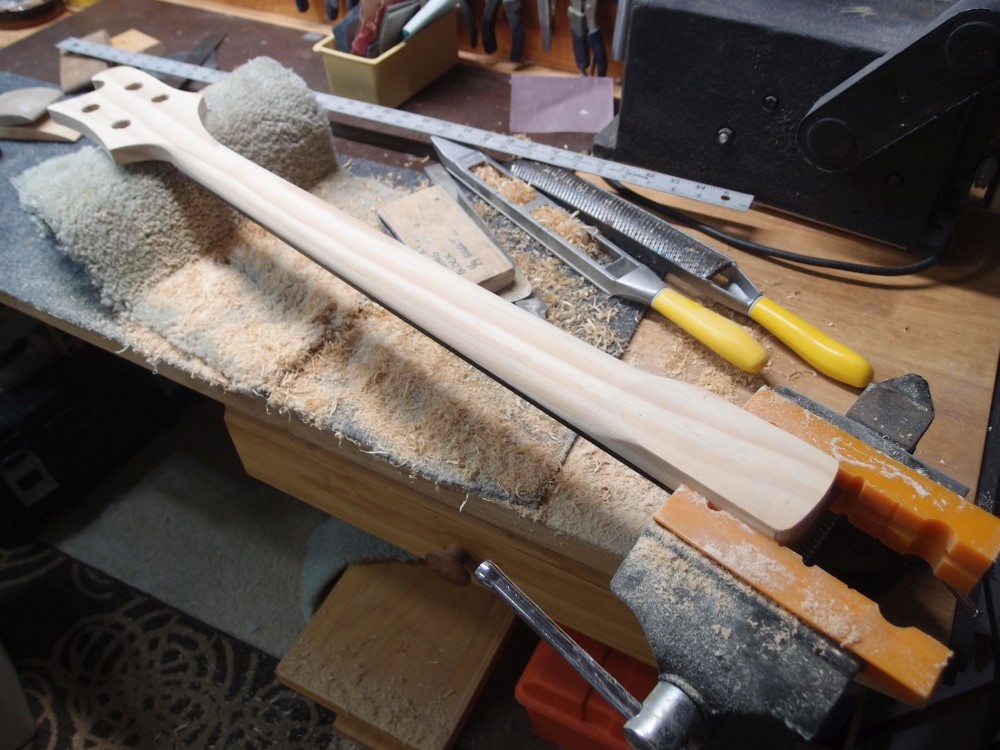
So I knocked the hand-made brass nut out of it and used it as a template to make a new one above. The old one is on the right, the new one is on the left, about 1 mm taller. Those are weirdly tall Ric-style nuts. They are both made from a piece of brass I got on eBay. Brass is reasonably priced and very easy to work. I can't believe how fast I banged out the new nut. I sawed off a piece of material with a hacksaw, and rough-shaped it on the belt sander, leaving it a bit oversized. I transferred marks from the old nut and roughed in the slots with the Dremel attachment of my pocket-sized Harbor Freight bench grinder. That thing is terrific, I hope it doesn't die young, like most of Harbor Freight's power tools.
For the final shaping of the slots, I used needle files, and a set of gauged files I made from threaded rod. The steel rod cuts bone, plastic, aluminum, and brass readily. Finally, I filed the final contours, sanded out the tool marks, and polished it on the little grinder. I used the mini vise in the picture a great deal during all of this. Again, eBay. The new nut is ready to install, and I will cut down the old nut to fit another neck, so it is not wasted.
If you want to get into the nut business, first get an assortment of nuts on eBay to use as templates. There are many kinds - wide (Precision), narrow (Jazz), Fender-style, Gibson style, 4, 5, and 6 string, etc - get whatever you think you'll need. Then get some raw material. Brass, bone, aluminum, and plastic are all available on eBay. You can also get aluminum at Home Depot. I've often thought 1/4" polycarbonate would be a good material, but I've never tried it. Get a set of needle files, and have at it!
Here is the new brass nut, installed. I use Loctite Goto Glue. It's strong stuff, but I don't recommend it because the packaging is idiotic and 3/4 of it will go to waste. I keep water-based glues in the fridge, and others in the freezer after opening. It doesn't take up that much space, at the back behind everything else, and greatly extends the shelf life, even Crazy Glue.
For bone nuts, I install with white glue (Elmer's). It is easy to clean up, and easy to fiddle with things later if you want to. It doesn't take a whole lot to hold a nut in place, the strings do most of the work, you really just need to keep it from sliding sideways. For plastic nuts, I usually scratch up the glue surfaces and use white glue as well. It's not made for non-porous materials, but it grabs the scratches well enough. For metal nuts, I use something for non-porous materials. Crazy Glue will work, but it makes things difficult if you ever need to make changes down the road ( like this. ) E6000 works well, and cleans up fairly easily - let the squeeze-out dry and rub it off with your thumb. Goto glue doesn't clean up at all, the directions don't even mention clean-up. If your piece is unfinished, you can sand off the excess, otherwise, you need to be extremely careful.
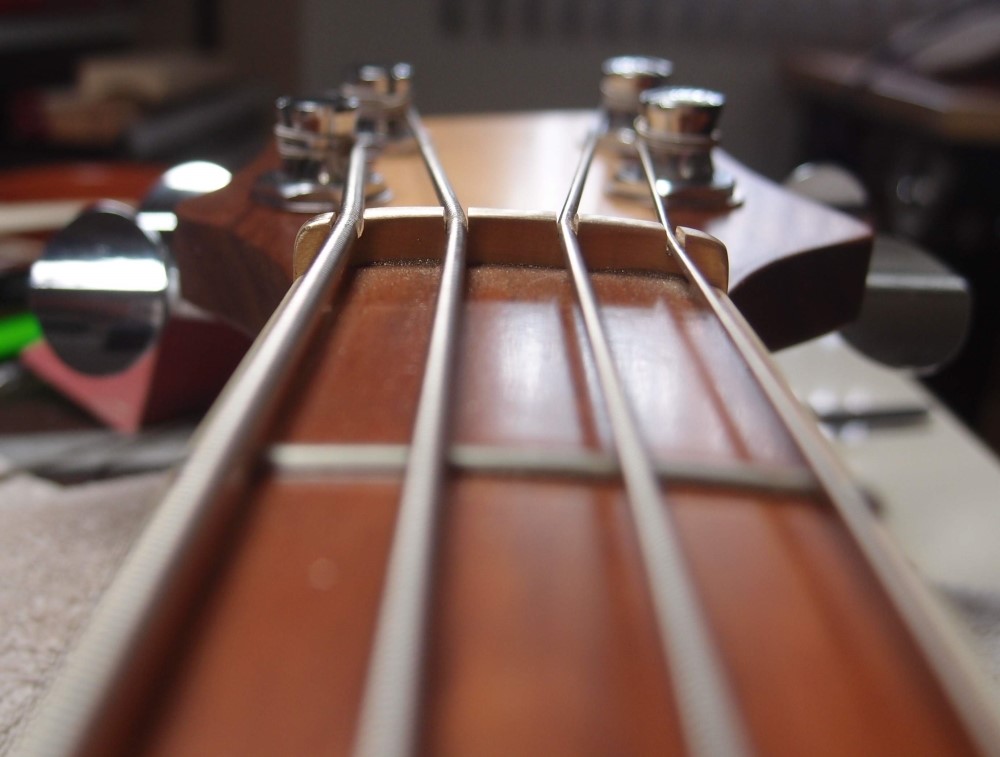
Enough about glue. This view is interesting. First, the string slots are very deep, deeper than the strings in some cases. This is because the Rickenbacker is a strange combination of a flat headstock and non-straight string pulls. Anything less than what you see and the strings will jump out of the slots, even the E and G, which are almost straight. On a Gibson-type, the headstock angle keeps the strings in place, and on a Fender, the straight pulls minimize the problem, although most Fenders still require hold-downs, kind of a kludge.
And second ... I guess that's it.
This nut is much taller than standard nut blanks, which is why I made it from brass. The brass plate I bought will make half a dozen nuts, for a lot less than the price of a real RIC nut. Brass gives the open notes a tone that is closer to fretted than plastic or bone. And the sustain blah blah blah blah blah a lot of bunk. But the open notes do sound different. The height of the nut has no effect on playing, as long as you round off all the corners and edges nicely.
There's nothing wrong with doing a nut this way, you also find very deep slots on old Danelectros, which use aluminum nuts instead of brass. Aluminum works just as well and is just as easy to work and cheaper, but it looks chintzy, while brass looks deluxe. One thing I have found when making metal nuts is that they are much more prone to buzzing than softer plastic or bone. You need to make sure that the string departs from a sharp corner, not a shelf that it can buzz against, so a little more care is needed when filing the fret slots. Make sure the entire slot is angled back. A magnifying glass or jeweler's loupe is useful for inspections.
All the slots were initially roughed-in with a Dremel cutting wheel to save time. The big slot for the E-string was then cut directly with a round needle file. The other slots were cut with the edge of a flat needle file. The bottoms were rounded with the homemade slot files I mentioned above. The bottoms of the slots don't really need to be round, square fret slots work just fine too.
A RIC flat headstock is actually a little more recessed than a Fender, because a RIC fretboard is typically about 3/8" thick, while a Fender is less than 1/4". This is a 1/4" fretboard backed with a piece of 1/8" mahogany that peeks out under the binding, so it looks just like the real thing. I also re-approached the setup on this bass. I backed the truss rod quite a ways to pull a bow into the neck. This neck is thick and very strong, and the medium-scale strings make absolutely no difference to it, it will not bend. With a little more relief, I was able to lower the action a bit. The RIC bridge goes up and down in one piece, so you can't spend hours fiddling with it like a Fender. It plays much better now, I really like it.
For a flat nut like this, an alternative to glue is to screw it into the end of the fretboard, like an old Danelectro. It can be difficult to drill the hole precisely and straight though, the headstock is in the way.
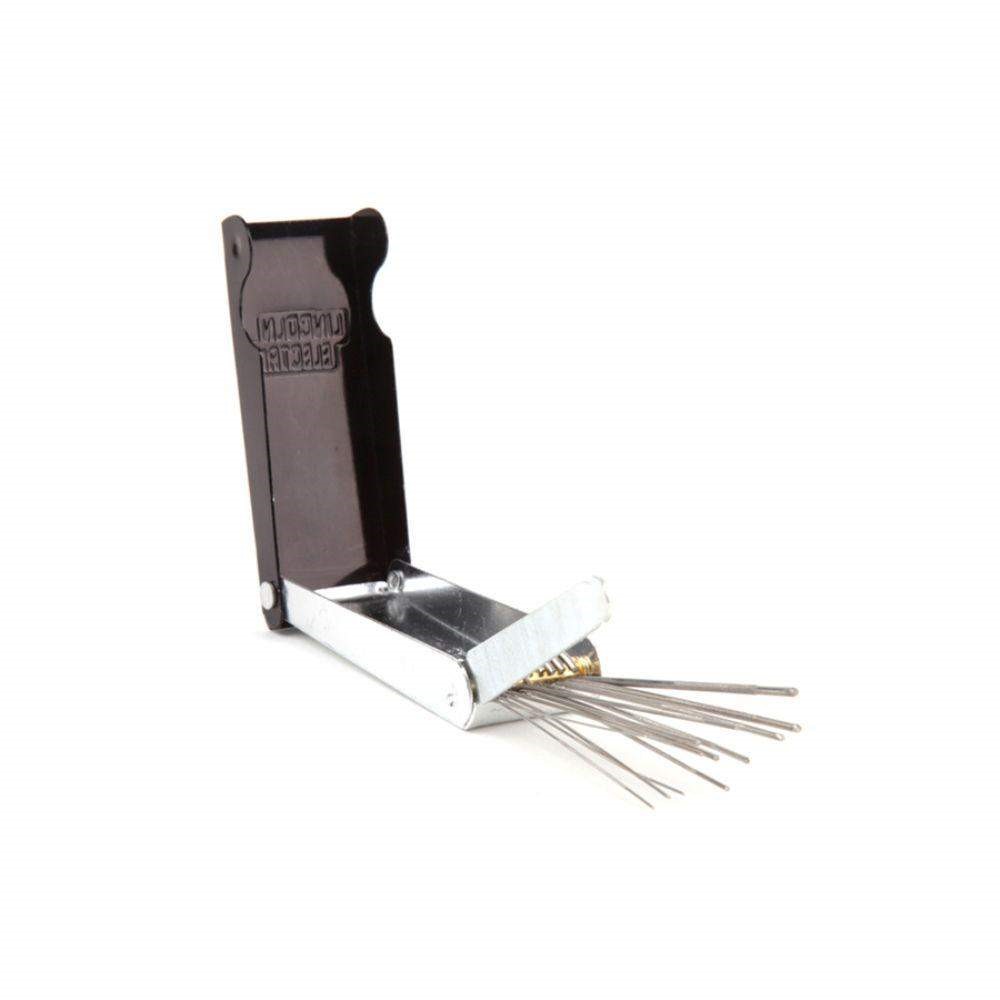
You can find these welding tip cleaners at Home Depot or Lowes for about 4 bucks. There are lots of sizes in the set, good for filing tiny nut slots for guitars. Basses are better done with needle files, which you can also find at the hardware store. These are not real files, but they cut plastic, bone, and even soft metals for a while, then throw them out. I disassemble the set and throw the case away, they're much easier to use that way.
I first found them on eBay, where some shyster was selling them as nut files for twice the price, which is still cheap compared to what you'd pay AllParts or StewMac. I have also made bass nut files from threaded rod. You can use the larger sizes directly, and make the smaller ones by grinding the 'sides' of the nearest size rod. You can get the materials from McMaster-Carr.
Questions or Inquiries?
Just want to say Hello? Sign the .