Rickenbacker 4001 Bass 1 (4/5)
July 8, 2020
I finished the shaping with a big metal file and 80-grit. Then finish-sanded 100-150 and cleaned out the fret slots. 150 is good enough for now. For final finishing, I'll take it up to 320, which is smooth but leaves plenty of 'tooth' for the finish to grab onto. I wouldn't go any higher - the surface becomes too smooth.
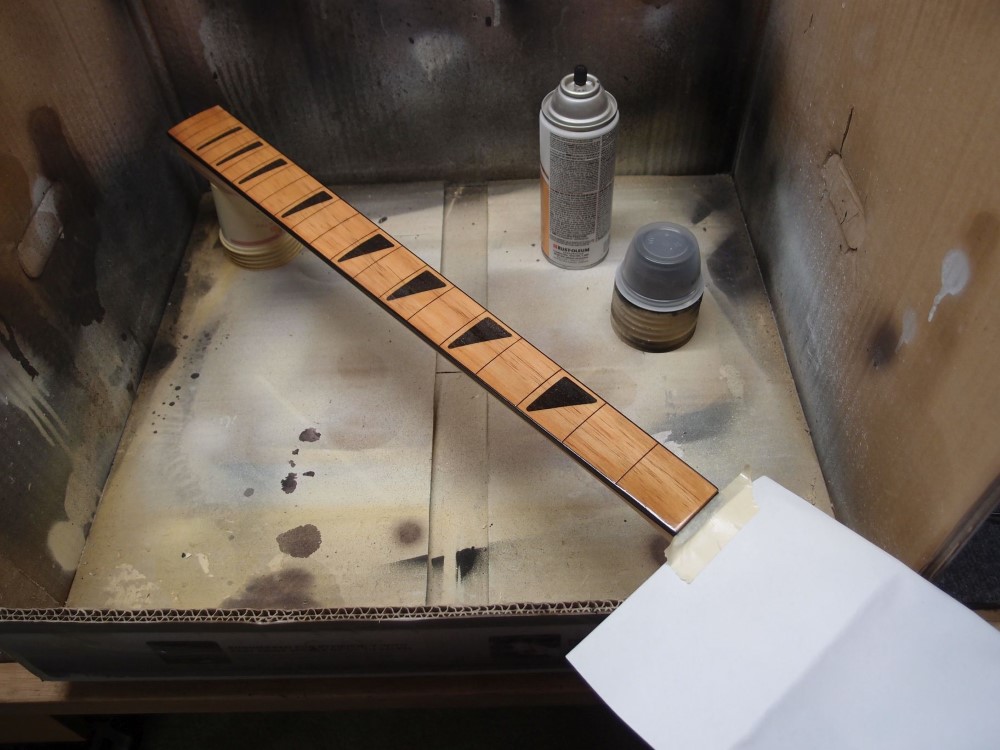
Finally, I put several coats of poly wet-on-wet on the fretboard, to build up a single thick layer of plastic. That will give a nice thick protective covering over the stained surface. That will need a few days to harden-off, then I can smooth it down, install the frets, and give it a thin top-coat, and also finish the rest.
July 13, 2020
Since last time, I roughed-up the surface of the fretboard and applied another thick layer of poly. Normally, I let poly dry for a week at least before I touch it, but I got restless. After two days of drying in a warm place, I smoothed it down with 400 grit and then polished it up from 1000 to 2000, all dry as I do not want to get water in the fret slots. Finally, I decided to try the polishing wheel on it, and the result came out very nice - like wood underwater.
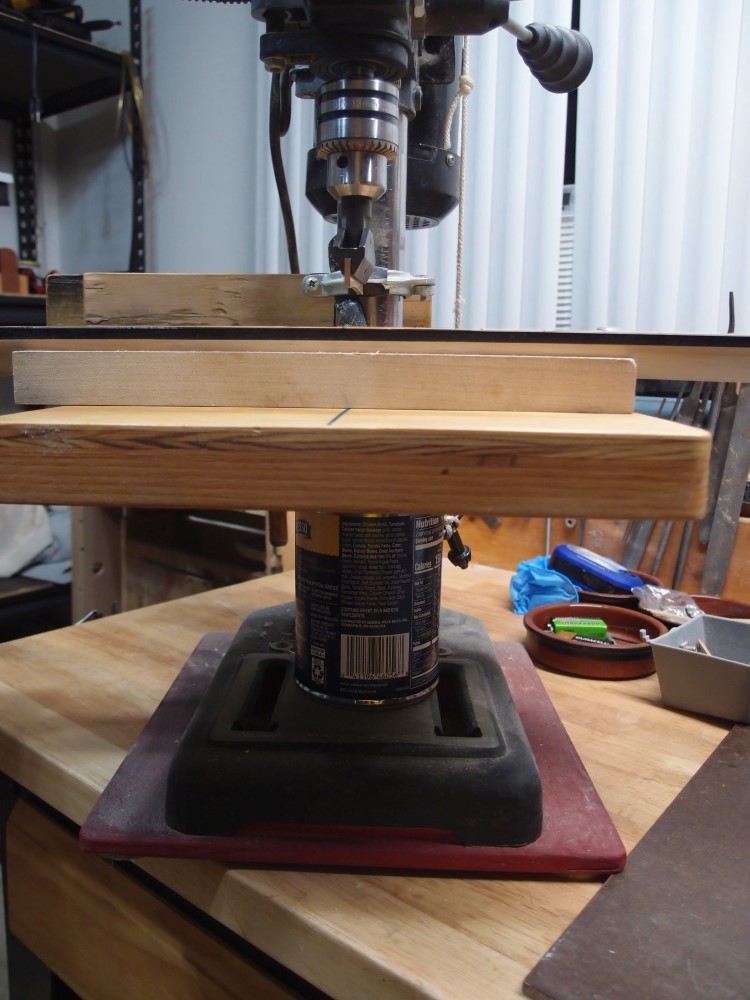
Then I decided to install the frets. I am using my little drill press with StewMac's fret press caul and neck support. It doesn't take a lot of force to push a fret in, the drill press works fine. One thing that is important is in the picture above - note the soup can under the table supporting it. Without that, the table would flex and eventually break. You don't need a 1/2 ton press to install guitar frets, that's silly.
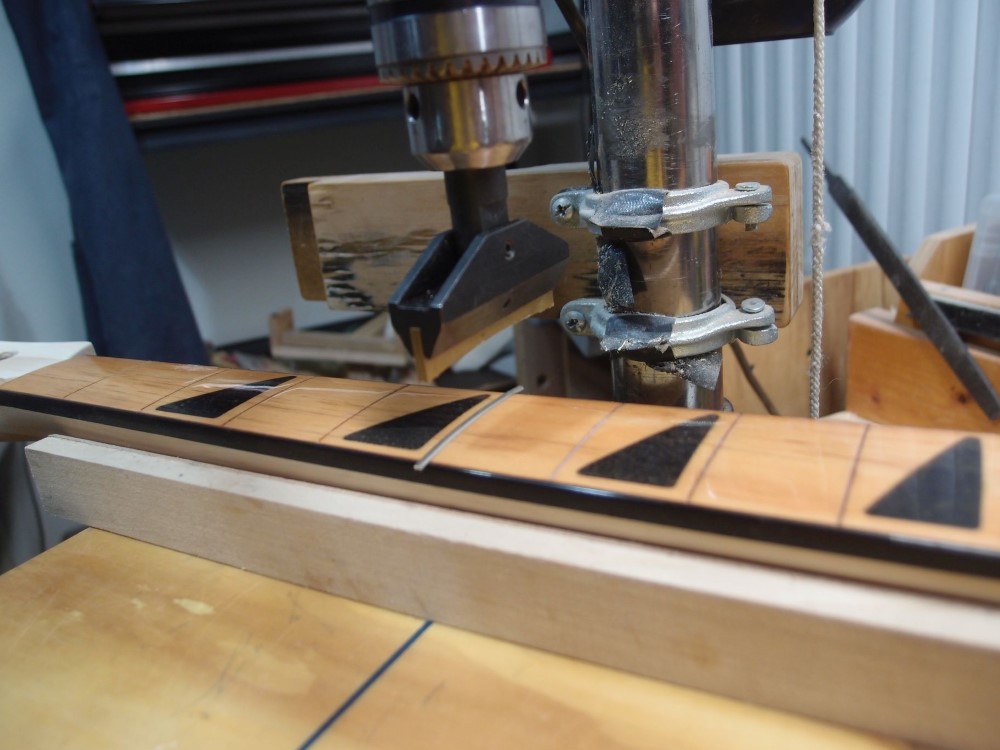
Installing frets with binding is a pain. You have to trim back the tang and file it flush. I like to start each end in the slot with a hammer, then switch to the press. On the press, I don't try to push the whole thing at once, that takes a lot of force, and if the fret snaps over sideways it will mar the neck. Instead, I push one end in, then the other, and finally the middle. I think that way the middle is sprung against the ends and holds them down better.
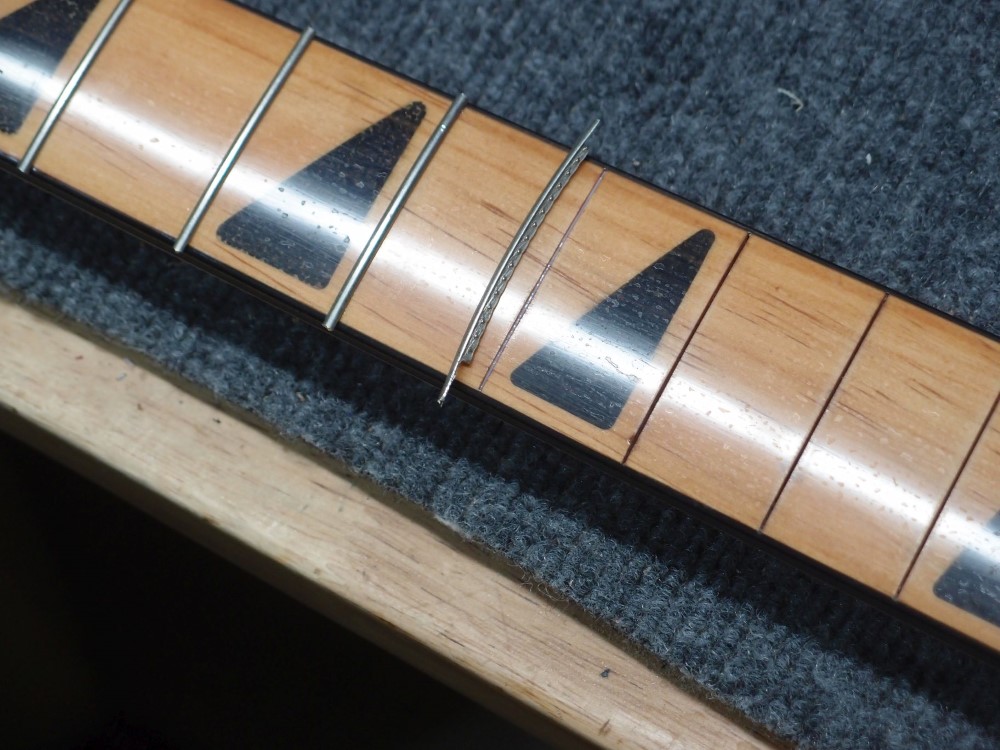
You can see the nice finish on the fretboard is ruined by water marks. I'm sure I can polish it up again. I should have let the poly dry longer. If you look closely, you can see that the fret slot is filled with a special fret slot glue made by a famous loothier named Elmer. The nice thing about Elmer's glue is that it cleans up with a damp rag, even after it has dried. Every loothier should have a bottle of Mr Elmer's glue for special jobs like this.
Some people use Crazy glue to set frets. I can hardly imagine what a pain that must be, although I do resort to it on occasion for problem spots. Crazy glued frets must make re-frets almost impossible.
Since this is a real cheap build, I debated whether to use my cheapest brass fret wire. But in the end, I went with the nickel wire, simply because the brass would not have looked good with the rest of the hardware.
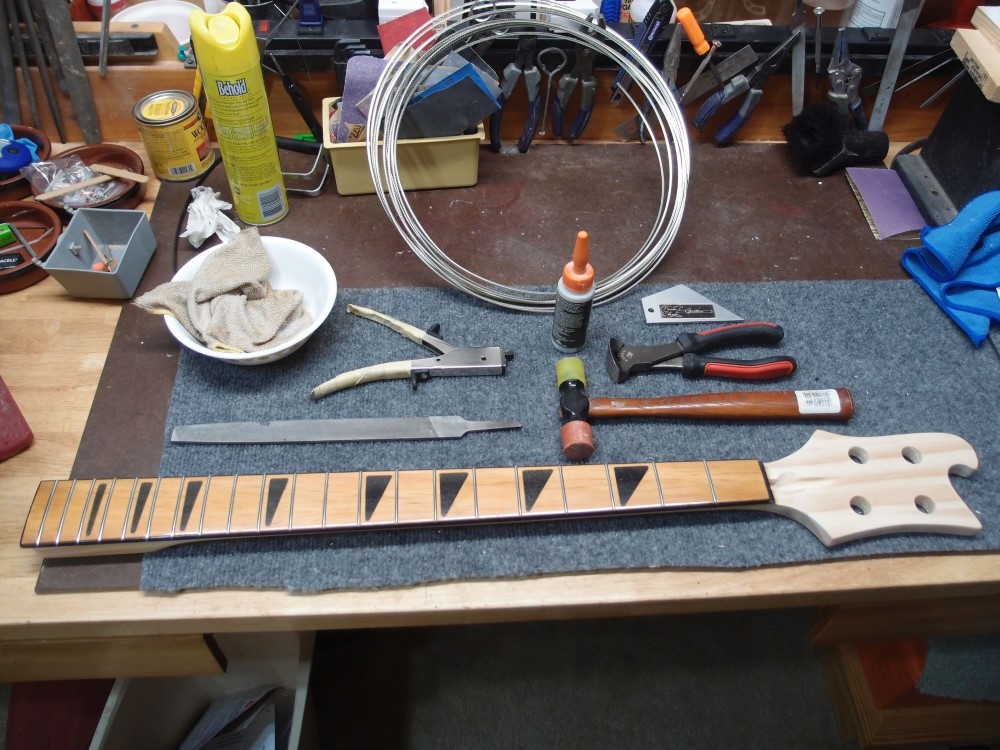
And here it is all done. The fret rocker says the job is almost perfect. The tools are all described in the workshop section of the website.
You can see my big roll of fret wire. I don't bother radiusing it, I just use it as it comes off the roll. That's all a bunch of bullshit to sell you a $50 radiusing machine. The frets do come off the roll with a slight side-to-side bend. Sometimes I straighten them, mostly I just let them straighten themselves. Fret wire is not very strong stuff, and in the contest between the fret slots and the frets, the frets are going to lose.
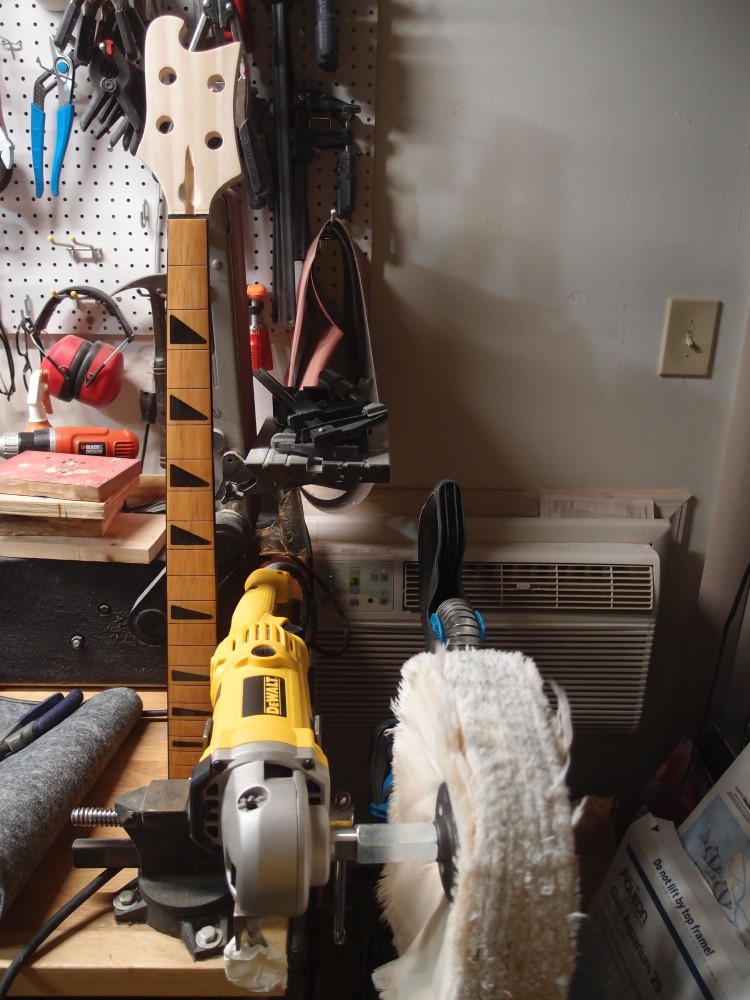
I got all the fret ends clipped and then filed down with the big file, and then I realized I forgot the side markers. I always do them before the frets, so that if something goes awfully wrong, I can fix it by stripping off the binding ( or adding binding if there was none. ) With the frets already in, I'm going to have to do this carefully.
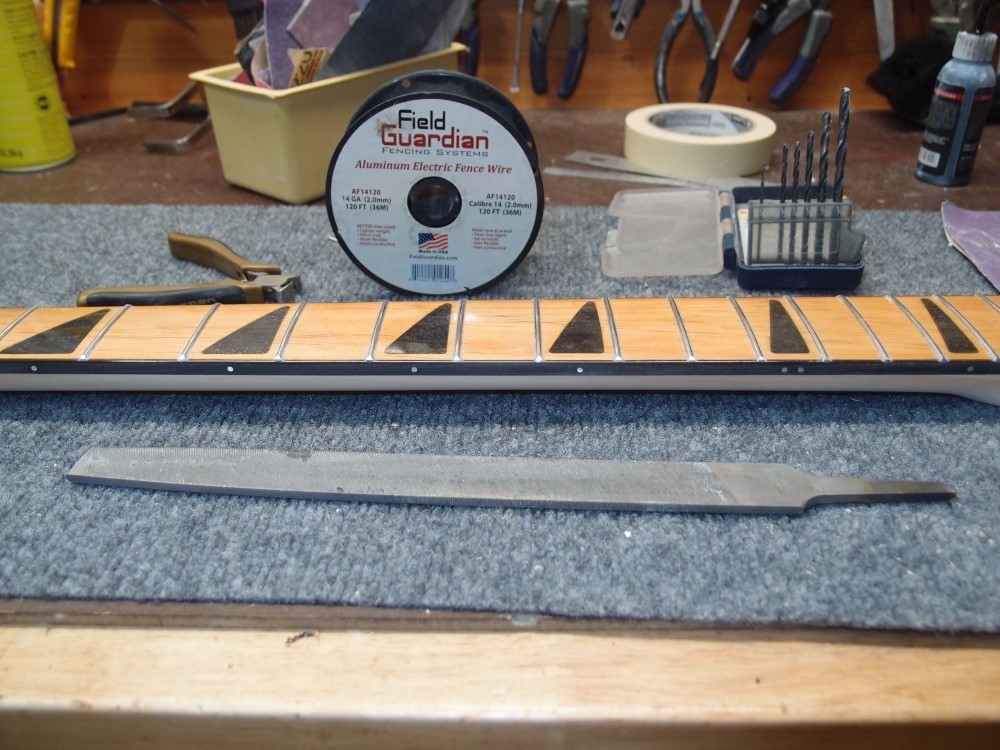
I drew out all the spots with a pencil and ruler, and then snapped dimples into them. Using an old piece of 2x2 to hold the neck against, I drilled the holes on the drill press. The holes don't need to be perfectly perpendicular, but they do need to be nice and even.
I am using my favorite side marker material - 14GA aluminum fence wire. Drill a 5/64" hole, put a drop of Crazy Glue in it, stick the wire in and clip it off just a bit long. When the 'dots' are all in, file them flush much like the fret ends. The shiny aluminum works against any color wood or binding.
When using metal wire, be sure to file off the flared edges left behind by the cutter, so that the wire goes in cleanly. And that's it - bedtime.
July 15, 2020
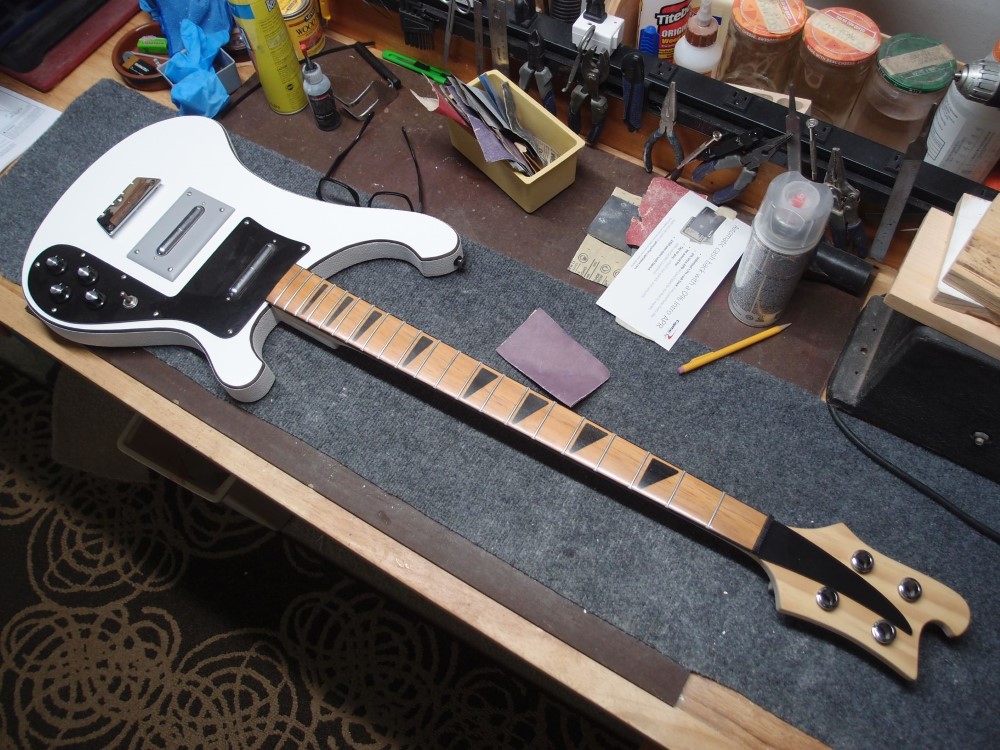
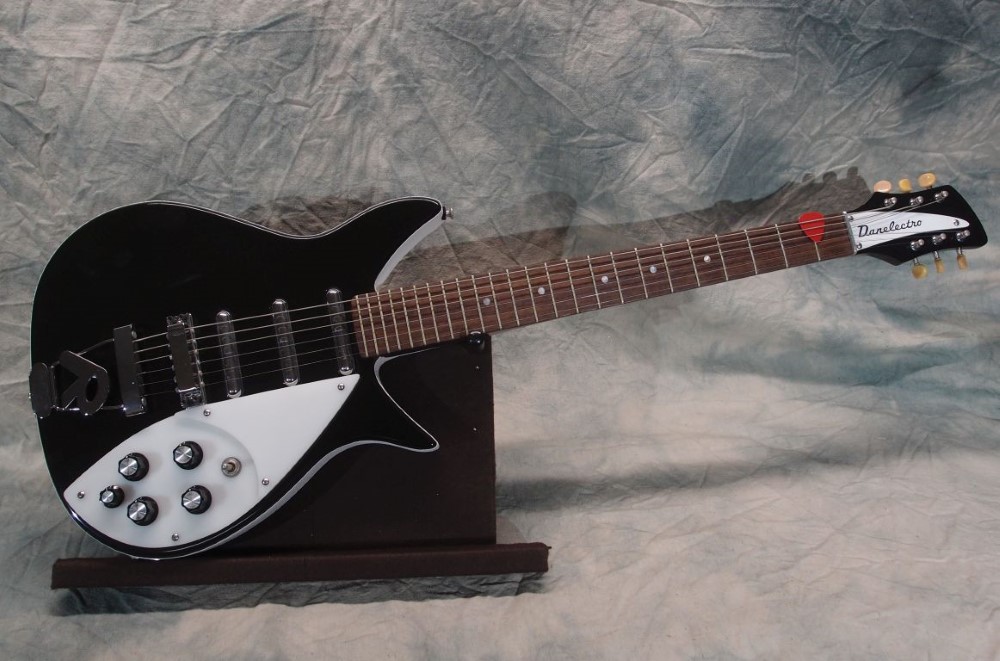
Laying out the parts to see what it will look like. The body has been finished for a long time. Yesterday I encased the neck in plastic - 4 layers of polyurethane, wet-on-wet. Today I smoothed it out with 320 sandpaper, a gentle touch to remove any remaining wood grain and give a good surface for the final topcoat. It will need a few days to fully cure before then.
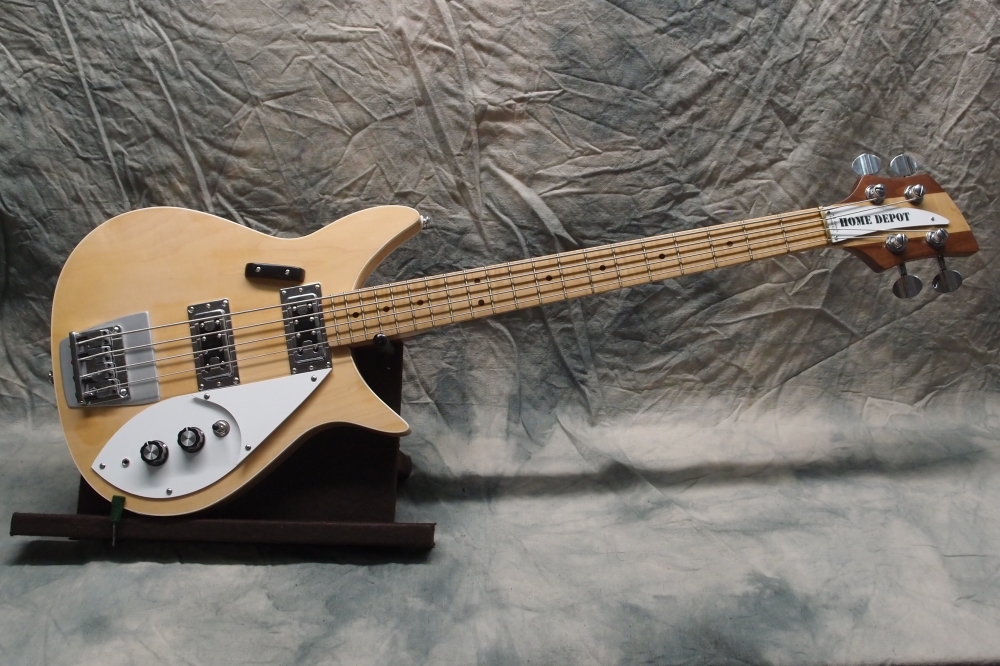
I'm using Krylon satin poly. It goes on very nice, and you can get it pretty cheap at Hobby Lobby with their ever-present coupon. It also seems to be less yellow than Minwax or the other one. This Ric is coming together nicely. I've started to pull together parts for another.
Update:
The final coat of poly is on the neck and looks great. I'll give it a week to cure hard before I start installing hardware. I also want to re-polish the fretboard.