Inlays (1/2)
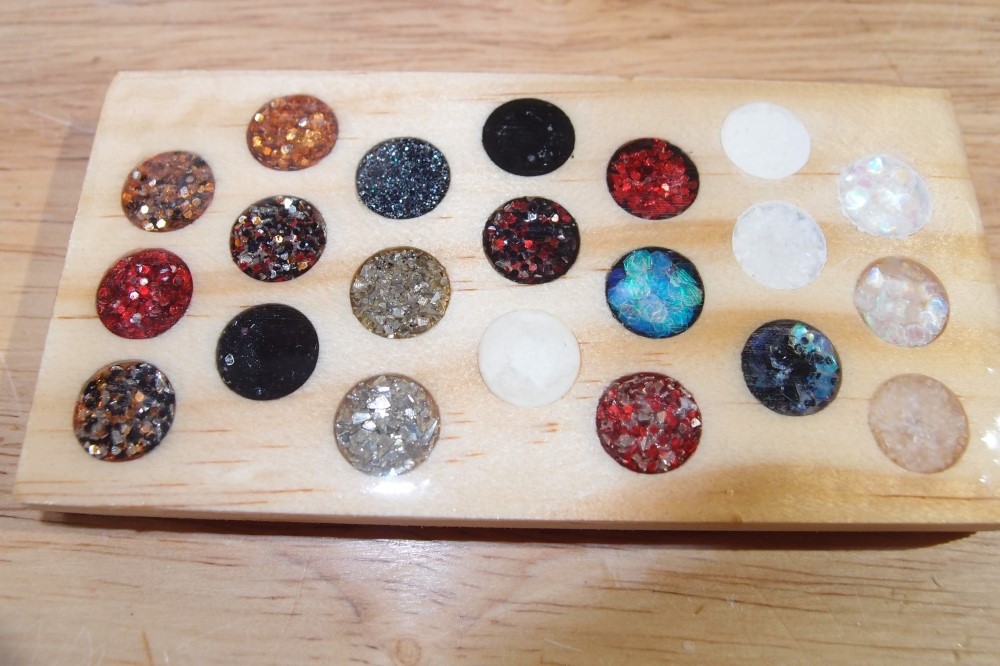
I have done a lot of experimenting with CA/glitter inlays. I am only going to post the successes. I have tried a number of other materials besides CA, none of which were satisfactory.
Always wear safety glasses when working with CA !!! Those little tubes and bottles spurt just when you don't expect. You can un-stick your fingers with acetone, but that's not a good choice for your eye. That's a trip to the ER, and I'm not sure what even they can do for you. I don't even want to think about it.
Test Fills
Above are 21 tests of potential inlay materials. All of them are dirt-cheap glitter available pretty much anywhere. All the glitters are plastic except silver & gold, which are glass. Except as noted, all fills are clear Loctite CA.
The board has been rough-sanded flat and finished with two coats of UV-poly, no polishing. The poly did a pretty good job of filling the scratches, but not perfect. If this was a real fretboard, I would sand the scratches out before finishing. I was curious what the worst case would be.
Starting at the upper left (1-1) going to the lower right (7-3):
1-1 copper/black - glittort
1-2 red - strawberry jewel
1-3 copper/black/silver - glittort
2-1 copper - nice
2-2 copper/red/black/silver - glittort
2-3 black - best way to make black
3-1 fine gunmetal - nice
3-2 gold (glass) - MOP
3-3 silver (glass) - MOP
4-1 pure black CA - not great
4-2 red/black - glittort
4-3 spackle - not useful
5-1 red over black CA - nice
5-2 jumbo diamond over black CA - not useful
5-3 red/silver - glittort
6-1 spackle 2 - not useful
6-2 crystal over white paint - pearl
6-3 jumbo diamond/black - jade
7-1 jumbo diamond over white paint - best MOP
7-2 jumbo diamond - not useful
7-3 crystal - not useful
The CA did not penetrate the spackle as hoped. Therefore this has no strength. The black CA has a very long drying time, and also issues with "heave", where it throws up a wall around itself.
Jumbo diamond has filling issues, but mixing it with regular diamond would help with the edges and corners. Most of these are also available in extra-fine versions, similar to the gunmetal.
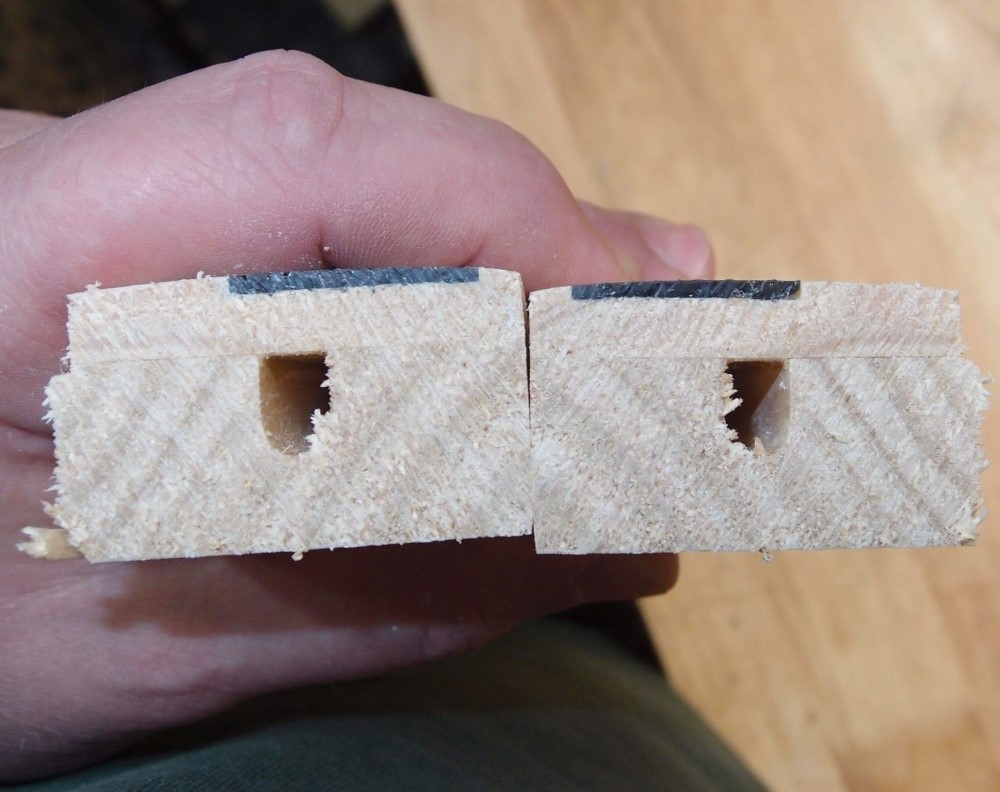
Cross-section through a black CA inlay in a neck that I ruined.
Questions or Inquiries?
Just want to say Hello? Sign the .