Fretboard Inlay Jig (1/2)
This is the initial layout. The material is 24" x 18" x 0.22" acrylic from Home Depot, about $25. I cut it in thirds lengthwise on the bandsaw, enough for three generously wide neck templates. The bandsaw cut this stuff well, the big blade makes a good heat sink, and as long as you keep moving along in a straight line at the right speed, no melting.
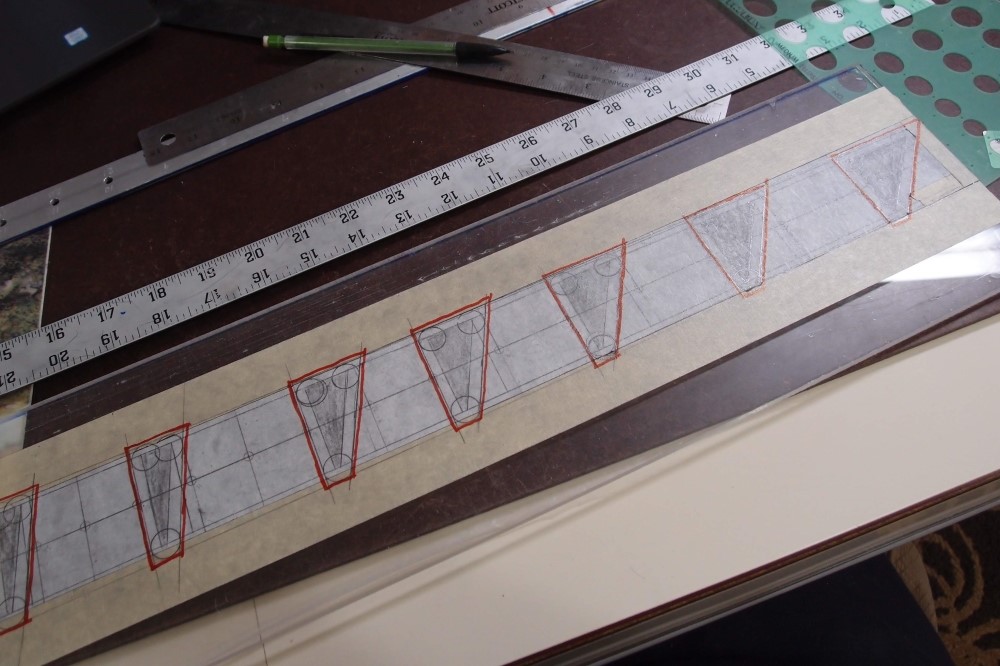
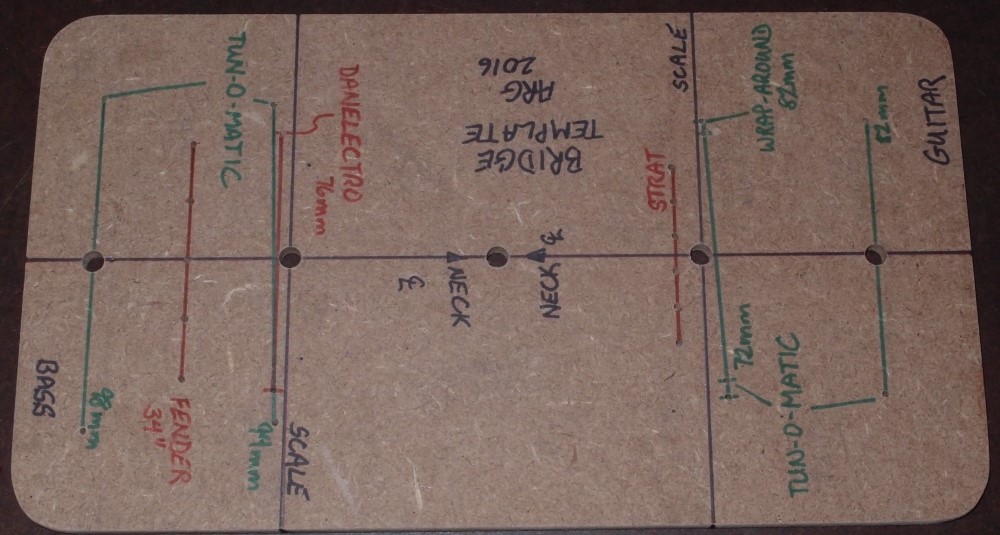
Assuming you've decided on the shape, there are three variables: nut width, heel width, and scale. I chose a Precision nut, guitar heel, and 32" scale. The guitar heel should work fine on a bigger bass heel, but not vice-versa. This way I can build both widths. Most basses are Precision nut width, only the Jazz is freakishly narrow, and I don't really care for it, so that was an easy choice. Finally, I wanted it to be my favorite 32" scale. You could possibly make a template with an inlay at every fret, which would cover several scales, but I'm not going to try. Yet; I still have two more pieces of material.
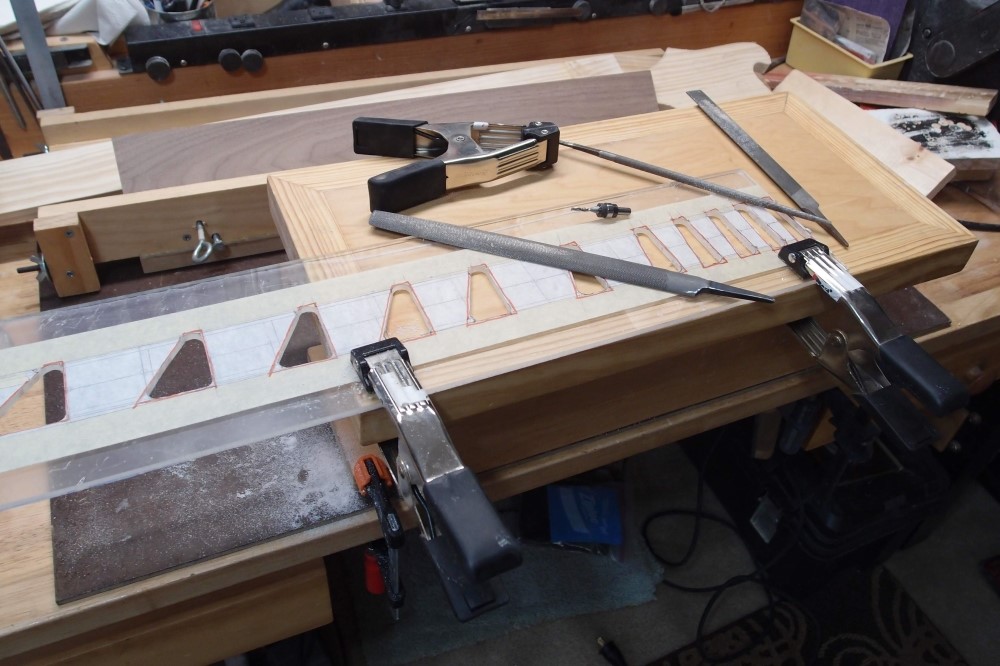
Above, I have put tape on the acrylic and drawn in a neck, and then the triangles I want. I'm planning to use a 1/8" spiral bit with a 1/2" bearing - that is another variable. That will give corners with a reasonably tight 1/16" radius. Hopefully, hogging out the centers won't require changing to a larger bit. I need a border of 3/16" for this router setup, and drew it around my triangles. Then I used a circle guide to lay in the corners to fit the bearing.
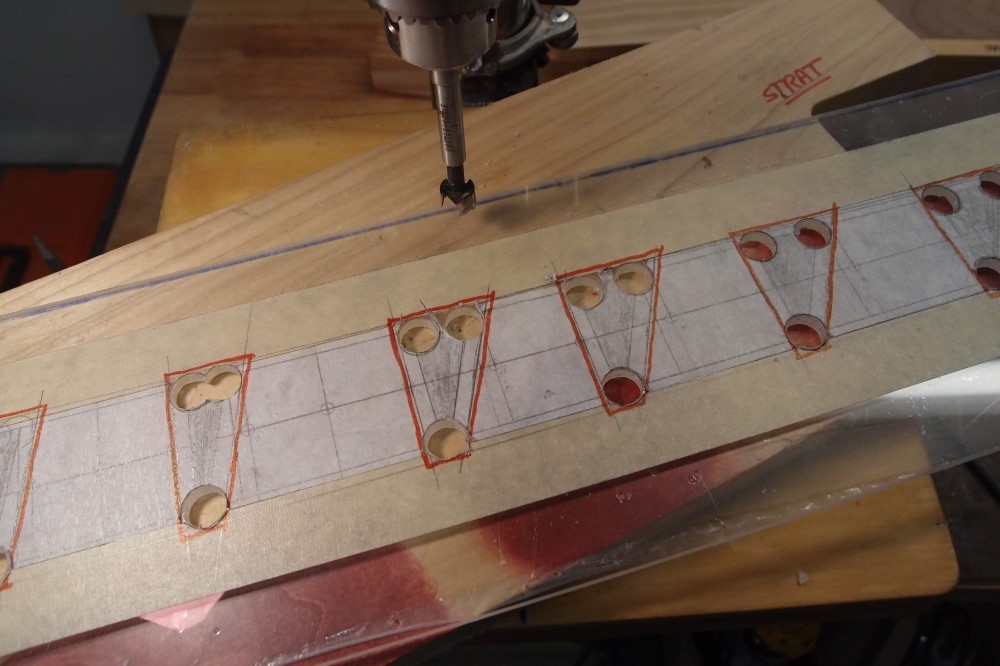
I used a 1/2" Forstner bit on the drill press for the corners. I shifted the drill to a lower speed, and the material didn't drill too badly, taking occasional breaks to let the bit cool down. That's about 30 holes. Thicker material heats up more as you drill it and melts, this was actually easier than I was expecting.
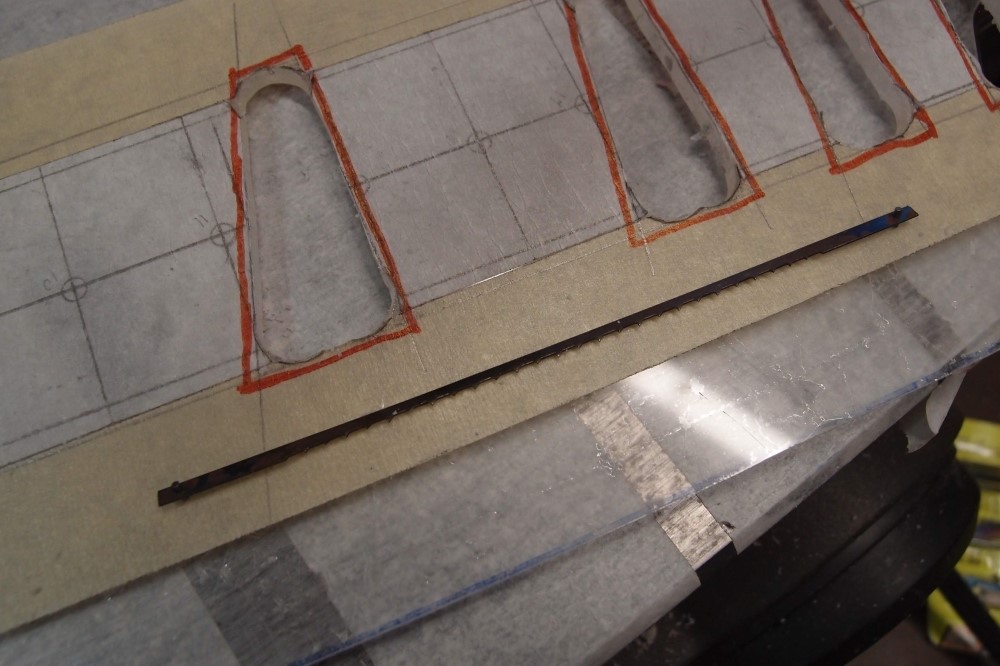
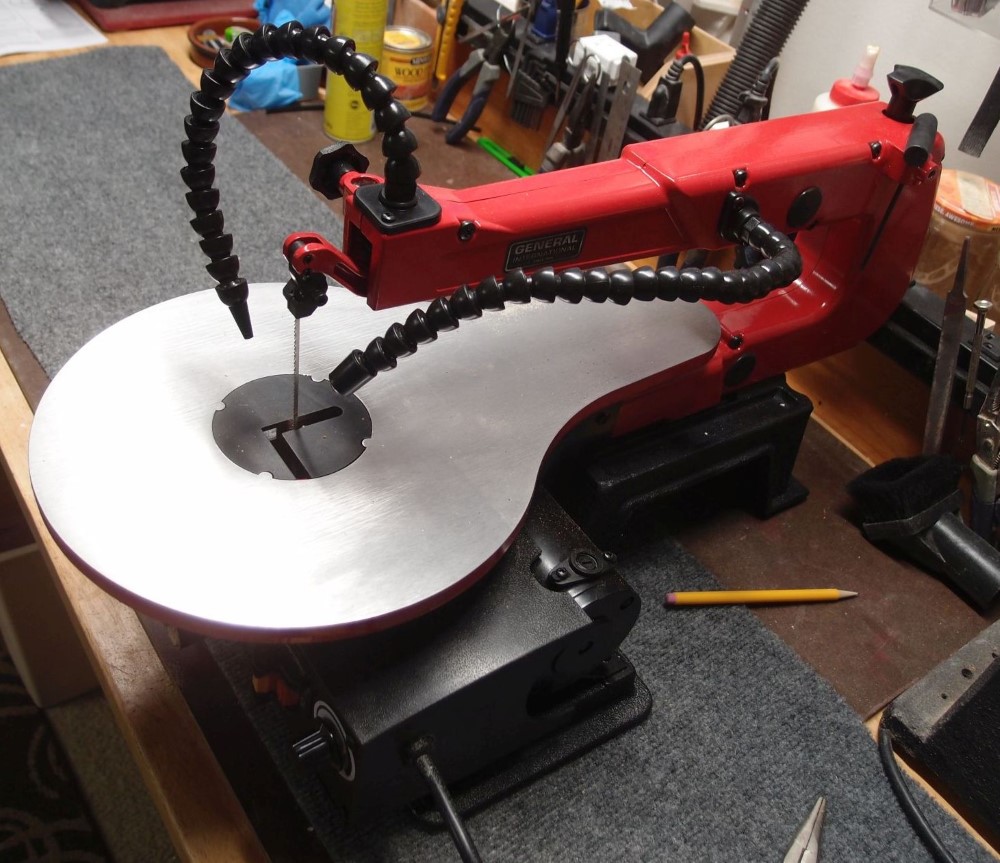
This is the part I was really not looking forward to - cutting plastic on my ancient single-speed scroll saw. I think I paid 15 bucks for this thing, and it's built like a tank and just won't die. It wasn't as bad as I'd expected. This skip-tooth blade generates much less heat than a normal blade, and the thinner material cuts better. Towards the end, the blade dulled-up a bit and started melting its way through instead of cutting, but it made it through the whole job.
Drilling the corners out to the final radius saves me having to do anything but straight cuts in between. Cutting curves in this plastic would not have been fun at all. About 30 sides.
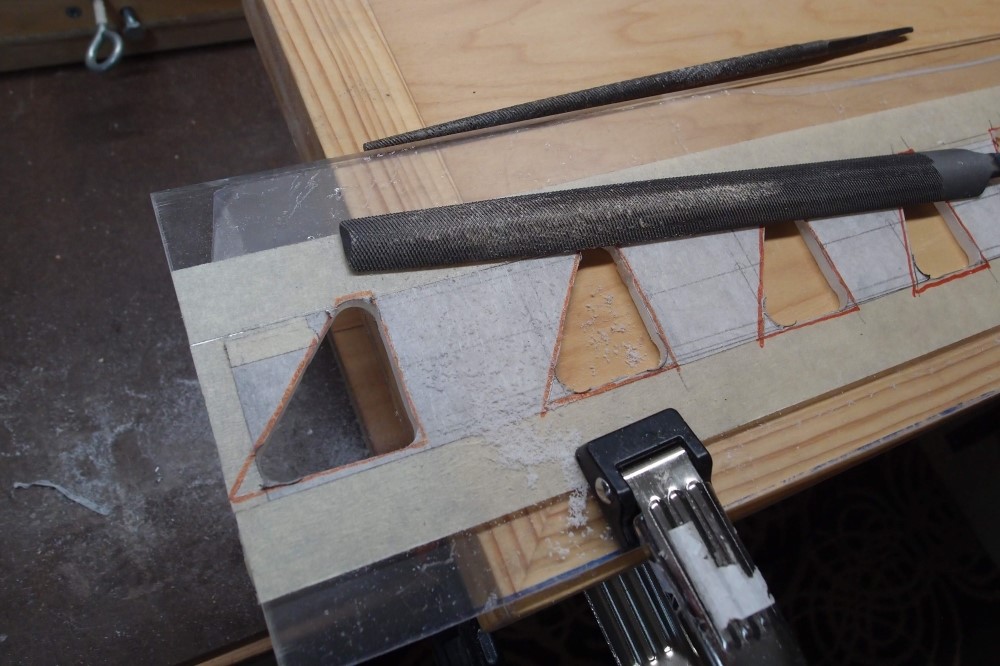
Now it's time to clean up the shapes. I used a round file and the big half-round that I recently got, which is nice and sharp and made quick work of it, relatively speaking. I am also using my bench-top box to work over, which is a lot more convenient than trying to find a usable edge on the workbench.
A lot of filing to get everything nice and straight and even. But this saga is not nearly over. This template went through two weeks of fine-tuning the shapes until I was completely happy with it. Then I made two others: blocks and trapezoids.
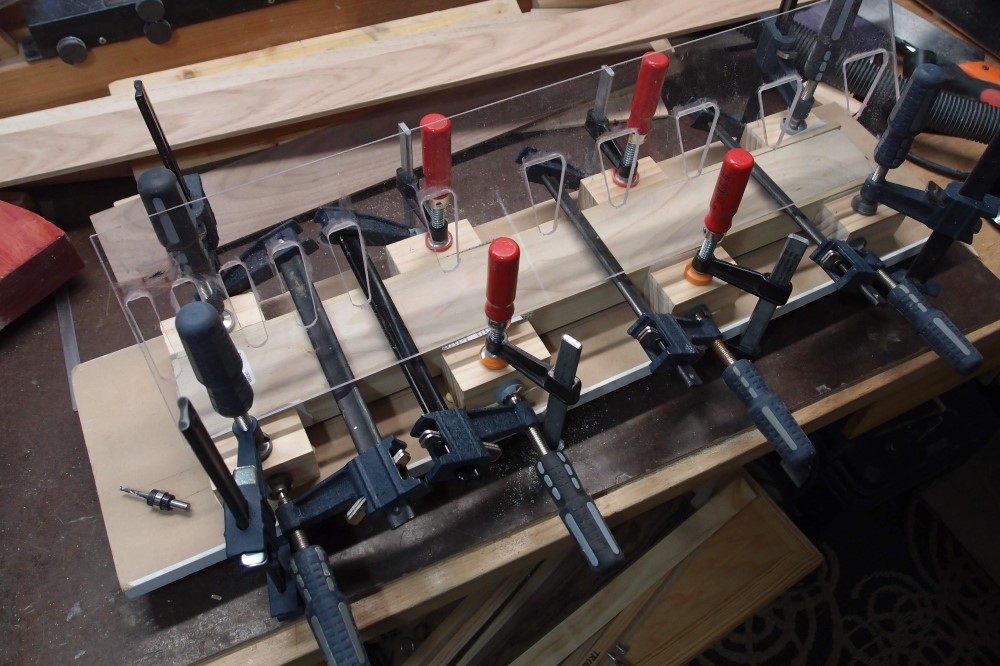
Building the support structure for the shark fin template. The base is 3/4" MDF that I found in the mouldings aisle at Loothery Depot. The supports are 2x2 Radiata scraps, with wide gaps between them so I can reach inside. I would once have used maple, but Radiata is so hard and precise that I think it will work just as well. The template will be screwed to the top of the supports.
The router bit setup is at the lower-left - 1/8" spiral bit with 1/2" bearing. The template was built around this. This is an up-cut bit. If that does not give clean results, I'll get a down-cut. I can also use 1/16" or 3/16" or even 1/4" for slightly larger or smaller inlays.
The supports are 3" apart, plus some folded paper for clearance. This will fit 3" stock directly, or 2-1/2" stock with a set of 1/4" side shims. Fine adjustments can be made with tape. Since the bearing has to follow the template, the depth of cut is grossly adjusted by shimming under the workpiece. A piece of 1/4" poplar should do, thicker or thinner are easily arranged.
I need to work out an end adjustment to make the inlays line up with the fret slots, which will be pre-cut. It should be easy to swap out the template on the base if I make others, like blocks or crowns.
This is designed to cut fingerboards, not necks. I always try to arrange operations so that if something risky goes wrong, I can throw away a single piece, not a whole assembly. Radiusing can take place before or after inlaying. After seems to make more sense, but that's just guessing at this point. I'm making this up as I go along.


Questions or Inquiries?
Just want to say Hello? Sign the .