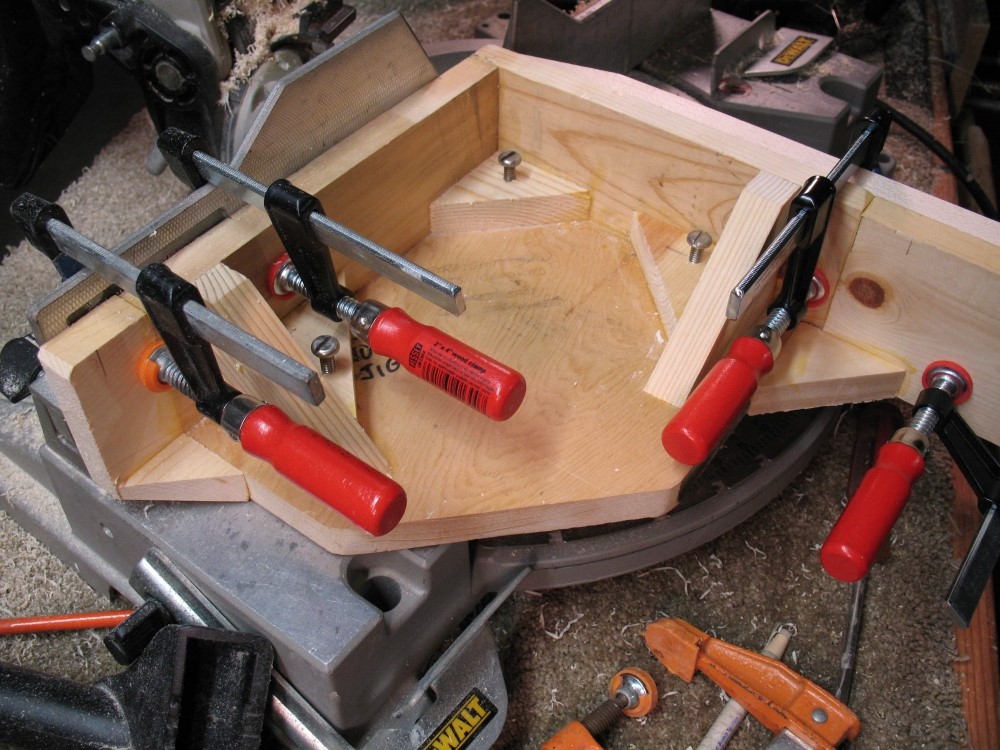
This is the angled headstock jig I built from pine scrap, with an already-cut piece of 5" Home Depot maple headstock material attached with clamps. Basically, this jig is a 90-degree square brace, as precise as I could build it. It is square in all three dimensions, the most important being the vertical direction. The final stage of construction of the jig was to smooth all the surfaces on the sander, true up the saw, and then true-up the jig face by shaving it with the saw. You can see that the angle of the headstock is easily selected on the saw. The accuracy of this angle is not critical, as long as you are in the ballpark, anything will work.
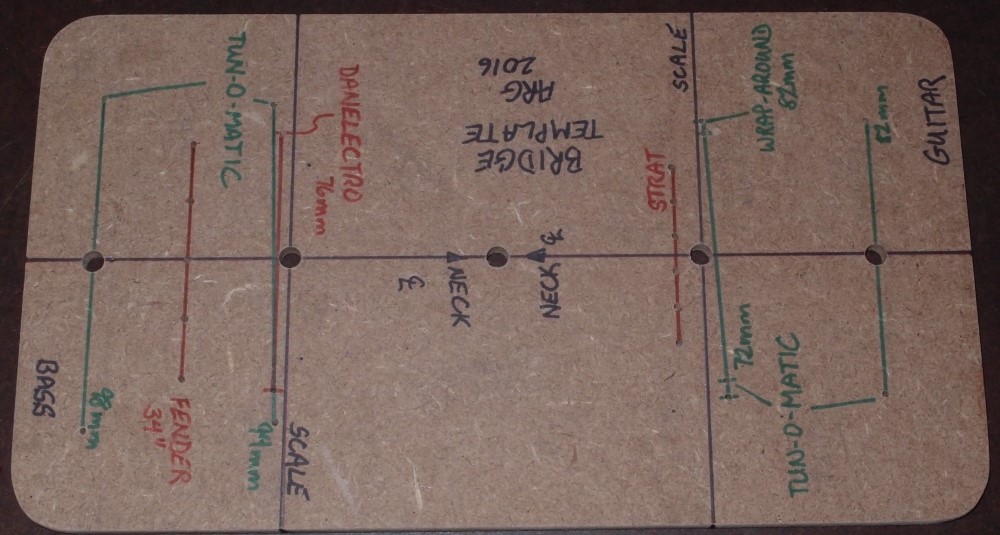
Here's a little gadget that I finally got around to finishing, that should save me a lot of bother in the future. It is a template for laying out screw holes for various bridges, both guitar and bass.
I added some notes on this subject, see page linked below. I keep seeing truly horrific advice being dispensed online by luthiées, when the correct solution is easy and free.
If you've read this whole site, you've probably picked up on my love of Danelectro guitars. Inexpensively produced for the masses, Danelectros are much better guitars than they have any right to be. Lipstick pickups, masonite bodies, innovative construction, great styling, tone, and playability, at bargain-basement prices. I just love Danelectros, both the old and the new.
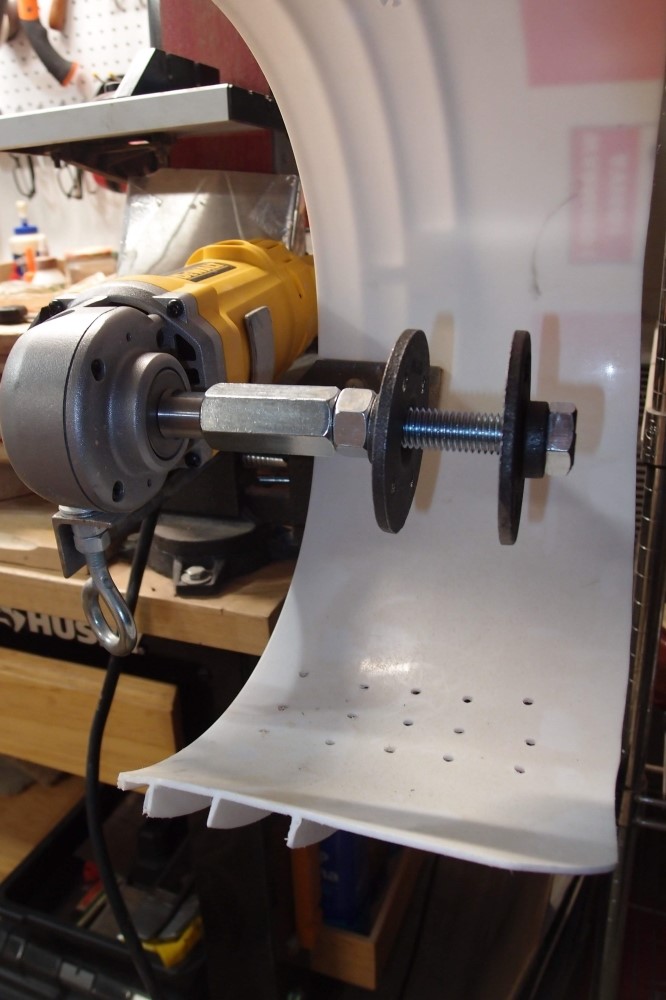
This is a prototype arbor I made from Home Depot parts. A 5/8" coupling nut fits my DeWalt DWP849 variable-speed polisher. A 5/8" bolt holds a pair of plumbing flanges. The polisher is held in the bench vise in a bracket I built for it. You can see the eye-bolt that screws into the handle mounting.
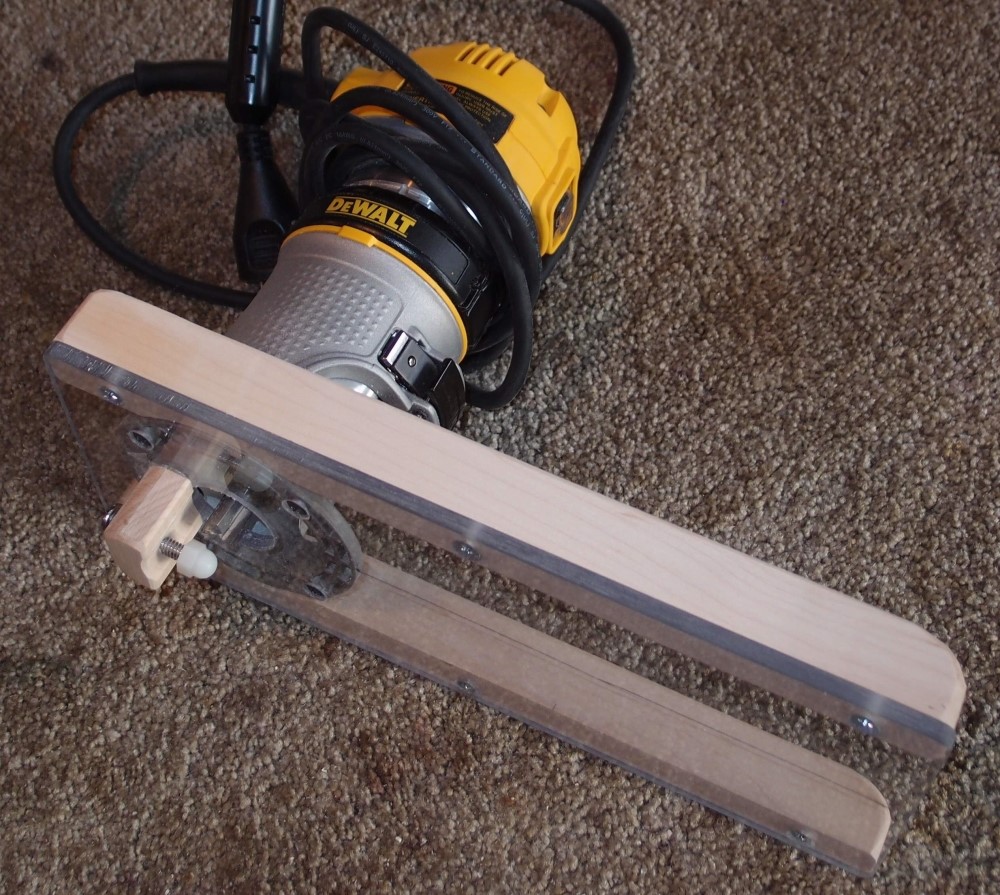
The Edge Binding Jig is inspired by StewMac's attachment for the Dremel, except that mine uses a real router, and is designed to fit into tight spaces like the inside of Fender horns, which StewMac's does not do well. The edge follower is a nylon cap nut on a 1/4-20 bolt threaded tightly through a block of maple. The jig is also useful with the follower removed for routing neck pockets, round-overs, etc. The length of the base plate, with the maple stiffeners, allows a large area of contact with the workpiece for stability, something that can be a real problem with a standard router base. The small DeWalt 611 router is easily controlled with one hand, while the other hand keeps the jig aligned on the workpiece. I sometimes even clamp the whole thing upside-down and use it as a quickie little router table.
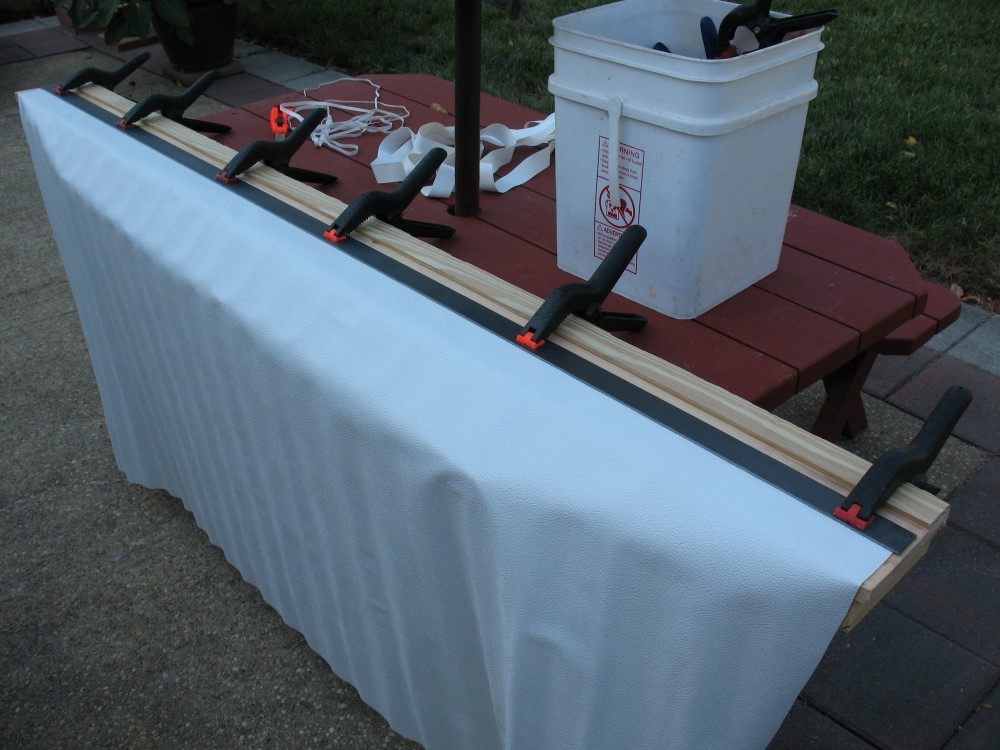
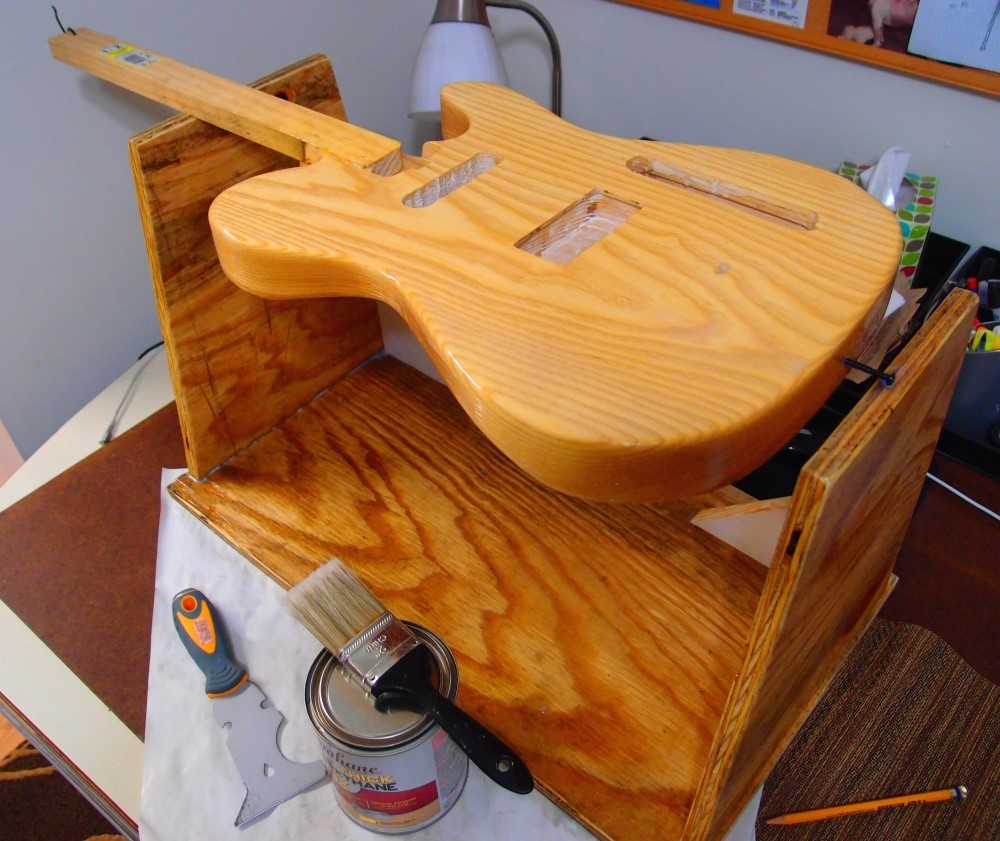
I guess I would call this a finishing stand. It is vaguely inspired by StewMac's typically over-designed finishing stand. I think mine is more practical and does not require a bench vise, which means you can use it anywhere. It is also $90 cheaper. Credit where credit is due: many of my ideas come from flipping through the StewMac catalog, although I think I often improve on their designs and definitely improve on their prices.
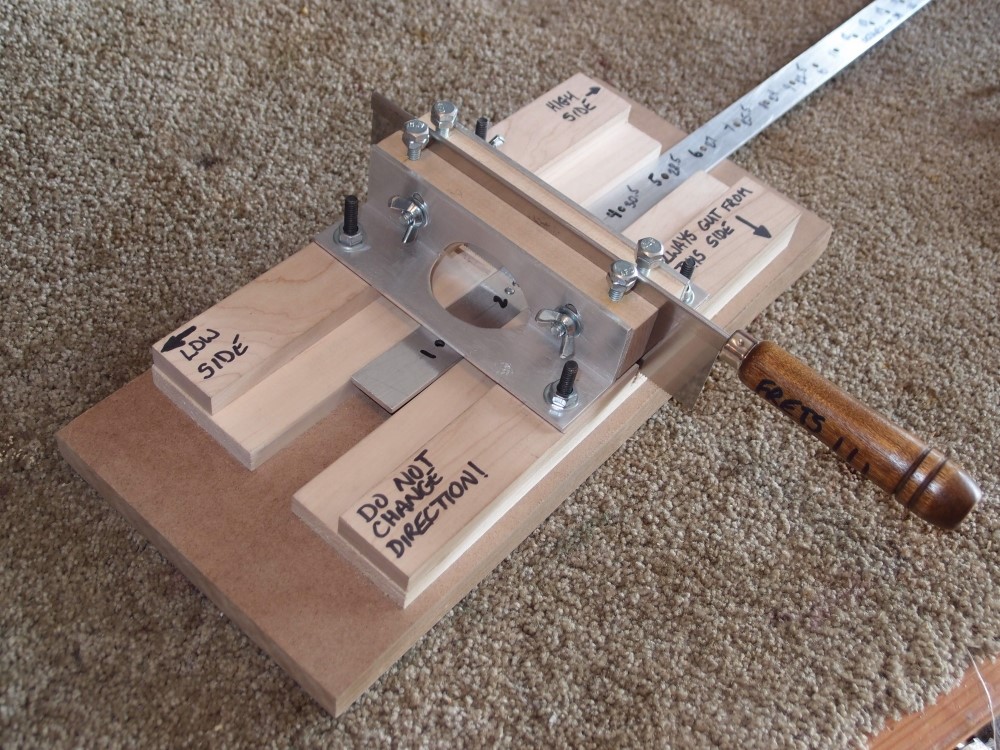
The Fret Slotting Jig is basically a very precise mitre box. What makes it a fret slotting tool is the Fret Guide, which attaches underneath the workpiece with double-sided tape, and engages a pin on the Fret Slotting Jig directly below the saw blade. The holes in the guide are spaced to Fender's formula, so depending on which hole you start with for the nut slot, you can cut anything from a 36" bass to a 20" ukelele, and all the standard scales in between. The guide fits snugly between the inner rails of the jig to keep the workpiece centered and straight.
This is the initial layout. The material is 24" x 18" x 0.22" acrylic from Home Depot, about $25. I cut it in thirds lengthwise on the bandsaw, enough for three generously wide neck templates. The bandsaw cut this stuff well, the big blade makes a good heat sink, and as long as you keep moving along in a straight line at the right speed, no melting.
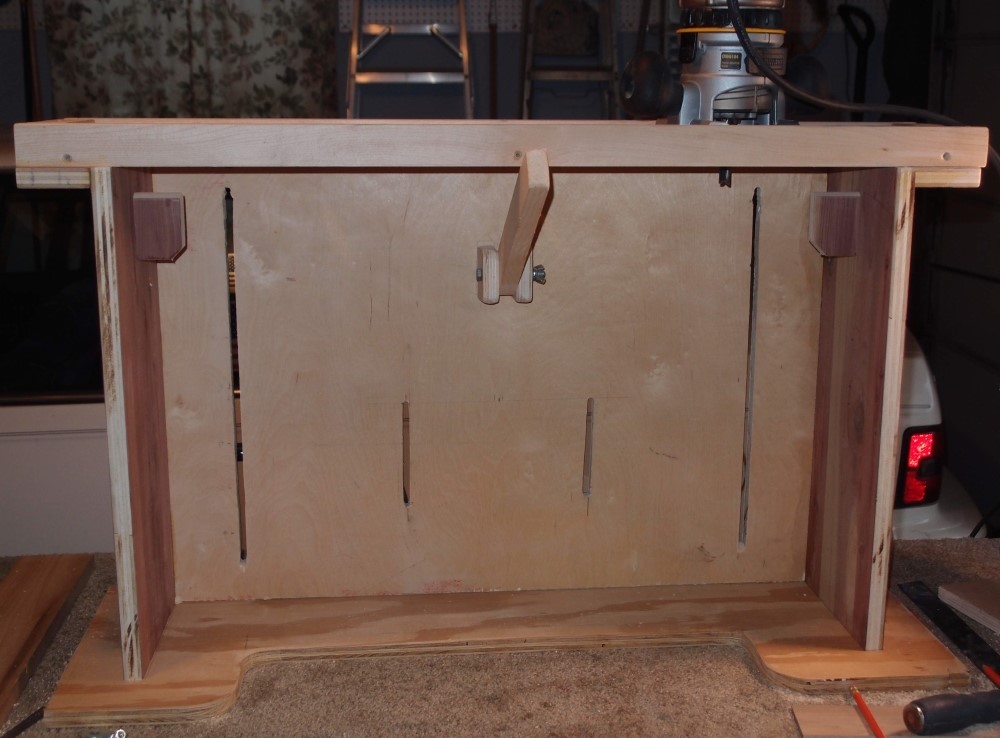
Front view of main frame, showing friction arm & setup supports inside. The odd shape of the base was already that way, I just used it as-is.
The Radius Jig is capable of cutting constant radii from 6 to 16 inches, both concave and convex, as well as convex conical radii. That means it can cut sanding blocks, clamping cauls, and 'compound radius' fingerboards. Sanding blocks can be cut up to a finished length of 14", while fingerboards can be cut up to 28", enough for even an extra-long scale bass.