Fretboard Radius Jig (1/2)
The odd shape of the base was already that way, I just used it as-is.
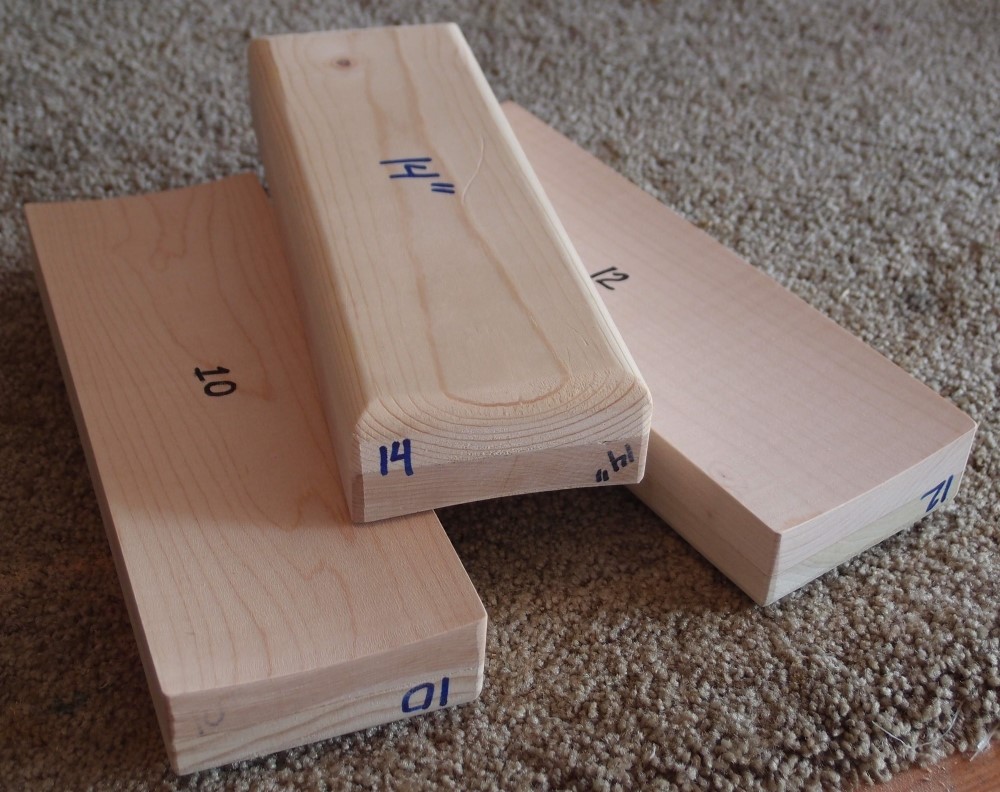
The Radius Jig is capable of cutting constant radii from 6 to 16 inches, both concave and convex, as well as convex conical radii. That means it can cut sanding blocks, clamping cauls, and 'compound radius' fingerboards. Sanding blocks can be cut up to a finished length of 14", while fingerboards can be cut up to 28", enough for even an extra-long scale bass.
As far as I know, this is the only design that can cut both inside and outside radii. Of course, being made of wood, this is only suitable for very low production, home-workshop type use. In a factory setting, a piece like this would wear out very fast, but I expect it to last me as long as I need it.
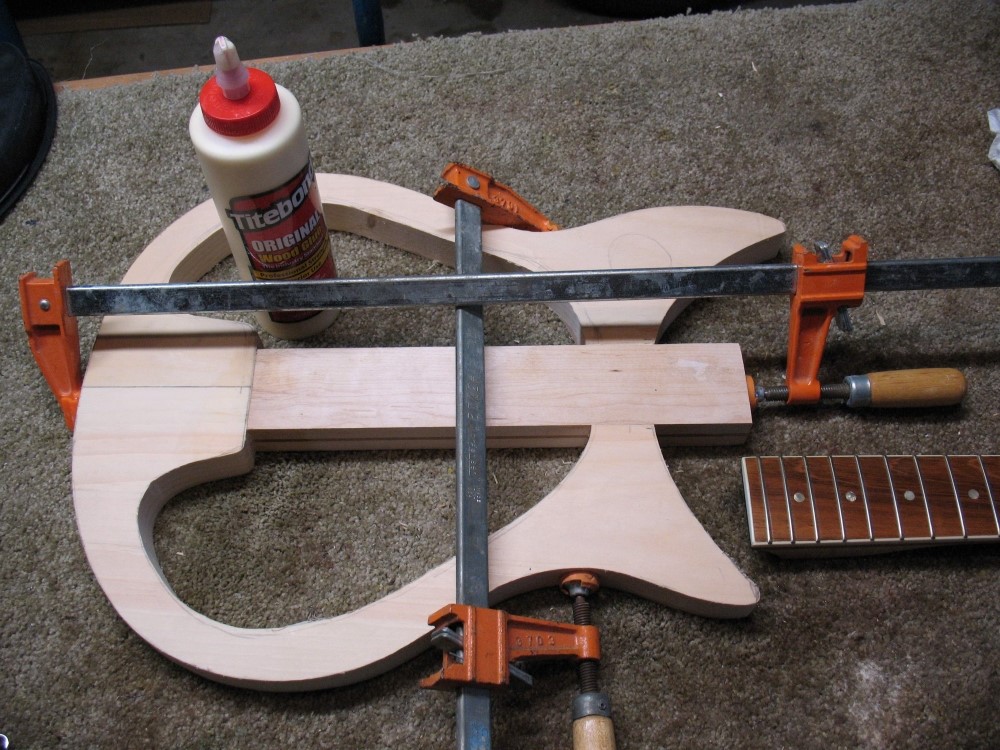
My goal was to build a dual-purpose jig as solid and compact as possible, at minimum cost.
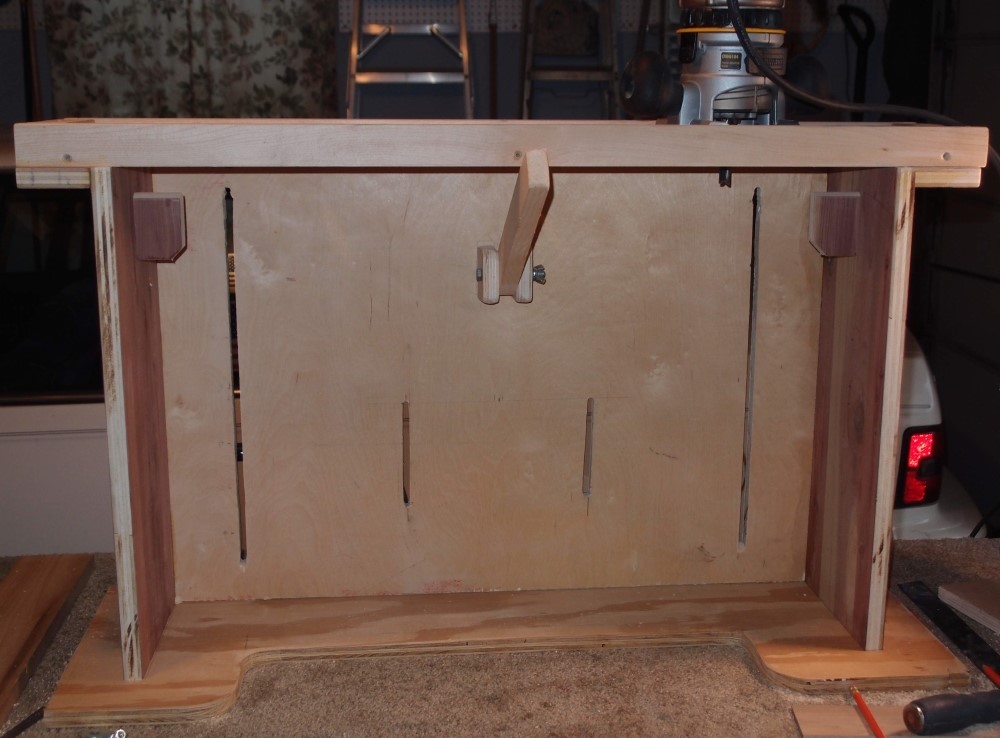
The Radius Jig is made mostly from 3/4" plywood scrap, with 3/4" hard maple for bearing surfaces. Inside are side setup supports and a center support bar for setting up the Fingerboard Jig. The main part of the jig is a large box frame of plywood. The back of the frame has two sets of vertical 1/4" slots. There are also setup supports are either side, and a pivoting friction arm installed in the center.
The top of the Radius Jig is a slide for the router, made of hard maple. There is a 1" cutting slot down the center of the top for the bit. All of the other jigs attach to the slots on the back of the Radius Jig with 1/4-20 hanger bolts, fender washers, and wing nuts.
If the frame was 4 inches taller, it could cut 20" radii as well, but the plywood I had wasn't big enough, and I didn't want it to be too big and bulky. I doubt I would ever want to cut a 20" radius anyway, that's almost flat. At the other end, the 6" radius isn't very useful either, but it didn't add anything to the design except extending the slots a bit, so what the heck.
The Radius Jig is used in conjunction with either the Fingerboard Jig or the Sanding Block Jig:
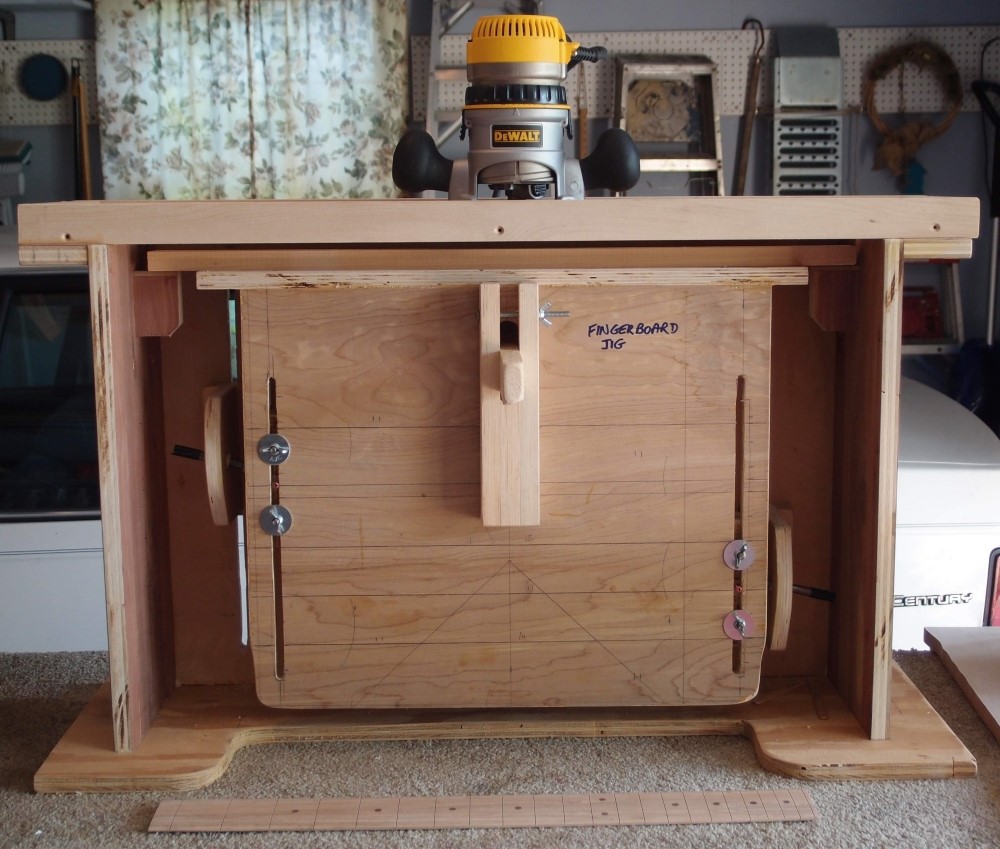
Fingerboard Jig
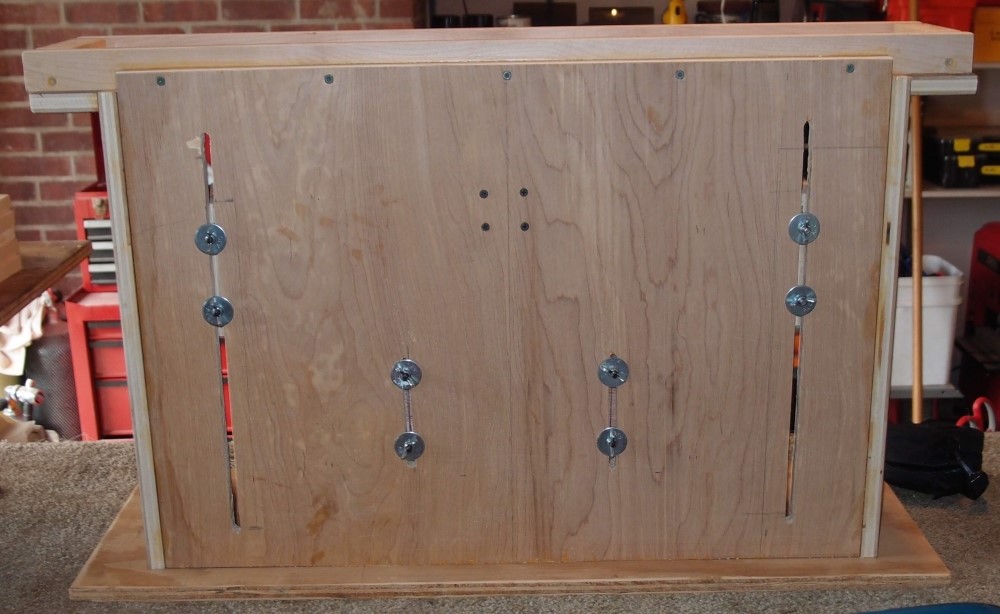
For fingerboards, the Fingerboard Jig is installed into the Radius Jig. The main part of the Fingerboard Jig is a piece of 3/4" plywood with a pair of 1/4" vertical slots. At the top of the Fingerboard Jig is a 2-1/2" wide maple shelf to which the workpiece is attached with double-sided tape. The geometry of the shelf is such that the workpiece is centered and squared below the cutting slot, and centered above the pivot line. A slot and clamp on the front of the Fingerboard Jig receives the support arm.
The maple shelf of the Fingerboard Jig is not glued to the plywood under-shelf, it is held on with screws so that it can be adjusted with shims, or even replaced if necessary. Using folded paper as shim stock, the maple shelf is adjusted to have less than 0.2 mm vertical runout from side to side at any point along the entire length. Also, the runout from end to end is no more than 0.25 mm.
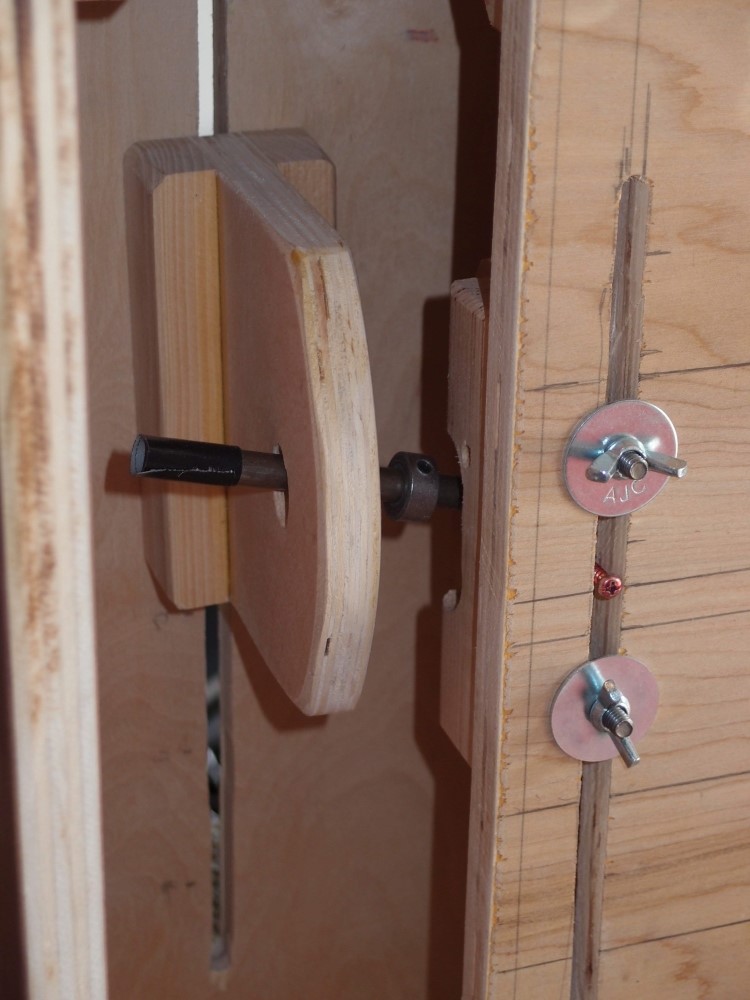
A pair of sliding braces mates with the slots on both the main jig and the Fingerboard Jig. A 3/8" steel rod serves as the pivot, with special angle bearings and lock collars to keep everything in line. The only part that is not readily available at your local hardware store is the bearings and collars, which can be found at McMaster-Carr ( mcmaster.com ). The short inner set of slots are not used.
Note that if you discard the compound radius feature, you can dispense with the rod and bearings, or at least the bearings, and just use simple straight pivots, similar to the sanding block jig below. Eliminating those parts means you can source the entire assembly from the hardware store, and save some money too. I would retain the rod for strength and ease of adjustment.
To adjust the radius, first the jig is centered and blocked up on the side supports, and held in place by tightening the clamp around the tension bar. I find popsicle sticks make good blocks. The braces are loosened front and back, and will then slide freely up and down. A small screw inside the slot is aligned with marks on the Fingerboard Jig, and then everything is tightened and the blocks are removed. Radius settings are infinitely adjustable, and different settings can be used on each side to achieve compound radius cuts.
The friction arm clamp is then loosened, allowing the jig to swing. In practice, keep the clamp tight enough to hold the jig in place, but still allow adjustments.
For actual cutting, I use a 3/4" bowl-cutting bit, with rounded corners. This bit leaves less tool marks than a regular square-ended bit. First, center the bit above the workpiece, and lower it to just above the center. Lock in this depth on the router. Pull the router to the end of the slide, and make a full cut down one edge of the piece. Move the Fingerboard Jig 1/8"-1/4", and make another cut. Repeat until you reach the other edge of the workpiece. This should leave a strip in the center uncut.
I find moving the jig incrementally and making full side to side cuts with the router gives better results than moving the router incrementally and jiggling the workpiece under it. By making very small movements of the workpiece and a lot of passes with the router, you can minimize the flats and crowns that will naturally result from this method of cutting.
Finally, sanding with a radius block will remove any tool marks and imperfections, and round over the uncut flat in the center.
Sanding Block Jig
To make radius sanding blocks, The Sanding Block Jig is installed into the Radius Jig. The Sanding Block Jig consists of two parts: a router slide that is a shortened version of the Radius Jig slide and mounts to the back of the Radius Jig, and a swing arm that mates with the Radius Jig in the same manner as the Fingerboard Jig.
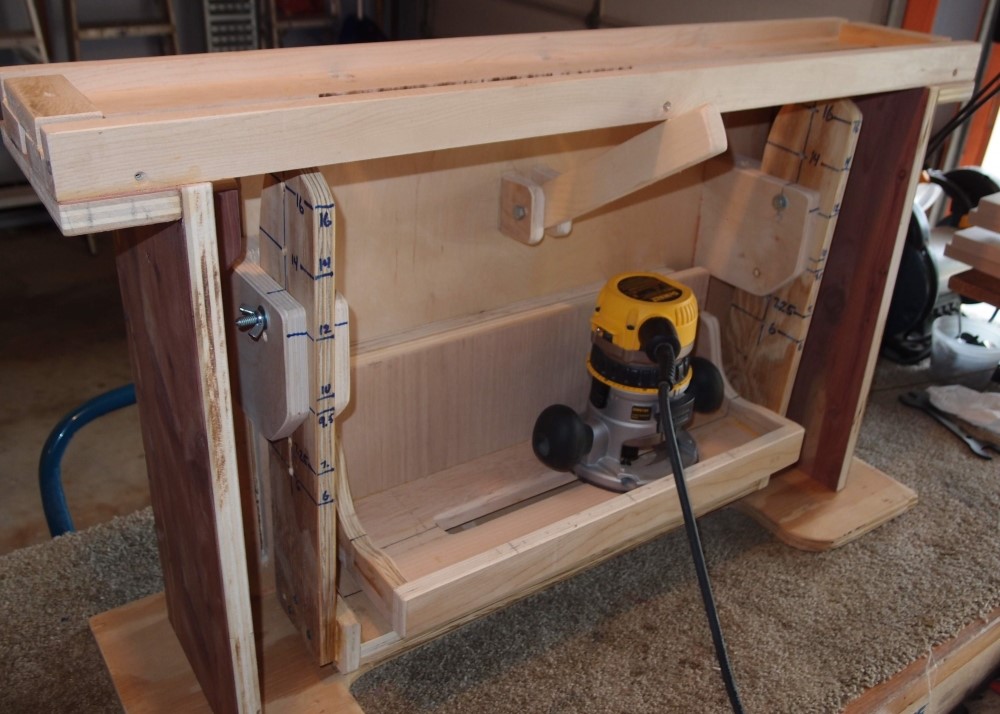
Sanding block jig assembled in main frame. The tight fit of all the components is apparent.
The cutting is now done on the inside of the swing arm, whereas above it is done on the outside, thus producing the opposite curvature.
To set up the Sanding Block Jig, first the friction arm is locked up out of the way. Then the swing arm is placed on a block and the pivot braces loosely attached to the back of the Radius Jig. I use a 3/4" piece of pine for a block. The radius is selected by moving the pivot braces between the pre-drilled holes in the swing arm, then the pivot braces are secured tight to the Radius Jig.
The pins for the braces are 5/16" bolts with wing nuts, and the braces are double-sided for greatest strength and stiffness. Note that you can't use a continuous rod for the pivot here as above, unless you want to drill a hole through your router, which would probably void the warranty.
The workpiece is installed to the pivot arm with double-sided tape. The workpiece is assumed to be 3/4" x 3.5" dimensional maple, easily available at any hardware store. The maximum length is 10-11". Another 3/4" block is then placed on top of the workpiece, and the router slide is then installed snugly on top of it. Both blocks are then removed.
Questions or Inquiries?
Just want to say Hello? Sign the .