Nut Slot Jig
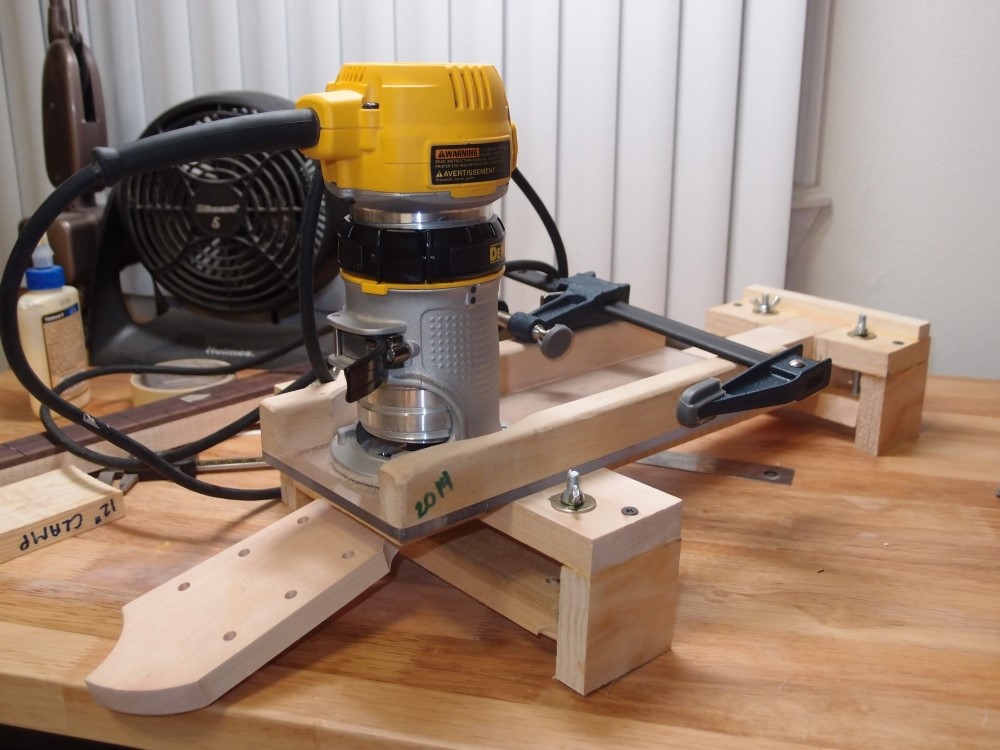
Cutting nut slots ( the slot for the nut, not the slots in the nut for the strings ) has always been a pain in the ass. I've done it with the table saw, with the fret slotting jig, and freehand with a file, and it is always more adventure than I like. There has to be a better way, and this contraption is it. ( The gray clamp is not part of the jig, it is just there to keep the router from tipping off. )
The whole thing is made from scrap wood and fasteners from the Big Screw Box. The front clamp is wide enough to allow the necessary sliding room for the router. The back clamp is just wide enough to fit the heel. Two strips of yellow binding scrap allow for the curvature of the fretboard. The bearing surfaces are hard maple, the rest is pine or whatever, I think there may be a piece of poplar in there as well.
Here you can see a neck clamped firmly in place, aligned to the front edge and the long axis of the jig. A follower attaches to the router base using the holes for the binding guide and is adjusted so a 1/4" bit will cut flush. Set the depth of the bit, and make one pass. Couldn't be easier.
This thing went through a number of evolutions. Much of the design was driven by whatever bits of scrap I had handy. Then it got cut up and put back together because I didn't really know what I needed at first. So it is a cobbled-up mess.
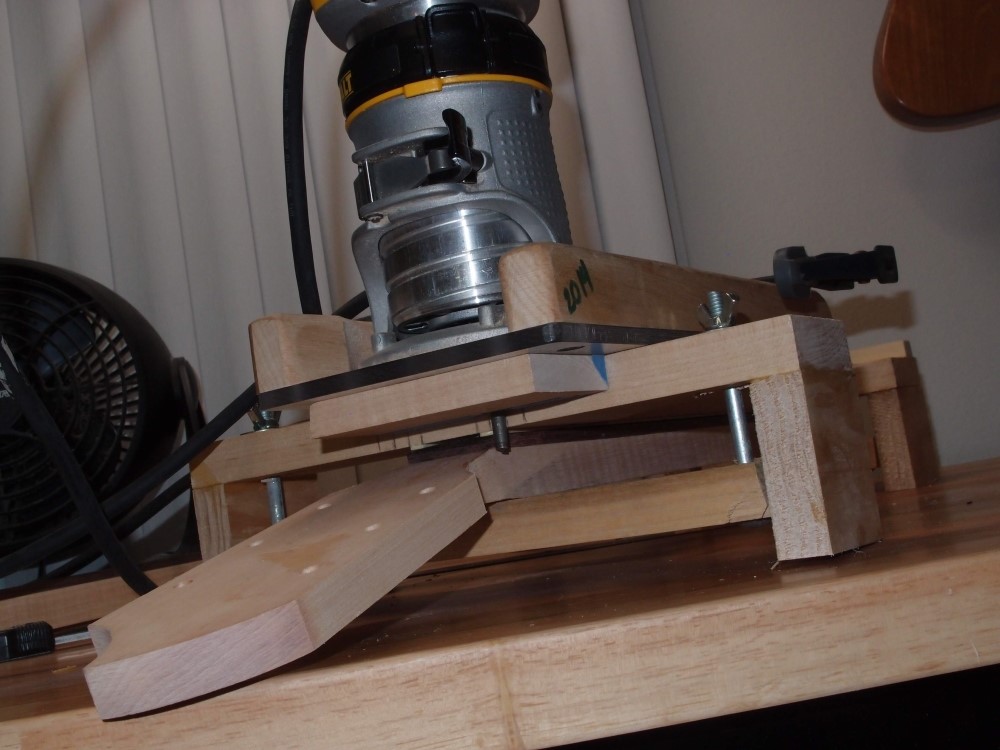
At first, I thought to use a guide bearing on the router, but that proved too difficult to set up accurately. The follower works like a fence and is a no-brainer to set up. I also went around with the clamping arrangement until I came up with something that is easy to set up and adjust, and solid. The clamps work from the top with wing nuts, and the whole thing has a tendency to stay together as you adjust it, as opposed to falling apart. When not in use, the follower can be clamped into the jig so it doesn't get lost.
I also cut up a carriage bolt to make a 1/4" shaft that I can chuck in the router as a setup guide. The bolt diameter is actually 0.244", close enough for woodwork. The follower can be fine-tuned with the wiggle room of the screws, and/or masking tape. I also scribed a line on the router base for a starting point. I could cut the other side of the follower to do a 3/16" Fender-style nut slot.
Seems like a whole lot of bother to make one little cut, but I'm looking at 8 of these to do, so it is worth investing the time in a jig. Also, this may be a small cut, but it is a critical step that is pretty late in the build - screw it up, and you lose everything you've done, including an expensive rosewood board. It's too late to try it tonight, tomorrow I'll make some test cuts in scrap, and if it works, I'll do some necks.
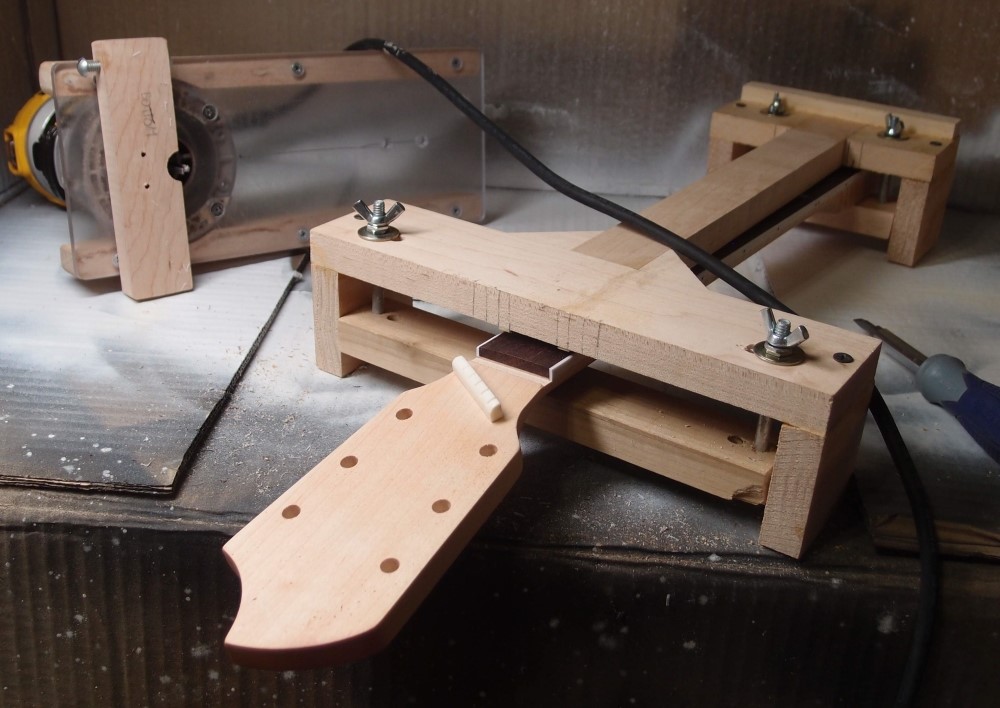
Here is the nut slotting jig, with all the details finally worked out. Behind is the router with the guide attached, and a 15/64" router bit that almost exactly matches the width of the nuts I am installing. The guide is adjustable by the bolt in one end, which carries a nylon cap nut, much like my binding guide. However, this guide only needs to make a short straight cut, using the adjustable part and the other corner against the edge of the jig.

Questions or Inquiries?
Just want to say Hello? Sign the .