Silvertone 1472 Amplifier (2/3)
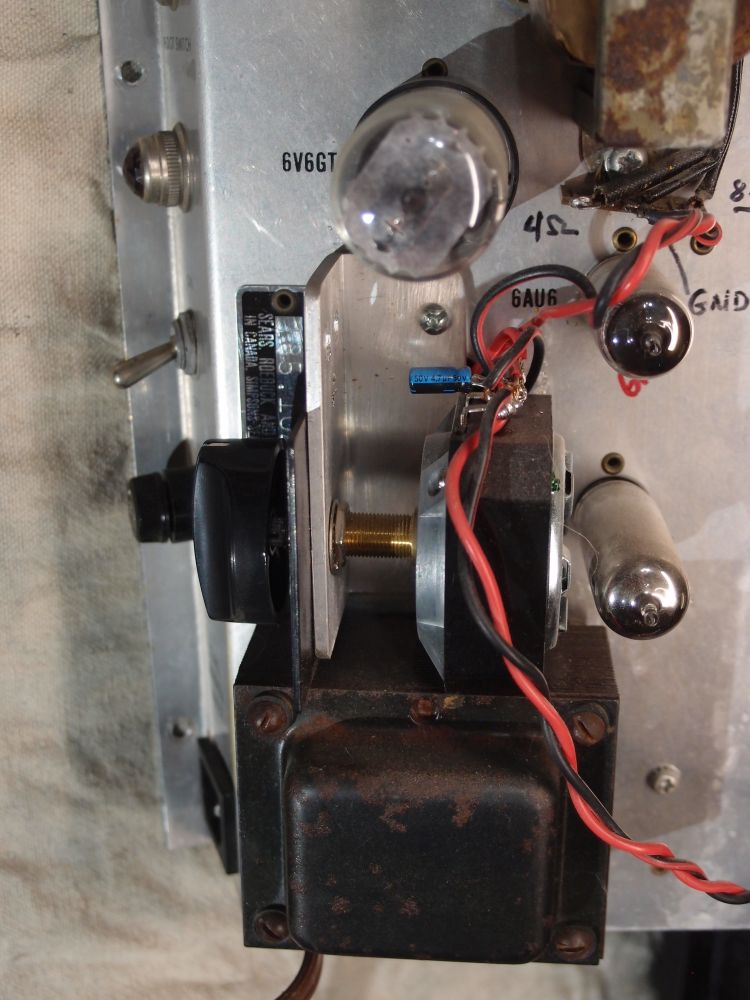
Now comes the fun - modding. The 1482 is an up-rated version of the 1472, 15 watts vs 10 watts. It is the same circuit, but with some of the component values changed to drive the tubes harder. It would be easy to make a 1472 into a 1482. I chose not to do that, since louder would also be higher voltage and hotter, and shorten the lives of those sixty-year-old power tubes. Instead, I did the opposite - I added an attenuator, to make the amp quieter, rather than louder. I also added a P-CF22707 choke to the power supply for noise suppression, exactly the same as I did on the 1457 amp. The choke is inserted between the 6X4 rectifier tube (pin 7) and the first filter cap C17C, where the circuit diagram is labeled 270v. It goes without saying that I changed the power cord to a modern detachable three-prong plug and removed the 'death cap' C18. You can see the new power jack at the bottom. At the top, I added a switch to internally jumper the two input channels together. Finally, I moved the power switch and light to the front panel. The result is this:
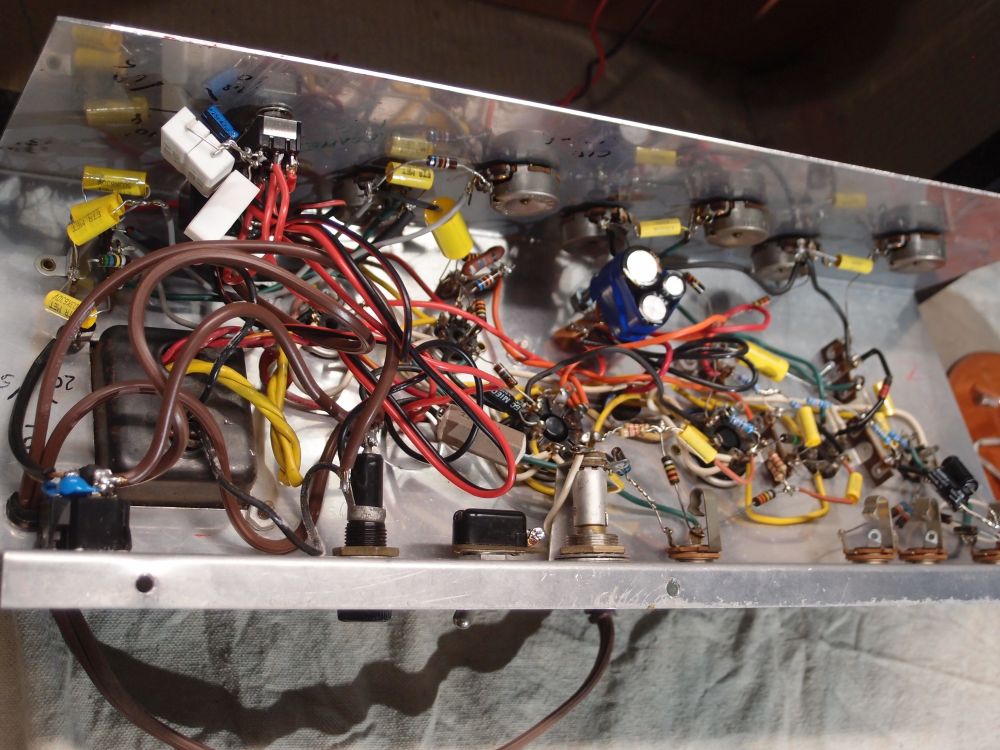
Looks like a mess, but there's a lot more going on now. In the center, the power supply filter caps sit on a new terminal strip; they were once external. The power lines now cross from the jack at the back to the new switch at the front. The old disused power switch and light are still in place. Part of the attenuator circuit is also inside the amp chassis - the big white block resistors and associated switches.
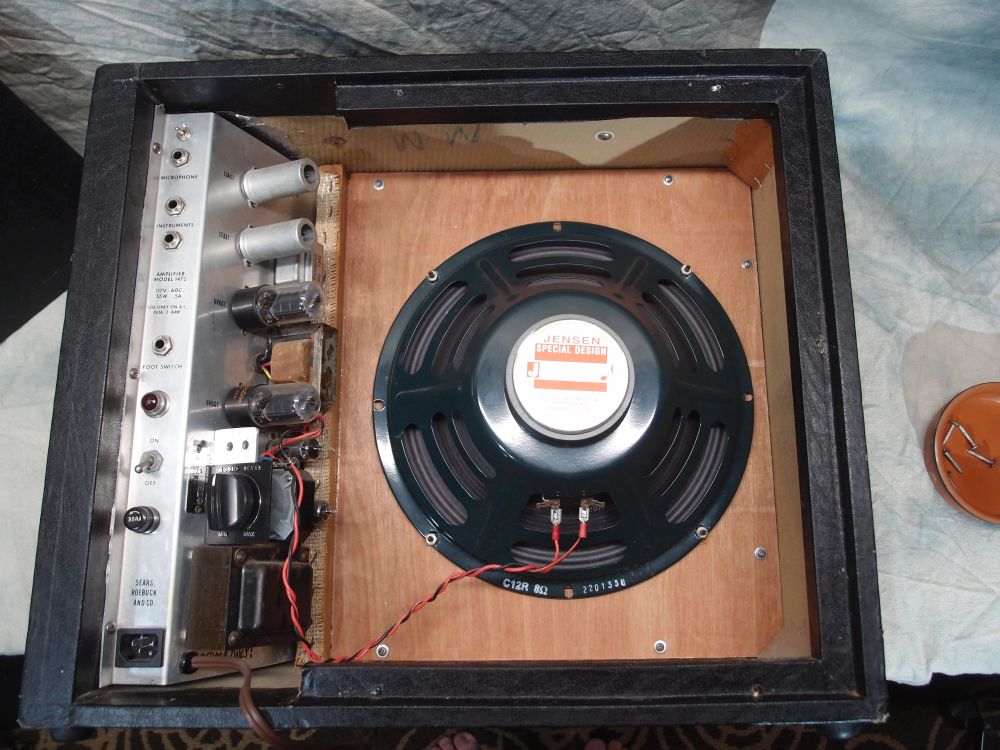

From the outside it is still pretty neat - the new power jack and input jumper switch look like they've always been there. The brown cord is an accessory power outlet that can be pulled out for pedals and such; cut from the same extension cord that donated all the brown power wires inside the amp. It uses the old power cord grommet. The new choke sits behind the preamp tubes, while the L-pad for the attenuator occupies the spot where the power supply capacitor can once sat.
Originally, I was happy enough with the power switch and attenuator controls all on the back, until one day I forgot to turn the amp off. With my modifications and the attenuator engaged, this amp is very quiet now, and with the power light on the back, there is no indication that it is on. Eventually it turned itself off - the rectifier tube burned out. Fortunately, an easy fix, but it got me thinking - I don't want that happening again. That's when I moved the power switch and light to the front, and while I was at it, the two attenuator switches, leaving the two empty holes in the bracket.
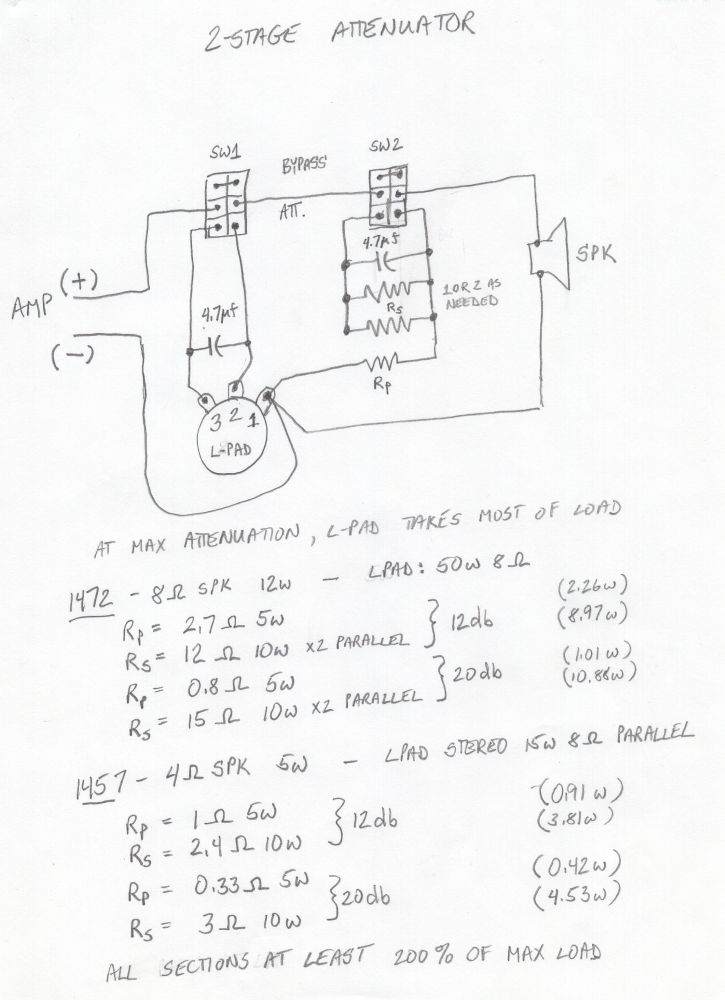
For the circuit above, the 1457 amp is nominally 5 watts at 4 ohms, while the 1472 is 10 watts at 8 ohms. The idea is to bleed off power while maintaining a constant impedance to the amp. This lets you get nice natural tube distortion without the neighbors calling the police. For these small amps, heat dissipation is not a problem.
The LPad is the first stage and does most of the work, the fixed second stage can be switched in for even more quiet. The 50 watt LPad should be sufficient for at least a 20 watt amp. The capacitors suppress audible pops from the switches.
Each circuit has two options for the fixed second stage, one for 12db and one for 20db - choose one. The values of the fixed resistors depend on the impedance of the speaker. For simplicity, just omit the second stage, it is not necessary, I was just experimenting.

Here's another look at the front - I think I did a pretty neat job with the switches, looks almost factory. I could have moved the L-pad to the front as well, but that would have obliterated the logo and added a non-matching knob. The attenuator switches give enough control that you seldom need to adjust the knob anyway.
So, did I commit sacrilege, turning this old amp into something modern and practical? I don't think so. I did all this years ago, so I may not be remembering all the details quite right.