Audiovox Batch Builds (2/5)
Jun 4, 2016
Routed out some pickguards last night
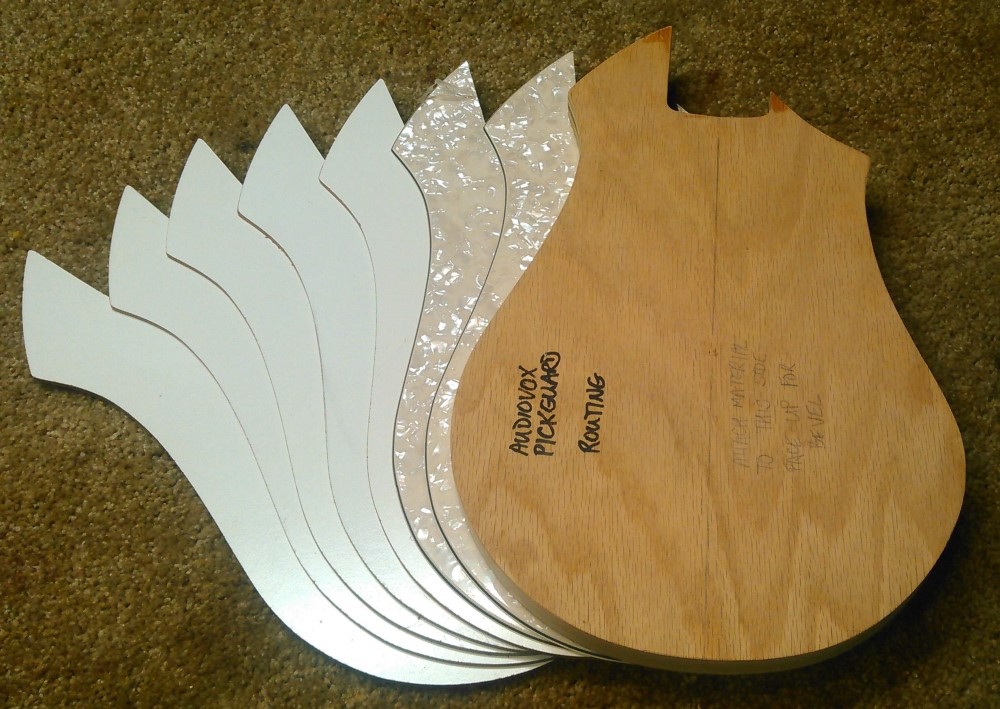
Two of them are pearl plastic, each one requires an entire blank, with a lot of waste. The only other pickguard that uses an entire blank like this is the Precision bass. The ever-cost-conscious Leo Fender must have realized that was a mistake, and never repeated it. It would have gotten too expensive for me to make them all that way, so the others are 3/16" Masonite, a la Danelectro, for about 50 cents each. You can get a Masonite 'blank' at Home Depot or Lowes for about the same price as a guitar pickguard blank. The difference is, the masonite blank will be 4 feet by 8 feet! This is pre-finished white on one side, it is typically unfinished very dark brown, which you can see around the edges. The white finish is not really good enough to use itself, but it makes a good base layer for whatever you want to do with it. A thin coat of flat white enamel and several coats of water-based polyurethane will do for me ( water-based poly does not yellow like oil-based. )
There are a lot of nice things about Masonite pickguards: They require far fewer screws - Danelectro would attach quite expansive ones with as few as three screws, and they stay flat and tight just fine. The screws are also typically not counter-sunk, which saves a lot of bother, although there is no reason you could not counter-sink them if you want. I think just four screws each should be enough for this shape, nice and neat; the plastic guards will take twice that number. The edges of a Masonite pickguard are square, not beveled, which saves a really bothersome second routing stage, although you could bevel them if you want. I would use a standard angled laminate bit rather than a 45-degree bevel if I was going to do that. You can either paint the edges the same as the face, or sand off the over-spray to get a quick black(ish) outline. You can paint them any color you like, then put a tough protective poly clear-coat over it. Or you can just clear-coat it directly - Masonite 'grain' looks really cool under a polished clear finish. The same material also makes nice body faces - no wood is as smooth and even as Masonite - it is by far the easiest material to finish, and is also easy to cut and route. Drawbacks of Masonite are that it produces the most awful fine choking dust when working it, a breather mask is essential. Also, Masonite swells on contact with water, which can be an issue when wet-sanding and polishing a finish. Fill-in all pre-drilled holes prior to finishing, leaving just dimples to mark the locations, then drill them out after all the wet-work is done. This is true of wood as well, but Masonite swells really badly.
A proper template is critical for routing a pickguard. It supports the workpiece and provides a guide for the router. While these bodies are hand-made to very close tolerances, the pickguards are exact - you can stack them like a deck of cards. I probably spent more time making the template than cutting out the pickguards from it. This template is 3/4" cabinet-grade void-free oak plywood that I trash-picked somewhere. A certain lack of pride can save a lot of money. If I was making just one pickguard, I might have just traced it out on the material and shaped it on the belt sander. You can make a beveled edge by hand with a file - that's what I did on my first Audiovox build. But I would recommend that only for a small simple piece, like a Les Paul or a Hofner. For a project like this, I would make a routing template first, even if I was making just one.
Tooling is important, I'm now up to five templates for this project: body, cavity, 2 pickguards, and headstock. I'll need to make a couple more for pickups and battery boxes. That takes time up front, but saves work in the end.
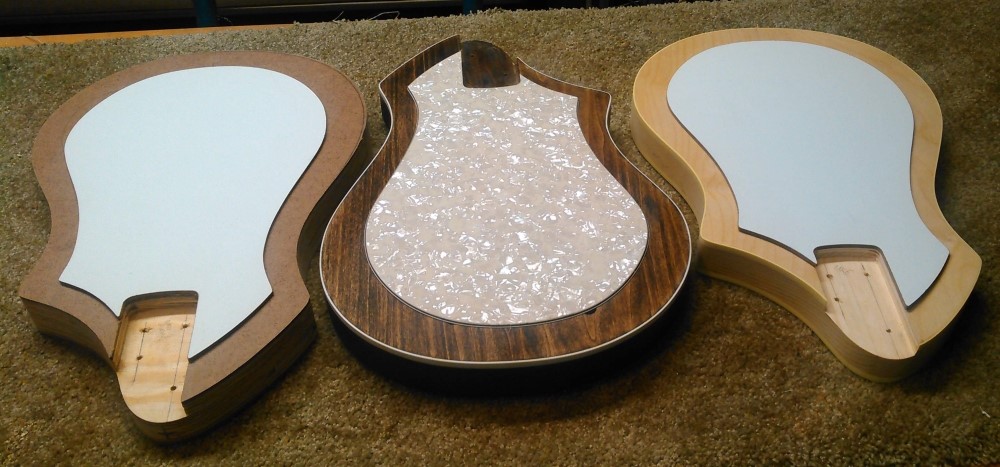
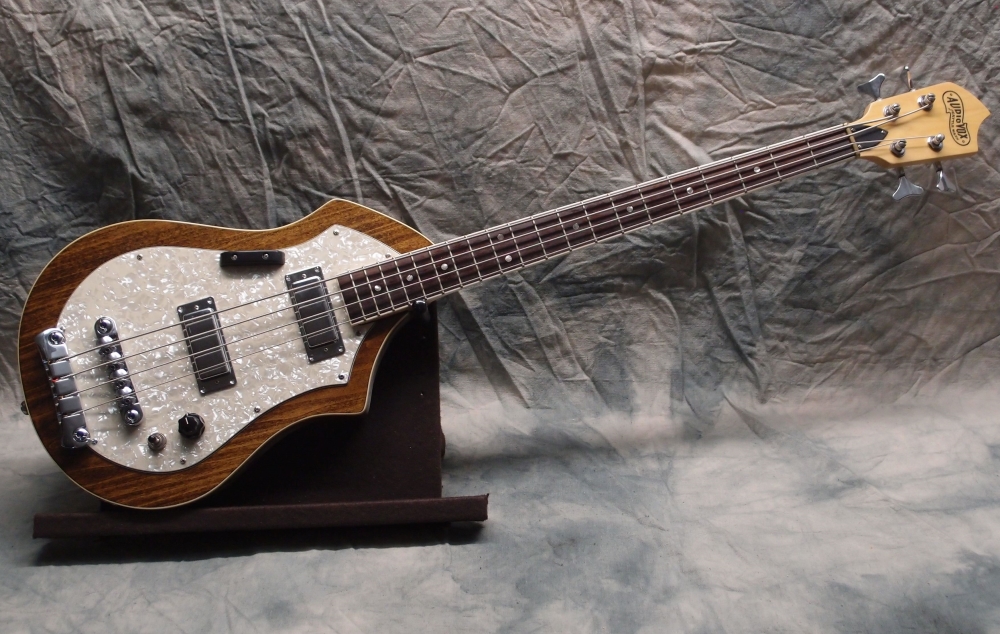
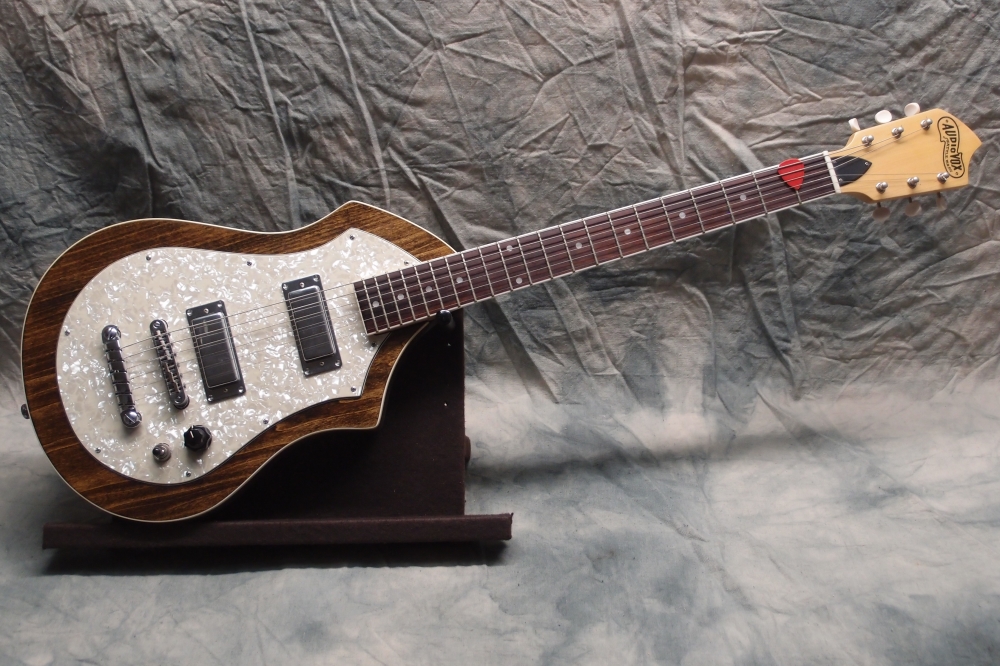
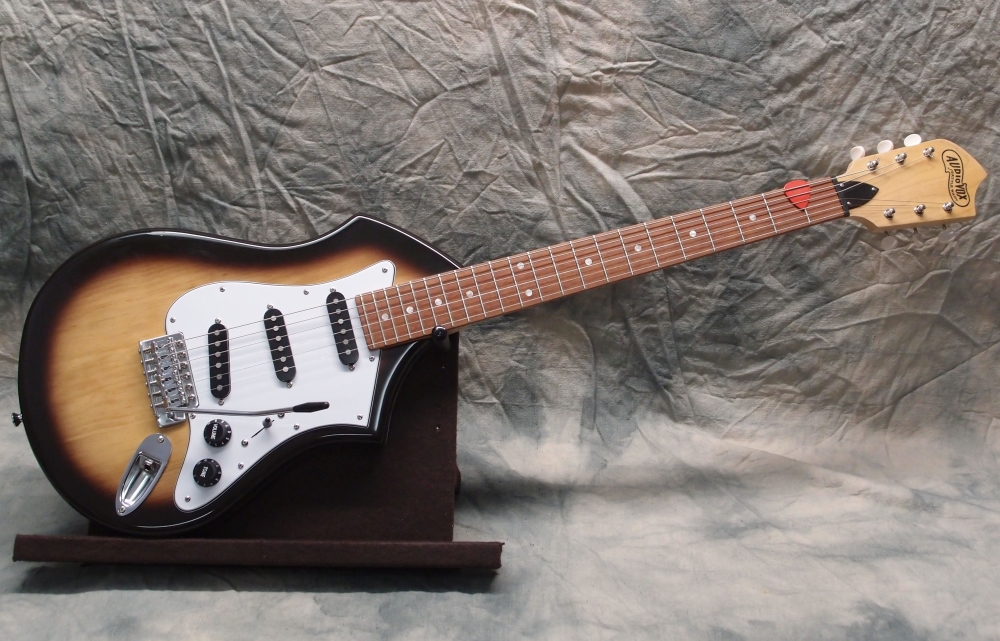
These are the three different body styles I'm working on:
On the left is a modern Danelectro Masonite over a chambered plywood core. Again, the plywood came from a dumpster. Those will get a painted finish with Danelectro-style Tolex binding. Probably a cream-pearl black-burst, I haven't made a final decision. In the middle is solid poplar stained to walnut, with single white binding. Better lumberyards will often stock 'non-dimensional' poplar up to 13 inches wide by 7/4 thick, which is entirely suitable for this style of body.
On the right is 1/4" maple plywood over a chambered pine core, with amber binding. The core is 8" x 5/4" white pine stock from Lowes that is good enough to edge-glue into guitar-sized blanks. Pick through the pile to find the straightest clearest piece. With 1/4" plywood faces, you get a very lightweight body with a thickness of about 1-5/8". Note the nice color match between the pine sides and the maple veneer faces. There are some small splotches of dark pine pitch showing, but I can live with that. Most pieces come out clear; there's no telling if that will happen or not until you actually cut it out. The pine is soft and easy to work with, but hard enough for a guitar body when finished, and in any case, less of it is exposed after binding. The plywood is very hard and resistant to dings. This nice maple plywood can be ordered from Home Depot in 2'x4' sheets. Lowes sells 4x8' sheets in-store, but they're not as nice; picking through the pile could find a good one. The drawback of this plywood is that the good veneer is very thin and if you sand through it, the project is ruined. I won't touch it with anything coarser than 320, and put a protective coat of poly on it as soon as possible.
Bindings are a nice touch, but a lot more work than a simple round-over. On the solid body, it is purely a decorative touch that I decided to add while doing bindings on the pine bodies and realizing that I had really perfected my binding jig and it was not that difficult. On the piney bodies, the bindings are essential to cover the edges of the plywood. It is nearly impossible to completely hide the fact that you used plywood, no matter how you fill and paint it. On the Danelectro bodies, it doesn't matter, the glued-on Tolex binding covers all sins, and a little roughness just makes it adhere better. The masonite faces get a 1/4" round-over which just touches the plywood core, the glue joint disappears under the finish. 'Classic' Danelectros actually used a bevel cut on the body edge, but a round-over is easier to work with during finishing. No reason you could not use plastic binding with a Masonite face.
The next step is to drill and screw the pickguards to the bodies, and then route out for the pickups and other hardware. I have kits for a guitar and bass of each, including a 12-string and a fretless, and one more for a uke bass. The necks will all be flamed maple, angled headstock, with various fretboards. If I use a maple fretboard, I can source all the neck woods from Home Depot and Lowes. I have a stock of nice flamed maple for fretboards, and a selection of other woods and a few pre-made fretboards. The necks are all at a very crude stage right now. The neck attachments are use ferrules, as a standard neck plate obviously wouldn't work. I like ferrules, they let you do anything you want, and set flush with the wood. Fortunately, I can use standard truss rods, shortened to fit, rather than build them from scratch. That will save some work.
Progress is slow, as I am working on all of them simultaneously. I'm going to be busy with these for a long while, and I have a couple of other projects in the works as well.
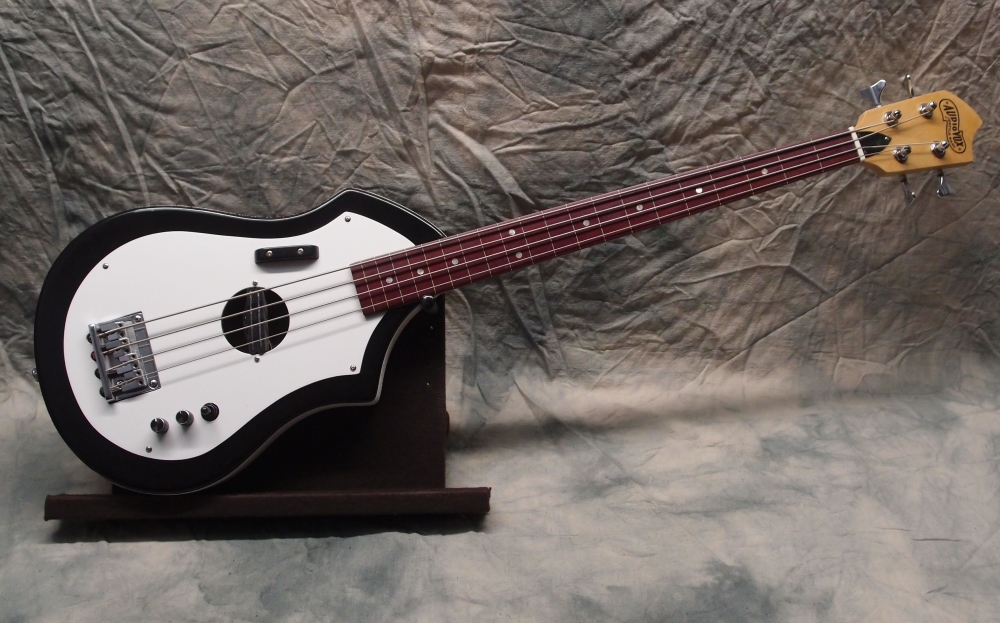
I decided to go with my original impulse - chrome side jacks, for a nice uncluttered pickguard and a bit of extra shiny. The original Audiovox had just one big black volume knob, mine will have a concentric volume/tone and a pickup switch. That's reasonably modern, and simple, I'm tired of wiring up monstrosities. Also, I want it to be reliable, as getting into the electronics for repair will require removing the bridge. If the jack goes bad ( don't they all? ) it is easy to fix without disturbing anything else. So I sharpened up my 7/8" Forstner bit and made a surprising pile of sawdust.
Jun 20, 2016
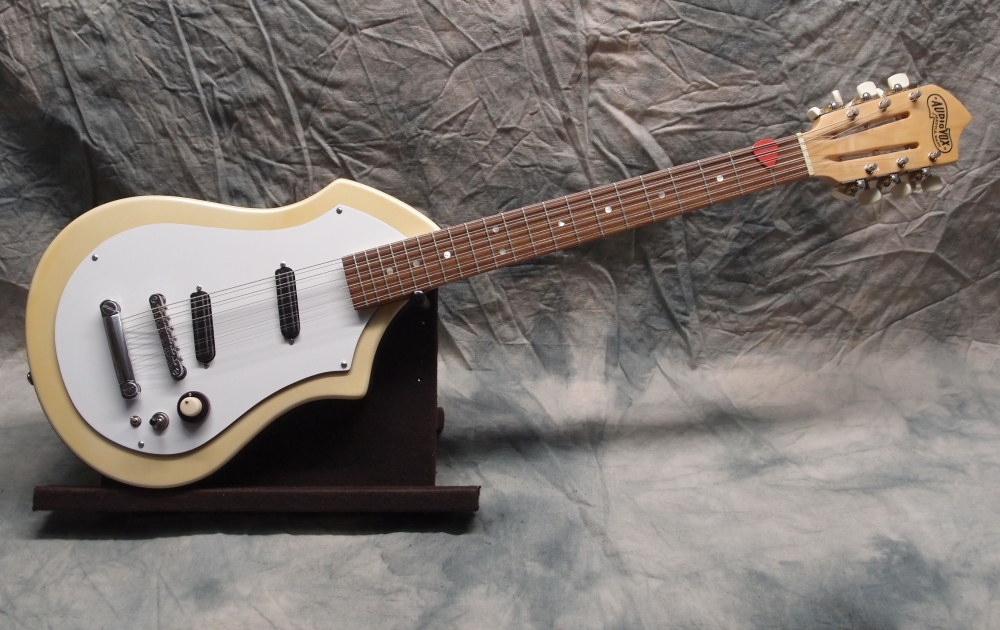
Finally starting to look like something
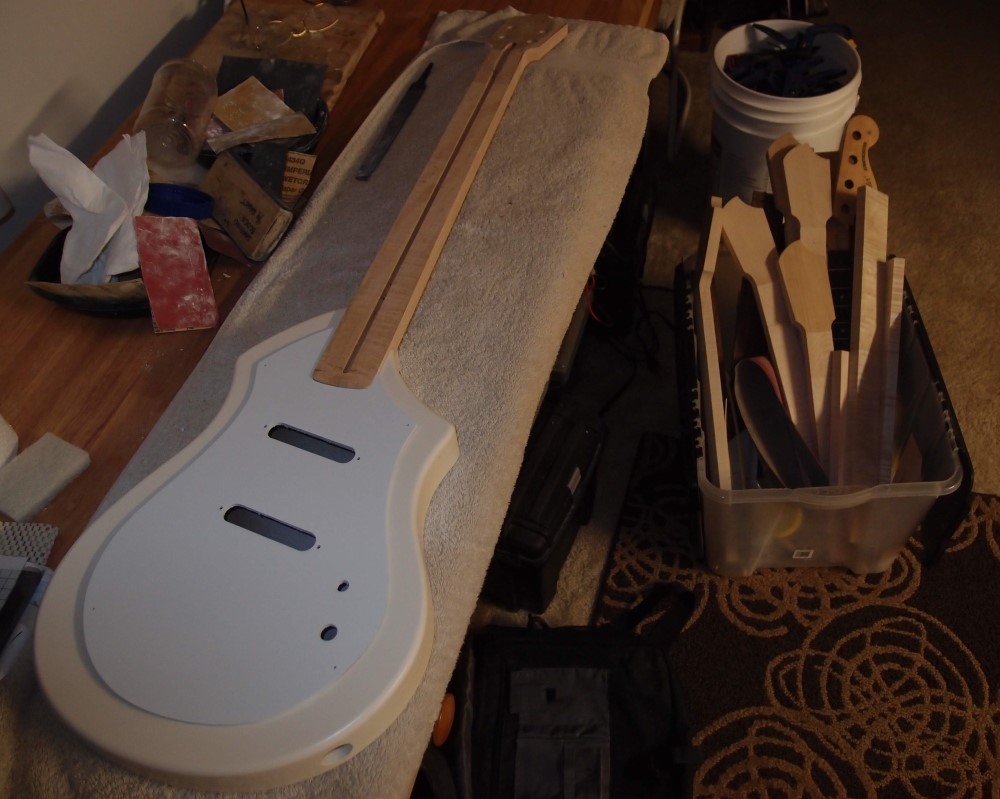
Here is one of the masonite bodies, with pickguard and neck fitted. The body is looking very plain in just a base coat. The neck pocket is standard Stratocaster, just a bit narrower than a standard Fender short-scale bass. On the floor is a bin full of rough necks and parts. Some are guitars, and some are basses.

Hard to see, but now I have a coat of pearl over the base paint. I need to sand off the edge of the pickguard for a dark stripe. A thin black burst around the body edges and white tape binding should look sharp.