Fretboard Inlay Jig (2/2)
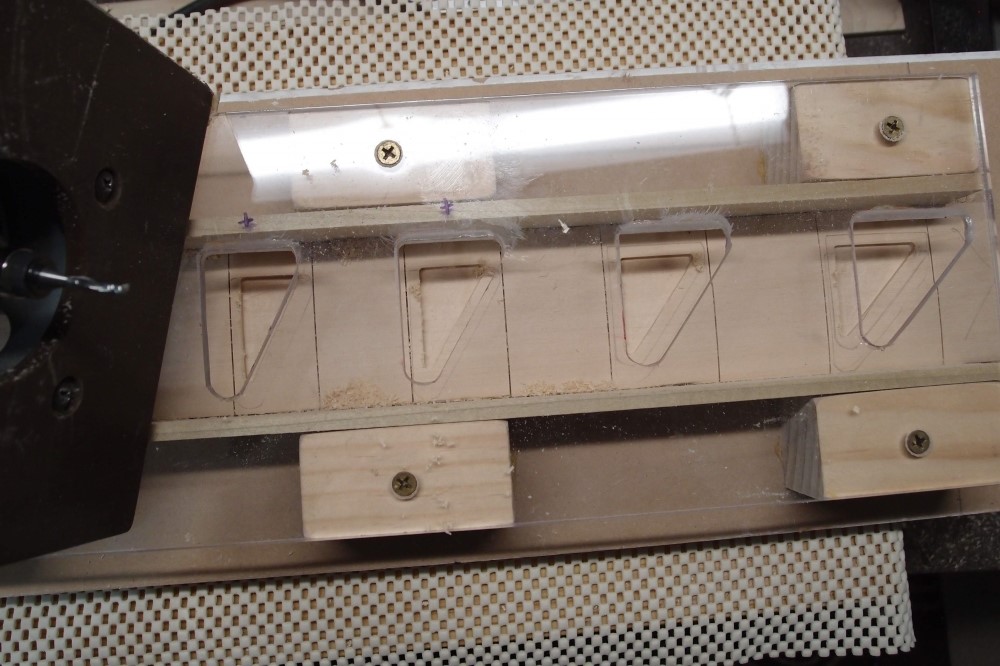
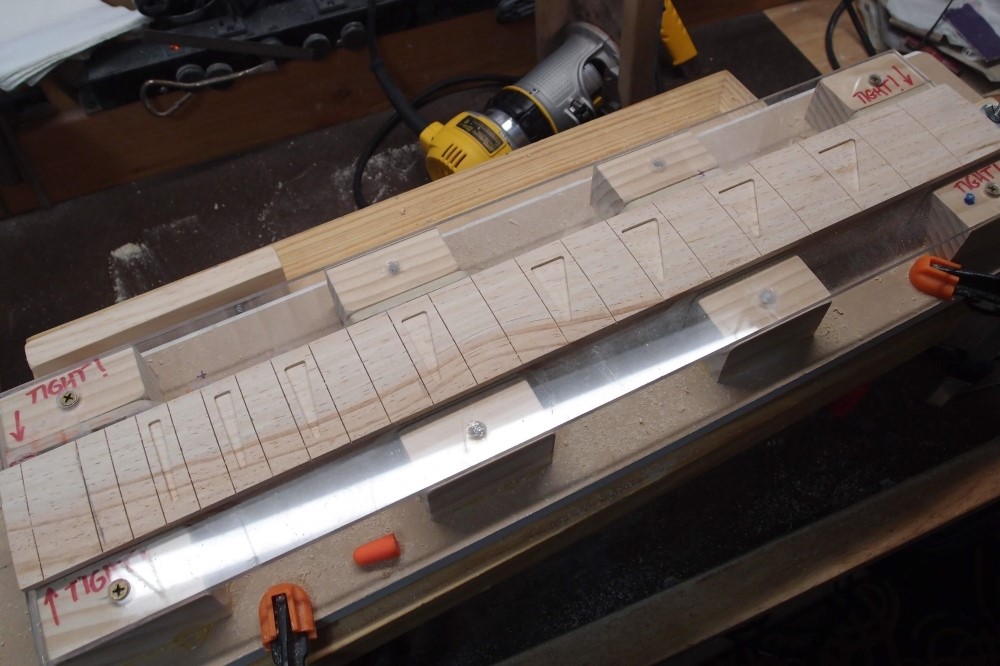
After much fussing, I finally got the shark-fin template working. This is no longer a template, but a jig. Here are my first test cuts in an old maple fretboard that I will never use. I bought this one, and my own are much better, but it makes a good test piece.
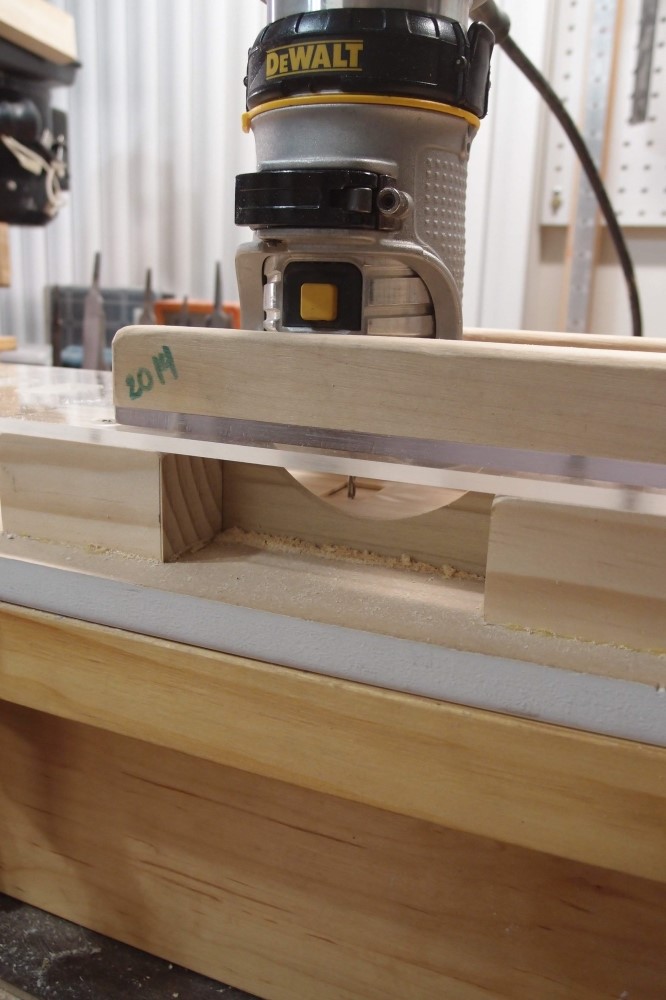
The jig is very simple - just put the piece in, line up the slots, and cut. To line up the slots, pull the piece up against the bottom of the template, line it up, and set the end stops. Then push it down and cut. I still need to build the end stops, for this cut I just used blocks and clamps.
I used a spiral up-cut bit, and it worked fine. But I think a down-cut would be a good investment for this. The 1/8" bit is a good compromise between small corner radius and cleaning out the center. It's the same as my 4001.
I found that the Loothier-grade walnut blanks I bought were all just a tiny bit out-of-square, so I spent a while making them fit in the jig. The center-line finds itself.
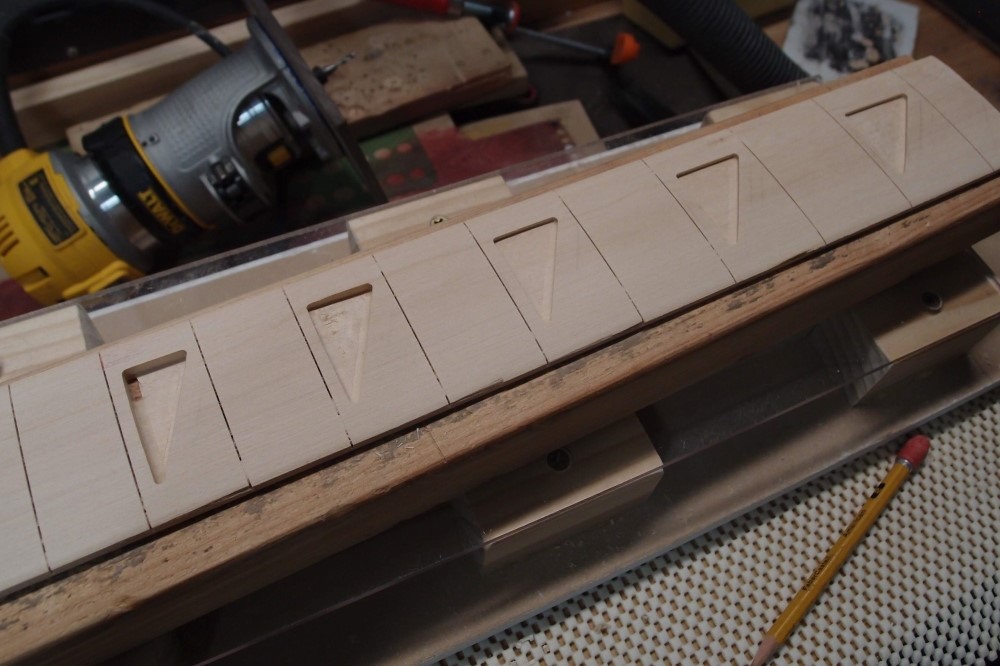
Here's a better shot of the results, sanded down a bit. You can see I went through on the very first cut. After adjusting the depth, the rest was a no-brainer. I can see a few spots that still need to be adjusted, but it is about 99% perfect. Once I get everything ironed out, I will be able to repeat this easier than drilling dots !!!
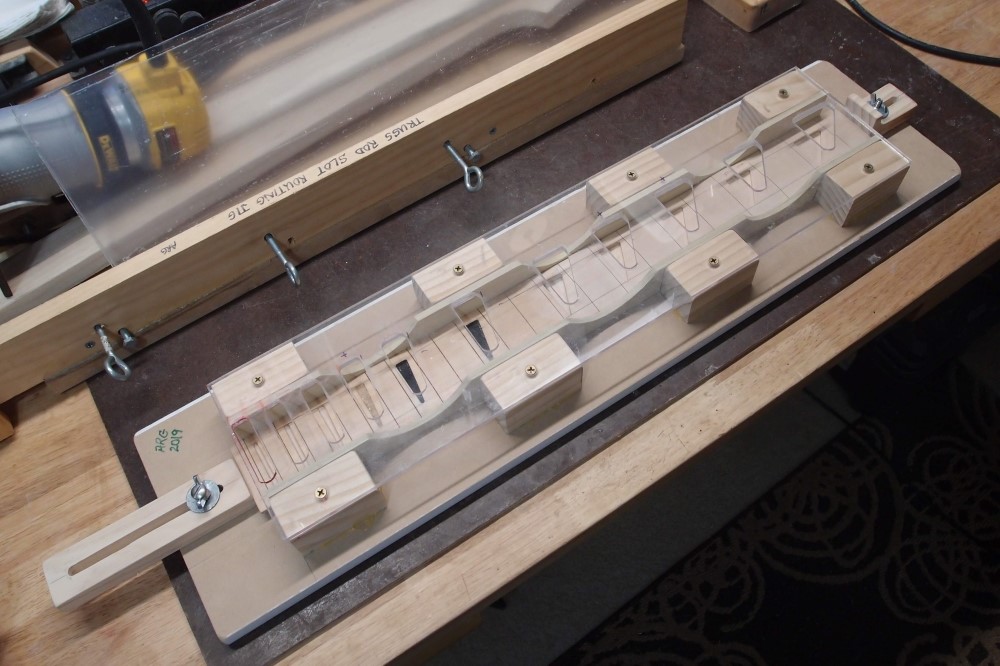
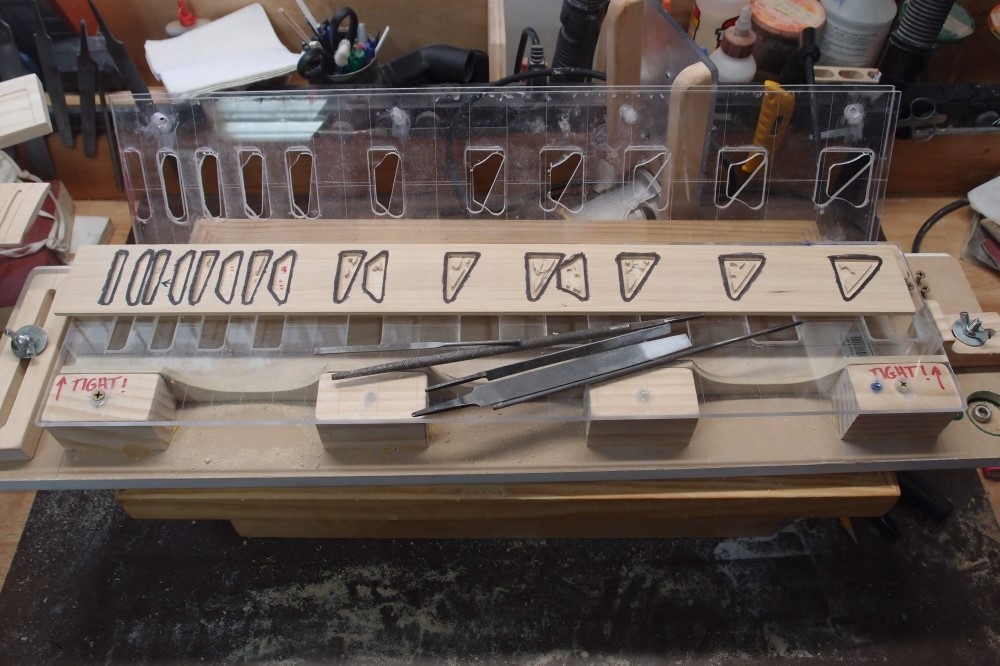
Here is the finished product. At the right end is the main adjusting stop, to line up the inlays with the pre-cut fret slots. To set up, pull the workpiece up directly under the template, line it up, and tighten down the main stop. Then push the piece back down and set the tail stop.
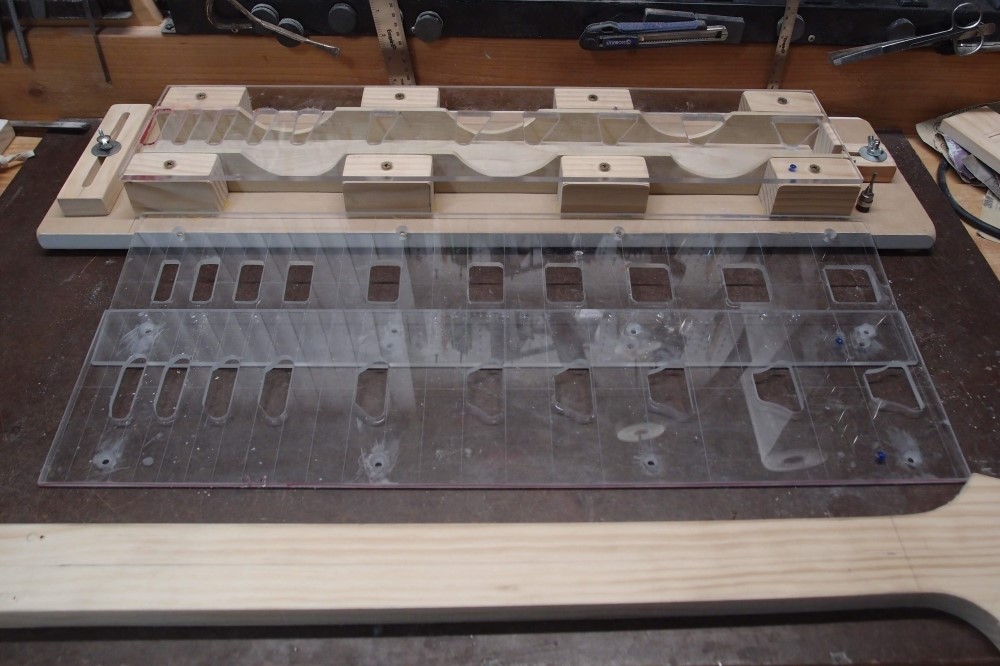
The templates are scale-specific. This one is 32". The minimum size of any slot in the template is dictated by the router bearing - 1/2". It would be nice to make a template that does all scales, but the slots would always run into each other at the high end. The nice thing about using a bearing is that it evens out any small bobbles in the template.
The jig accepts standard 3" wide blanks and 2-1/2" wide blanks with shims. It is a tight fit, most pieces will have to be straightened and narrowed to fit. There is a 1/4" spacer below the workpiece that could be swapped out or omitted for a thicker fretboard. Spacers could also be added under the clear template.
The workpiece can be pre-radiused or not. I assume it is pre-slotted, but that is not strictly necessary. With almost any slotting jig, it is going to be easier to line up the inlays between the slots than to align the slots between the inlays.
The material for the template is 24 inches long, which sets the limit on how long a piece you can make. At the high end, your pattern is going to collapse to a line anyway. The left-most slot in the template is reddened because it is out-of-place - it should be the second octave, one fret further over.
This suggests an alternative where the template openings are to scale but the spacing is not. You would have to re-align the workpiece for every cut. That way madness lies, methinks.
There are no hold-downs, just use your free hand. A pencil with a rubber eraser will reach down through the slots. I could add hold-downs if it ends up being necessary, but right now that seems like a needless complication.
At the left is the tail stop, which is fully removable to allow the workpiece and shims to be inserted. There are now access windows in the side shims, and I tweaked the triangles where they needed it. The top comes off with 8 screws.
Total cost: about $40, including two more pieces of clear material, and whatever junk and fasteners I had lying around.
I should have made the base plate 6 inches longer, but it works, it just took some fussing with the end stops.
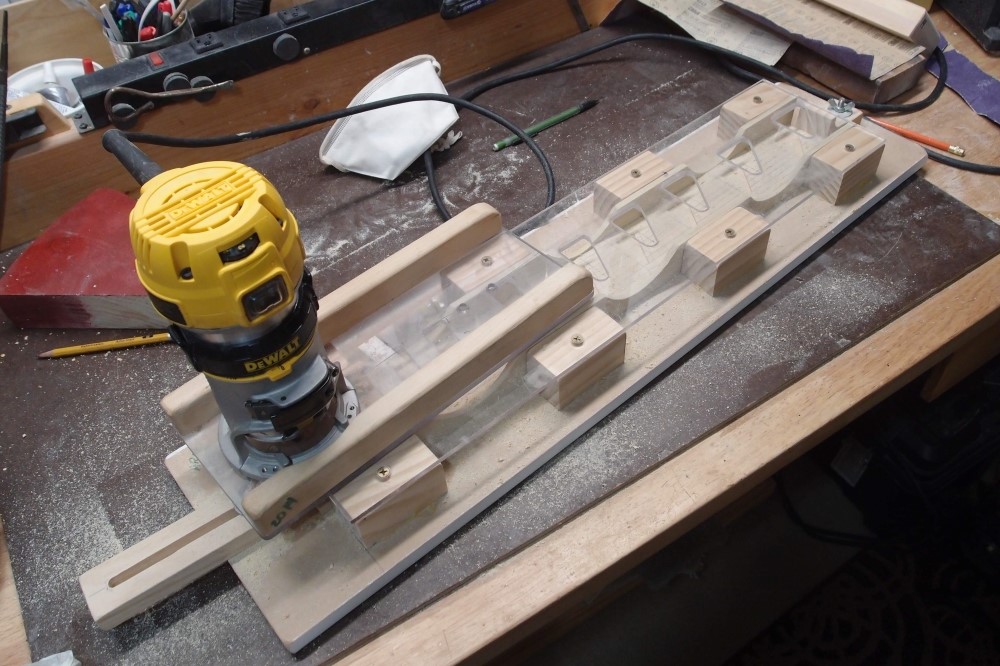
This thing then went through exhaustive testing. I'll skip all that.

Questions or Inquiries?
Just want to say Hello? Sign the .