Angled Headstock (1/3)
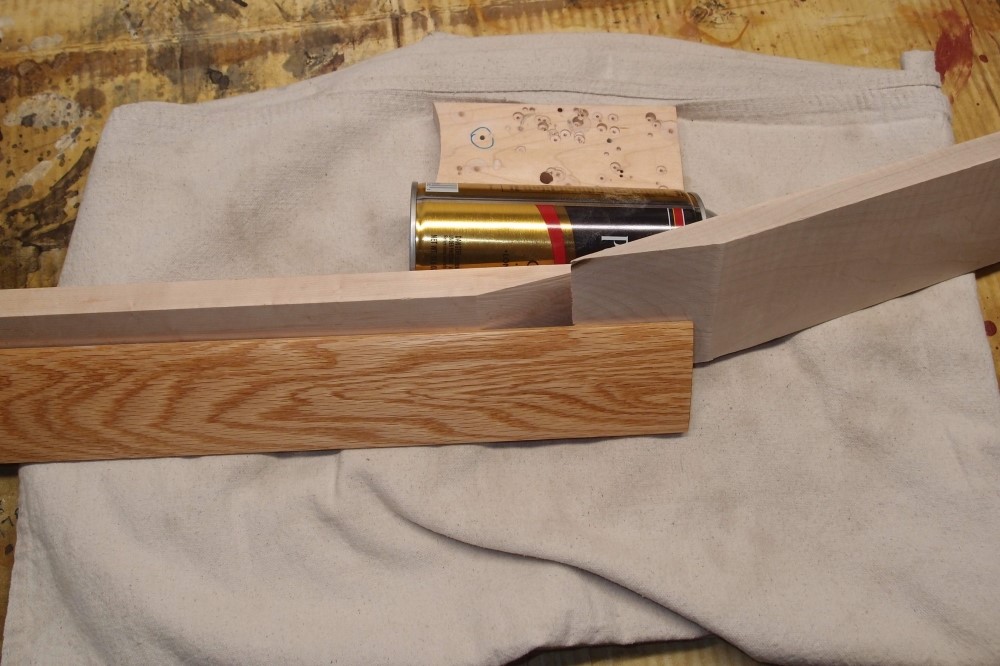
These three pieces will go together as shown to make a very strong angled headstock. This construction, known as a 'scarf joint', sandwiches the headstock between the neck and the fretboard. Unless the glue fails ( which has been known to happen ) this joint will never break. It also has the advantage of being very economical, as the neck piece only needs to be as wide as the neck, not the headstock. You can use 2-1/2" (3") lumber for the neck and 5-1/2" (6") for the headstock.
[[ That is that piece of oak I started with a few posts back. Looks like yellow rosewood, a lot more interesting than maple, but also a lot more work. ]]
Before going on with this, I should mention the flat Fender-style headstock. For this you need a single piece of wood that is wide enough for the headstock and long enough for the entire neck. That means more cost and more waste. Rickenbacker solves the waste problem by gluing wings onto a narrow neck piece to create the width for the headstock. To hide the glue lines, they sometimes use a contrasting wood, very clever.
All of these can be constructed using ordinary 3/4" maple lumber from the hardware store. Oak would also be plenty strong enough, as would yellow pine or Radiata. Poplar can be made to work, but requires a little extra thickness and a strategically placed volute.
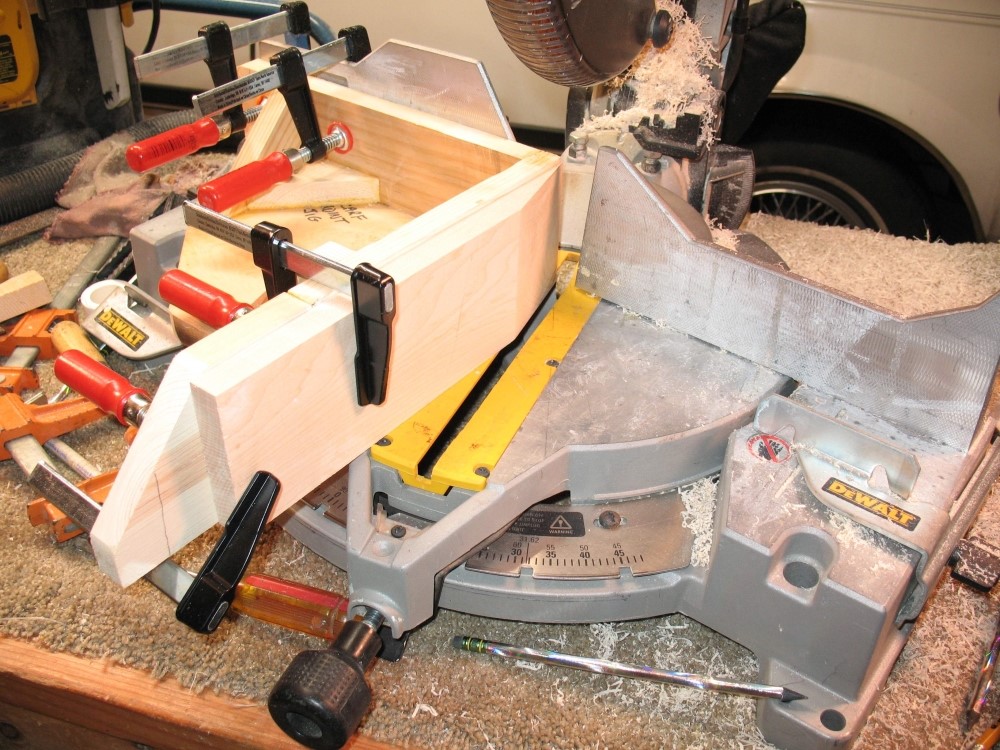
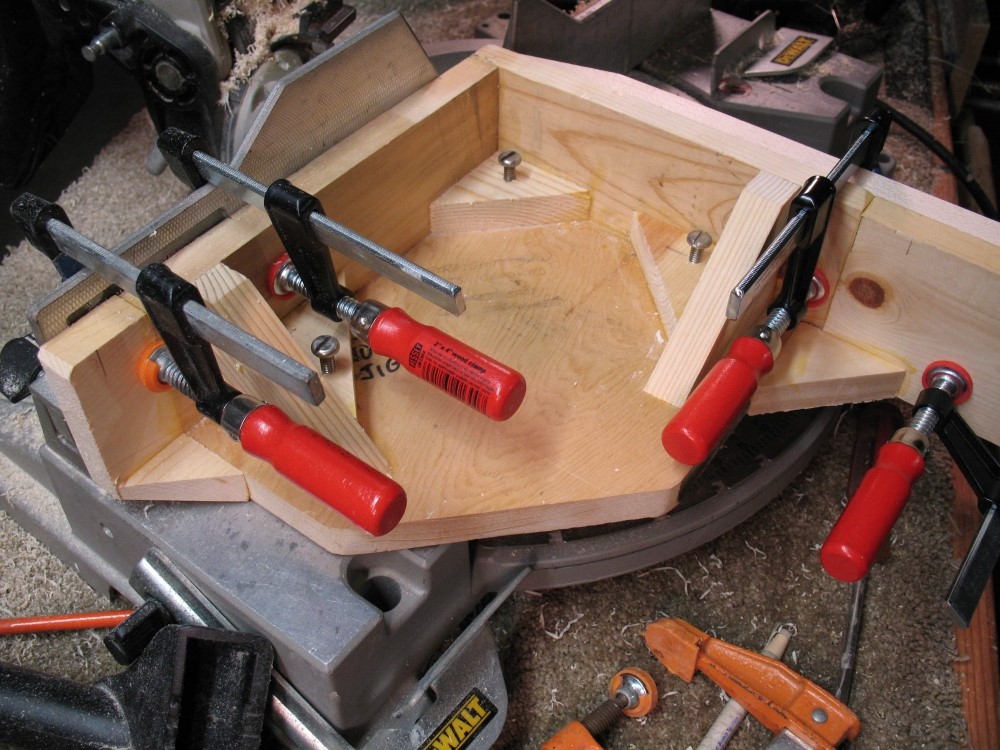
This is how I made the very shallow angled cuts on the mitre saw. The jig holds the workpiece perpendicular to the fence. Even after you have set up the saw perfectly, you will find that flex in the blade and bearings will cause the cuts to come out slightly crooked. The saw is not made to rip hard maple on such a shallow angle. That is what the three slotted screws in the base of the jig are for. Rather than work out the correction angle on the saw, I dial it into the jig with the screws. Once it is set, it is set forever, and you can keep your saw straight. You can see the jig had various extensions that were added as I worked out the whole process. All the angles on the jig that look like 90 degrees are 90 degrees.
( Actually, a pair of 'feet' under the cutting side and a single screw at the tail would work just as well. I was making it up as I went along. )
The saw is set to 15 degrees. The shallower you try to cut, the more difficult it becomes to get a good result. Check the edges of the cut for square, and if need be, adjust the jig and re-cut. If you have several inches of extra length on the piece, you can re-cut many times until you get it perfect, but once the jig is set up, one cut is all that is needed. It is my gut feeling that the hardness of the wood affects the crookedness of the cut, so I set up the jig using the wood I intend to cut, rather than random pine scraps.
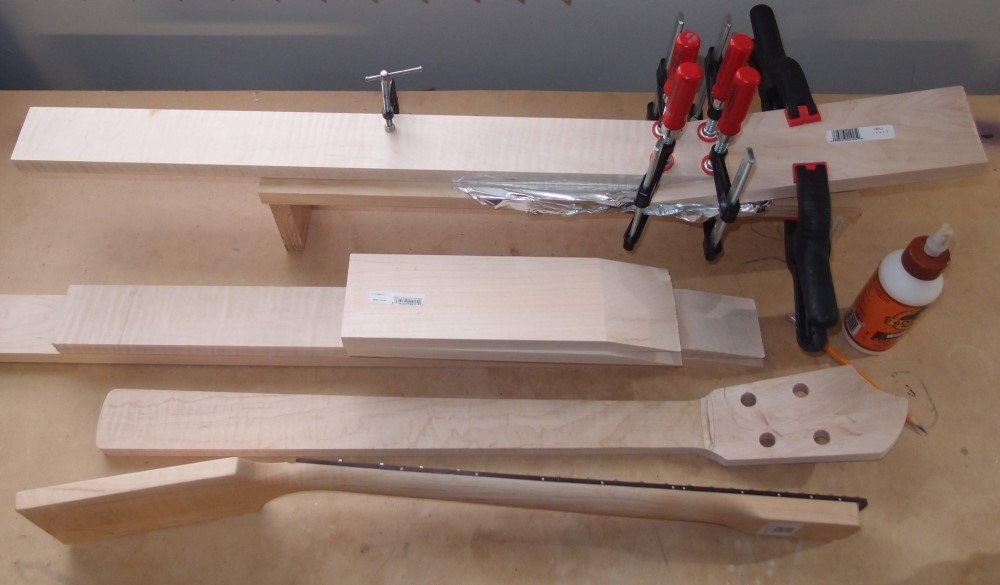
Here are several necks in various stages of assembly. In the center is a pile of parts, below that is a glued-up neck. At the top is a neck being glued on a special little table I made. The tinfoil keeps the neck from becoming a permanent part of the table. The C-clamp is holding down the tail. The four bar clamps are clamping the actual joint, especially the thin corners. The spring clamps are pressing down on the headstock to rotate it up into the joint. At the bottom is a neck I bought, which I used as a model.

Questions or Inquiries?
Just want to say Hello? Sign the .