The first side came out good, now I am installing the second side. I trimmed both pieces so that I could use the short clamps. Using long clamps for a job like this would be a pain in the butt.
More: Radiatabacker Part IIe ...
The first side came out good, now I am installing the second side. I trimmed both pieces so that I could use the short clamps. Using long clamps for a job like this would be a pain in the butt.
More: Radiatabacker Part IIe ...
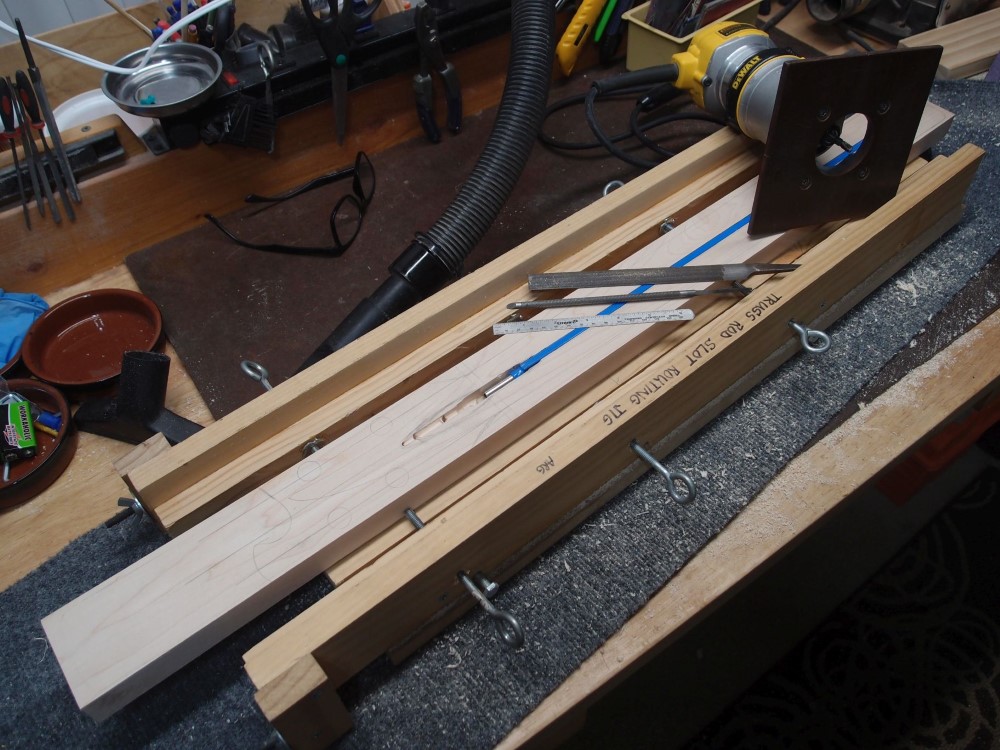
I've cut out the slot for the truss rod. This is a standard 540mm truss rod for a 34" scale bass. To make it fit in a 32" neck, I need to add one more fret. So my project will have one more fret than an actual Ric, just another way it will be better than the real thing. The jig and tools and method are all described in the Laboratory. Most of the work was done in the jig, with a little free-hand nipping for the adjuster end. I haven't carved out the access for the adjuster yet.
More: Radiatabacker Part IId ...
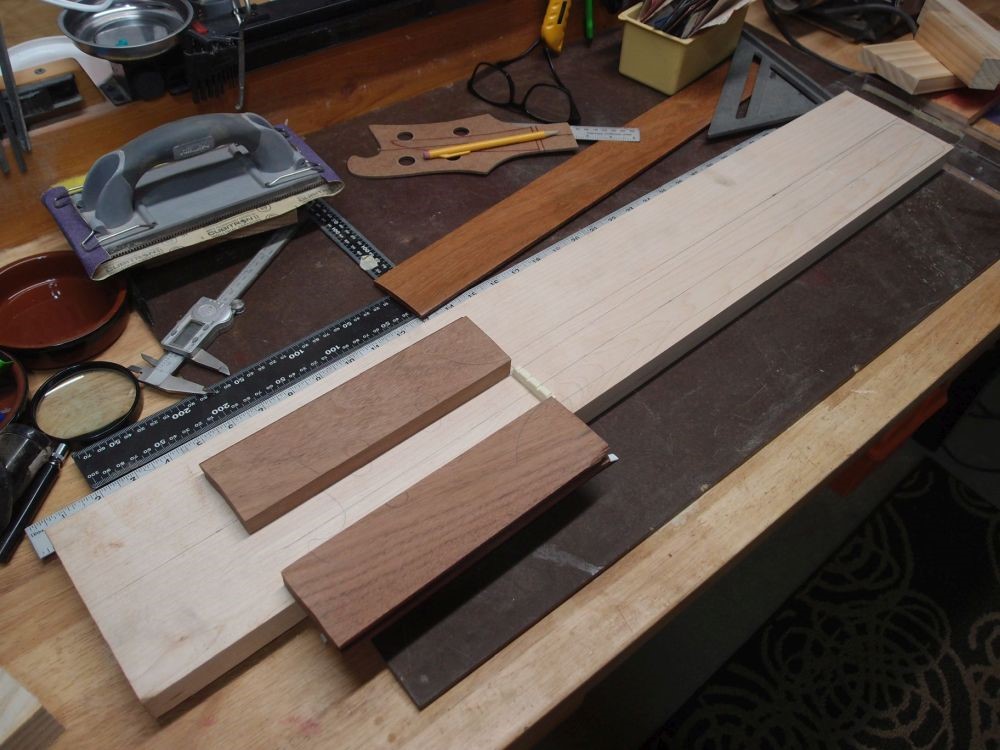
Yesterday I hunted around for stuff. The trusty local hobby shop is all out of everything but balsa, and it didn't sound like they were getting anything else in, ever ! So I went down the road a piece to the high-end builder's supply / lumberyard (Dykes) to see what they had. And I turned up this nice piece of 5/4" x 6" maple. 5/4" is actually 1", the same way 1" is actually 3/4", and 6" is actually 5-1/2". I looked at a couple of pieces, and took three feet off the nicest one for about $18.
More: Radiatabacker Part IIc ...
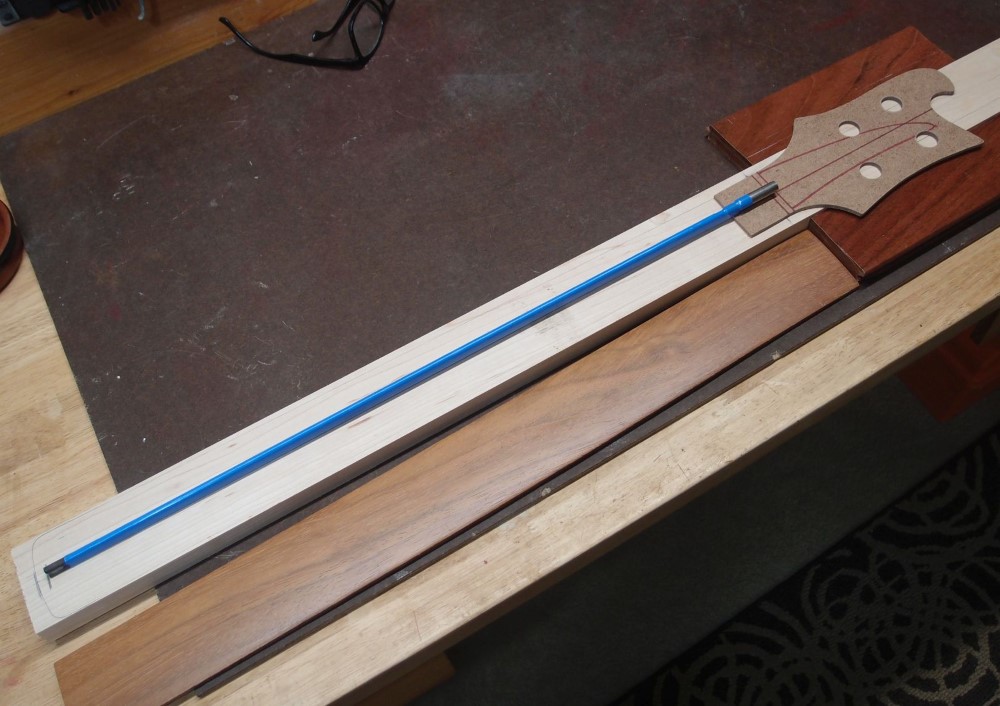
This is what I've settled on for the neck. The main part is plain maple from Home Depot. The headstock wings are leftover floorboard from the upright project, Brazilian Cherry. The fretboard is also Brazilian Cherry. The truss rod is 540mm, which will require a 21 fret neck. Or I could cut it down a bit and weld the ends back together, but that's more work.
More: Radiatabacker Part IIb ...
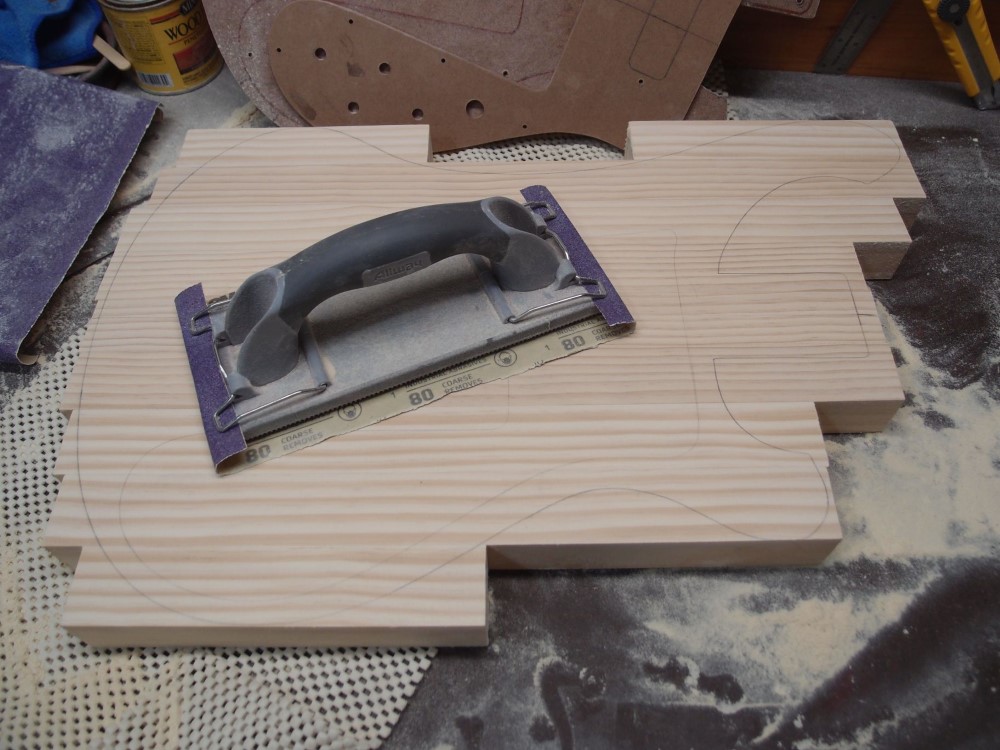
I made some small adjustments to the outline, and finished the neck mounting. And a lot of sanding. The drywall sander is a godsend, it works much better than a block, and really saves your hands. But my arms feel like lead.
More: Radiatabacker Part IIa ...
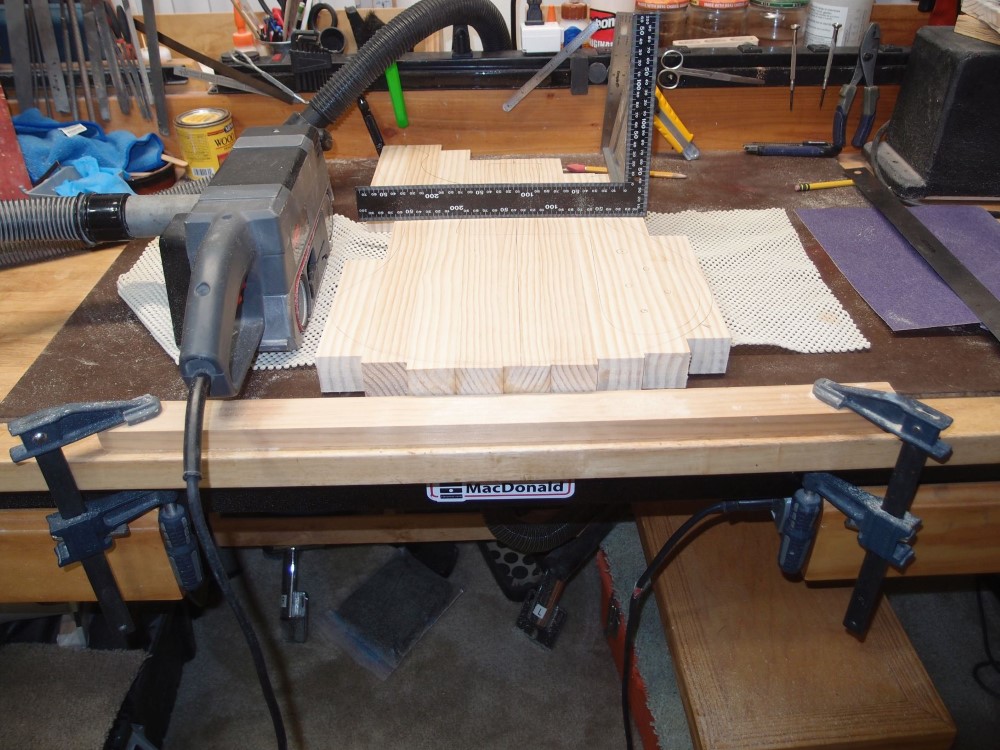
The glue is all dry, time to flatten out the blank. I clamped a piece of scrap wood at the edge of the bench for a stop, and laid the blank up to it on some padding. This will stop it from shooting off when the belt sander hits it. I sorted through all the vacuum cleaner parts I have collected over the years, and finally made an adapter to hook the sander to the little shopvac under the bench. Then I put on a new 80-grit belt, and went at it.
More: Radiatabacker Part II ...
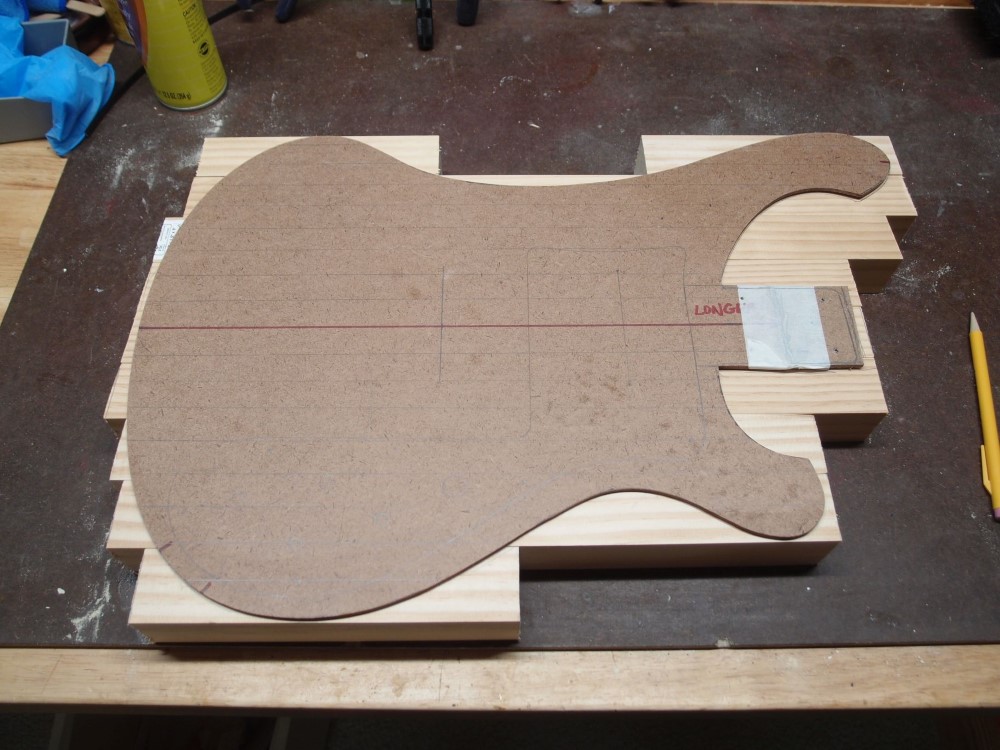
This is the Ric body template I made earlier. What's the point of making a template if you only use it once? Underneath are the sections for the new body. I used about 13 feet of 2x2" lumber, under $20 at Home Depot. I arranged the pieces so the stripier faces show. I'm also extending the tongue on the template. I had a brain fart and cut it too short when I made it.
More: Radiatabacker Part I ...
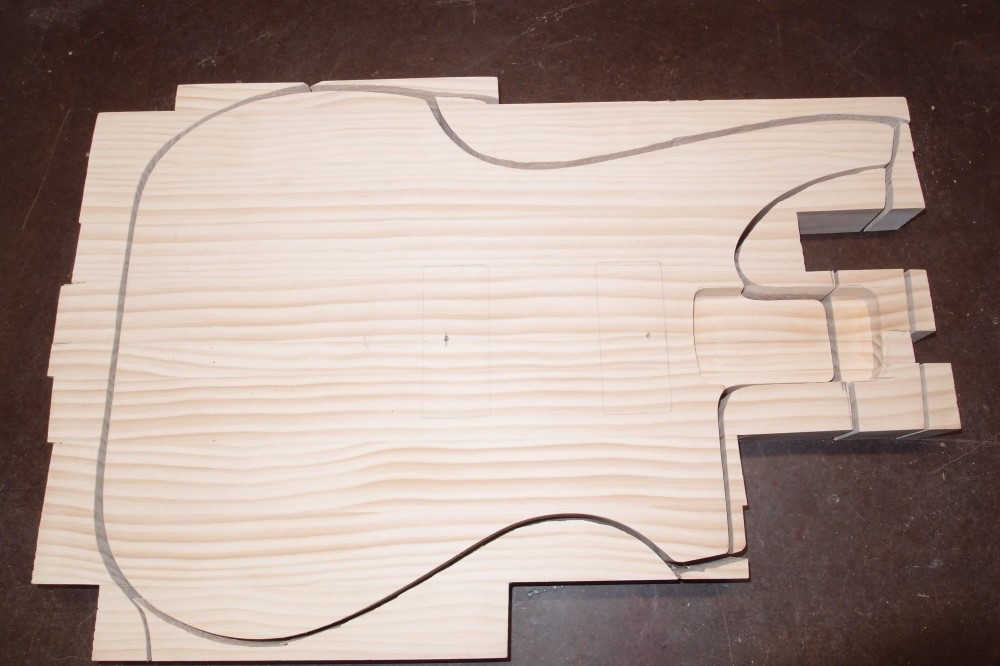
This is a body made from 2x2 Radiata pine from Home Depot. This material is actually 1-1/2" square and gives you a choice of tight grain on two opposing sides and loose feathery grain on the other two sides. This is the tight grain.
More: Radiata Glue-up ...
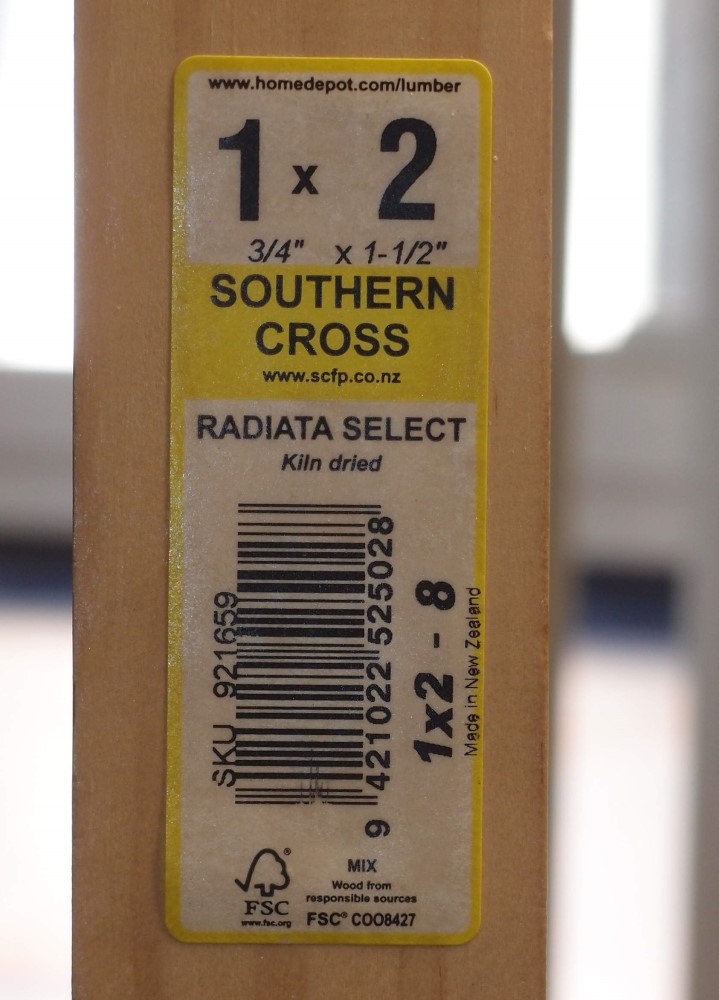
Here in the Northeast ( and probably everywhere ) Home Depot sells two grades of wood: Number 1, which they label as 'Select', and Number 2. Number 1 costs about twice as much as Number 2. Lowes is similar. Both grades are pine, not hardwood.
More: Radiata Pine ...

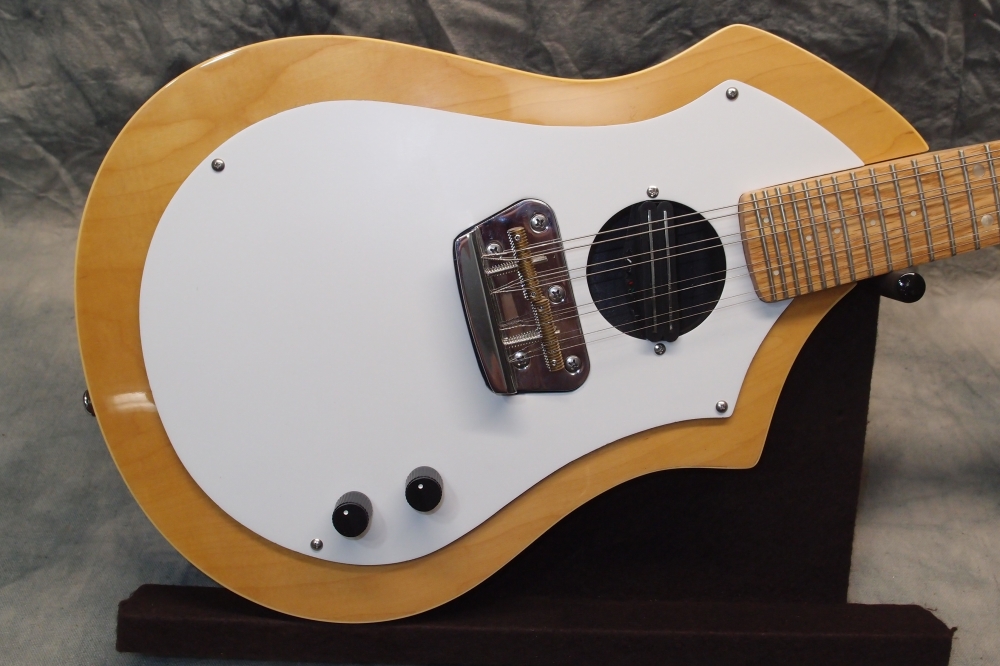

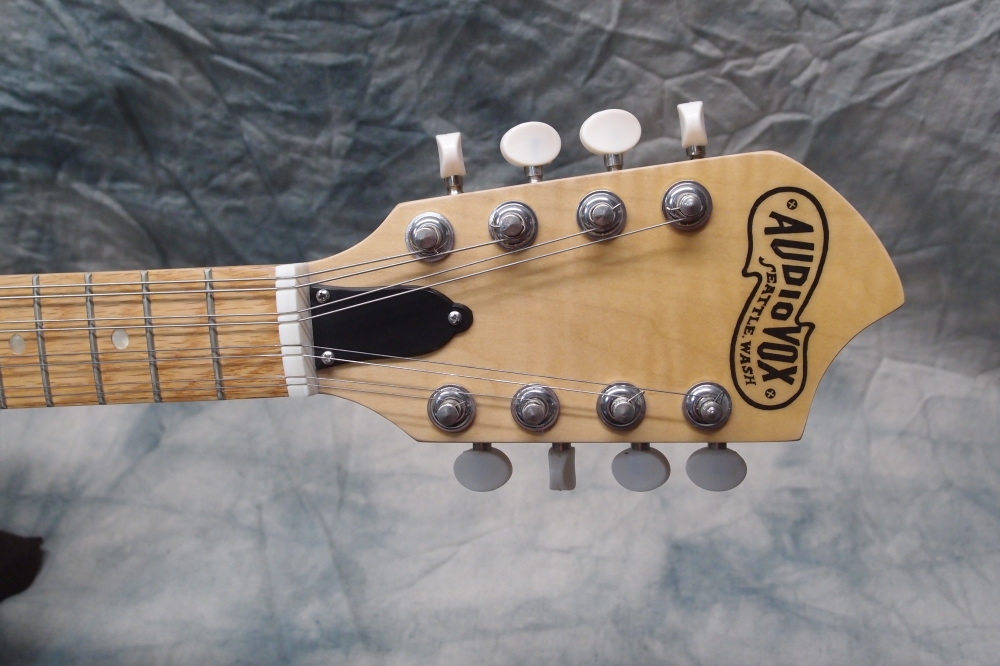

This body is maple plywood over a hollow pine core, double-bound. It came out very lightweight, too light to balance even a guitar neck. This was originally going to be the 12-string, but I realized that it would never balance. So I shuffled parts and bodies between some other projects - a planned six-string got canceled and became the twelver. That left this body free. I thought about it a while and decided it would make a good mandolin.
More: Audiovox Mandolin ...