Reverse Fenderbird (2/2)
Quick Update:
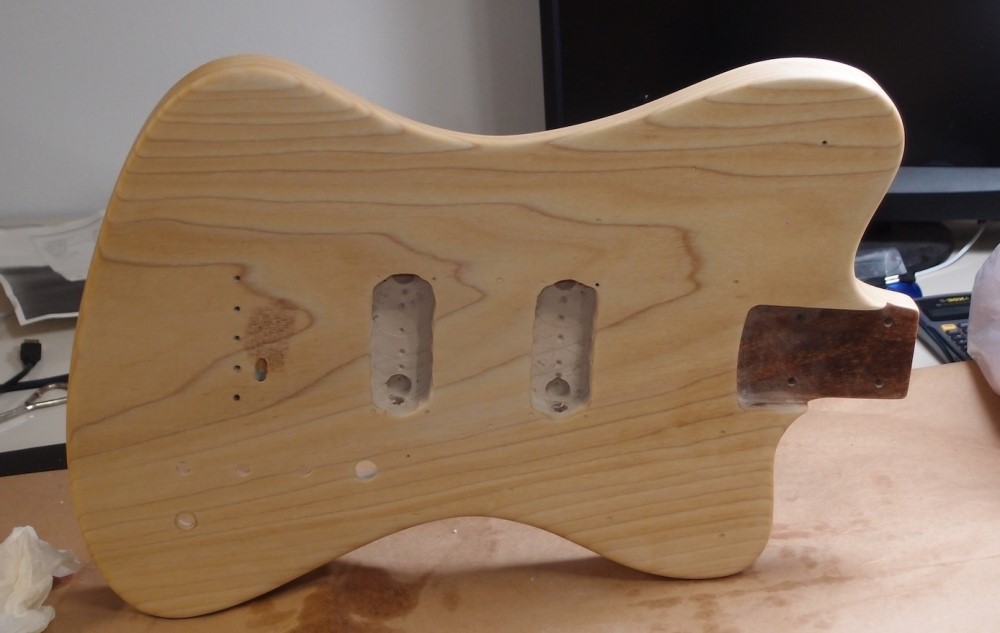
Sanded to 220, 1 coat Minwax pre-stain, 3 coats 'natural' to clog up the wood, 2 coats 'honey'. In the neck pocket, you can see what would have happened if I had gone directly to the color coat. What a difference! Even the end grain came out pretty good, and the only small blotching around the edges will ultimately be hidden. Note the almost white original color of the bare wood inside the pickup route.
This is exactly the color I was going for, not the much darker Gibson shade. The wood grain still shows clearly, and the contrast with the white guard and black edges should be very nice. This is the first time I have ever seen a Minwax stain match the color on the can.
'Natural' stain has become my new favorite stuff. It gives maple that nice slightly amber 'aged' tint, and even gave a nice subtle tint to this poplar. I originally bought a can on a lark, thinking 'What the hell is transparent stain?'. You can see, it worked very well as a pre-treatment for the wood, otherwise, this would have been a dark blotchy mess, poplar is renowned for staining badly. Still to come: one more coat of stain when this is good and dry, then black burst and wipe-on poly for a quick finish, no pun intended.
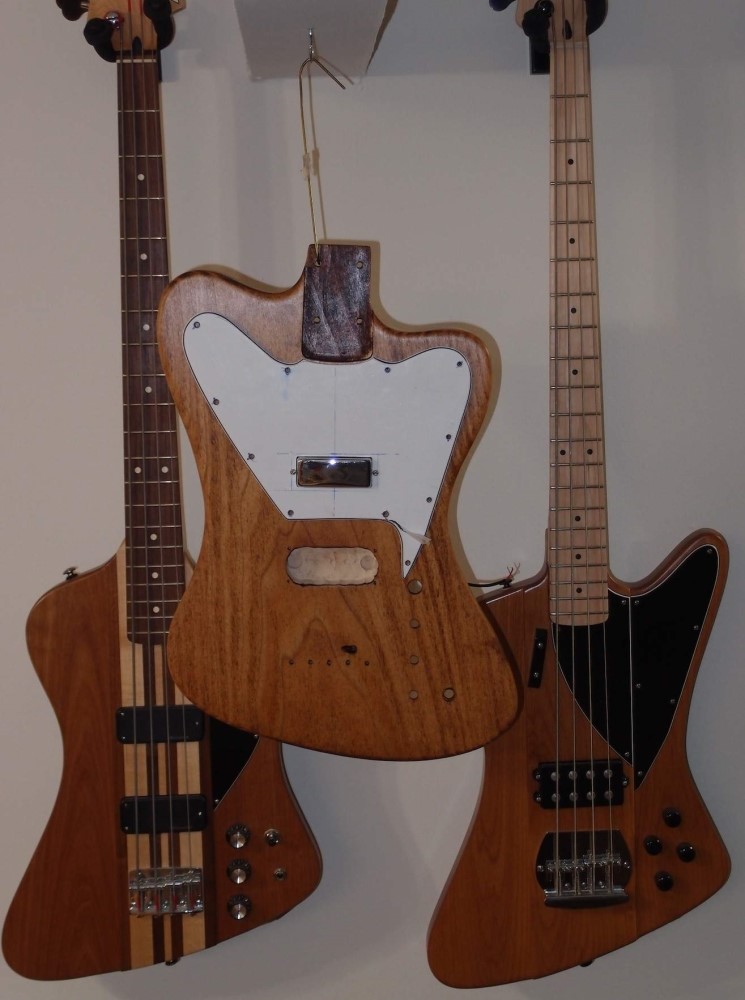
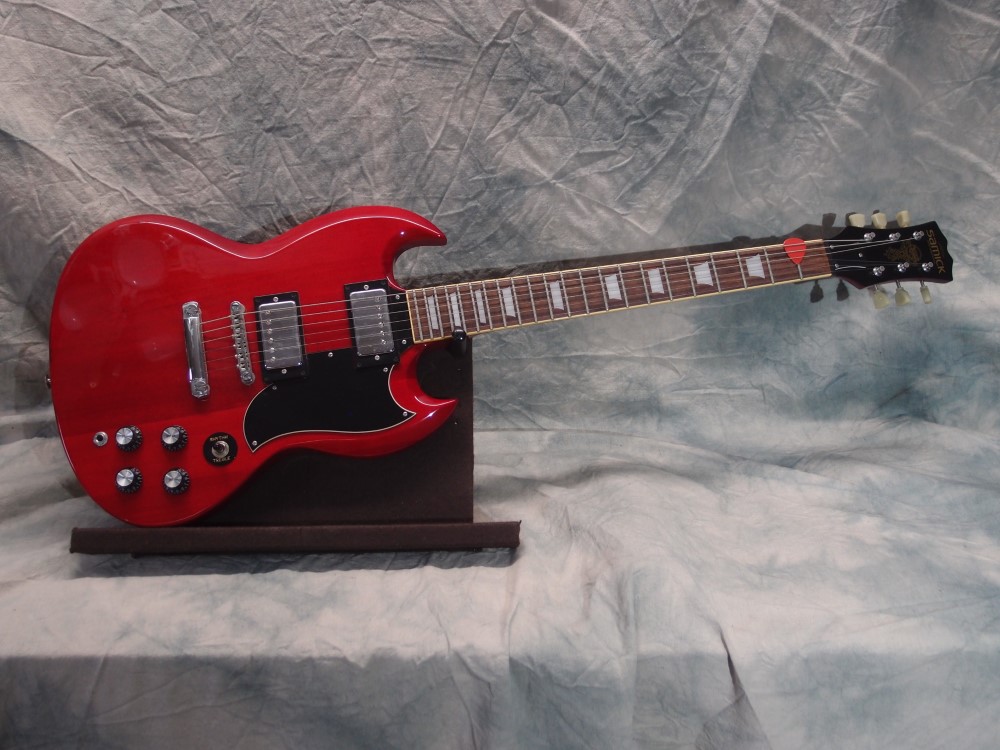
Also, the upper and lower horns have been subtly re-contoured from the bulbous original tracing to something a bit sleeker. The two in the background are clear-coated only, mahogany and cherry. The cherry has darkened noticeably since I first finished it, and will continue to for years to come, that's what cherry does.
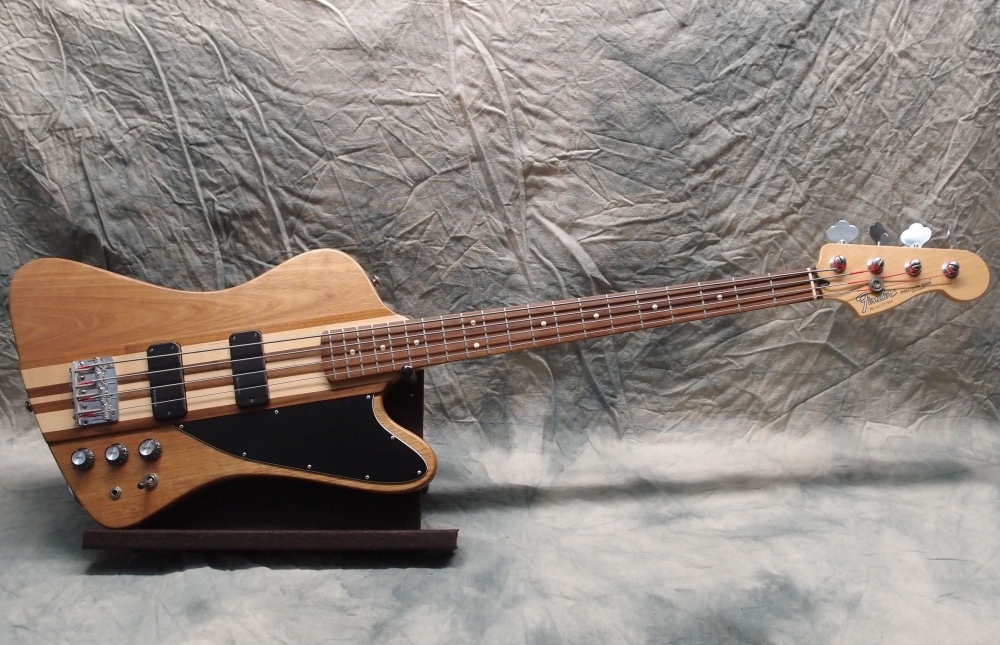
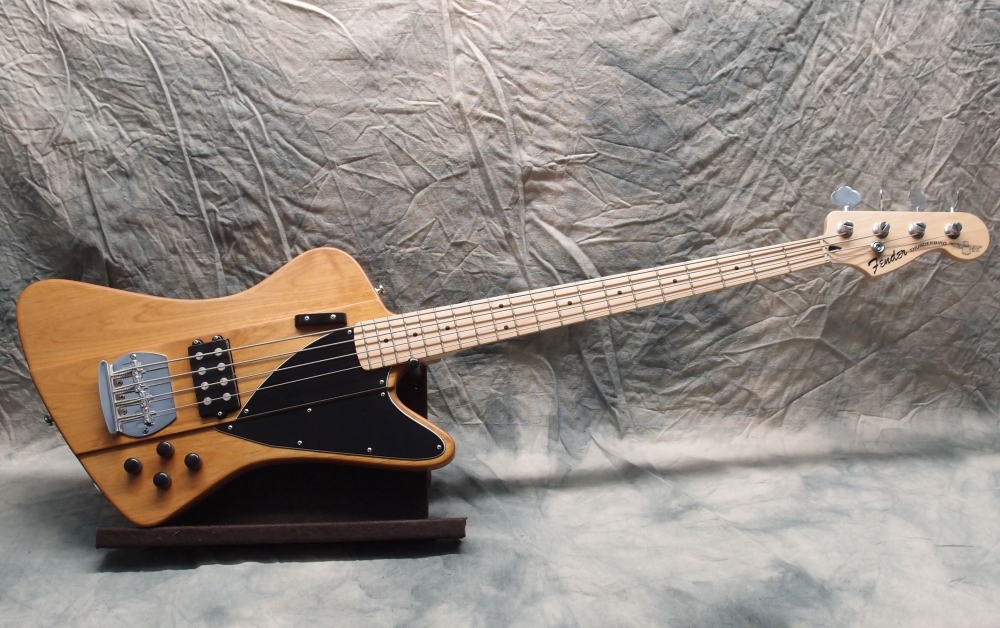
The non-reverse Squierbird is finally finished. This project took seemingly forever, proceeding in fits and starts since its inception over two years ago. In that time, I got a compressor and spray equipment, which changed the planned finish from Danish oil to polyurethane. Danish oil is wonderful stuff, but very difficult and time-consuming to get a nice guitar finish with. Much more suited to furniture.
The neck is a Korean-made Squier Precision, "50th Anniversary". These basses seem to sell for about the same as MIM Fenders. I am guessing it was actually made by Samick, who does much of Fender's ( and everybody else's ) work there, and it is a notch above your run-of-the-mill Indonesian Squier neck, about as nice as a MIM. Samick has also built Fender-branded instruments, which are of similar high quality. With minimal fret leveling & setup, it plays perfectly. The finish also needed some touching-up, and I did use several coats of the Danish oil on the back. Another nice thing about this neck is that it has a proper double-acting truss rod that adjusts at the head, not a crappy primitive 'skunk stripe' setup. In that, it is actually better than a 'real' Fender.
The body is a hunk of poplar from the lumberyard, about $15. Poplar is a medium-hard and medium dense wood with a nice fine grain that requires little or no filling. Bandsaw ... belt sander ... round-over ... etc etc. The biggest problem with poplar is that the natural color is often an unpleasing combination of yellow and green, and it stains very poorly - dark and blotchy. I solved the staining problem by applying three coats of "natural" clear stain before applying the color. By the time I started applying the color coats, the wood was already so saturated that very little color actually sank in, and by the third color coat, I realized that more would make no difference.
The result came out very even and warm, and exactly the shade on the can, the first time I've ever seen that happen. There are actually dedicated 'pre-stain' products that are supposed to accomplish this, but I have never seen them make much difference. This was just a crazy idea I had that turned out to work very well.
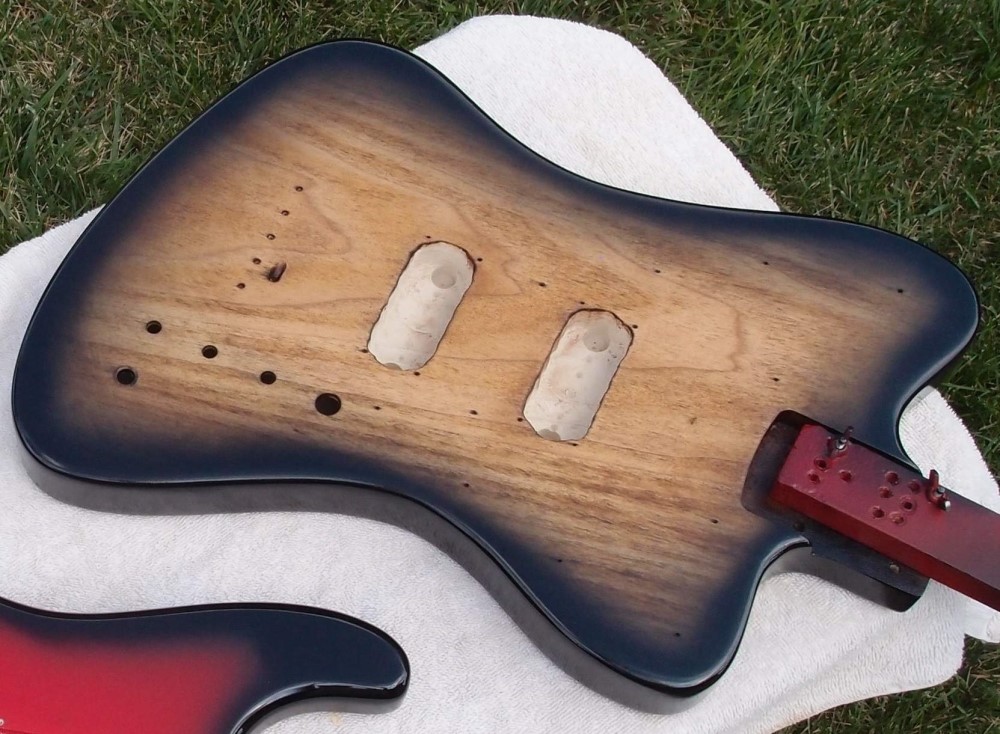
The black burst was then sprayed with Minwax Polyshades black, which is a mixture of stain and polyurethane. The back was sprayed with a touch-up gun, and the front was sprayed with an airbrush. The result is a finer feathering on the front, but in both cases it was surprisingly easy. While sold as a stain, the black Polyshades can be applied as opaque as paint if desired, and sprayed just fine, cut with acetone. After that, I started a series of experiments, this being my first overall poly finish apart from some trivial clear-coats. First, I sprayed on several coats of brushing poly as a test, which worked just fine. Then I brushed on many coats of the same clear poly to build up a thick coating fast. Finally, I wet-sanded all the brush marks out, and topped it with several coats of spray-can poly, followed by more sanding and polishing, from 1000 grit through 4000 grit and finally with the random orbital sander using a sponge pad and buffing compound, Meguiar's. Lastly, a quick coat of Turtle wax gave it a silky-soft feel.
Turns out that every 'brushing' polyurethane I tried sprayed just fine, despite the can saying no. For spraying, I used either a cheap touch-up gun, or a very expensive vFan airbrush that Home Depot gave me to evaluate. The vFan is a great system that can be used to paint anything from tiny details to an entire body by swapping out the needle & orifice, and can also spray fan-shaped patterns like a spray gun. In fact, the vFan will do pretty much anything the touch-up gun will do, only better. However, for the final clear topcoat, I fell back on rattle-can poly as the easiest and best solution, and they are not tied to the compressor.
The final result is that gorgeous mile-deep clear plastic finish that you get on so many cheap Asian guitars, but not on expensive American ones for some reason. I know where the flaws are, but I would have to point them out, and from three feet away it is perfect. This might all sound easy, but I am leaving out a whole lot of oopses and do-overs and frustration. You learn more from your mistakes than your successes. BTW, the spray poly topcoat is a satin, but it polished-up to a nice gloss. From now on, I am only buying satin, so that I can spray necks and bodies from the same can, and either polish it up or not.
The pickguard is an easy shape, and the body routs and internal interconnects were likewise not complicated. The pickup routs and battery box were freehanded, the neck and control cavity used templates. Most of the material for the routs was actually hogged-out with a Forstner bit on the drill press, which is easier and more boring than doing the whole thing with the router, more boring being better in this case.
The electronics are active volume-bass-treble, which is actually easier to install as it is all pre-wired. The volume pot was replaced with a push-pull that bypasses and powers-down the electronics, so you can leave it plugged-in without killing the battery, bypass a dead battery, or leave the battery out for just noodling. There is more than enough room to shove the battery inside the control cavity, but I do not like to need tools to get access to it. The Gotoh box is the best I've found, it does not use the usual clip that so often breaks, you just slide the battery in and close it.
I have seen too many 9-volt batteries leak, I do not trust them at all, and never leave them installed. The reason 9-volt batteries are so much more prone to leaking is that inside the casing are actually 6 little cylindrical batteries, any one of which could leak. So six times the likelihood - don't trust them, especially cheap ones.
The bridge is my last good Gotoh from StewMac. The neck needed no shimming, the action fell right into place just as it is supposed to on a Fender. That really is a great piece of engineering that Fender did. The thickness of the neck, depth of the pocket, and height of the bridge combine to make a near-perfect setup on assembly, with any three parts randomly selected off the production line. Probably the most significant improvement in guitar manufacture in 500 years. Strings are my old standby D'Addario 50-105 nickel rounds, and the intonation fell into place almost perfectly as well.
So what does it sound like? The mini-humbuckers sound like ... mini-humbuckers. A very Gibson sound, not Fenderish at all. I must say, I am not a great fan of Gibson bass tone, or humbuckers on a bass at all, but the active bass and treble controls go a long way towards satisfaction. The tone is actually exactly what I was expecting, and I knew I would not really like it, which is why I installed the active controls. I think each pickup actually sounds better alone than the parallel combination. I could add a series/parallel switch, but my experience is that does not work well with humbuckers. While parallel humbuckers sound kind of dead, series humbuckers sound monstrous ( what better word? ) My preference would be for a P/J combination, or hot single-coils, or even lipsticks, but it is what it is, and I wanted to do something different.
Final verdict: I like it. I've been messing with short-scales so much lately, the long-scale neck is a nice stretch for the hands. And I learned a lot about finishing with modern poly finishes and spray equipment. In particular, I think my first black-burst with the airbrush came out very nice, as did the staining. The trick with the clear stain is one I know I will use again. And I found out you can spray damn near anything, regardless of what the can says.
Total cost: in the neighborhood of $300.
Weight: a hefty 10.7 pounds
Do you think The Ox would approve?
Oct 24, 2014
The cheap ( $36 / pair eBay ) Belcat mini-humbuckers sound better than the 'Pro' EMGs in the Epi-bird. The EMGs are dull and lack dynamics. Of course, no fair comparing the Musicman pickup. All 3 have the same type of string and active electronics.
The action on the new one is a bit high, but it will have to settle-in for a few weeks before I go for the final set-up. For comparison, the other two weigh 9.2 and 9.7 pounds. Neck dive on all three is pronounced, but only if you take both hands-off. My forearm on the body counters any tendency to dive. I don't understand why people complain so much about that.
I think I've built my last Funderbird, now on to other things.

Questions or Inquiries?
Just want to say Hello? Sign the .