Templates (2/2)
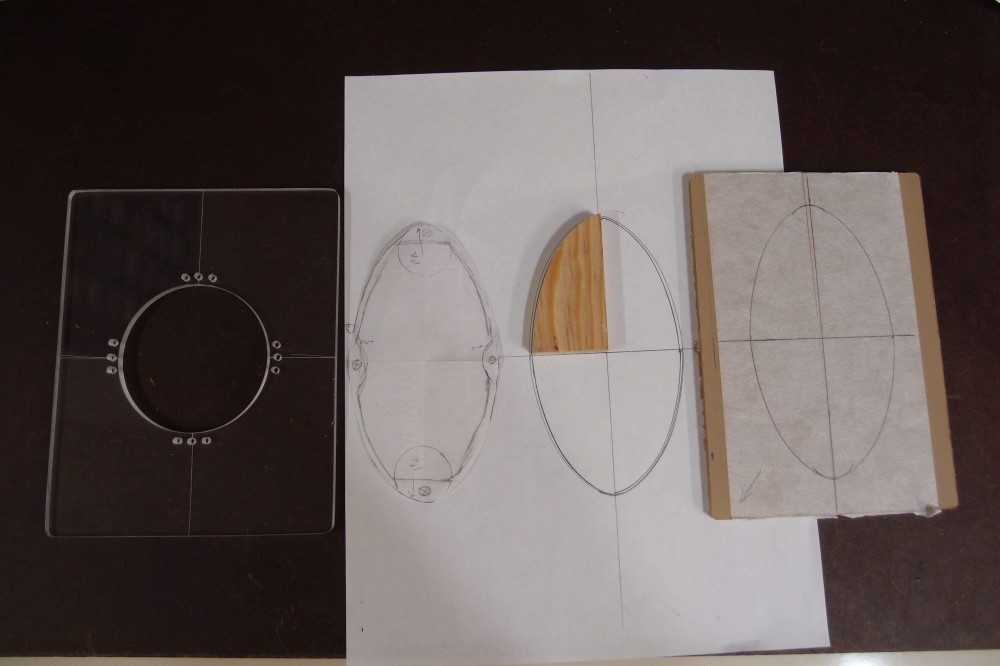
Still making templates. I find I need an even smaller control cavity/cover than the small one I previously made. Initially, I thought I’d redo my Strat soundhole template from MDF to plastic and then widen-out the MDF template to make a new control template. I fooled around and came up with this neat football shape which inherits the diameter of the soundhole, and should require only two screws. ( Many Danelectros have perfectly round control openings/covers with one screw in the middle. ) Then I decided to just do it in plastic and throw the old MDF template in the scrap box.
On the left is the new soundhole template. To get the hole perfectly round, do as much as you can with the biggest sanding drum that will fit, until you can fit a small can inside. I used Sweet Peas & Diced Carrots, but you can use what you like. Wrap a piece of sandpaper around the can, and whirl it in the hole. To get the diameter I wanted, about 68mm, I folded the sandpaper, first double, then triple. The resulting hole is within 0.2mm of round, or about 0.15%. Not bad for handwork, and totally invisible to the eye. I then scribed it and drilled three sets of mounting holes, the spec is 76.2mm.
Next to that is my initial paper template for the new control cavity. To make it symmetrical, I folded it over on itself twice, then trimmed the edges. I must have a good eye because my freehand sketch required very little trimming. When I was happy with that, I transferred the quarter-profile to a small block of wood, which I shaped on the belt sander. Finally, I laid out the crossed lines on the blank template and traced the shape from the wood quarter, four times. In the middle, you can see some test traces while I was refining the model, and on the right is the template ready to be cut out.
Control cavity templates are two pieces: An upper part for the cover shelf, which can also be used to trace out the cover, and a lower part for the cavity itself. This is for a hollow body, so I have no pressing need for the lower part, but I’ll probably make it anyway. And that uses up all my nice new material from the other day. The 1/4″ material sure is easier to work than the thicker stuff.
This was a lot easier process than my previous control template, which is also symmetrical. On that one, I achieved the symmetry by a process of repeatedly flipping and tracing and grinding. That was stupid. That’s why I’m posting this.
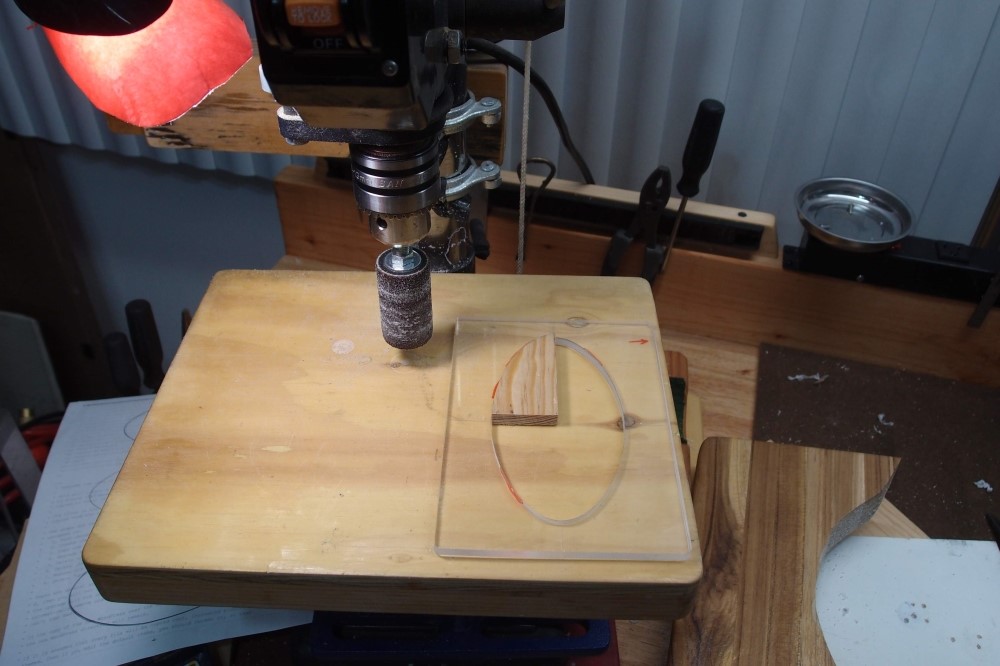
That was quick and easy. Forstner out the two ends, scroll saw between the holes, finish with a sanding drum on the drill press. The quarter-block confirms that symmetry is still spot-on.
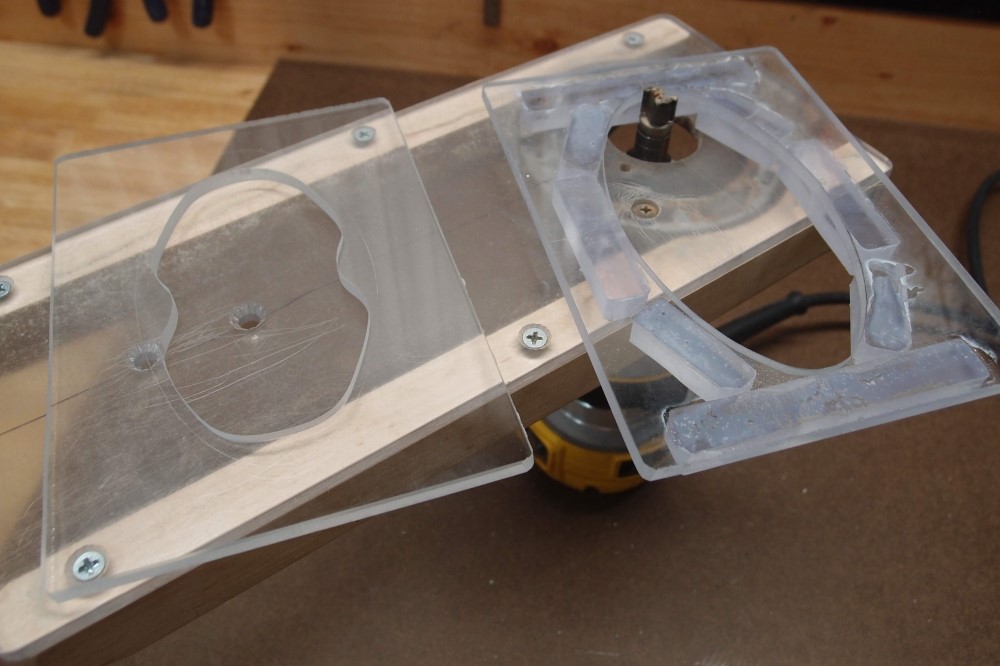
Here is why you need a deep template to make a shallow rout – see how the bearing barely catches the template. Fabricating and adding the stand-offs actually took longer than making the outline. They are 3/8″ scrap, my last piece of boat plastic, attached with Crazy Glue. The longer pieces are set to reinforce the weakest parts of the plate. All the pieces are just tangent to the outline, so they can be used as a guide. This construction has all the advantages of a thin template – lower cost and ease of fabrication, and also the capability of a thick template. And if I flip it over, it becomes a tracing template for the cover itself. I have also finished the lower template, with four screw bosses, although I think only two are necessary.
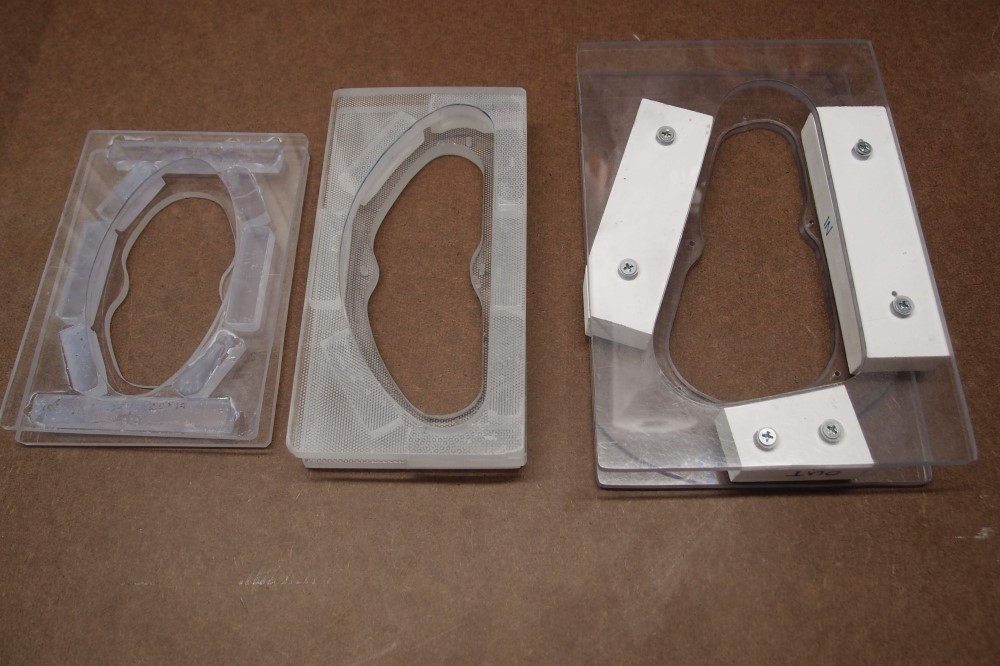
Here are all three control templates, from small to large. I should have every situation covered now. Working with plastic is especially messy; I love the new self-cleaning feature on the workbench. I’m going to rebuild the large cavity template on the right, it was one of my early ones and I can do better.
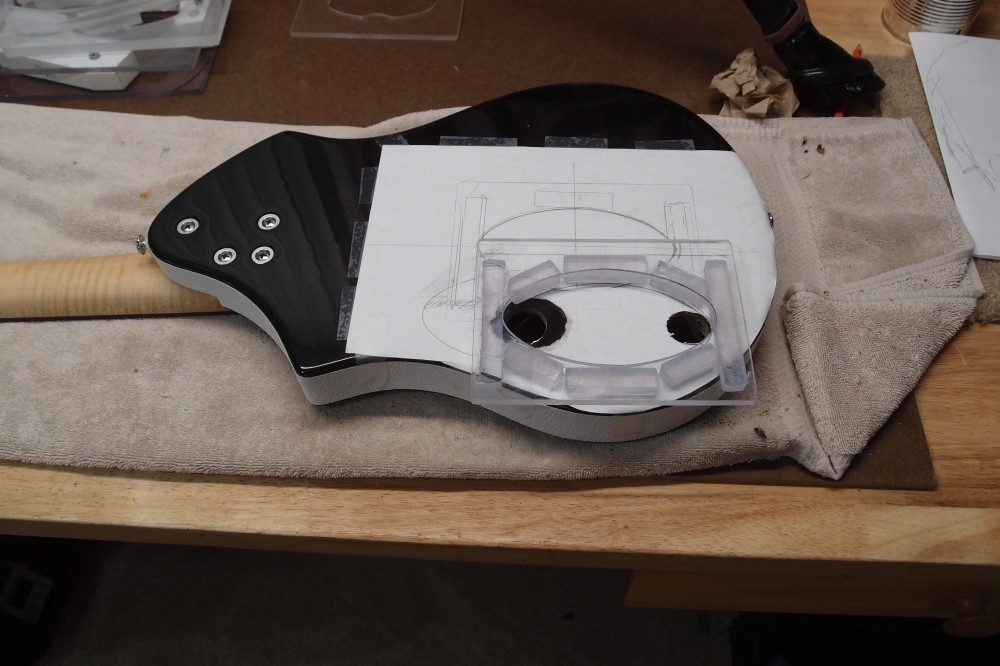
And finally, putting it to work. I scotch-taped a piece of paper over the finish, then Forstnered the two end holes. I will connect them with the jigsaw, and then make the final outline with the router and the template. Driving big Forstner bits is a good job for the corded drill, it never gets tired. The cut edge of the finish tends to separate, so I will run some Crazy Glue around it before it does.
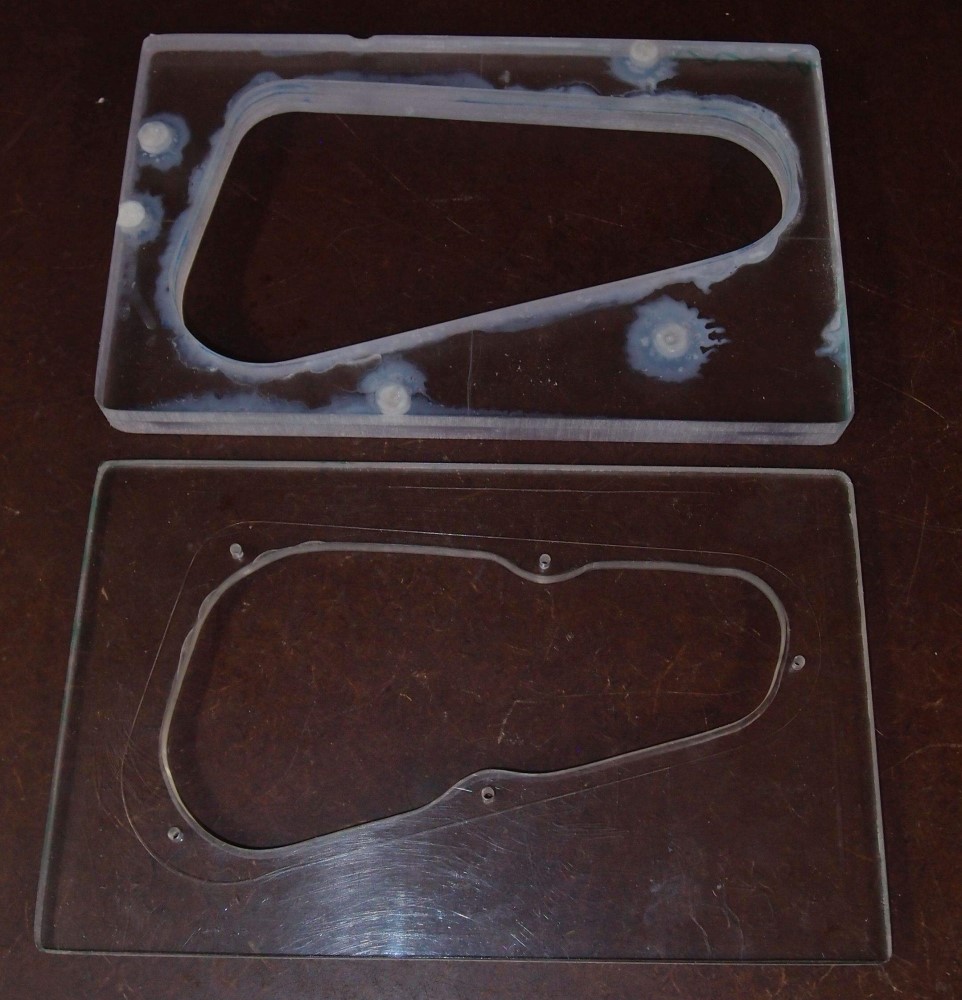
Here is my large control template redux. After making a copy of the midi-humbucker template (easy) I took the original and opened up the hole to this. After roughing it out on the scroll saw, I aligned the two pieces and tacked them together with dots of Crazy Glue around the inner edge. I used a brand new tube, so it would be really runny, and it did Crazy Glue’s second favorite thing and ran right into the crevices. ** Once the pieces were tacked, I put a bead of glue around all the edges – you can see where it turned white. I also filled in the old screw holes and miscellaneous divots where I should have been more careful won the saw. A puff of accelerant and the glue hardens right before your eyes – highly recommended.
** It’s favorite thing is to stick your fingers to each other.
For the final shaping, I inked the inner edge of the old part with a Sharpie, and then went to the sanding drum on the drill press, as usual. When the ink started to get scratched, I knew I was just about there – a useful woodworking trick. The final decision was made by touch, you cannot feel the seam. Finally, I straightened the straights with a file and ground the outer edges even and square on the belt.
It’s not beautiful, but it is a full 5/8″ thick, more than enough clearance to do a 1/8″ shelf. And now it is truly double-sided, with the same profile overall. That means between flipping and rotating, you can get at least four different useful orientations from it. It is also the tracing template for the cover piece. I like things that are multi-use.
I found that Lowes and Home Depot sell 0.22″x18″x24″ ( 5mm, 1/4″ nominal ) acrylic for $25. That works out to about five cents per square inch. The glass store charged me double that, for scrap !!! I got took. But the guy has done good by me in the past, I’m glad to support him. It’s hard for small stores to survive nowadays, with all the Big-Boxes, and when the little guys go under, it’s for good. 0.22″ is the same as the glass store stuff, and thicker than the old templates I have from StewMac, which are about 0.17″. If you need something thicker, you can double or triple it before you start shaping. You can get 3/8″ from StewMac. I haven’t checked eBay. The next time I need material though, I will be going to Lowes.
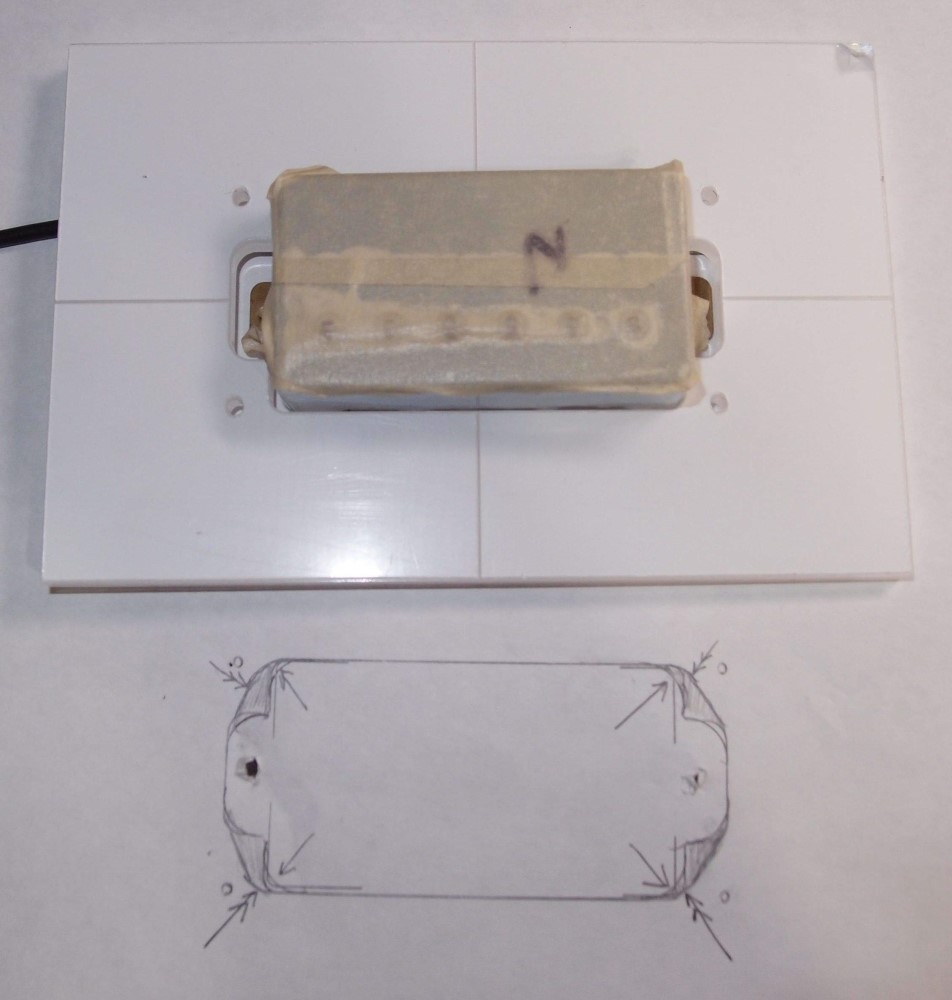
This is a full-sized humbucker pickup template I got on eBay, mainly to see someone else’s work. I could have easily made this myself, but I’m also down to my last blank. You can see that it is highly accurate, laser-cut, much prettier than one of mine. The plate is slightly smaller than an old StewMac, but the same thickness. Just took a look at StewMac’s new templates – very nice, but $$$$$$$$$$$
However, you can see in the tracing that it is also rather unrealistic. I traced out the template, then filled in the sharp corners to what a standard 1/2″ template bit would do, then traced in the pickup, and it doesn’t fit !!! The pickup’s corners are clearly outside of what the router bit would cut. A 3/8″ bit might do the trick, if you have one, otherwise you’ll have to file out the corners by hand. That’s nonsense. I am going to grind out the shaded areas with a 1/2″ drum, and then I can make the cavity with just one tool. My own templates are better than bought ones.
Questions or Inquiries?
Just want to say Hello? Sign the .