Angled Headstock Jig (2/2)
Back to guitars ... turns out that gluing the two pieces is not exactly easy, glue is slippery, and everything goes out of alignment when you try to clamp it down tight. My first attempt was to use the waste pieces ( you can see one in the pics above ) as angled shims, so that the clamping force is exactly perpendicular to the joint. That was a step in the right direction, but not enough. So I ended up making another jig for gluing:
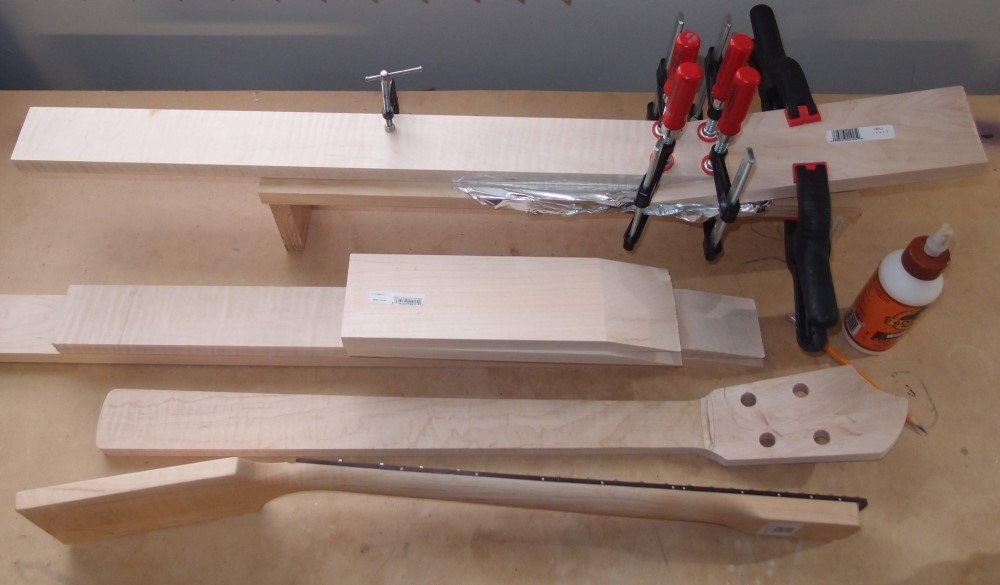
This jig is little more than a piece of scrap pine with a couple of legs attached. It matches the width of the headstock material. The legs allow you to get clamps underneath, and gives you something to align the parts to. First, clamp down the neck piece and align it, then stick the headstock under it and trace the outline. Put glue on the headstock, and stick it back under, align and clamp. All alignment is by Mk. I eyeball. The tinfoil is to keep from gluing the workpiece to the jig. Note how the spring clamps are up the headstock. This makes it pivot into the neck for a tight joint. Also note how the headstock has the same cut as the neck, but is flipped over to make the final angle. The headstock piece is about a foot long, the neck piece is about two feet, the end result should make a 20-24 fret 30" neck.
You can also see a partially finished neck that was glued with this jig, some extra parts, and a guitar neck that I bought, to see how it was made. That is where I got the 15-degree angle, I had previously messed around with 10-13 degrees. You can see how the fingerboard is part of the joint, and how far up the neck the joint is. A standard headstock is 9/16" thick, so if you use 3/4" lumber from the hardware store, it will have to be thinned 3/16". Careful inspection of the bought neck shows that the thinning is done on the back of the headstock, not the front as you might expect. That StewMac Safety Planer I sprang for a while back is going to come in handy, and then it's going to be some tricky shaping on the spindle sander. 15 degrees gives a really good break-over angle for the strings. The reason Gibson uses less is that the lousy way they make necks, if they used 15 degrees, half of them would break in the factory. Much better if it breaks after they sell it to you. Better for them, anyway.
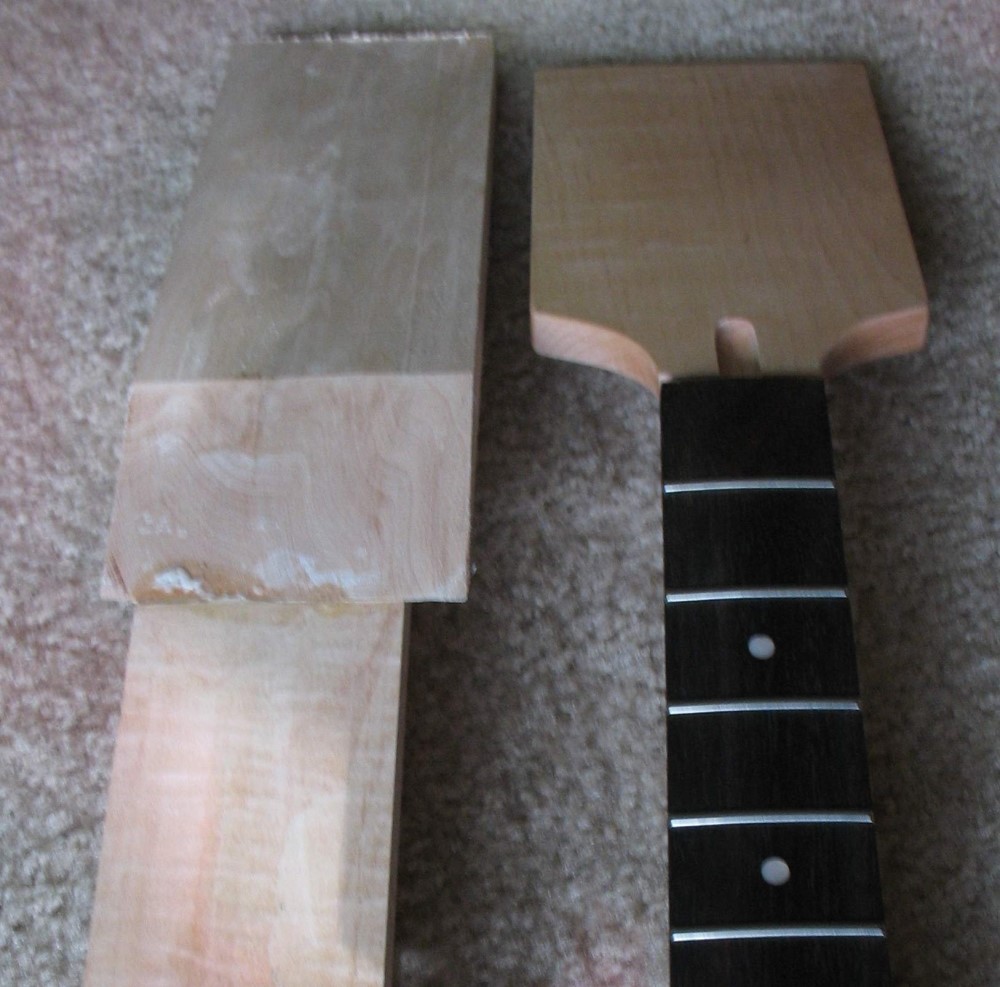
And here is my first go at it. Not perfect, but strong, and I think it will clean up on the belt sander. The headstock is deliberately a bit off to one side. The fingerboard will extend up to the corner, the truss rod slot will be as in the bought neck, and should present no problem for my truss rod jig. I could also use binding to cover up any small gaps.
This sort of a neck could use a heel-adjusting truss rod, but it is a natural for a headstock adjustment, which is what I will use. A cheap Chinese truss rod can easily be sawed-off to any length and brazed back together much faster than building a custom-length rod. As long as the adjustment is accessible without removing the neck.
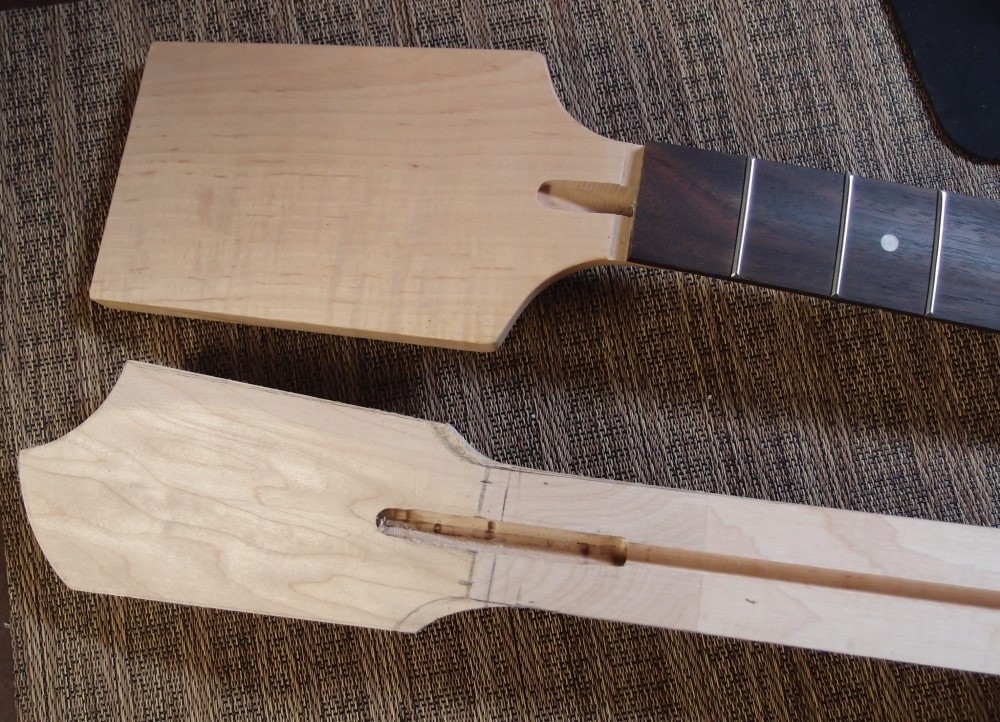
See the wacky grain pattern on the angled cut section of the headstock part? That's what a Gibson headstock would look like if you could see it.
Even though I didn't do the best job gluing it, the joint came out tight and cleaned up well on the sander. It's always nice when the first try comes out usable. I've also routed the truss rod slot. Now I need to shorten up a truss rod to fit.
Most Extreme Mitre Box
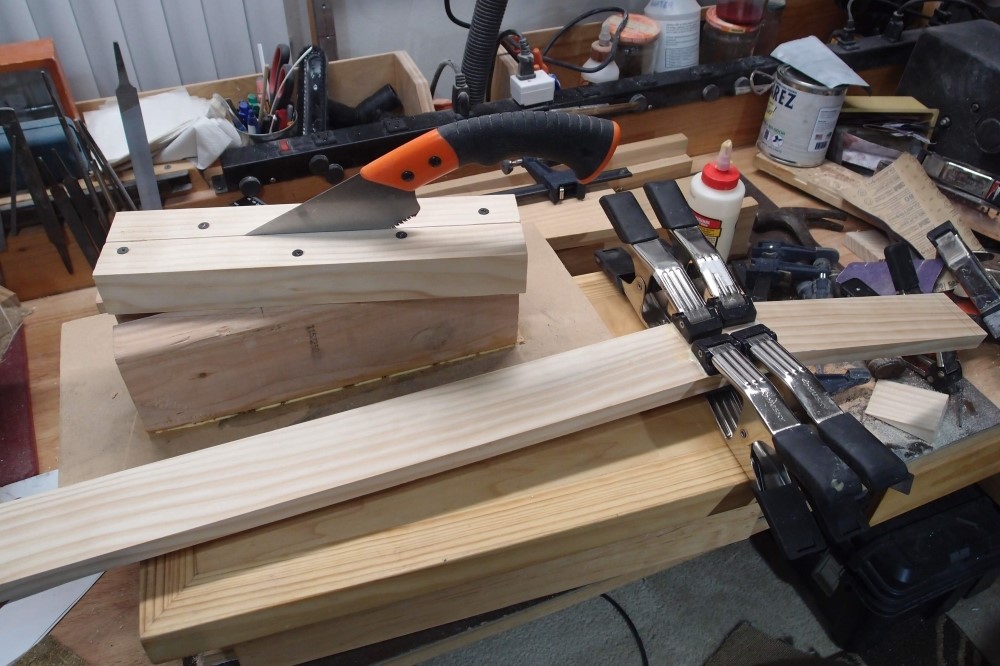
Here is the saw stuck in the mitre box I just built for building angled headstocks. It is 15 degrees, for cutting scarfed neck joints. I wanted to see if I could do this by hand. In front is the first test article, another piece of Radiata.
The base of the mitre box is an old scrap of MDF. MDF makes a great base for a jig, as it is strong, heavy, and perfectly flat and stable. To that, I glued two pieces of 2x4, that were clamped around a scrap of 3/4" whatever, with some folded paper for a spacer. When the glue set, I took the clamps off and knocked the center piece out, leaving a perfect 3/4" slot.
Then I arranged the upper pieces to make a 15 degree angled slot for the saw, and screwed them down. The upper pieces gave me a starting slot that I extended down through the 2x4s. I had to soap the saw blade, it is all pretty tight.
The test piece came out pretty good. A few minutes of block sanding, and it was ready for glue. Gluing an angled joint like this is tricky, as it wants to slide apart until the glue finally grabs.
This jig does the job well enough, but not as good as the power saw. The jig for that has very fine adjustments to get the cut square, whereas this has no adjustments. Still, it does work, and it was not that hard to make and cost nothing out-of-pocket. This saw is getting tired, saws don't last forever.

Questions or Inquiries?
Just want to say Hello? Sign the .