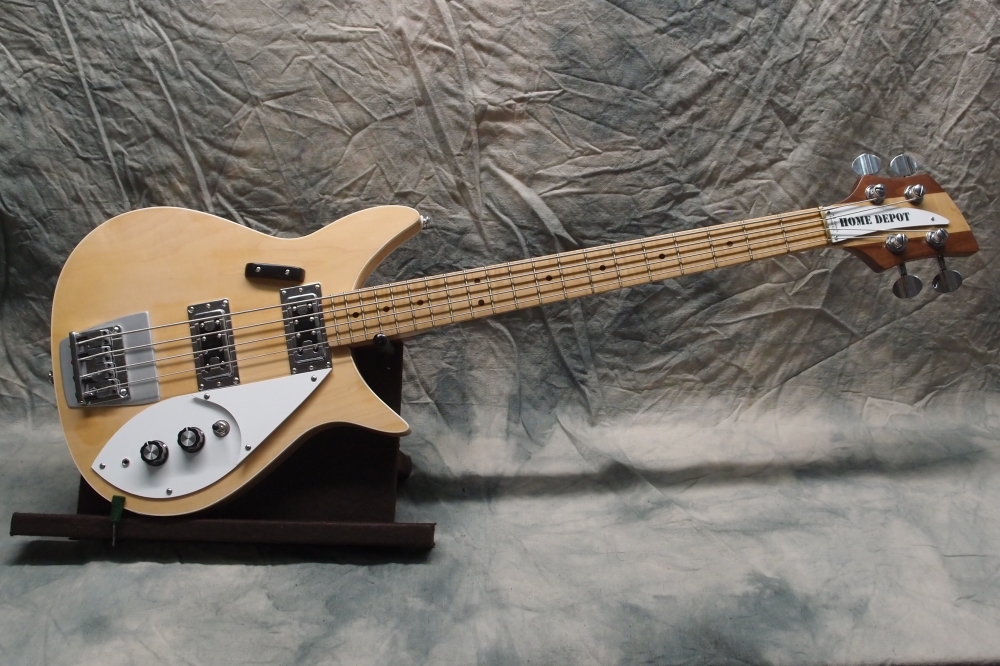
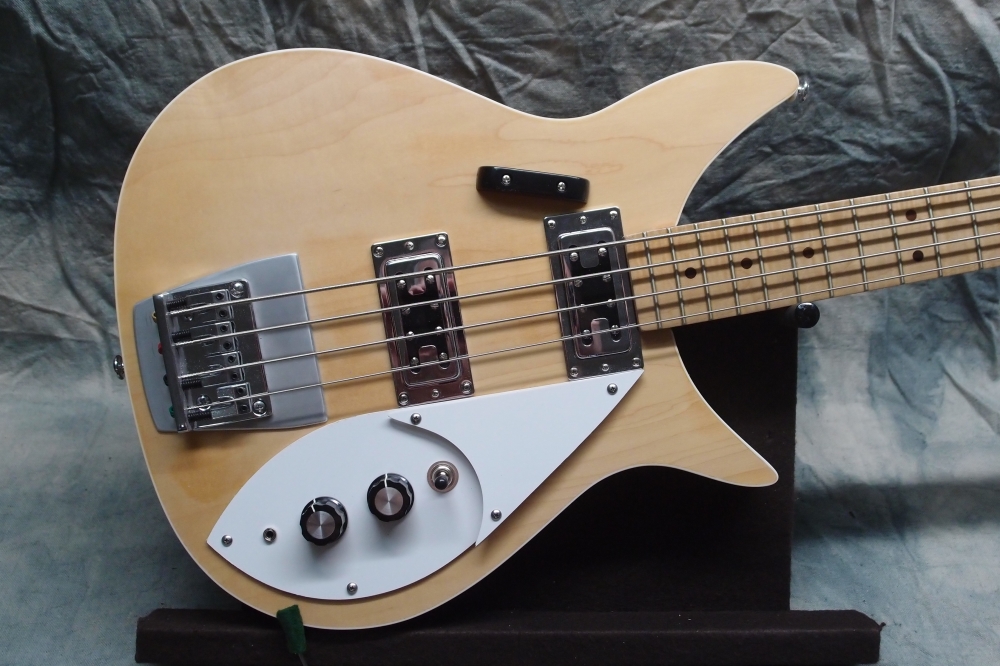
Decals & Logos
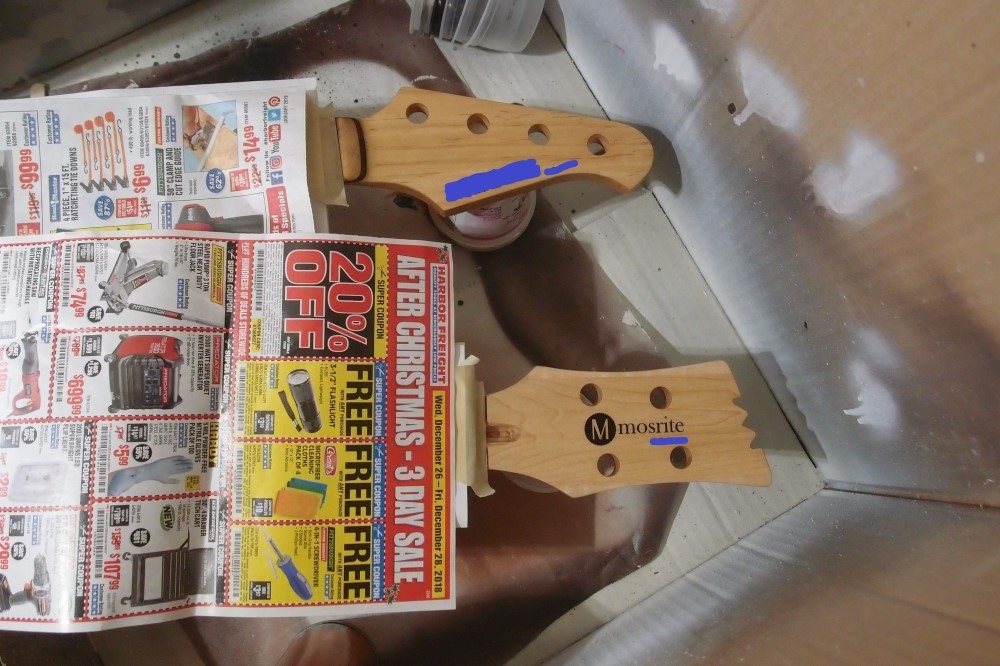
Doing decals on a couple of headstocks. The process I worked out on the Mac worked pretty much the same on the PC. A great deal of trial and error went into this. For myself, I am documenting it:
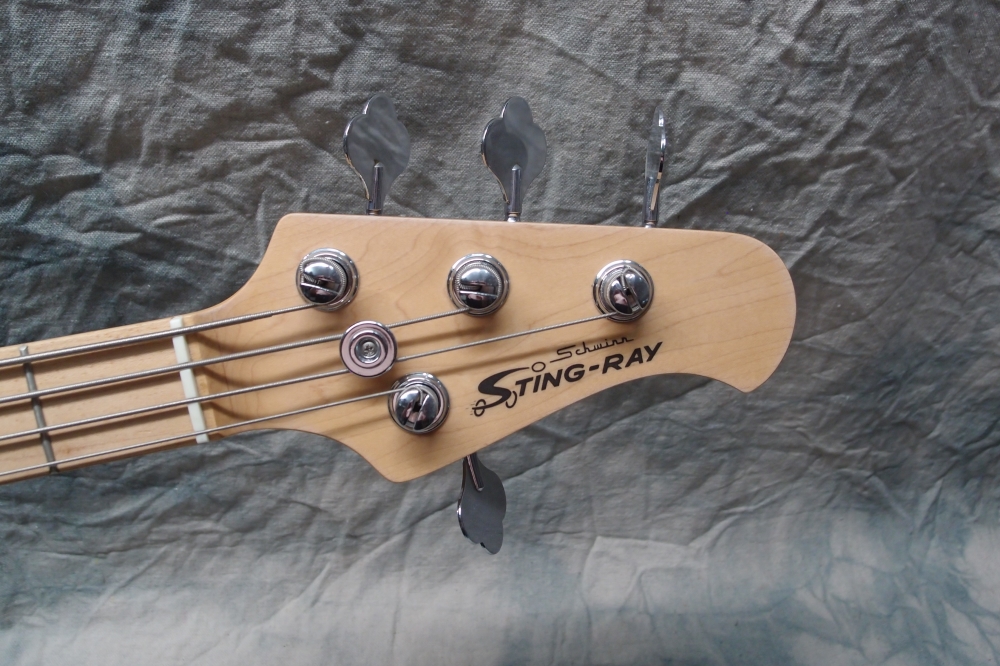
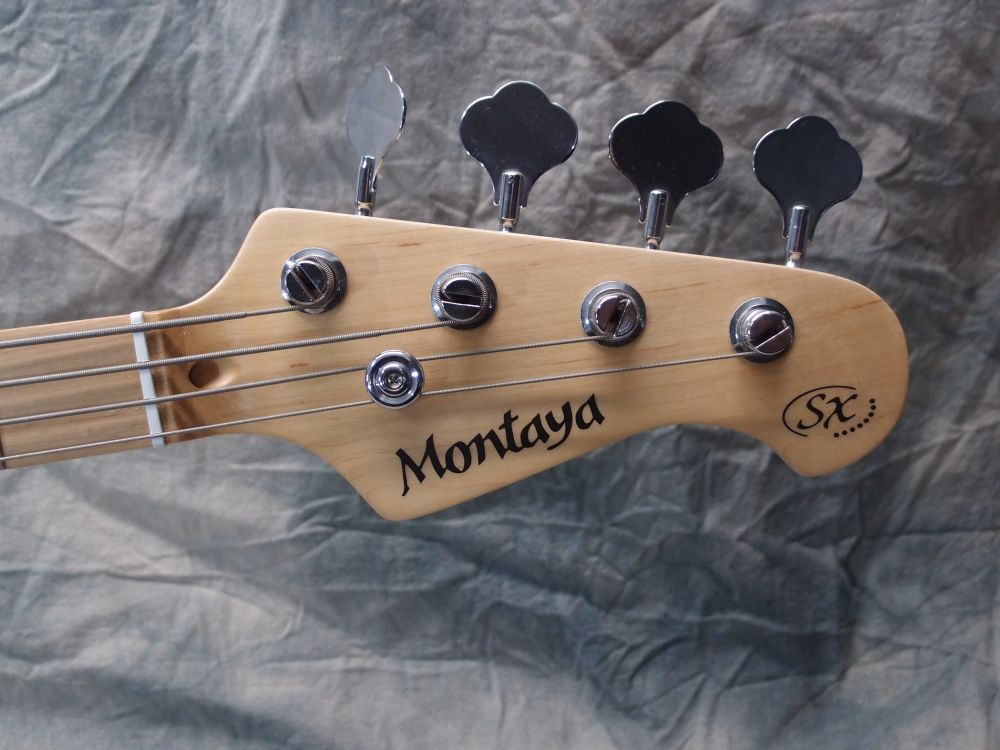
The waterslide decal material is from the Hobby Shop, you can also find it on eBay. There are two kinds, one for laser printers, and one for ink jets. The inkjet material has a visible coating; I am using the laser material, which restricts me to black and translucent shades of gray. If you have a color laser printer, good for you.
The ******** decal above is simply a font. Text prints out with razor-sharp edges. The Mosrite decal started as a jpg. Bitmaps always print out jagged, so I fed the image into a program called Inkscape ( Mac & PC, free ) and used it's "trace bitmap" function to make a smooth raster of it. The finer text did not convert well, so I removed it, leaving just the 'M' and Mosrite. Rasters print out sharp like text.
The decal material is in limited supply and not exactly cheap, and it suffers from multiple trips through the printer. The trick is to cut it into pieces so that you can print one logo at a time. But the printer doesn't handle small pieces, and page layout is a problem.
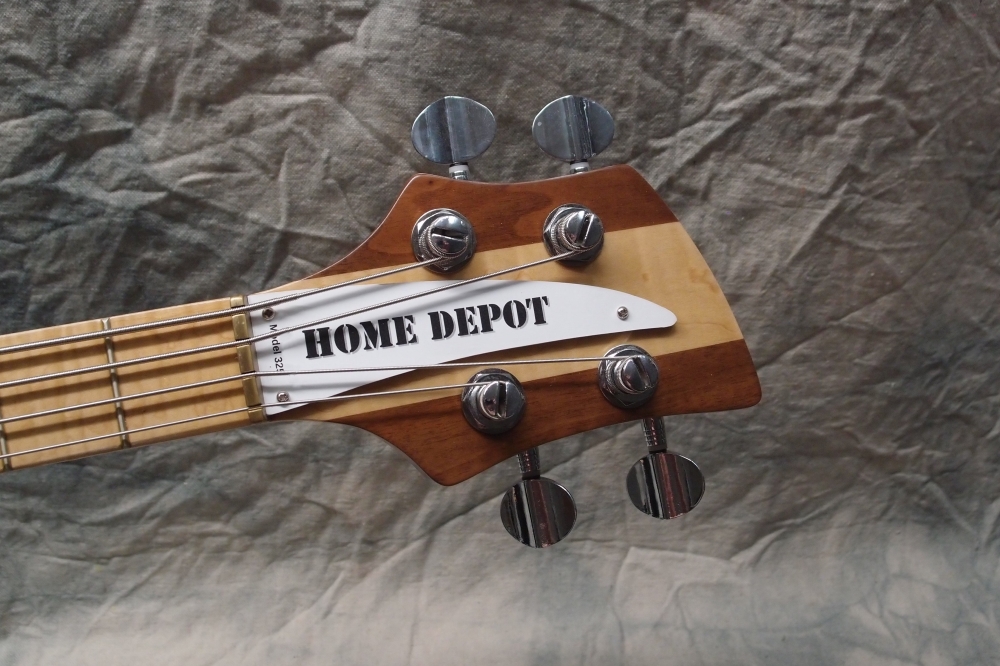
A headstock logo will typically fit into 3" x 1.5", so that is the size I make the decal blanks.
In printer settings, create a paper size of 3" wide by 5" tall, with minimum margins, about 0.2". I call it "Decal".
Using masking tape, attach the decal blank to a 3" wide strip of scrap paper and feed it into the manual paper tray, making sure it is aligned.
When printing, use portrait mode, align to top, selecting "Decal" for the paper size. Also, select the highest available resolution and best quality.
For images, select "scale to fit paper". This will probably give you about the right size with no fussing. You can also play around with percent scaling if you want to be exact.
For text, use the font size, usually in the range of 48-96. Test on 3" strips of scrap paper first.
Cut out the decal in the simplest shape you can make of it, try to minimize the amount of edge, and keep the contours smooth.
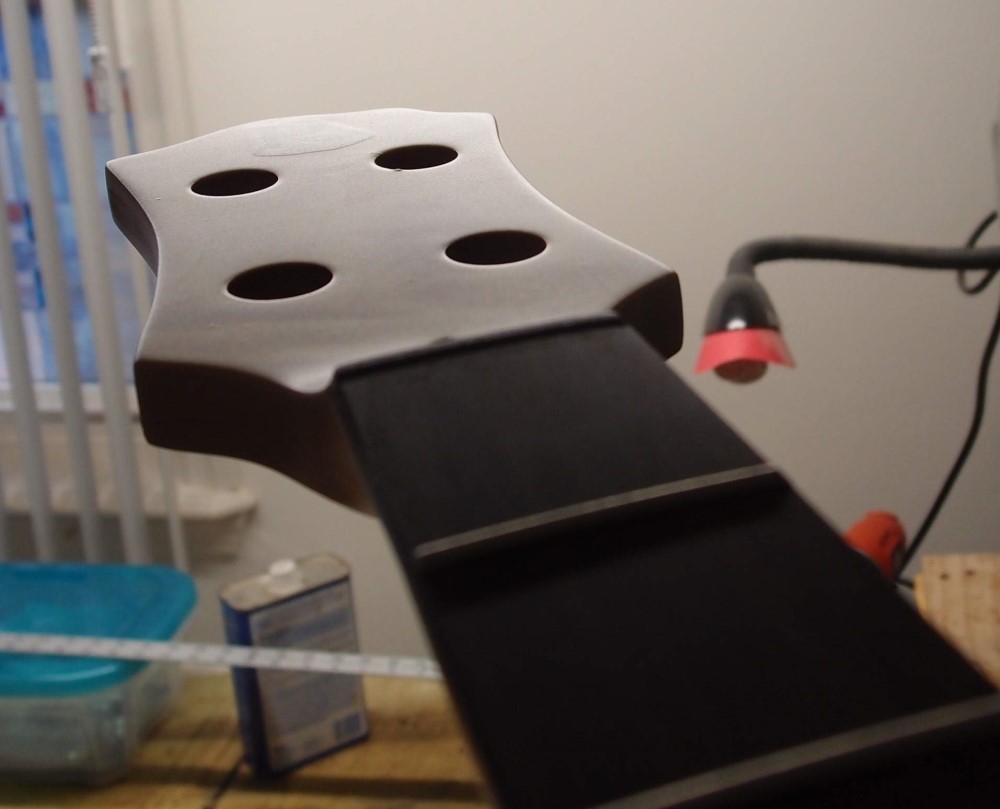
Prepare the surface for the decal with several coats of polyurethane. Let dry thoroughly, then smooth and polish the location for the decal. The surface should be perfectly smooth - no wood grain pulling through.
Apply the decal according to the instructions, and let dry overnight.
Apply several very light mist coats of polyurethane over the decal. Let each one dry before re-coating. The object is to seal the decal against the heavy coats that will follow, which would cause it to run.
Keeping the surface horizontal, apply multiple coats of poly over the decal. Apply each coat as the previous one becomes tacky, so they bond together into a single layer. Polyurethane thins considerably when it dries, so put on more than you think you need.
After a few thin coats to seal the decal, start applying heavy coats to build up the thickness, letting each one flow out. The goal is to build up a homogeneous layer of finish thicker than the decal itself. Note that with oil-based poly, this will result in noticeable ambering.
The edges of the decal should be indistinct, not sharp, and the decal itself should become a slightly raised area in the finish. Let dry thoroughly.
Polish the surface as you would normally. The edges of the decal should disappear. The decal itself may be left as a slight bulge, or the surface may be polished flat. Note that the second option requires a thicker layer of finish over the decal.
The clear edges of the decal should be invisible, and the logo will appear to be floating in the finish. Top-coat if desired.
As I write this, I have been re-coating the decals in the photo above, which now have a lovely pool of wet polyurethane over them that has flowed out to a perfectly smooth finish. Needless to say, it is critical to keep the parts horizontal and undisturbed at this point. I will continue until this can runs out, then set them in a warm place for a week to dry. The end result will look factory.
The method for stickers is similar: I use Avery Product 15516, weatherproof shipping labels. These are a very smooth paper-like plastic for laser printers. The size is 5-1/2" x 8-1/2", which is enough to print out two Rickenbacker-sized logos in landscape mode.
Printing stickers is the same as for decals, only the size is different. To apply the sticker, remove the backing and lay it face down. Press the truss rod cover onto the sticker, and cut away the excess with a razor.
Here is a different project showing the over-coating and final finishing of the decal. Above, you can see the edges under a fairly thin coating of poly. When I am done, the edges will be gone. This will get several more coats of rattle-can poly before I touch it.
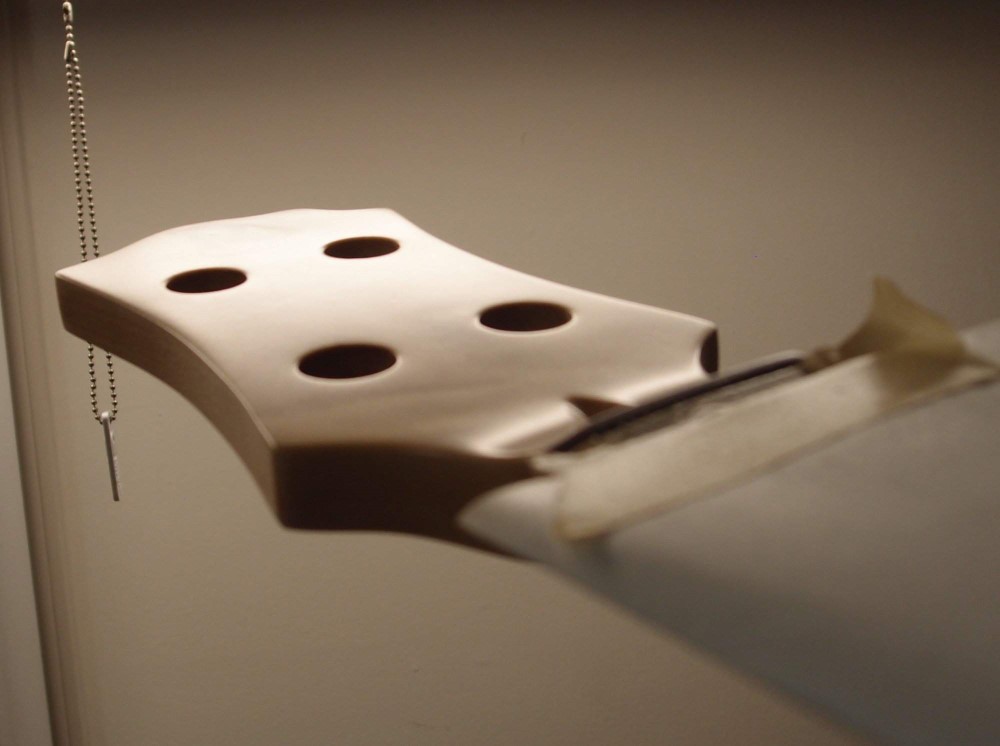
After one round of sanding and re-coating, the edge of the decal is much reduced and hard to photograph. It already looks good head-on, you have to play with the light to see anything. Just keep re-coating and sanding until everything is flush, being very careful not to sand through to the decal. Use nothing coarser than 400 grit sandpaper, on a padded block.
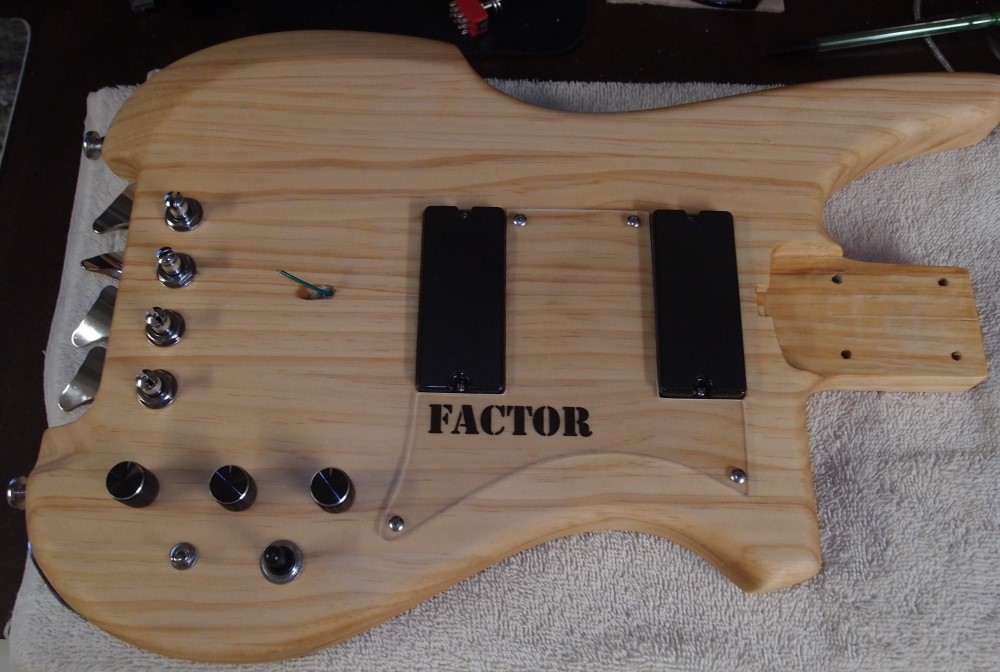
Here is a printed logo under a clear pickguard.
On a real Kubicki, the logo is silk-screened (?) directly onto the body. Mine is printed on inkjet transparency material ( I had a box leftover from grad-school days. ) I fooled around with fonts and sizing, and finally settled on this stencil font rather than the good old Fender font I had initially considered. ( Fender owns Kubicki. Fender also owns Gretsch, Guild (formerly), Jackson, Charvel, EVH, Ovation, and Ashbory. Hopefully, someday they will buy Epiphone and Steinberger at Gibson's bankruptcy liquidation. )
The logo is underneath the pickguard, where it is protected. ( As is the wood, which I think would suffer badly otherwise. ) The transparency material stretches from edge to edge under the pickguard, so there are no visible seams. The alternative would have been to reverse-print a decal and apply it to the back of the pickguard, but that would have left visible edges. The transparency material also gives a slight shimmer underneath the pickguard, which is neat.
Transparent pickguards are great because you can put anything under there, and change it whenever you want. For example, print anything you want on any color paper you want. Why settle for just tort when you could print tiger stripes on orange paper! The clear material is simply inexpensive window stuff from the hardware store. Another advantage is that it is much harder and more scratch and scuff resistant than typical soft pickguard material.
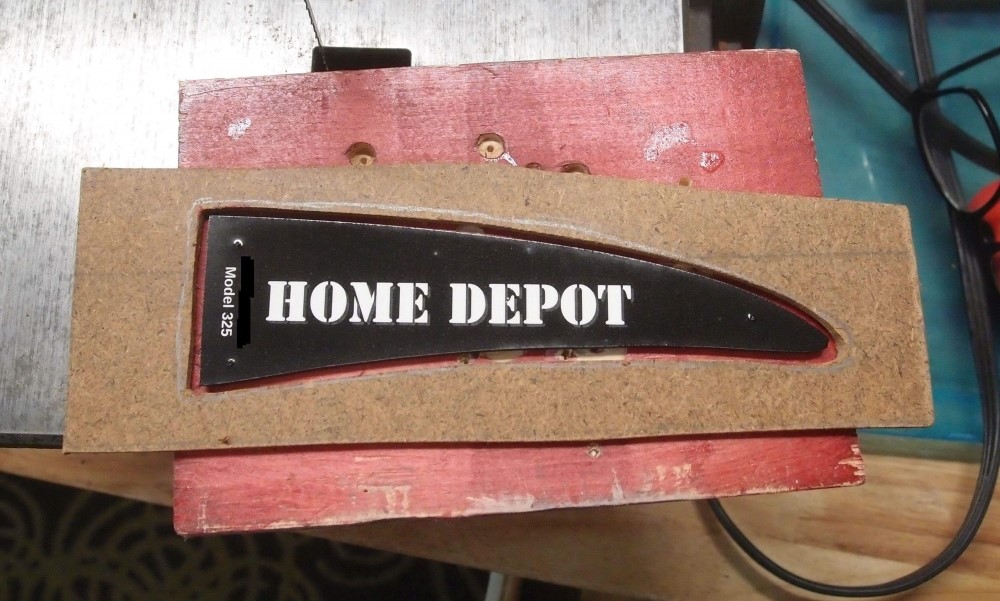
Here I have laser-printed a logo on a self-adhesive shipping label. Actually, I printed the black background, leaving the white letters. I applied it to a piece of masonite and sealed it with a light coat of polyurethane. The template helps to line things up.


Questions or Inquiries?
Just want to say Hello? Sign the .