August 29, 2020
Ribbed Mussels
August 29, 2020
The Ribbed Mussel is a cousin to the edible Blue Mussel. The main difference is that Blue Mussels are found out in the clean ocean, while Ribbed Mussels are found in smelly marshy places. And the ribs. So you wouldn't want to eat a Ribbed Mussel. Actually, I don't care for Blue Mussels either, but back in my diving days I used to collect them because back at the dock you could trade them with the fishing boats for tuna steaks and all kinds of good stuff. Like trading gravel for gold. Blue Mussels form a thick layer over almost anything solid, and the ones I got were much bigger and better than anything I ever saw in the store, where they are also very expensive.
I collected a bag of Ribbed Mussel shells near the mouth of a salt creek. I think the fishermen thought I was nuts. I could get Blue Mussels too, but it would be a lot further drive. But these things smell, even though I only collected empty shells. They smell like mussels, and I don't like that smell. And I need to get the black skin off. First, I tried boiling them for a while. That really made them smell. Like mussels. Yuck. And it didn't seem to do much to the skin. So I dumped them in a bucket of cool water and added some bleach. That will kill the smell if nothing else. Bleach attacks organics, so I am hoping that a soak overnight will loosen up the skin without harming the pearly shells.
So that is today's Lab Report. Never got around to testing the new bass. Maybe tomorrow.
Updates:
8/31/20
I got some more bleach, and soaked the shells in a very strong solution for a couple of hours. And the results are pleasing: all the brown skin dissolved, leaving behind patches of dark purple. Also, the pearl got whiter and pearlier. I decanted* the old worn-out bleach solution and replaced it. Much less fizzing the second time, which means the shells are clean of organics.
* That's what we say here in the Lab. If I was doing this in my kitchen sink, I would say I poured it out.
One thing that I have noticed is that as the shells get cleaner and whiter, the pink and green hues become stronger. Some of the pearl white glitters I have tried are very similar. I guess that is more accurate than I thought.
9/1/20
I let the shells soak overnight in bleach, then rinsed them off and put them in 50% white vinegar for 10 minutes. That actually removed a lot of the purple on the outsides. Then I soaked them for a while in baking soda to neutralize the acid.
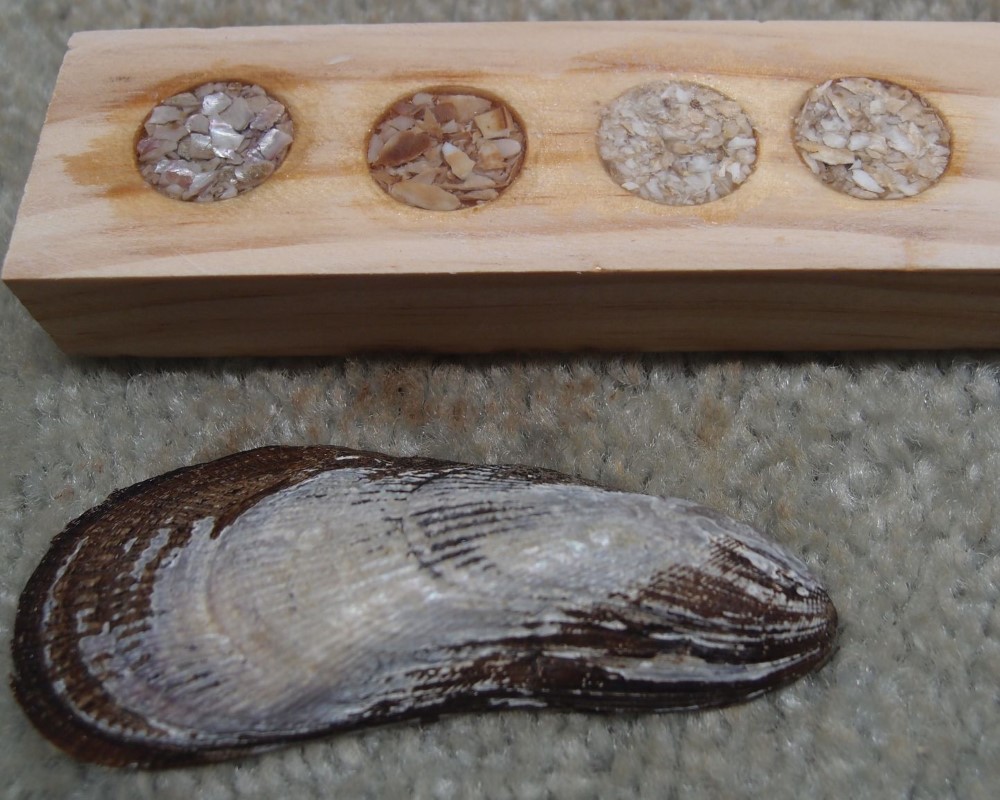
The shells now look like this. They are also more prone to breaking after the acid treatment, which should make the crushing stage easier. That's all the science for today.
9/2/20
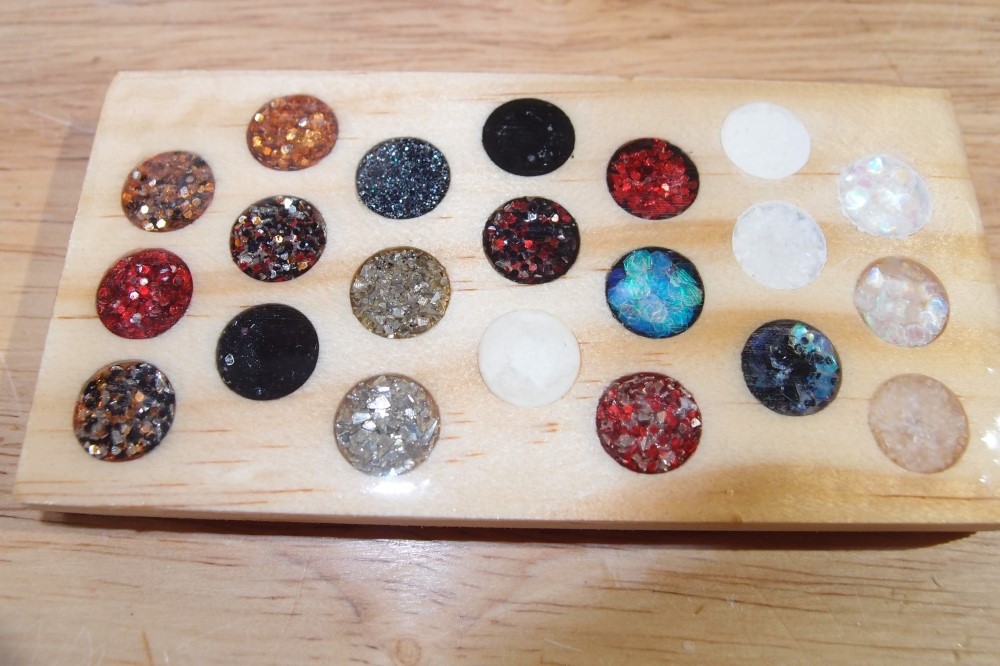
Here is another test, this time using clean mussel shell, on the left. On the right is glitter, three different sizes mixed together. The shell is everything from fairly coarse flakes to powder. In both cases, the finest material allows a nice fill right up to the edge. With only the coarse material, you would get gaps around the edges. Also, I have learned to slightly overfill the inlays and then sand them back. This also gives a better result at the edges. The CA dries as clear as glass.
The whole point of this is to find a light-colored inlay. I have found plenty of nice dark-colored and bright-colored inlays in the fine and very fine glitter, but I just don't like the light colors. I don't like this one either, it is simply garish. The shell retains a bit of pearly reflectivity, and I think it would look nice under a finish and a set of strings. Depending on how the light hits it, the glitter is either totally blah, or fires off bright pink and green sparks. Mixing-in something dark for a salt-and-pepper effect might make it better.
I think the experiment with the shell is worth continuing. I need to find the optimum 'grind'. Hopefully I will have the tools for that soon. A big advantage of the shell is that the CA hardens in under and hour, whereas with the plastic glitter it takes overnight or longer.

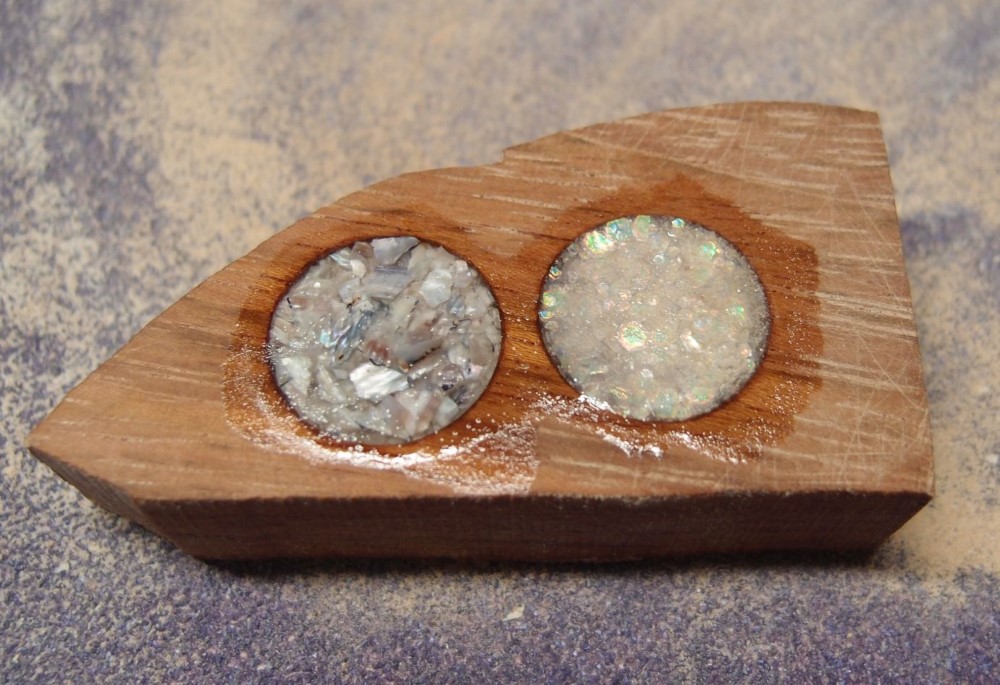
This is a picture of crushed shell you can buy on eBay, set in epoxy. I think it lacks character, might as well be sand.
Later
I think this is going to work. I have enough shells to fill that little jar, which will probably be a lifetime supply. The test fill looks even better under a quick coat of poly.