Fretboard Radius Jig (2/2)
Cutting a sanding block is the inverse of cutting a fingerboard in almost every way. I find a 1/2" straight bit works best. To set the depth, center one edge of the workpiece below the bit, and lower it until it is not quite touching, about 1/16". Lock in this depth for the first rough cut. For sanding blocks, the best way to cut is to start with the router at one end of the block, and swing the block under it, moving the router 1/8-1/4" on every swing.
For all but the smallest radii, you can swing the workpiece out into the clear where you can inspect it. When the rough cut is done, lower the router but just enough to touch the workpiece, and make another full pass over it to clean up the tool marks. This should leave a surface that is smooth and even to the touch, with just a slight swirl pattern. This is good enough for a tool, after all, sandpaper is not smooth either.
It is well to note that cutting a piece of wood to an exact radius is not all that critical, and would actually be very difficult. I doubt even factory-made boards are better than +/- 1/4". I think mine are at least that good, but it really makes no difference if it is a little off. What matters is that the board is consistent from edge to edge and end to end, with no bulges or dips anywhere. For the sanding blocks, you would also have to account for the thickness of the sandpaper, which i did not even bother with. Besides, once you install the frets, that will change the radius again. Happily, the effect of the sandpaper and the frets are opposite and tend to cancel each other out.
Radius Sanding Blocks & Clamping Cauls
To finish the block, I glue a matching piece of pine scrap to the back, cut to length, sand all the sides smooth, and round-over the top edges. Finally, label it on all sides. I find my wider, longer sanding blocks work much better than StewMac's. Of course, you could also make shorter ones, or narrower ones, whatever you like.
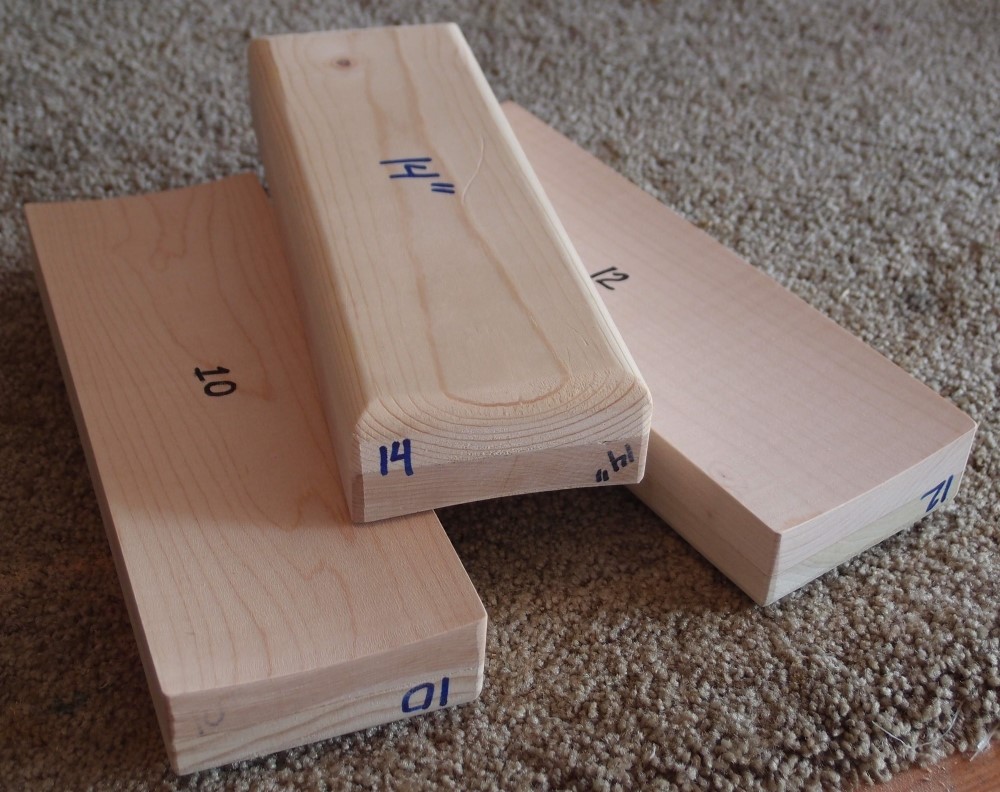
Clamping cauls are similar to sanding blocks, but only 2.5" wide, and single thickness, cut from soft pine scrap in lengths enough to cover an entire fretboard. I had a pile of scrap wood leftover from building furniture when I started all these projects, and it is almost all gone now. Have to go to the scrap store.
Sorry, blocks are not for sale. The jig is not made for mass production, and it takes a lot more time than you'd think to set up, cut, and finish one of these. Stewmac's outrageous prices for their sanding blocks are not so outrageous actually, although I prefer my own blocks to theirs. Add to the time, the materials and the shipping, and it is just not worth it to me - I have thought about it.
Right now, the jig is set up to cut 12-inch fingerboards, and that is how it is going to stay. I can easily re-radius a 12 into a 10 or a 14 by sanding. 16 is so flat that you can skip the routing part and just sand it, and 7.25 is a relic. Compound fingerboards are not necessary for a bass, the action is much higher than a guitar and there is a lot less string bending.
Same Thing All Over Again
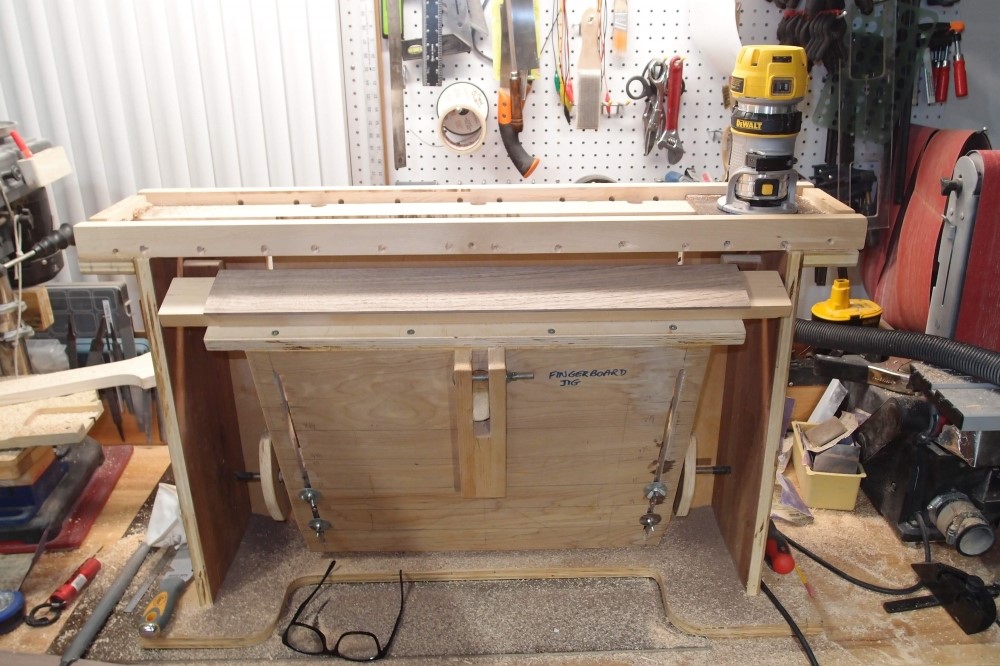
You can see a piece of walnut attached to the top of the swing arm, which is set for 14". The router slides back and forth across the top, cutting down through a slot with a 1/2" square bit.
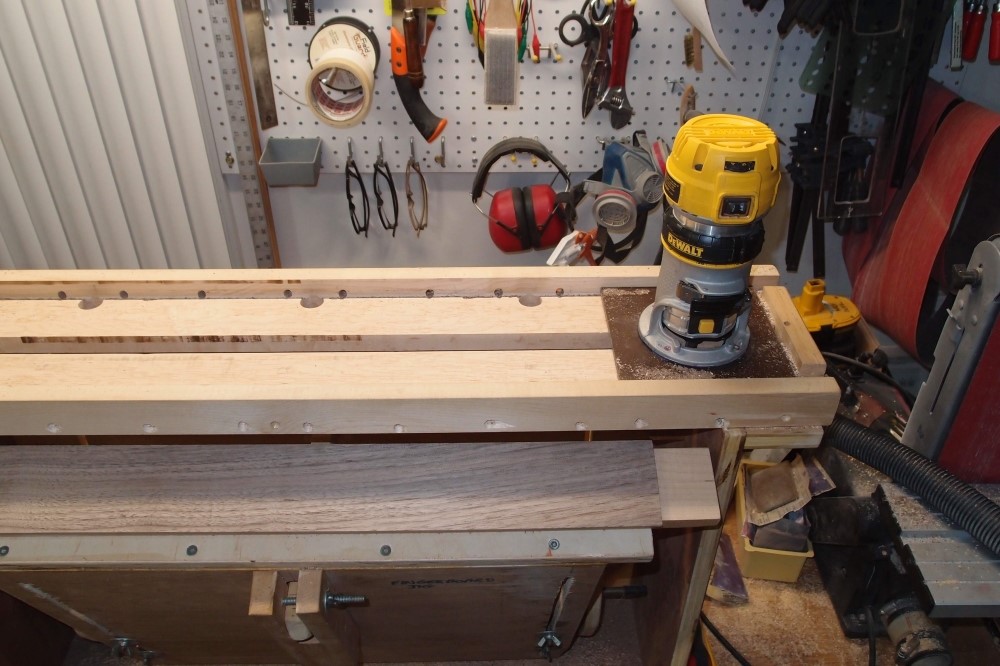
This jig was originally designed only for 1/4" stock. The last time I used it was to make a 3/4" floorboard into an UEB neck with a 6" radius, and a corresponding sanding block. That required disassembly and modification, and when I finally put it back together for regular use, it was a little out of whack.
I found that out by ruining a $2 piece of Radiata, but in the process, I modified the jig to handle 3/8" stock, and the second piece came out good. Then I hacked up a bunch of walnut and maple boards and made a big mess of sawdust.
The walnut I got on eBay was something of an adventure. I placed a wrong order first, tried to cancel it, and got ignored. So I placed the order I wanted and got both. Good thing too, about a third of the pieces were unusable. Since I was already teed about being ignored on the first order, I decided to play a little dirty myself. I sorted through both orders and kept all the best pieces, and sent the rest back defective for a refund. I'm talking cracks and large voids, stuff that should never have been sold. Today I found that one of the pieces I thought was good is actually noticeably thin, although usable. So buyer beware on eBay, and if I ever buy wood there again, I will remember this trick. Am I a bad person, or the guy who sold me a bunch of unusable wood?
Pre-radiusing to 14" gets me most of the way to 12" or 10", and can be backed off to 16" easily enough. That will save a lot of sanding. My remaining piece of Bocote is a little warped, I didn't trust it to lie flat in the jig, so I'll have to do that one by hand.
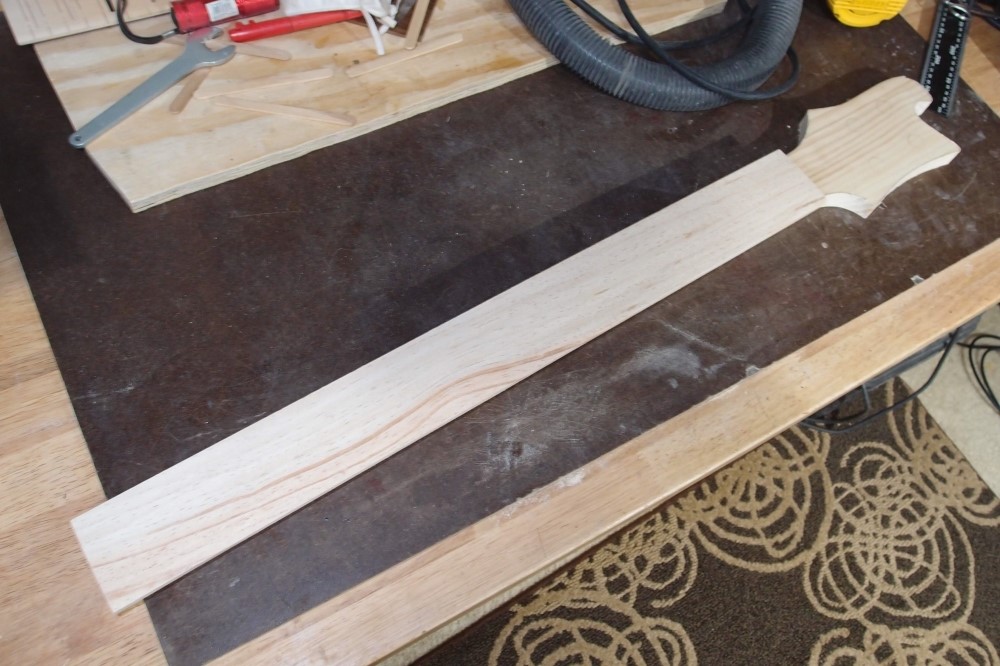
And the point of the whole exercise - a Radiata fretboard on a Radiata neck. I like the dark stripe in it, and it has little freckles for character. The next steps are slotting and then into the inlay routing jig. I have a new downcut spiral bit just for cutting inlays. This entire neck is going to be Radiata. For a fretboard, it is on the soft side at 900 Janka, vs around 1200 for good maple. But walnut is 1100, and works fine.
A few weeks ago I spoke to someone who told me he made fretboards out of poplar - around 500 Janka !!! Poplar is hardwood in name only, and he was taken aback when I told him so. I ran into him again, and he said he had switched to maple from Lowes. I told him to try oak and Radiata as well. Oak works ok, it's just a bother to fill, and comes out looking like a table leg.
But if this guy was getting away with mushy poplar for fretboards, then Radiata should work fine. This 3/8" stock is available at Lowes, I've yet to find 1/4", I need to search the mouldings aisle again. Getting out the old radius jig seemed the easiest way to take off 1/8", and cut the radius in the process.
I have no problem with maple for a light-colored fretboard, this is just another kooky experiment. If all I could do was build Les Pauls out of mahogany the way you're supposed to, I'd find another hobby.


Questions or Inquiries?
Just want to say Hello? Sign the .